
Featured image for tacklife car jump starter instructions
Image source: everstartjumpstarter.com
Master your Tacklife car jump starter with this clear, step-by-step guide designed to help you jump-start your vehicle safely and efficiently every time. From proper cable connections to built-in safety features and troubleshooting tips, this complete resource ensures reliable performance when you need it most—no guesswork, just quick, confident results.
Key Takeaways
- Read the manual first: Always review Tacklife’s instructions before use to ensure safety and proper operation.
- Check battery level: Fully charge the jump starter before emergencies to avoid power issues.
- Connect clamps correctly: Attach red to positive (+) and black to negative (-) terminals to prevent damage.
- Power on before starting: Turn on the jump starter only after all connections are secure.
- Monitor safety alerts: Heed LED indicators and alarms to avoid reverse polarity or overloads.
- Store properly: Keep in a cool, dry place to maintain battery life and performance.
📑 Table of Contents
- Why Every Driver Needs a Reliable Jump Starter (And How Tacklife Delivers)
- Understanding Your Tacklife Car Jump Starter
- Step-by-Step Tacklife Car Jump Starter Instructions
- Using Your Tacklife Jump Starter for Other Devices
- Maintaining and Storing Your Tacklife Jump Starter
- Common Mistakes and How to Avoid Them
- Performance Comparison: Tacklife vs. Other Jump Starters
Why Every Driver Needs a Reliable Jump Starter (And How Tacklife Delivers)
Let’s be honest—few things are more frustrating than turning your car key and hearing that dreaded click… click… click. Your battery’s dead. Again. Maybe you left the lights on overnight, or the cold winter air finally drained your aging battery. Whatever the reason, being stranded without a jump start option is stressful, especially if you’re late for work, picking up the kids, or miles from the nearest gas station.
That’s where portable jump starters come in. And not just any jump starter—reliable, powerful, and easy-to-use models like the Tacklife car jump starter. I’ve been there: stuck in a parking lot at midnight, phone dying, and no jumper cables in sight. After that night, I invested in a Tacklife unit, and it’s been a game-changer. Whether you’re a new driver or a seasoned road warrior, having a jump starter like Tacklife in your trunk means peace of mind. But owning one is only half the battle—knowing how to use it safely and effectively is what really matters.
In this guide, I’ll walk you through everything you need to know about the Tacklife car jump starter instructions, from unboxing and charging to jump-starting your vehicle and maintaining the device. No fluff, no hype—just real-world advice based on my experience and best practices. Whether you’re a first-time user or just need a refresher, this guide will help you get the most out of your Tacklife jump starter.
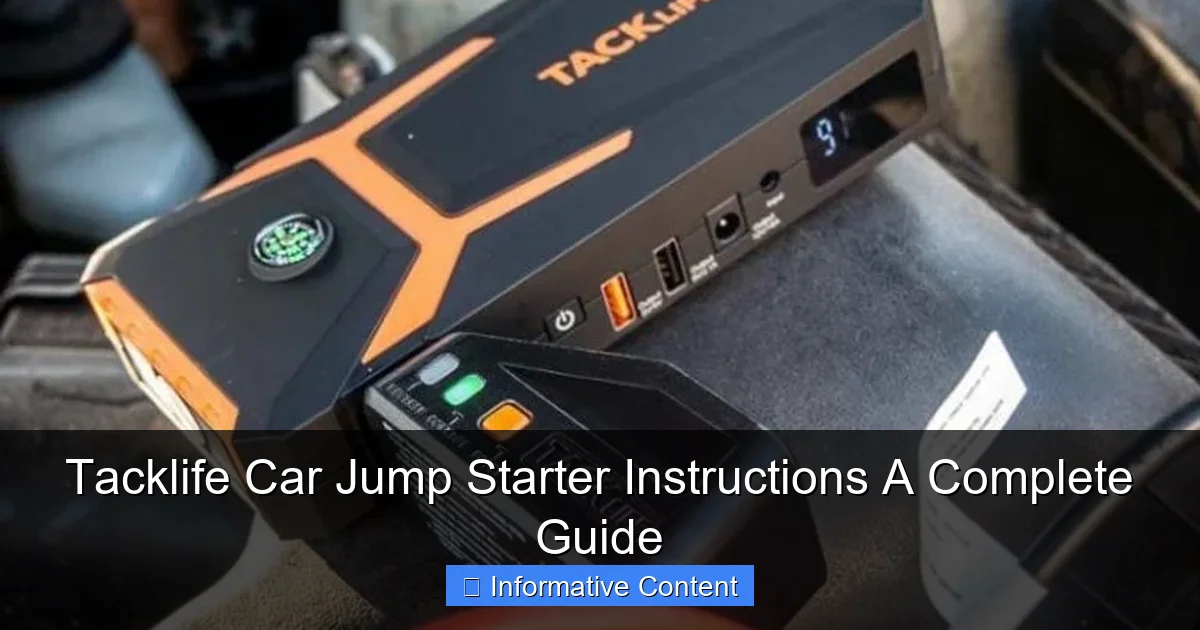
Understanding Your Tacklife Car Jump Starter
Before we dive into the Tacklife car jump starter instructions, let’s get familiar with what you’re working with. Tacklife offers several models (like the T8, T6, and T8 Pro), but they all share core features designed for safety, convenience, and power. Think of it as a portable battery pack—but one that can jump-start a car, charge your phone, and even act as an emergency flashlight.

Visual guide about tacklife car jump starter instructions
Image source: docerp.s3.amazonaws.com
What’s in the Box?
When you open your Tacklife jump starter, you’ll typically find:
- The jump starter unit (compact, lightweight, with a rugged exterior)
- Smart jumper cables with reverse polarity protection
- USB charging cable (usually micro-USB or USB-C)
- Wall charger or car charger (varies by model)
- User manual
- Storage bag (on higher-end models)
One thing I love: the jumper cables are “smart,” meaning they have built-in protections that prevent sparks, reverse polarity, and short circuits. This is a huge safety upgrade from old-school jumper cables, which can be dangerous if connected incorrectly.
Key Features That Matter
Not all jump starters are created equal. Here’s what sets Tacklife apart:
- Peak Current (e.g., 1200A, 1500A): This determines how powerful the jump is. A 1200A model can start most 6.0L gas engines; 1500A+ handles larger trucks and SUVs.
- Battery Capacity (12V, 12000mAh–18000mAh): Higher mAh means more charge cycles and longer standby life.
- USB Ports (1–3): Great for charging phones, tablets, or GPS devices on the go.
- LED Flashlight: With strobe and SOS modes—perfect for nighttime emergencies.
- LCD or LED Display: Shows battery level, voltage, and charging status.
- Reverse Polarity Protection: Prevents damage if you connect the clamps backward.
For example, the Tacklife T8 Pro delivers 1500A peak current, has 18000mAh capacity, and includes three USB ports. It’s a solid choice for most drivers. But even the smaller T6 (800A) is enough for compact cars and hybrids.
Who Is It For?
The Tacklife car jump starter is ideal for:
- Drivers who live in cold climates (where batteries die faster)
- Frequent travelers or road trippers
- People who keep their cars parked for long periods
- Anyone who wants to avoid waiting for roadside assistance
And honestly? It’s great for anyone who drives. You never know when a dead battery will strike—even if your car is brand new.
Step-by-Step Tacklife Car Jump Starter Instructions
Now, let’s get into the heart of this guide: how to use your Tacklife car jump starter. These instructions apply to most Tacklife models, but always refer to your specific user manual for model-specific details.
Step 1: Charge Your Jump Starter
Before your first use—and after every jump—charge your Tacklife unit fully. A fully charged jump starter can perform multiple jumps (typically 2–5, depending on engine size and battery condition).
- Use the included wall charger or car charger.
- Plug the charging cable into the input port (usually labeled “IN”).
- Connect to a power source. The LED indicator will light up red (charging) and turn green when full.
- Charging time: 3–5 hours, depending on capacity.
Pro Tip: I keep mine charged to 100% and store it in my car’s glove box. I check the charge every 2–3 months. If it drops below 50%, I recharge it. This ensures it’s ready when I need it.
Step 2: Prepare Your Vehicle
Safety first. Here’s how to set up:
- Turn off the engine and all electronics (lights, radio, AC, etc.).
- Engage the parking brake.
- Open the hood and locate the battery. If the battery is covered, remove the cover (use gloves if needed).
- Check for corrosion, leaks, or damage. If the battery is cracked or leaking, do not jump-start. Replace it instead.
Real-life example: Last winter, I tried to jump-start a friend’s SUV. The battery terminals were covered in green gunk (corrosion). I cleaned them with baking soda and water first—then the jump worked perfectly. Never skip this step!
Step 3: Connect the Jumper Cables
This is where the magic happens. Follow these steps carefully:
- Connect the red (positive) clamp to the positive terminal on the car battery (+).
- Connect the black (negative) clamp to a bare metal surface on the engine block or frame—not the negative terminal on the battery. This prevents sparks near the battery, reducing explosion risk.
- Make sure both clamps are secure and don’t touch each other.
Important: Tacklife’s smart cables have reverse polarity protection. If you connect them backward, the unit will beep and flash a warning light. If this happens, disconnect immediately, fix the clamps, and try again.
Step 4: Start the Engine
Now, the moment of truth:
- Get into the driver’s seat.
- Turn the key to the “on” position (don’t start yet). Wait 10–15 seconds. This lets the jump starter power the car’s systems.
- Start the engine. If it doesn’t turn over, wait 30 seconds, then try again. Do not crank for more than 5 seconds at a time.
- If it starts, great! Let it run for 2–3 minutes to charge the battery.
Pro Tip: If the engine cranks slowly, wait another 30 seconds and try again. Sometimes a weak battery needs a little more juice. But if it still won’t start after 2–3 attempts, the battery may be too far gone—or there’s another issue (like a bad starter motor).
Step 5: Disconnect Safely
Once the car is running:
- Turn off the engine (just for a second).
- Disconnect the black (negative) clamp first.
- Then disconnect the red (positive) clamp.
- Close the hood.
Never disconnect the red first! That could cause a spark near the battery—dangerous if there’s any hydrogen gas present.
After disconnecting, store the cables neatly in the included bag. I wrap mine around the unit to prevent tangles.
Using Your Tacklife Jump Starter for Other Devices
One of the best things about the Tacklife car jump starter? It’s not just for cars. It’s a multi-functional power bank that can save you in all kinds of situations.
Charging Your Phone or Tablet
Running low on battery while hiking? Stuck at an airport? No problem.
- Use the USB cable to connect your phone or tablet to one of the USB ports.
- The jump starter will automatically detect the device and start charging.
- Some models support fast charging (e.g., Quick Charge 3.0).
I’ve used my Tacklife to charge my iPhone 14 Pro twice on a single charge. That’s a lifesaver when you’re off-grid.
Powering Other Electronics
Need to charge a GPS, dash cam, or even a portable fan? The jump starter can handle it.
- Use a USB-to-device cable (e.g., micro-USB for older cameras).
- Check the device’s power requirements—most are 5V, which the jump starter supports.
Caution: Don’t try to power high-draw devices like laptops or coffee makers. The jump starter isn’t designed for that.
Using the LED Flashlight
Most Tacklife models have a built-in LED flashlight with three modes:
- Steady On: For general illumination.
- Strobe: To attract attention in emergencies.
- SOS: Flashes in Morse code (S-O-S) to signal for help.
To activate: Press and hold the flashlight button for 3 seconds. Tap to cycle through modes.
Personal story: I used the SOS mode once when my car broke down on a dark rural road. A passing motorist saw the flashing light and stopped to help. That flashlight might have saved me from a long, cold wait.
Maintaining and Storing Your Tacklife Jump Starter
A jump starter is only as good as its condition. Proper maintenance ensures it’s ready when you need it most.
Regular Charging Schedule
Batteries degrade over time—even when not in use. To keep your Tacklife in peak condition:
- Charge it to 100% every 2–3 months.
- Store at room temperature (ideally 50–77°F / 10–25°C).
- Avoid extreme heat or cold (e.g., don’t leave it in a hot car in summer).
I set a phone reminder every 8 weeks to check and charge mine. It takes 5 minutes and gives me peace of mind.
Cleaning and Inspection
Every few months, do a quick check:
- Wipe the unit with a dry cloth. Use a cotton swab to clean the ports.
- Inspect the jumper cables for fraying or damage.
- Test the flashlight and USB ports.
If you notice any issues (e.g., slow charging, flickering lights), contact Tacklife support. Most models come with a 2-year warranty.
Safe Storage Tips
Where you store your jump starter matters:
- Keep it in a dry, ventilated area.
- Use the included storage bag to protect it from dust and moisture.
- Store upright—don’t stack heavy items on top.
- Keep out of reach of children (the clamps can pinch).
I keep mine in my car’s center console. It’s protected from weather and easy to access.
Common Mistakes and How to Avoid Them
Even with clear Tacklife car jump starter instructions, mistakes happen. Here are the most common ones—and how to avoid them.
Mistake 1: Not Charging Regularly
A dead jump starter is useless. Don’t assume it’s always ready.
- Fix: Set a reminder to charge it every 8–12 weeks.
- Check the battery level before long trips.
Mistake 2: Connecting Clamps to the Wrong Terminals
It’s easy to mix up + and – in a stressful situation.
- Fix: Remember: Red to +, Black to metal.
- Use the smart cable warnings: if it beeps, you’ve done it wrong.
Mistake 3: Cranking Too Long
Holding the key for 10+ seconds can overheat the starter motor.
- Fix: Crank for 3–5 seconds, then wait 30 seconds before trying again.
- If it doesn’t start after 3 tries, stop. The battery may be too weak or there’s another issue.
Mistake 4: Storing in Extreme Temperatures
Heat and cold can damage lithium-ion batteries.
- Fix: Avoid leaving it in direct sunlight or a freezing trunk.
- If you live in a cold climate, bring it inside during winter.
Mistake 5: Ignoring Warning Lights
Tacklife units have LED indicators for low battery, charging, and errors.
- Fix: Learn what each light means (check your manual).
- Don’t ignore a flashing red light—it could mean a fault.
Pro Tip: Practice using your jump starter at home. Do a “dry run” once a year. It builds confidence and helps you spot issues early.
Performance Comparison: Tacklife vs. Other Jump Starters
How does Tacklife stack up against the competition? Let’s compare key specs and real-world performance.
| Model | Peak Current | Battery Capacity | USB Ports | Weight | Price (Approx.) | Best For |
|---|---|---|---|---|---|---|
| Tacklife T8 | 1200A | 18000mAh | 2 | 1.8 lbs | $70–$80 | Sedans, SUVs, light trucks |
| Tacklife T8 Pro | 1500A | 18000mAh | 3 | 1.9 lbs | $85–$95 | Trucks, SUVs, frequent use |
| Tacklife T6 | 800A | 12000mAh | 1 | 1.4 lbs | $50–$60 | Compact cars, emergencies |
| NOCO Boost Plus GB40 | 1000A | 18000mAh | 1 | 1.6 lbs | $100+ | Premium performance, durability |
| DBPOWER 600A | 600A | 12000mAh | 2 | 1.3 lbs | $40–$50 | Small cars, budget buyers |
Key Takeaways:
- Tacklife offers excellent value—especially the T8 and T8 Pro.
- Higher peak current = better for larger engines.
- More USB ports = more versatility.
- Tacklife’s smart cables and protections are on par with premium brands.
In my experience, the T8 Pro is the sweet spot: powerful enough for most vehicles, with great features at a fair price.
Whether you’re facing a dead battery in a parking lot or charging your phone on a camping trip, the Tacklife car jump starter is a reliable, versatile tool. By following these Tacklife car jump starter instructions, you’ll not only jump-start your car safely but also extend the life of your device and avoid common pitfalls.
Remember: the key to success is preparation. Charge it regularly, store it properly, and practice using it. And when that dreaded click… click… click happens? You’ll be ready—calm, confident, and in control.
Stay safe on the road. And keep that Tacklife unit charged.
Frequently Asked Questions
How do I use the Tacklife car jump starter for the first time?
To use your Tacklife car jump starter, fully charge it via the included USB cable. Connect the clamps to the battery terminals (red to positive, black to negative) and turn on the device to start your vehicle. Always follow the safety guidelines in the user manual.
What should I do if my Tacklife jump starter won’t turn on?
First, check if the battery is charged. If the LED indicator is off, recharge the device using a 5V/2A adapter. Ensure the power button is held for 3-5 seconds to activate it.
Can I use the Tacklife car jump starter in cold weather?
Yes, but store the jump starter at room temperature before use, as extreme cold can reduce battery efficiency. The device works best between -4°F to 140°F (-20°C to 60°C).
How do I maintain my Tacklife jump starter for long-term use?
Recharge the jump starter every 3 months to prevent battery degradation. Store it in a dry, cool place and avoid exposing it to moisture or extreme temperatures.
What safety features does the Tacklife car jump starter have?
The Tacklife jump starter includes reverse polarity, over-current, and short-circuit protection. These features prevent damage to your vehicle and ensure safe operation during use.
How long does the Tacklife jump starter take to fully charge?
It typically takes 4-5 hours to fully charge the Tacklife jump starter using a 5V/2A adapter. The LED indicator will show a solid light when charging is complete.