
Featured image for type s jump starter instructions
Image source: everstartjumpstarter.com
Master your Type S jump starter with this simple, step-by-step guide for fast, reliable engine starts every time. From proper cable connection to safety checks, follow these clear instructions to jump-start your vehicle confidently and avoid common mistakes that can damage your battery or device.
Key Takeaways
- Always inspect clamps for damage before connecting to avoid sparks or short circuits.
- Connect red clamp first to the dead battery’s positive terminal for safety.
- Attach black clamp last to an unpainted metal surface on the engine block.
- Wait 30 seconds after connecting before attempting to start the engine.
- Charge fully after each use to ensure peak performance next time.
- Store in a cool, dry place to extend battery life and reliability.
📑 Table of Contents
- Why Every Driver Needs a Type S Jump Starter (And How to Use It Right)
- Understanding Your Type S Jump Starter: Features & Safety Checks
- Step-by-Step Type S Jump Starter Instructions
- Troubleshooting Common Issues (And How to Fix Them)
- Maintenance & Storage: Extend Your Jump Starter’s Life
- Real-World Scenarios: Type S Jump Starter in Action
- Final Thoughts: Your Roadside Safety Net
Why Every Driver Needs a Type S Jump Starter (And How to Use It Right)
Let’s face it: there’s nothing more frustrating than turning the key in your car and hearing nothing but a faint click. A dead battery can strike at the worst times—rushing to work, picking up the kids, or stranded on a dark highway. That’s where the Type S jump starter comes in. Compact, powerful, and surprisingly simple to use, it’s like having a roadside mechanic in your glovebox. I remember the first time mine saved me. It was a freezing winter morning, and my 10-year-old sedan refused to start. Instead of waiting 45 minutes for a tow truck, I pulled out my Type S, connected it in seconds, and—*vroom*—I was back on the road. No stress, no drama.
But here’s the catch: even the best tool is useless if you don’t know how to use it. Whether you’re a new driver, a seasoned road warrior, or just someone who hates being unprepared, this guide will walk you through Type S jump starter instructions step by step. We’ll cover everything from safety checks to troubleshooting common issues, so you’re never left guessing when your car won’t start. And don’t worry—this isn’t a dry manual. Think of it as a friendly chat over coffee, where I share the tips, tricks, and real-life lessons I’ve learned over years of using these little lifesavers.
Understanding Your Type S Jump Starter: Features & Safety Checks
What Makes the Type S Jump Starter Unique?
The Type S jump starter isn’t just another portable battery pack. It’s designed with drivers in mind, combining high cranking power (typically 12V/24V, 1000–2000 amps) with safety features that prevent damage to your vehicle or yourself. Here’s what sets it apart:
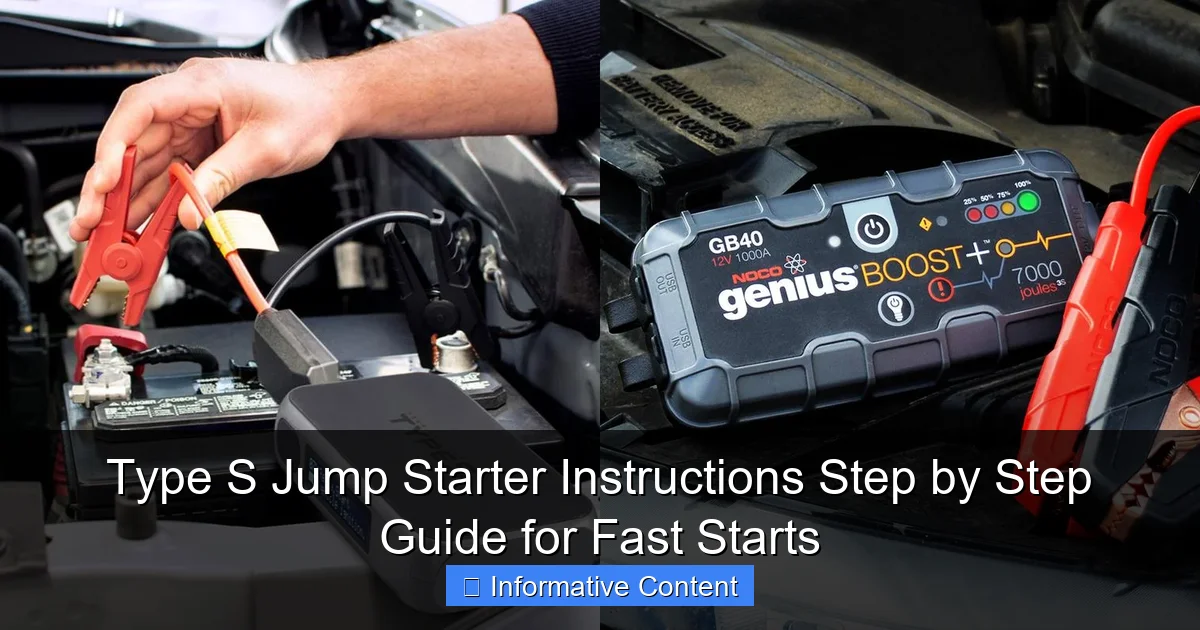
Visual guide about type s jump starter instructions
Image source: docerp.s3.amazonaws.com
- Smart Clamps: Unlike basic jump starters, Type S clamps detect reverse polarity (connecting positive to negative, etc.) and flash a warning light instead of delivering power.
- USB Ports: Most models include USB-A and USB-C ports to charge phones, tablets, or even a portable fan in a pinch.
- LED Work Light: A built-in flashlight (often with strobe or SOS modes) is a game-changer for nighttime emergencies.
- Compact Design: Weighing 2–4 pounds, it fits in most glove compartments or center consoles.
Pro tip: Check your model’s manual to confirm amps and voltage. For example, a 1500A Type S works for cars, trucks, and SUVs, while smaller 800A models suit motorcycles or compact cars.
Safety Checks Before Use
Jumping a car isn’t rocket science, but skipping safety steps can lead to sparks, battery damage, or even injury. Here’s your pre-jump checklist:
- Inspect the jump starter: Look for cracks, leaks, or corrosion on the clamps. If the battery feels hot or swollen, stop and replace it.
- Check charge level: Most Type S models have an LED indicator. Aim for at least 50% charge (3–4 bars). If it’s low, plug it in for 2–4 hours first.
- Park safely: Turn off both vehicles (if using another car), engage parking brakes, and set flares or reflectors if on a road.
- Clear the area: Remove metal objects (rings, tools) to avoid accidental sparks. Keep kids and pets away.
Real-life example: My neighbor once tried to jump his car with a jump starter that had a loose clamp. The spark melted the terminal—and cost him $200 in repairs. Don’t be him. A 60-second inspection saves headaches.
Step-by-Step Type S Jump Starter Instructions
Step 1: Position the Jump Starter
Place the Type S on a flat, stable surface near the dead car’s battery. Never set it on the battery itself—vibrations can cause spills or sparks. If the ground is wet, use a plastic tray or towel to insulate it.
Tip: For trucks with under-hood batteries, keep the Type S outside the engine bay. For sedans with front-mounted batteries, you might need to angle it carefully to reach the terminals.
Step 2: Connect the Clamps (Red First!)
Here’s the golden rule: Red to positive (+), black to negative (–). But let’s break it down:
- Attach the red clamp to the dead battery’s positive terminal (marked “+” or red). Ensure it’s tight—no wiggling.
- Attach the black clamp to a metal grounding point, not the battery’s negative terminal. Why? To reduce the risk of hydrogen gas ignition. Good spots include:
- Unpainted metal brackets or bolts
- The engine block (far from moving parts)
- The car’s frame (if accessible)
Common mistake: Connecting black to the negative terminal. This can cause sparks near the battery, which is dangerous if the battery is leaking gas (common in older cars).
Step 3: Power On and Wait
Turn on the Type S using its power button. Most models have a “boost” or “engine start” mode—select it if available. Wait 2–3 minutes. This lets the jump starter transfer charge to the dead battery. You might hear a faint hum—that’s normal.
Pro tip: If the Type S has a “ready” light, wait for it to turn green. If it flashes red, check the clamps or charge level.
Step 4: Start the Engine
Turn the key (or push the start button) and crank the engine. If it starts immediately, great! If it hesitates:
- Wait another 1–2 minutes and try again.
- If it still doesn’t start, don’t force it. Over-cranking can drain the Type S or damage the starter motor.
Real-life example: My friend’s SUV needed two attempts. The first try turned the engine slightly but died. After waiting 90 seconds, the second try worked perfectly. Patience is key!
Step 5: Disconnect in Reverse Order
Once the engine runs, disconnect the clamps in reverse order:
- Remove the black clamp first (from the grounding point).
- Remove the red clamp (from the positive terminal).
- Turn off the Type S.
Critical: Never let the clamps touch each other or metal while connected. This can cause a short circuit.
Troubleshooting Common Issues (And How to Fix Them)
“The Jump Starter Isn’t Delivering Power”
Symptoms: Clamps are connected, but the car won’t crank.
- Check the charge: If the Type S is below 50%, it might lack the power to start the engine. Recharge it first.
- Verify connections: Loose clamps are the #1 culprit. Wiggle them—if they move, reattach firmly.
- Test polarity: If the Type S has a reverse polarity alarm, heed it. Swap the clamps immediately.
- Inspect the battery: If the dead battery is cracked, leaking, or over 5 years old, it might be beyond saving. Call for a tow.
“The Engine Cranks but Won’t Start”
This means the jump starter is working, but the car has another issue. Common causes:
- Fuel problems: If you hear the starter motor but no combustion, the fuel pump might be dead. Wait 10 minutes to let fuel pressure build, then try again.
- Faulty spark plugs: If the engine sputters but won’t catch, the spark plugs may need replacement.
- Alternator failure: If the car starts but dies after 1–2 minutes, the alternator isn’t charging the battery. Drive to a mechanic immediately.
Tip: After a jump start, drive for at least 20 minutes to let the alternator recharge the battery. Avoid short trips.
“The Type S Feels Hot or Smells Strange”
Stop using it immediately. Overheating can damage the battery or pose a fire risk. Let it cool for 30 minutes, then:
- Check for obstructions (dirt blocking vents).
- Ensure you’re not using it in extreme temperatures (below -4°F or above 122°F).
- If the smell is chemical or burning, dispose of it safely and buy a replacement.
Maintenance & Storage: Extend Your Jump Starter’s Life
Charging Best Practices
The Type S jump starter’s battery (usually lithium-ion) degrades faster if left fully drained or overcharged. Follow these rules:
- Recharge every 3–6 months, even if unused. Lithium batteries lose charge over time.
- Use the included charger. Third-party chargers can damage the battery.
- Store at 50–70% charge for long-term storage. A fully charged battery stresses the cells.
Real-life example: I once stored my Type S in a hot garage for a year. When I tried to use it, the battery was dead and wouldn’t hold a charge. Lesson learned: climate control matters.
Cleaning and Storage
After each use:
- Wipe the clamps with a dry cloth to remove corrosion.
- Check for dirt or debris in the ports (use compressed air if needed).
- Store in a cool, dry place. Avoid direct sunlight or moisture.
Tip: Keep the Type S in a padded case or glovebox organizer. Bouncing around in a trunk can loosen internal connections.
When to Replace Your Jump Starter
Most Type S models last 3–5 years. Replace it if:
- It won’t hold a charge after 8+ hours of charging.
- The clamps are cracked or corroded.
- It fails to start a car after 3–4 attempts (and the battery is healthy).
Real-World Scenarios: Type S Jump Starter in Action
Scenario 1: Cold Weather Jump Start
Problem: Your car won’t start on a -10°F morning. The battery is 4 years old.
- Solution:
- Pre-warm the Type S indoors for 10 minutes (cold lithium batteries lose power).
- Connect it as usual, but wait 5 minutes before cranking (cold batteries charge slower).
- If the engine doesn’t start after 2 tries, let the Type S sit in the car for 15 minutes to warm up, then retry.
Result: Success! The extra wait time gave the battery enough juice to turn over the thick winter oil.
Scenario 2: Jump-Starting a Hybrid
Problem: Your Toyota Prius won’t start—but the 12V auxiliary battery (not the main hybrid battery) is dead.
- Solution:
- Locate the 12V battery (often in the trunk or under the rear seat).
- Use the Type S to jump the 12V battery only. Never connect it to the high-voltage hybrid system.
- Start the car, then drive to recharge the 12V battery fully.
Warning: Hybrids have complex electrical systems. When in doubt, consult the manual or call a professional.
Data Table: Type S Jump Starter Performance by Vehicle Type
| Vehicle Type | Recommended Type S Model (Amps) | Average Start Time | Notes |
|---|---|---|---|
| Compact Car (e.g., Honda Civic) | 800–1000A | 1–2 seconds | Works even with 30% battery charge. |
| Mid-Size SUV (e.g., Ford Explorer) | 1500A | 2–3 seconds | May require 2–3 attempts in cold weather. |
| Full-Size Truck (e.g., Ford F-150) | 2000A | 3–5 seconds | Ensure clamps are tight on large terminals. |
| Motorcycle (e.g., Harley-Davidson) | 600–800A | 1–2 seconds | Use the “motorcycle mode” if available. |
Final Thoughts: Your Roadside Safety Net
Let’s be real: no one plans to get stranded with a dead battery. But the Type S jump starter turns panic into a 5-minute fix. From the first time I used it to the countless times it’s bailed me out since, I’ve learned that preparation isn’t just about having the tool—it’s about knowing how to use it right. This guide covered everything: connecting the clamps safely, troubleshooting failures, and even real-world scenarios like winter starts or hybrid cars. But remember, the best jump starter is the one you’ve practiced with. Try a dry run in your driveway this weekend. Connect it to your car (when the engine is off!), then disconnect it. It takes 2 minutes and builds muscle memory.
And here’s my final piece of advice: keep your Type S charged, clean, and ready. Treat it like your car’s spare tire—something you hope to never use, but are grateful to have when you do. Whether you’re a new driver or a road-trip veteran, this little device could be the difference between a frustrating delay and a smooth journey. So next time your car clicks instead of cranks, take a deep breath, grab your Type S, and follow these steps. You’ve got this.
Frequently Asked Questions
How do I use the Type S jump starter for the first time?
Begin by fully charging your Type S jump starter using the included USB cable or AC adapter. Connect the clamps to the battery terminals (red to positive, black to negative), then start the vehicle—the jump starter will automatically detect and deliver power.
Can I leave the Type S jump starter connected to the car battery indefinitely?
No, disconnect the jump starter once the vehicle starts to prevent overcharging or voltage spikes. The Type S jump starter instructions recommend removing clamps immediately after ignition to ensure safety and prolong device lifespan.
What should I do if the Type S jump starter doesn’t turn on?
Check the battery level using the LED indicator; if it’s low, recharge the unit fully. If the issue persists, hold the power button for 3–5 seconds to reset the system, as outlined in the Type S jump starter instructions.
Is the Type S jump starter safe for all vehicle types?
Yes, it works with 12V gasoline and diesel engines, including cars, trucks, and motorcycles. Always follow the step-by-step guide in the manual to avoid incorrect polarity or short circuits.
How long does the Type S jump starter hold a charge when stored?
When fully charged, it retains power for 3–6 months in standby mode. Recharge every 3 months if stored long-term to maintain optimal performance, per the manufacturer’s guidelines.
Can I use the Type S jump starter to charge my phone?
Yes, the jump starter doubles as a portable power bank. Use the USB port to charge devices like phones or tablets, but ensure the jump starter has at least 50% battery for dual functionality.