
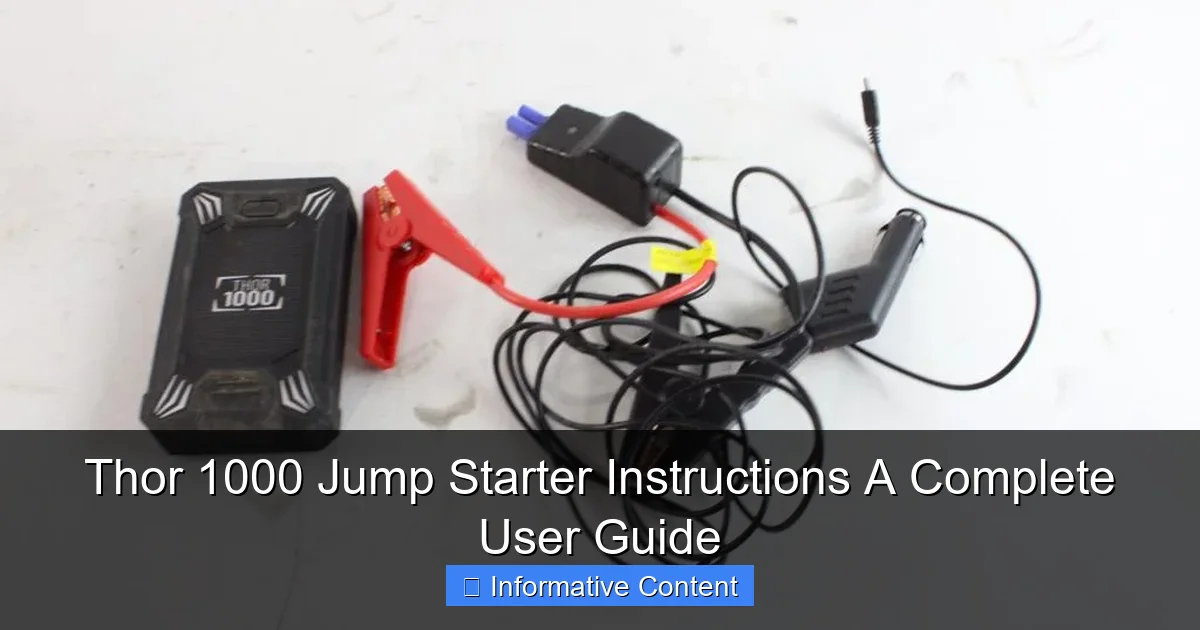
Featured image for thor 1000 jump starter instructions
Image source: content.propertyroom.com
The Thor 1000 Jump Starter delivers powerful, reliable performance with simple, step-by-step instructions for safe and effective use. Follow the included guide to jump-start your vehicle in minutes—just connect the clamps, power on the unit, and start your engine. Always prioritize safety by reading warnings and ensuring proper polarity to avoid damage or injury.
Key Takeaways
- Always charge fully before first use to maximize performance and battery life.
- Connect red clamp first to positive terminal, then black to ground.
- Wait 30 seconds after connecting before attempting to start the engine.
- Never use on damaged batteries to avoid sparks or electrical hazards.
- Store in cool, dry place to maintain battery health and longevity.
- Use included accessories only to ensure safety and optimal functionality.
📑 Table of Contents
- Why the Thor 1000 Jump Starter Deserves a Spot in Your Car
- Getting to Know Your Thor 1000 Jump Starter
- Step-by-Step Thor 1000 Jump Starter Instructions
- Using the Thor 1000’s Extra Features Like a Pro
- Thor 1000 Jump Starter: Troubleshooting Common Issues
- Thor 1000 vs. Other Jump Starters: A Quick Comparison
- Final Thoughts: Is the Thor 1000 Worth It?
Why the Thor 1000 Jump Starter Deserves a Spot in Your Car
Let me paint a picture: It’s a cold winter morning, you’re late for work, and your car just won’t start. The engine cranks weakly, then gives up—classic dead battery syndrome. You call for help, wait 30 minutes in the freezing air, and finally get a jump. Sound familiar? That’s exactly what happened to me last year, and it was the last straw. I decided to invest in a portable jump starter, and after some research, I landed on the Thor 1000 Jump Starter. Fast forward six months, and I’ve used it to revive three cars, my brother’s truck, and even my neighbor’s SUV during a power outage. It’s become my go-to emergency tool.
But here’s the thing: A jump starter is only as good as your understanding of how to use it. I’ve seen people panic because they didn’t know how to connect the clamps or accidentally reverse the polarity. The Thor 1000 Jump Starter is powerful, reliable, and packed with safety features—but only if you follow the right steps. This guide is my way of sharing what I’ve learned so you can skip the frustration and get it right the first time. Whether you’re a first-time user or just need a refresher, these Thor 1000 Jump Starter instructions will walk you through every step, from setup to storage, with tips, tricks, and real-world scenarios.
Getting to Know Your Thor 1000 Jump Starter
Before you dive into using the Thor 1000, it’s worth taking a moment to understand what makes it stand out. This isn’t just another jump starter—it’s a multi-functional powerhouse designed for real-world emergencies. Let’s break down its key components and features so you know exactly what you’re working with.
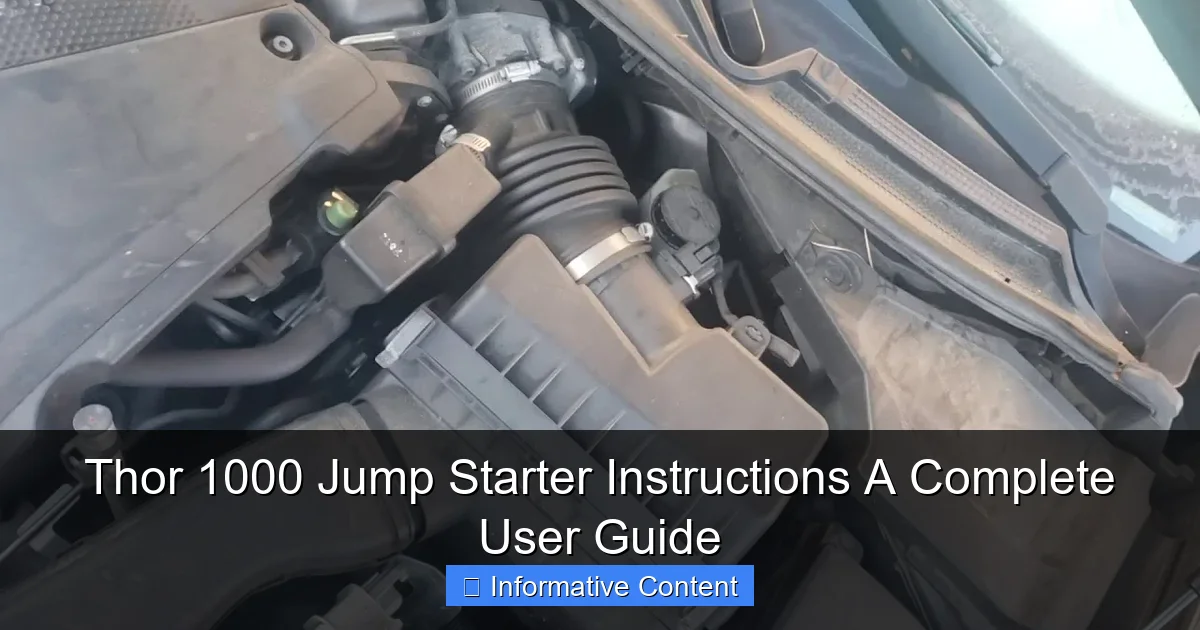
Visual guide about thor 1000 jump starter instructions
Image source: i.ytimg.com
What’s in the Box?
When you unbox the Thor 1000, you’ll find:
- The main jump starter unit (compact but heavy-duty)
- Smart jumper cables with insulated clamps
- USB-C charging cable and wall adapter
- 12V car charger (for topping up on the go)
- Protective carrying case
- User manual (but let’s be honest—you’re reading this instead!)
<
<
The unit itself is about the size of a small shoebox, with a rugged rubberized casing that can handle drops and vibrations. It’s not waterproof, but it’s definitely splash-resistant—perfect for roadside emergencies.
Key Features and Specs
The Thor 1000 packs a serious punch under the hood:
- Peak Current: 1000 amps (enough to start most cars, SUVs, and small trucks)
- Capacity: 20,000mAh (can jump-start multiple vehicles on a single charge)
- Battery Type: Lithium-polymer (lightweight and long-lasting)
- Safety Features: Reverse polarity protection, spark-proof clamps, overheat protection
- Additional Functions: 2x USB ports (5V/2.4A), 12V DC outlet, built-in LED flashlight with SOS mode
One thing I love is the smart cable system. Unlike older jump starters, the Thor 1000’s cables have built-in sensors that detect incorrect connections and flash warnings—no more guesswork. It’s like having a safety net for your first jump.
Understanding the LED Indicators
The front panel has a simple but effective LED display:
- Green: Fully charged or ready to use
- Yellow: 30–70% charge (still good for a jump)
- Red: Below 30% (needs charging)
- Flashing Red: Error or unsafe condition (e.g., reverse polarity)
I’ve learned to glance at these lights before every use. A few months ago, I ignored a yellow light and barely managed to start a truck—lesson learned!
Step-by-Step Thor 1000 Jump Starter Instructions
Now let’s get to the good stuff: how to actually use this thing. I’ll walk you through the process like we’re standing in your driveway, ready to bring a dead battery back to life.
Preparing the Thor 1000
Step 1: Check the Charge
Before anything else, verify your Thor 1000 has enough juice. A full charge takes about 4–6 hours via wall outlet (or 8–10 hours via car charger). I always charge mine overnight after a jump—no surprises later.
Step 2: Inspect the Cables
Look at the clamps and cables. Are they clean? No fraying? The Thor 1000’s smart cables are durable, but salt, mud, or corrosion can mess with conductivity. I keep mine in the case with a microfiber cloth to wipe them down.
Step 3: Power On
Press the main power button. You’ll hear a beep and see the LED lights. If it flashes red, check the user manual—usually a loose connection or low battery.
Connecting to the Battery (The Right Way)
Step 4: Turn Off the Vehicle
Make sure the car is off. No keys in the ignition, no radio on. This prevents voltage spikes.
Step 5: Identify the Battery Terminals
Pop the hood and find the battery. Most have a red (+) and black (–) cap. If it’s covered, look for markings or consult your car’s manual. Pro tip: If the battery is under the seat (like in some BMWs), you might need to access it differently—check the manual!
Step 6: Connect the Clamps
This is where most people mess up. Follow this order:
- Red Clamp to Battery Positive (+): Attach to the metal post, not a plastic cover. Wiggle it to ensure a solid connection.
- Black Clamp to Battery Negative (–): But here’s the trick—don’t attach it to the battery’s negative post. Instead, clamp it to a bare metal surface on the engine block or chassis. This grounds the circuit and reduces sparks. I use a bolt or bracket near the battery.
Why the engine block? It’s a safety thing. If there’s a hydrogen gas leak (rare but possible), grounding away from the battery reduces the risk of a spark. The Thor 1000’s manual emphasizes this—and I’ve seen it save someone from a scary situation.
Step 7: Verify the Connection
The Thor 1000 will beep and show a solid green light if everything’s correct. If it flashes red, double-check the clamps. I once reversed the cables and got a loud beep—thank goodness for that safety feature!
Starting the Vehicle
Step 8: Start the Car
Now turn the key or push the ignition button. The engine should crank and start within 3–5 seconds. If it doesn’t:
- Wait 30 seconds, then try again (the Thor 1000 has a built-in cooldown timer).
- If still no luck, check the battery connections or try a different ground spot.
Note: The Thor 1000 can handle 3–5 jump attempts on a full charge, but let it rest 2–3 minutes between tries to avoid overheating.
Step 9: Disconnect Safely
Once the engine runs, disconnect in reverse order:
- Remove the black clamp from the engine block.
- Remove the red clamp from the battery.
- Turn off the Thor 1000 (press and hold the power button).
Pro tip: Keep the Thor 1000 connected for 1–2 minutes after starting. This lets the car’s alternator recharge the battery slightly before you disconnect. I learned this the hard way when my battery died again 10 minutes later!
Using the Thor 1000’s Extra Features Like a Pro
The Thor 1000 isn’t just a jump starter—it’s a mini power station. Here’s how to make the most of its other functions.
Powering Devices with USB and 12V Outlet
Got a dead phone or a portable cooler? The Thor 1000 has you covered.
- USB Ports: Plug in your phone, tablet, or even a Bluetooth speaker. The 2.4A output charges fast. I’ve used this during camping trips to power a lantern.
- 12V DC Outlet: This is a game-changer. It powers car accessories like air compressors, coolers, or even a small TV. Just make sure the device’s wattage is under 120W (the Thor 1000’s limit).
Real-world example: During a power outage, I used the 12V outlet to run a fan for my elderly dog. The Thor 1000 lasted 4 hours—plenty of time to wait for the grid to come back.
Using the LED Flashlight
The built-in flashlight has three modes:
- Standard: Bright white light (great for under-hood work)
- Strobe: For signaling or emergencies
- SOS: Flashes in a distress pattern
Press the flashlight button once for standard, twice for strobe, three times for SOS. I keep the Thor 1000 in my trunk for night-time breakdowns. The light is surprisingly bright—I’ve even used it to change a tire in the dark.
Charging the Thor 1000 (Best Practices)
To keep your jump starter ready:
- Charge it every 3–6 months, even if unused (lithium batteries degrade when stored flat).
- Use the USB-C cable for fastest charging (wall adapter recommended).
- Avoid charging in extreme temperatures (below 32°F or above 104°F).
I keep mine in my garage with a smart plug, so I can charge it via an app. It’s one less thing to worry about.
Thor 1000 Jump Starter: Troubleshooting Common Issues
Even the best devices have hiccups. Here’s how to solve the most common Thor 1000 problems.
Jump Starter Won’t Power On
Problem: No lights, no beep.
Solution: Try a hard reset: Press and hold the power button for 10 seconds. If that fails, plug it into a wall outlet for 30 minutes—sometimes the battery is so low it can’t power the display.
Clamps Don’t Connect Properly
Problem: Flashing red light or beeping.
Solution: Check for:
- Reverse polarity (swap clamps)
- Corroded battery terminals (clean with baking soda/water)
- Loose connection (wiggle clamps)
I once spent 10 minutes troubleshooting only to realize the battery was so corroded the clamps couldn’t grip. A quick scrub with a wire brush fixed it.
Vehicle Won’t Start After Jump
Problem: Engine cranks but won’t fire.
Possible Causes:
- Dead Alternator: The battery won’t hold a charge. Test with a multimeter.
- Fuel or Ignition Issue: Check fuel pump, spark plugs, or fuses.
- Old Battery: Even with a jump, a battery older than 3–5 years may need replacement.
Rule of thumb: If the Thor 1000 works on another car but not yours, the problem isn’t the jump starter—it’s the vehicle.
USB Ports Not Charging
Problem: Phone won’t charge.
Solution: Try a different cable. Some cheap USB-C cables don’t work with high-output ports. I keep a certified Anker cable in my kit just for this.
Thor 1000 vs. Other Jump Starters: A Quick Comparison
How does the Thor 1000 stack up? Let’s compare it to two popular alternatives.
| Feature | Thor 1000 | NOCO Boost Plus GB40 | DBPOWER 800A |
|---|---|---|---|
| Peak Current | 1000A | 1000A | 800A |
| Battery Capacity | 20,000mAh | 18,000mAh | 18,000mAh |
| USB Ports | 2x (2.4A) | 1x (2.1A) | 2x (2.1A) |
| 12V DC Outlet | Yes | No | Yes |
| Safety Features | Reverse polarity, spark-proof | Reverse polarity, spark-proof | Reverse polarity |
| Price (Avg.) | $89.99 | $129.99 | $79.99 |
The Thor 1000 holds its own. It has more capacity than the DBPOWER and better USB output than the NOCO. The 12V outlet is a standout feature—no other mid-range jump starter offers it. Plus, the price is competitive. I’d say it’s the best value in its class.
Final Thoughts: Is the Thor 1000 Worth It?
After months of use, I can confidently say the Thor 1000 Jump Starter is worth every penny. It’s saved me time, stress, and even a few towing bills. The Thor 1000 Jump Starter instructions are straightforward, but this guide goes deeper—covering the “why” behind each step so you can troubleshoot like a pro.
Is it perfect? Not quite. The carrying case is a bit bulky, and the flashlight could be brighter. But the pros far outweigh the cons. It’s reliable, safe, and versatile—exactly what you want in an emergency tool.
Here’s my final advice: Don’t wait for a dead battery to buy one. Keep your Thor 1000 charged and ready in your car, RV, or even your boat. And when you use it, follow these steps carefully. You’ll not only get your car running but also gain peace of mind knowing you’re prepared for whatever the road throws at you.
So, next time you hear that dreaded click-click-click of a dead battery, don’t panic. Grab your Thor 1000, follow these Thor 1000 Jump Starter instructions, and get back on the road—no help needed.
Frequently Asked Questions
How do I use the Thor 1000 jump starter for the first time?
To use the Thor 1000 jump starter, fully charge it via the included AC adapter or USB-C port. Connect the clamps to your vehicle’s battery (red to positive, black to negative), then turn the ignition while holding the power button for 3 seconds.
What should I do if the Thor 1000 jump starter doesn’t power on?
Ensure the unit is charged for at least 4 hours. If the LED indicator remains off, try resetting it by holding the power button for 10 seconds or check for firmware updates via the companion app.
Can the Thor 1000 jump starter charge other devices?
Yes, the Thor 1000 includes USB-A and USB-C ports to charge phones, tablets, or laptops. Use the 12V/10A DC output for car coolers or air compressors, but avoid exceeding 100W total output.
How often should I recharge the Thor 1000 jump starter when not in use?
Recharge the Thor 1000 every 3-6 months to maintain battery health. The built-in battery management system (BMS) prevents overcharging, so you can leave it plugged in for maintenance.
What safety features does the Thor 1000 have to prevent damage?
The Thor 1000 has reverse polarity, spark-proof, overload, and temperature protection. The LED screen will display error codes (e.g., “E1” for reversed clamps) to guide troubleshooting.
How do I update the firmware on my Thor 1000 jump starter?
Download the “Thor Power” app, connect via Bluetooth, and follow in-app prompts for firmware updates. Keep the jump starter charged above 50% during updates to avoid interruptions.