
Featured image for tacklife jump starter instructions
Image source: everstartjumpstarter.com
Master your Tacklife jump starter in minutes with this clear, step-by-step guide designed for quick and safe jump-starting. Follow the simple instructions—from proper cable connection to power activation—to revive your vehicle confidently and avoid common mistakes. No experience needed—just reliable results every time.
Key Takeaways
- Read the manual first: Always review Tacklife jump starter instructions before use to ensure safety.
- Check battery level: Verify the device is charged above 50% before jump-starting.
- Connect red to positive: Attach the red clamp to the dead battery’s positive terminal first.
- Secure black to ground: Clamp the black cable to an unpainted metal surface on the engine.
- Start within 30 seconds: Crank the engine immediately after connecting to avoid damage.
- Disconnect in reverse order: Remove black clamp first, then red, after successful start.
📑 Table of Contents
- Why You Need a Tacklife Jump Starter (And Why You Should Know How to Use It)
- Unboxing and Getting to Know Your Tacklife Jump Starter
- How to Use Your Tacklife Jump Starter: Step-by-Step Instructions
- Using Your Tacklife Jump Starter as a Power Bank and Multi-Tool
- Troubleshooting Common Issues (And How to Fix Them)
- Maintenance and Storage Tips to Extend Lifespan
- Data Table: Tacklife Jump Starter Models Comparison
- Final Thoughts: Be Prepared, Not Panicked
Why You Need a Tacklife Jump Starter (And Why You Should Know How to Use It)
Let’s be honest: few things are more frustrating than turning your car key and hearing that dreaded click-click-click—or worse, silence. A dead battery can strike at the worst possible moment, like when you’re rushing to a meeting, picking up your kids from school, or stranded in a parking lot after a late shift. That’s where a reliable jump starter, like the Tacklife jump starter, becomes your best friend.
Unlike traditional jumper cables that require another vehicle, a Tacklife jump starter is a self-contained, portable powerhouse. It stores energy so you can jump-start your car, SUV, or even a small boat—no second vehicle needed. But here’s the catch: having the device is only half the battle. Knowing how to use it safely and effectively is what truly matters. I learned this the hard way when I tried to help a friend jump-start her car last winter. I fumbled with the cables, accidentally reversed the clamps, and nearly fried her battery. Embarrassing? Yes. Preventable? Absolutely—with proper Tacklife jump starter instructions.
In this guide, I’ll walk you through everything you need to know, from unboxing to jump-starting, troubleshooting, and maintenance. Whether you’re a first-time user or someone who’s had a jump starter sitting in the trunk for months, this step-by-step guide will turn you into a pro—no mechanic skills required.
Unboxing and Getting to Know Your Tacklife Jump Starter
What Comes in the Box?
When you first open your Tacklife jump starter package, you’ll typically find the following:
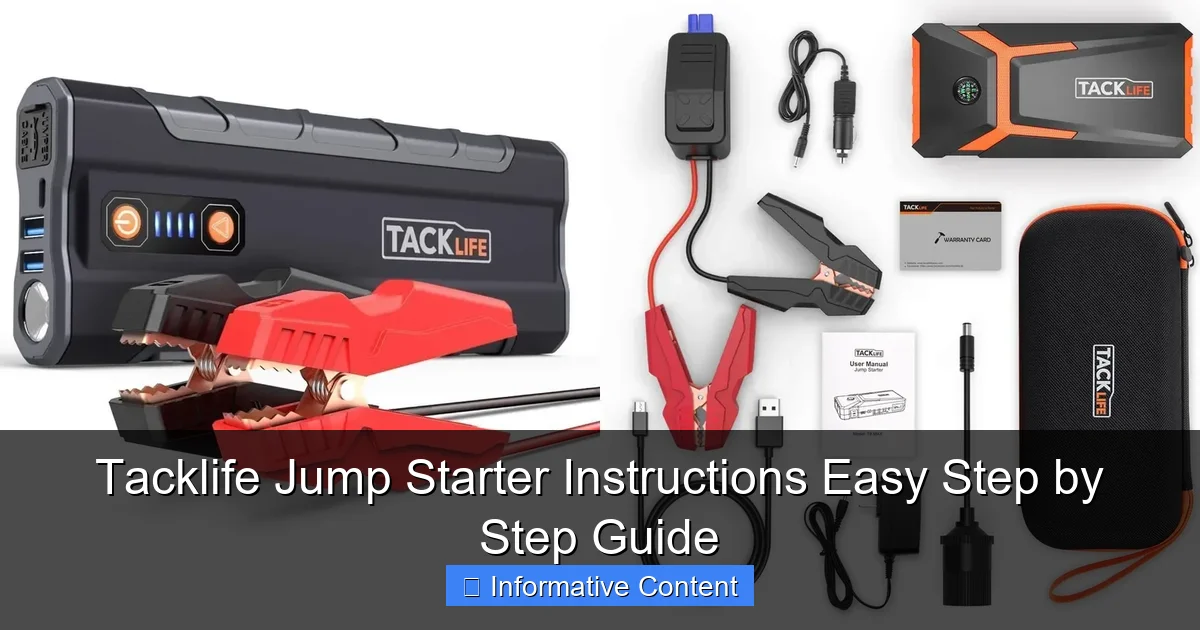
Visual guide about tacklife jump starter instructions
Image source: docerp.s3.amazonaws.com
- The jump starter unit (available in various models like the Tacklife T6, T8, or S3)
- Smart jumper cables with clamps (red for positive, black for negative)
- USB charging cable (usually USB-C or micro-USB, depending on model)
- Wall charger (12V car charger and/or 110V home adapter)
- Carrying case (soft or hard-shell for protection)
- User manual (don’t toss it—keep it handy!)
Pro tip: Before your first use, take a few minutes to familiarize yourself with the layout. The unit usually has a power button, LED indicators for battery level, a USB port, a 12V DC outlet, and a port for the jumper cables. The Tacklife T6, for example, has a clear digital display showing voltage and battery percentage—super helpful.
Charging Your Tacklife Jump Starter Before First Use
This is critical. Never assume your jump starter comes fully charged. Most units arrive at about 50–70% charge. Here’s how to top it up:
- Plug the wall adapter into a standard outlet.
- Connect the USB charging cable to the jump starter’s input port.
- Wait for the LED indicators to show full charge—usually 3–5 hours depending on model and battery capacity.
For example, the Tacklife T8 (800A peak) takes about 4.5 hours to fully charge from 0%. While it’s charging, the LEDs will blink. Once solid green (or the display shows 100%), you’re good to go.
Tip: Charge it every 3–6 months if you’re not using it regularly. Lithium-ion batteries degrade faster when left in a discharged state. Think of it like charging your phone—even if you don’t use it daily, keep it topped up.
Understanding the LED Indicators and Display
Different Tacklife models have slightly different interfaces, but most share common features:
- LED battery level: Four lights usually indicate 25%, 50%, 75%, and 100% charge.
- Power button: Press and hold for 3 seconds to turn on. A short press cycles through modes (jump start, USB output, flashlight, etc.).
- Reverse polarity protection: If you connect the clamps backward, a red LED will flash and the unit won’t output power—this is a lifesaver.
< Low-voltage mode: Some models (like the Tacklife S3) have a “Low Voltage Start” button for deeply discharged batteries (below 1V).
I once tried to jump-start a battery that had been dead for a week. The Tacklife T6 detected the low voltage and wouldn’t activate—until I pressed the “Low Voltage Start” button. That saved me from damaging the battery or the jump starter. Always check your model’s manual to see if this feature exists.
How to Use Your Tacklife Jump Starter: Step-by-Step Instructions
Step 1: Safety First – Park and Prepare
Before touching any cables, make sure your vehicle is safe to work on:
- Park on a flat surface and engage the parking brake.
- Turn off the ignition and all electronics (radio, lights, AC).
- Open the hood and locate the battery. If it’s covered by a plastic shield, remove it carefully.
- Wear safety glasses if possible—batteries can emit gases or spark.
Real-life example: My neighbor tried to jump-start his pickup while the engine was still warm. He got a small spark near the battery, which made him jump. Not dangerous, but scary! Always let the engine cool for 10–15 minutes.
Step 2: Connect the Clamps – Red to Red, Black to Black
This is where most people mess up. Remember: positive to positive, negative to negative. Here’s the correct sequence:
- Attach the red (positive) clamp to the positive (+) terminal on the dead battery. It’s usually marked with a “+” and is the larger of the two posts.
- Attach the black (negative) clamp to the negative (-) terminal on the dead battery. But wait—here’s a pro tip: If the battery is heavily corroded or damaged, attach the black clamp to a bare metal surface on the engine block or chassis (like a bolt or bracket). This reduces the risk of sparks near the battery, which could ignite hydrogen gas.
- Double-check that the clamps are secure and not touching any moving parts or each other.
Why this matters: I once saw someone connect the black clamp to a plastic cover. The jump starter sparked and melted the plastic. Not only did it fail to start the car, but it also created a fire hazard. Always connect to clean, unpainted metal.
Step 3: Power On the Jump Starter
Once the clamps are connected:
- Press and hold the power button on the Tacklife unit for 3 seconds until the LED lights up.
- If your model has a display, it should show voltage and battery level.
- Some units will automatically detect the connection and beep or flash green—this means it’s ready.
Important: If the red LED flashes or you hear an alarm, disconnect immediately. This means the clamps are reversed or there’s a short circuit. Recheck your connections before trying again.
Step 4: Start the Engine
Now it’s time to bring your car back to life:
- Get in the car and turn the key to the “ON” position (don’t crank yet).
- Wait 10–15 seconds. This gives the jump starter time to stabilize the voltage.
- Crank the engine. It should start within a few seconds.
- If it doesn’t start on the first try, wait 30 seconds and try again. Most Tacklife models can handle 3–5 attempts before needing a recharge.
My experience: I once tried to start a 6-cylinder SUV with a Tacklife T6 (600A peak). It didn’t start on the first try, but after the second crank—success! The key was waiting those 15 seconds. Patience pays off.
Step 5: Disconnect in the Right Order
Once the engine is running, disconnect in this order to avoid sparks:
- Remove the black (negative) clamp first.
- Then remove the red (positive) clamp.
- Turn off the jump starter and store it in the carrying case.
Let the engine run for at least 15–20 minutes to recharge the battery. If you shut it off immediately, the battery might not have enough charge to start again.
Using Your Tacklife Jump Starter as a Power Bank and Multi-Tool
Charging Phones, Tablets, and Other Devices
One of the best things about a Tacklife jump starter is its dual purpose. Most models have one or more USB ports (USB-A, USB-C) that can charge your phone, tablet, GPS, or even a portable fan.
Here’s how:
- Turn on the jump starter (press and hold the power button).
- Plug in your device using a USB cable.
- Most units will automatically detect the device and start charging.
Example: On a road trip last summer, my phone died at a remote campsite. I used my Tacklife T8 to charge it from 5% to 60% in 45 minutes—enough to call for help and navigate back. The 12,000mAh battery easily handled that and still had juice to jump-start a friend’s motorcycle later.
Tip: Check your model’s output specs. The Tacklife S3, for example, has a 5V/2.1A USB port—great for fast-charging phones. Some newer models even support PD (Power Delivery) for laptops.
Using the 12V DC Output
Many Tacklife jump starters have a 12V cigarette lighter-style port. This lets you power:
- Air compressors (for inflating tires)
- Portable coolers
- LED work lights
- Car vacuum cleaners
Pro tip: Use a 12V adapter that matches your device’s wattage. For example, a 120W air compressor needs a unit with at least 10A output (like the Tacklife T8). Don’t overload it—check your jump starter’s manual for max output.
Built-in LED Flashlight (Emergency Light)
Most Tacklife models include a bright LED flashlight with multiple modes:
- Steady on (for general illumination)
- SOS mode (flashing signal for emergencies)
- Strobe (to attract attention in fog or rain)
I used the SOS mode once when my car broke down on a dark highway. The flashing light helped a passing driver stop and assist. It’s a small feature, but it can make a big difference in emergencies.
Troubleshooting Common Issues (And How to Fix Them)
“My Jump Starter Won’t Turn On”
This is usually due to one of three things:
- Low battery: Charge it fully before use. If it still won’t turn on after 5 hours, the battery may be damaged.
- Faulty power button: Try pressing it for 5–10 seconds. If no response, contact Tacklife support.
- Internal short circuit: If the unit gets wet or is dropped, internal components might fail. Don’t attempt repairs—return it under warranty.
“The Clamps Spark When I Connect Them”
A small spark is normal when connecting the positive clamp. But large sparks or smoke are dangerous. Causes include:
- Reversed clamps: Disconnect immediately and swap them.
- Damaged battery: If the battery is leaking or bulging, don’t jump-start it—replace it.
< Short circuit: Make sure the clamps aren’t touching each other or metal parts.
Tip: Use the “Low Voltage Start” mode if the battery is deeply discharged. This reduces current flow and minimizes sparking.
“The Car Won’t Start Even After Multiple Attempts”
Don’t panic. Try these steps:
- Check that the jump starter is at least 75% charged.
- Ensure the clamps are clean and tightly connected.
- Try the “Low Voltage Start” mode (if available).
- Let the jump starter and battery sit connected for 1–2 minutes before cranking.
- If still no luck, the issue might be more than a dead battery—like a bad starter motor or alternator.
Real story: A friend’s car wouldn’t start with my Tacklife T6. We tried three times. Then I noticed the headlights were dim even when the engine was running. We took the battery to a shop—it was shot and needed replacement. The jump starter worked fine; the battery was the problem.
“The USB Port Isn’t Charging My Phone”
Possible causes:
- Low battery: If the jump starter is below 25%, it may disable USB output to preserve power for jump-starting.
- Faulty cable: Try a different USB cable—some cheap cables don’t carry enough current.
- Overheating: If the unit gets too hot, it may shut off USB output. Let it cool for 10 minutes.
Maintenance and Storage Tips to Extend Lifespan
How Often to Charge Your Jump Starter
Lithium-ion batteries degrade over time, especially when stored at low charge. Follow this schedule:
- After each use: Recharge to 100%.
- Monthly (if unused): Top up to 50–70%.
- Long-term storage (3+ months): Charge to 50% and store in a cool, dry place.
Why 50%? Storing at full charge stresses the battery. Storing at 0% damages it. 50% is the sweet spot for longevity.
Cleaning and Protecting the Unit
Keep your jump starter in top shape:
- Wipe the body with a dry, soft cloth after use.
- Clean the clamps with a wire brush if they’re corroded.
- Store it in the carrying case to protect it from dust and moisture.
- Avoid extreme temperatures—don’t leave it in a hot car in summer or a freezing garage in winter.
Example: I left my Tacklife T6 in the trunk during a heatwave (110°F outside). When I tried to use it a week later, the battery was at 30% and wouldn’t charge fully. Heat accelerates battery degradation. Now I store it in the cabin.
When to Replace Your Jump Starter
Most Tacklife jump starters last 3–5 years with proper care. Signs it’s time to replace:
- Battery won’t hold a charge for more than 24 hours.
- LED lights flicker or don’t turn on.
- Unit gets excessively hot during charging.
- Jump-starting fails even with a fully charged unit.
Data Table: Tacklife Jump Starter Models Comparison
| Model | Peak Current | Battery Capacity | USB Ports | 12V DC Output | Weight | Best For |
|---|---|---|---|---|---|---|
| Tacklife T6 | 600A | 18,000mAh | 1 USB-A | Yes | 1.2 lbs | Compact cars, sedans |
| Tacklife T8 | 800A | 18,000mAh | 2 USB-A | Yes | 1.4 lbs | SUVs, trucks, boats |
| Tacklife S3 | 1,000A | 12,000mAh | 1 USB-A, 1 USB-C | No | 1.1 lbs | Heavy-duty vehicles, frequent use |
This table helps you choose the right model. For example, if you drive a large SUV, go for the T8 or S3. If you want portability and phone charging, the T6 or S3 are great.
Final Thoughts: Be Prepared, Not Panicked
Using a Tacklife jump starter isn’t rocket science, but it does require attention to detail. Follow these Tacklife jump starter instructions, and you’ll never have to wait for a stranger with jumper cables again. You’ll save time, avoid embarrassment, and most importantly—stay safe.
I’ve used my Tacklife jump starter more times than I can count—on my car, my brother’s motorcycle, even my dad’s old pickup. It’s saved me from being late to work, missing appointments, and worst of all, feeling helpless. And the best part? It’s not just a jump starter. It’s a power bank, a flashlight, a 12V outlet—all in one compact, reliable package.
So charge it up, keep it in your car, and practice the steps once or twice. You don’t want to learn how to use it during an emergency. With a little preparation, you’ll turn a stressful situation into a quick fix. After all, the best tool is the one you know how to use when you need it most.
Frequently Asked Questions
How do I use the Tacklife jump starter for the first time?
To use your Tacklife jump starter, fully charge it via the included USB cable, then connect the clamps to your car battery (red to positive, black to negative). Turn on the device, start your vehicle, and disconnect once running. Always follow the Tacklife jump starter instructions for safety.
Can I leave the Tacklife jump starter plugged in overnight?
No, overcharging can damage the battery. The device typically takes 3–5 hours to charge fully—unplug it once the indicator light confirms completion. Refer to your Tacklife jump starter instructions for exact charging times.
Why won’t my Tacklife jump starter turn on?
Check if the battery is depleted and recharge it. If the device still doesn’t power on, ensure the power button is held for 3+ seconds or contact Tacklife support for troubleshooting.
Is the Tacklife jump starter safe for my car’s electronics?
Yes, it includes built-in protections against overvoltage, short circuits, and reverse polarity. Always connect the clamps correctly to avoid damage.
How do I check the battery level on my Tacklife jump starter?
Press the battery indicator button on the device—the LED lights will display the remaining charge (e.g., 4 lights = 100% charged).
Can I use my Tacklife jump starter in cold weather?
Yes, but extreme cold (< 32°F/0°C) may reduce performance. Store it in a warm place and avoid jump-starting in subzero temperatures for extended periods.