
Featured image for streetwize jump starter instructions
Image source: cdn.aws.toolstation.com
Always connect the Streetwize jump starter to the correct battery terminals—positive to positive, negative to negative—to prevent damage or injury. This guide walks you through each step, from powering on and connecting clamps to starting the vehicle safely and disconnecting properly. Follow these clear, no-nonsense instructions to jump-start your car confidently and avoid common mistakes.
Key Takeaways
- Always inspect cables for damage before connecting to avoid hazards.
- Follow polarity strictly: red to positive, black to negative terminals.
- Charge fully before first use to maximize jump starter performance.
- Turn off accessories before jump-starting to prevent electrical overload.
- Store in a cool, dry place to prolong battery lifespan.
- Use safety gloves and goggles to protect during the jump-start process.
- Refer to the manual for model-specific troubleshooting and guidelines.
📑 Table of Contents
- Why Every Driver Should Have a Streetwize Jump Starter in Their Car
- Understanding Your Streetwize Jump Starter: What’s in the Box?
- Step-by-Step Streetwize Jump Starter Instructions: How to Use It Safely
- Maintaining Your Jump Starter: Tips to Extend Its Lifespan
- Advanced Features and Smart Use Cases
- Comparing Streetwize Models: Which One Fits Your Needs?
- Final Thoughts: Be Prepared, Not Panicked
Why Every Driver Should Have a Streetwize Jump Starter in Their Car
Remember that heart-sinking moment when your car won’t start? The headlights dim, the radio flickers, and the ignition just clicks—over and over. It’s a scenario we’ve all faced at some point, and it’s never at a convenient time. Whether you’re rushing to work, stranded in a dark parking lot, or just trying to get home after a long day, a dead battery can ruin your plans fast. That’s why I always keep a Streetwize jump starter in my trunk. It’s not just a backup—it’s peace of mind.
Unlike traditional jumper cables that require another vehicle, a portable jump starter like the Streetwize gives you independence. No more flagging down strangers or waiting for roadside assistance. But here’s the catch: owning one isn’t enough. To use it safely and effectively, you need to know the Streetwize jump starter instructions inside and out. I learned this the hard way when I accidentally reversed the clamps during my first use—thankfully, nothing exploded, but it was a close call. That experience taught me that proper knowledge is just as important as the device itself. In this guide, I’ll walk you through everything you need to know—from setup to storage—so you can jump-start your car confidently and safely, every time.
Understanding Your Streetwize Jump Starter: What’s in the Box?
When you first open the box of your Streetwize jump starter, you might be surprised by how much more it offers than just a battery pack. These devices are designed to be multifunctional tools for modern drivers. Let’s break down what you’re getting and why each component matters.
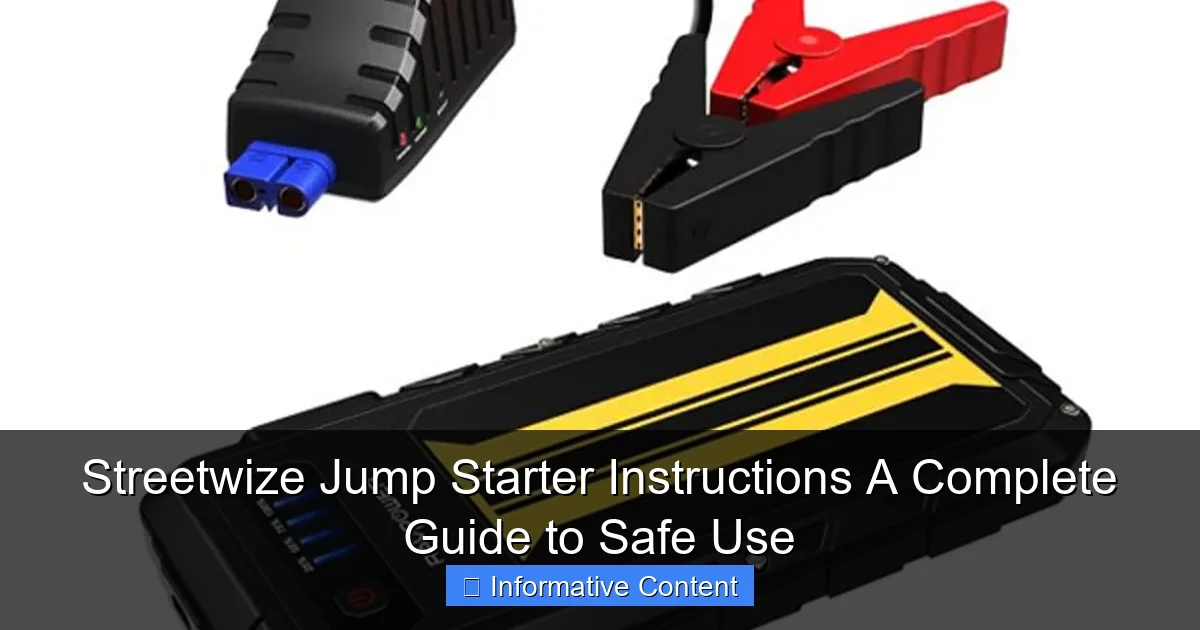
Visual guide about streetwize jump starter instructions
Image source: cdn.sharafdg.com
Key Components and Their Functions
Most Streetwize models—like the Streetwize 12V 18000mAh or the compact 10000mAh version—come with the following:
- Main jump starter unit: This is the heart of the device. It stores power and delivers the surge needed to start your engine.
- Smart jumper cables: These are the heavy-duty clamps (red for positive, black for negative) that connect to your car battery. Unlike basic cables, they often include built-in surge protection and reverse polarity alerts.
- USB charging cables (Micro-USB or USB-C): Used to recharge the jump starter from a wall outlet, car charger, or even a power bank.
- Wall charger and 12V car adapter: Dual charging options mean you can top up at home or on the go.
- LED flashlight with multiple modes: Useful for nighttime emergencies or signaling for help. Some models include SOS strobe and steady beam options.
- Carry case or storage bag: Keeps everything organized and protected from dust and moisture.
- User manual: Always keep this handy. It contains the official Streetwize jump starter instructions specific to your model.
For example, my Streetwize SWJS18000 came with a bright yellow case and a flashlight that doubles as a work light—super handy when I had to jump-start my car at dusk in a dimly lit parking garage.
Understanding the Power Ratings
Not all jump starters are created equal. The two most important specs to understand are:
- Peak Amps (e.g., 1800A, 2000A): This is the maximum power output during a jump start. Higher amps mean it can handle larger engines (like trucks or SUVs).
- Capacity (mAh): This tells you how much charge the battery holds. A 18,000mAh unit can typically jump-start a car 20–30 times on a full charge.
Tip: If you drive a small sedan, a 10,000mAh model may be enough. But for SUVs, diesel engines, or frequent use, go for 15,000mAh or higher. I made the mistake of buying a smaller model first—it worked, but only once. After that, it needed a full recharge before I could use it again. Lesson learned.
Smart Features That Make a Difference
Modern Streetwize jump starters come with safety tech that older models lacked:
- Reverse polarity protection: If you accidentally connect the clamps wrong, the device won’t send power—preventing sparks or damage.
- Overcharge and over-discharge protection: The internal circuit cuts off power if the battery is too full or too low.
- Short-circuit protection: Prevents damage if the clamps touch or short out.
- Low-temperature operation: Some models work down to -20°C, crucial for winter drivers.
These features aren’t just marketing fluff. They’re the reason I now trust my jump starter in any weather. Last winter, my battery died in a blizzard. The Streetwize worked flawlessly at -15°C, and the built-in flashlight helped me see the battery terminals clearly.
Step-by-Step Streetwize Jump Starter Instructions: How to Use It Safely
Now that you know what’s in the box, let’s get to the core of this guide: the actual Streetwize jump starter instructions. I’ll walk you through the process step by step, with real-world tips to avoid common mistakes.
Step 1: Safety First—Park and Prep
Before touching anything, ensure safety:
- Park on a flat, dry surface. Turn off the engine and remove the keys.
- Engage the parking brake and put the car in park (or first gear if manual).
- Wear gloves and eye protection if available. Battery acid and sparks are no joke.
- Check the battery for cracks, leaks, or corrosion. If the battery is damaged, do not attempt a jump start. Replace it instead.
Pro tip: I keep a pair of disposable nitrile gloves in my jump starter case. They’re cheap, lightweight, and protect my hands from dirt and acid.
Step 2: Charge and Power On the Jump Starter
- Ensure your Streetwize is at least 50% charged. A full charge is best, but 50% should handle most 4- to 6-cylinder engines.
- Turn on the jump starter by pressing and holding the power button. You should see the LED battery level indicator light up.
- Connect the smart cables to the jump starter’s port (usually labeled “Battery”). They only fit one way—don’t force them.
Note: Some models have a “Jump Start” mode button. Press it if required. This activates high-current output and disables USB ports to focus power.
Step 3: Connect the Clamps to the Car Battery
This is where most people mess up. Follow this order strictly:
- Connect the red (positive) clamp to the positive (+) terminal of the car battery. Look for a “+” sign or red cable.
- Connect the black (negative) clamp to a bare metal surface away from the battery. Use the engine block, a bolt, or a bracket—not the negative terminal. This prevents sparks near the battery, which could ignite hydrogen gas.
⚠️ Never connect the black clamp to the negative battery terminal unless the manual specifically says so. I made this mistake once and got a spark—luckily, no damage, but it scared me straight.
Step 4: Start the Engine
- Double-check all connections.
- Enter the car and turn the ignition. The engine should crank and start within a few seconds.
- If it doesn’t start on the first try, wait 30–60 seconds before trying again. The jump starter needs time to recover. Most models allow 3–5 attempts in a row.
Example: My friend tried to start his SUV three times in 10 seconds. The jump starter shut off due to overheating. We waited a minute, then it worked on the fourth try.
Step 5: Disconnect and Store Properly
Once the engine is running, disconnect in this order:
- Remove the black clamp first.
- Remove the red clamp.
- Disconnect the cables from the jump starter.
- Turn off the jump starter and store it in its case.
Important: Let your car run for at least 15–20 minutes to recharge the battery. A quick start won’t fully restore a deeply discharged battery.
Troubleshooting Common Issues
- Jump starter won’t turn on: Check charge level. Recharge for 2–4 hours.
- Clamps spark or get hot: Disconnect immediately. Reconnect properly. Ensure no metal parts are touching.
- Engine cranks slowly: The jump starter may be low on charge. Try a second attempt after a 1-minute rest.
- “Reverse Polarity” warning light: You connected the clamps wrong. Swap them and try again.
Remember: The Streetwize jump starter instructions in your manual may have model-specific quirks. For example, the SWJS10000 has a “Boost” button that must be held during cranking. Don’t skip the manual!
Maintaining Your Jump Starter: Tips to Extend Its Lifespan
Like any battery-powered device, your Streetwize jump starter needs care. Neglect it, and it might fail when you need it most. Here’s how to keep it in top shape.
Charge It Regularly—Even When Not in Use
Lithium-ion batteries degrade if left discharged. Follow this rule:
- Recharge your jump starter every 3 months, even if you haven’t used it.
- Store it at 40–60% charge for long periods (e.g., winter storage).
- Use the original charger or a high-quality USB-C PD adapter. Cheap chargers can damage the battery.
I set a reminder on my phone every 90 days. It takes 5 minutes to plug it in and saves me from a dead jump starter.
Store It in a Cool, Dry Place
- Avoid extreme temperatures. Don’t leave it in a hot trunk (above 40°C) or freezing garage (below -10°C).
- Keep it away from moisture, dust, and direct sunlight.
- Store in its case to protect the screen and ports.
My first jump starter died after I left it in a sun-baked car for a week. The battery swelled and wouldn’t hold a charge. Lesson: treat it like a smartphone.
Clean and Inspect Monthly
- Wipe the unit with a dry, soft cloth.
- Check the clamps for corrosion or damage. Use a wire brush if needed.
- Test the flashlight and USB ports to ensure they work.
Know When to Replace It
Jump starters don’t last forever. Signs it’s time to upgrade:
- Holds charge for less than 1–2 months.
- Fails to start the car after 2–3 attempts.
- Shows physical damage (cracks, leaks, swelling).
- Is over 3–5 years old (battery chemistry degrades over time).
Tip: Keep your receipt and warranty card. Most Streetwize models come with a 12- to 24-month warranty.
Advanced Features and Smart Use Cases
Your Streetwize isn’t just a jump starter. It’s a portable power hub. Let’s explore how to use it beyond emergencies.
Using It as a Power Bank
Most models have USB-A and USB-C ports. You can:
- Charge smartphones, tablets, and Bluetooth devices.
- Power GPS units, dash cams, or camping lights.
- Run small appliances (e.g., a portable fan) via a 12V-to-USB adapter.
Example: On a road trip, my phone died at a remote trailhead. I used the jump starter to charge it while hiking—saved me from getting lost!
Emergency Lighting and Signaling
The built-in flashlight is more than just a light:
- Use the SOS strobe mode to signal for help in an accident.
- Switch to steady beam for changing a tire at night.
- Some models have a red warning light to alert other drivers.
Jump-Starting Motorcycles and Small Engines
Yes, you can use it on:
- Motorcycles, scooters, and ATVs.
- Boats, snowmobiles, and lawnmowers.
Just ensure the engine is 12V and the jump starter has enough amps. A 1000A model is usually fine for bikes.
Off-Grid and Camping Uses
Take it camping to:
- Power a portable fridge via a 12V adapter.
- Charge headlamps, radios, and drones.
- Run a small fan or heater in your tent.
Pro tip: Pair it with a solar charger for off-grid adventures. I use a 20W solar panel to top it up during long hikes.
Comparing Streetwize Models: Which One Fits Your Needs?
With several models available, choosing the right Streetwize can be confusing. Here’s a quick comparison to help you decide.
| Model | Capacity (mAh) | Peak Amps | USB Ports | Flashlight | Best For |
|---|---|---|---|---|---|
| SWJS10000 | 10,000 | 1200A | 1x USB-A, 1x USB-C | 3 modes (steady, strobe, SOS) | Small cars, city drivers |
| SWJS15000 | 15,000 | 1600A | 2x USB-A, 1x USB-C | 3 modes + red light | Mid-size sedans, SUVs |
| SWJS18000 | 18,000 | 1800A | 2x USB-A, 1x USB-C, 1x QC3.0 | 4 modes + work light | Large SUVs, trucks, frequent use |
| SWJS20000 (Pro) | 20,000 | 2000A | 3x USB-A, 1x USB-C, 1x PD | 5 modes + laser pointer | Heavy-duty, off-road, professional use |
Key takeaways:
- For city commuters: SWJS10000 is lightweight and affordable.
- For families: SWJS15000 or SWJS18000 offers more power and ports.
- For truck owners: Go for 1800A+ peak amps. The SWJS20000 is ideal.
- For outdoor enthusiasts: Look for models with a work light and red warning light.
I upgraded to the SWJS18000 after my old 10000mAh model struggled with my SUV. The extra amps made all the difference.
Final Thoughts: Be Prepared, Not Panicked
Having a Streetwize jump starter in your car isn’t just about convenience—it’s about safety, independence, and peace of mind. Whether you’re a daily commuter, a weekend adventurer, or a parent running errands, a dead battery shouldn’t derail your plans. But as I’ve learned, the device is only as good as your knowledge of it.
By following the Streetwize jump starter instructions carefully—charging it regularly, connecting it properly, and storing it safely—you’ll turn a potential disaster into a 2-minute fix. No more waiting for help. No more awkward favors from strangers. Just you, your car, and the quiet confidence that you’re prepared.
Remember: Practice the steps at home before an emergency. Open the hood, locate your battery, and simulate the connection (without turning on the jump starter). Familiarity breeds confidence. And when the moment comes, you’ll act calmly and correctly.
So charge up your Streetwize, store it in your trunk, and drive with one less worry. Because in the unpredictable world of car ownership, being ready is the ultimate power move.
Frequently Asked Questions
How do I use the Streetwize jump starter to jump-start my car?
To use the Streetwize jump starter, first ensure it’s fully charged. Connect the red clamp to the positive (+) terminal of the dead battery and the black clamp to an unpainted metal surface, then turn on the jump starter and start the vehicle.
What should I do if the Streetwize jump starter doesn’t turn on?
Check that the power button is held for 3–5 seconds, as some models require a long press. If it still doesn’t turn on, recharge the unit fully using the included AC/DC adapter or car charger.
Can I use the Streetwize jump starter on diesel engines?
Yes, most Streetwize jump starters support diesel engines, but verify your model’s peak current rating (e.g., 1000A+). Always follow the vehicle manufacturer’s jump-starting recommendations for diesel engines.
How do I safely charge the Streetwize jump starter?
Use the included 12V car charger or wall adapter, plugging it into the input port on the unit. A full charge typically takes 4–6 hours, and the LED indicator will show when charging is complete.
Is it safe to leave the jump starter connected to the battery after starting the car?
No, disconnect the clamps immediately after starting the engine to avoid overloading the jump starter. Leaving it connected can damage both the unit and the vehicle’s electrical system.
What are the safety precautions for using a Streetwize jump starter?
Always wear safety glasses, avoid touching clamps together, and ensure the jump starter is kept upright. Never use it on damaged or leaking batteries to prevent sparks or explosions.