
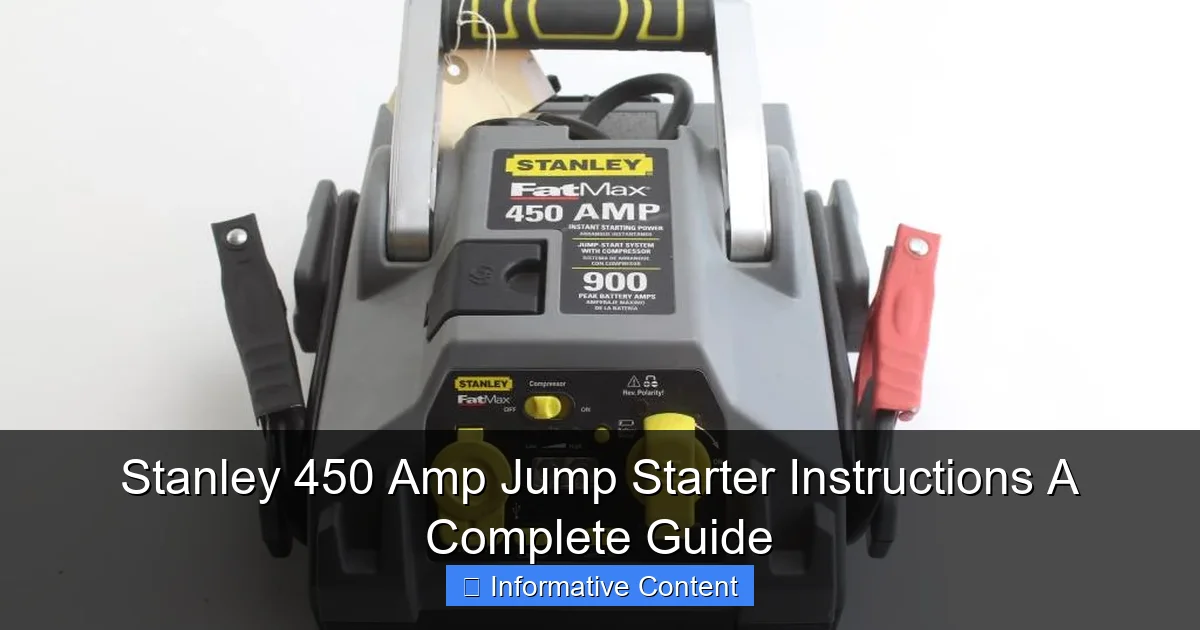
Featured image for stanley 450 amp jump starter instructions
Image source: content.propertyroom.com
The Stanley 450 Amp Jump Starter delivers reliable, powerful performance to jump-start vehicles quickly and safely, even in extreme conditions. Follow the included step-by-step instructions to connect clamps properly, power on the unit, and start your engine—no guesswork required, ensuring peak performance and battery longevity every time.
Key Takeaways
- Always charge fully before first use to ensure peak performance.
- Connect clamps correctly: red to positive, black to negative terminals.
- Turn on the unit only after secure connections to avoid sparks.
- Use safety features: built-in protection prevents reverse polarity damage.
- Store in cool, dry place to prolong battery life and reliability.
- Test monthly: maintain charge and check for operational readiness.
📑 Table of Contents
- Why You Need a Reliable Jump Starter (And Why the Stanley 450 Amp Is a Solid Pick)
- Getting to Know Your Stanley 450 Amp: Features and What’s in the Box
- Step-by-Step: How to Use the Stanley 450 Amp Jump Starter (Safely!)
- Charging and Maintaining Your Stanley 450 Amp Jump Starter
- Troubleshooting Common Issues with the Stanley 450 Amp
- Beyond Jump Starting: Getting the Most Out of Your Stanley 450 Amp
- Data Table: Key Specifications and Features
- Conclusion: Your Trusty Roadside Companion
Why You Need a Reliable Jump Starter (And Why the Stanley 450 Amp Is a Solid Pick)
We’ve all been there. You’re late for work, running on fumes (literally and emotionally), and your car just won’t start. The dreaded click, click, click of a dead battery. It’s a modern-day rite of passage, right up there with spilled coffee and forgotten passwords. In those moments, having a reliable jump starter isn’t just convenient – it’s a lifeline. And that’s where the Stanley 450 Amp Jump Starter comes in. I remember my first dead battery incident: stranded in a grocery store parking lot, frantically calling friends, hoping someone would pick up. It was a stressful, expensive lesson in the importance of being prepared. That’s when I started researching portable jump starters, and the Stanley 450 Amp quickly became a top contender.
This guide is designed to be your go-to resource for everything you need to know about using the Stanley 450 Amp Jump Starter. Whether you’re a seasoned DIYer or a complete newbie when it comes to car maintenance, I’ll walk you through the setup, safe operation, troubleshooting, and even some clever ways to get the most out of this handy device. Forget confusing manuals with tiny print. We’ll cover the Stanley 450 Amp jump starter instructions in plain English, focusing on practical, real-world use. Think of this as your friendly, no-nonsense guide to never being stranded again. We’ll explore its features, how to use it correctly, safety tips, and even compare it to other options, so you can make an informed decision and use your jump starter with confidence.
Getting to Know Your Stanley 450 Amp: Features and What’s in the Box
Before you even think about reviving a dead battery, let’s get familiar with what you’re working with. The Stanley 450 Amp Jump Starter isn’t just a glorified battery pack. It’s a multi-functional tool designed for convenience and safety. Unboxing it, you’ll typically find the main unit, heavy-duty jumper cables (with color-coded clamps), a 12V DC charging cable (for charging from your car’s cigarette lighter), a wall charger (AC adapter), and a user manual (which we’re making much easier to understand!).
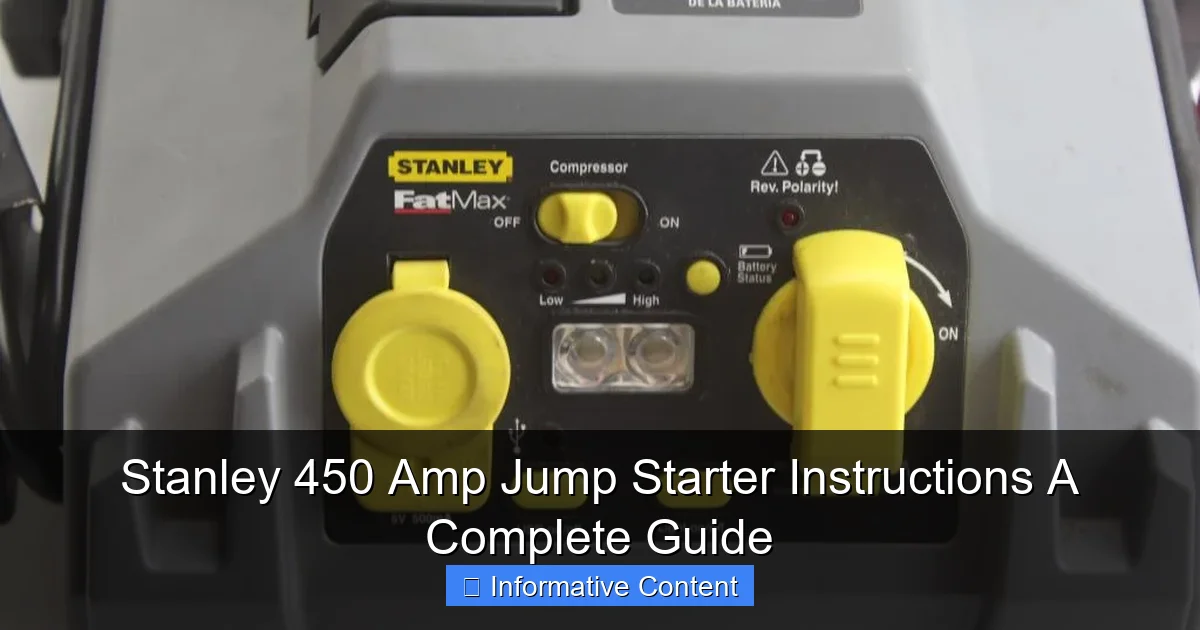
Visual guide about stanley 450 amp jump starter instructions
Image source: content.propertyroom.com
Key Features That Set It Apart
- 450 Peak Amps (300 Cranking Amps): This is the core of its jump-starting power. Peak amps are the surge it can deliver, crucial for overcoming a completely dead battery. Cranking amps are more relevant for cold starts. For most cars, trucks, SUVs, and even some small boats, 450 peak amps is generally sufficient. It’s powerful enough for V6 engines and most 4-cylinder and V8 vehicles, but always check your vehicle’s manual for recommended cranking amps, especially for larger diesel trucks.
- 12V DC Power Outlet: This is a game-changer. Need to charge your phone, run a portable cooler, inflate a tire with a 12V pump, or power a small fan on a hot day? The 12V outlet lets you do all that directly from the jump starter. It’s like having a portable power station for your car.
- Built-in LED Work Light: Ever tried to jump-start a car in a dark garage or at night? The integrated LED light is a lifesaver. It provides a bright, focused beam right where you need it – on the battery terminals. No more fumbling with a flashlight or phone light.
- Reverse Polarity Protection: This is a *crucial* safety feature. If you accidentally connect the clamps to the wrong battery terminals (red to negative, black to positive), the jump starter won’t deliver power and will typically flash a warning light. This prevents sparks, damage to your car’s electronics, and potential battery explosions. It’s your safety net.
- Overload and Short Circuit Protection: The unit has internal safeguards that automatically cut power if it detects an overload or a direct short (like if the clamps touch each other). This protects the jump starter and your vehicle.
- Compact and Durable Design: While not the tiniest on the market, the Stanley 450 Amp is designed to be stored in your car’s trunk or under a seat. It’s built with a rugged plastic casing to withstand the bumps and jostles of car life.
- Digital Display (on some models): Some versions include a simple LED display showing the battery level of the jump starter itself. This helps you know when it needs a recharge.
What the Specifications Mean (And When to Be Cautious)
Understanding the numbers helps you use it wisely. The “450 Amp” is the *peak* current it can deliver for a very short burst (typically 3-5 seconds). This burst is what’s needed to crank the engine. The sustained cranking amps (often listed as 300A) are lower. This means:
- Smaller Engines: Perfect for compact cars, sedans, small SUVs, motorcycles, ATVs, and lawn mowers. You’ll likely get multiple jumps from a single charge.
- Medium Engines: Works well for most mid-size sedans, SUVs, and trucks (V6 engines). Success depends on the battery’s condition and ambient temperature.
- Larger Engines/Diesel: For large trucks, diesel engines (which require much higher cranking amps, sometimes 1000+), or very cold conditions, the Stanley 450 Amp might struggle or require multiple attempts. It’s *not* designed as a primary tool for heavy-duty diesel rigs. In extreme cold, batteries lose power, and engines are harder to turn over. The 450A might not be enough for a completely dead diesel battery at -10°C (14°F).
Pro Tip: Always check your vehicle’s owner’s manual for the recommended cranking amps (CCA) for your battery. If it’s significantly higher than 300-450, the Stanley 450 Amp might not be the ideal long-term solution, but it could still provide a temporary fix if the battery isn’t *completely* dead.
Step-by-Step: How to Use the Stanley 450 Amp Jump Starter (Safely!)
This is the heart of the Stanley 450 Amp jump starter instructions. Safety is paramount. Rushing can lead to sparks, damage, or even injury. Let’s break it down into clear, simple steps:
Step 1: Preparation is Key (Safety First!)
- Park Safely: Turn off the vehicle with the dead battery. Put it in “Park” (automatic) or “First Gear” (manual) and engage the parking brake. Ensure the area is clear of traffic and flammable materials.
- Turn Off Everything: In the *dead* vehicle, turn off the headlights, radio, AC, phone charger, and any other accessories. This reduces the electrical load when you try to start.
- Inspect the Jump Starter: Check the unit for any damage, cracks, or loose cables. Ensure the clamps are clean and free of corrosion. Look at the digital display (if present) to confirm it has a charge (ideally above 50%). If it’s low, charge it first.
- Inspect the Dead Battery: Look for cracks, leaks, or excessive corrosion on the terminals. Do NOT attempt to jump-start a cracked or leaking battery. It’s a safety hazard. If the terminals are heavily corroded, clean them gently with a wire brush or a solution of baking soda and water (wear gloves and eye protection!).
- Wear Safety Glasses: Seriously, wear them. Battery acid can splash, and sparks can fly. It’s a small step for big safety.
Step 2: Connecting the Clamps (The Right Way)
This is where the reverse polarity protection becomes your best friend, but you still need to follow the order:
- Connect Red (+) to Dead Battery Positive (+): Take the red (positive) clamp from the Stanley unit and firmly attach it to the positive terminal of the *dead* battery. It’s usually marked with a “+” sign and often has a red cover. Ensure it has a good, tight metal-to-metal connection.
- Connect Black (-) to Dead Battery Negative (-) OR Engine Ground: Take the black (negative) clamp. You have two options:
- Option A (Preferred if accessible): Attach it directly to the *negative* terminal of the dead battery (marked “-“).
- Option B (If negative terminal is hard to reach or corroded): Attach the black clamp to a clean, unpainted metal part of the engine block, a heavy-duty metal bracket, or the negative battery cable itself (away from the battery and moving parts). This is called a “ground” connection. It completes the circuit safely. Never connect the black clamp directly to the dead battery’s negative terminal if the red is already on the positive *unless* you have a good ground alternative. This prevents sparks near the battery.
- Double-Check Your Connections: Ensure the red is on positive, black is on negative/ground, and the clamps are tight. Make sure they aren’t touching each other or any other metal parts.
Example: I once tried to jump my SUV in a tight garage. The negative terminal was buried under an air intake hose. I attached the black clamp to a large, unpainted bolt on the engine block (verified with a flashlight) instead of the terminal. The jump worked perfectly, and I avoided any sparks near the battery.
Step 3: Starting the Engine (The Moment of Truth)
- Turn On the Stanley 450 Amp: Locate the power button or switch on the unit and turn it on. You should hear a soft hum or see lights activate. Some models have a “Jump Start” mode button.
- Wait 2-3 Seconds: Give the jump starter a moment to stabilize and send power to the battery.
- Attempt to Start the Dead Vehicle: Get into the driver’s seat, turn the ignition key (or press the start button). Do NOT crank the engine for more than 3-5 seconds at a time. If it doesn’t start, wait 30-60 seconds before trying again. This allows the jump starter to recover and prevents overheating. Try 2-3 attempts.
What If It Doesn’t Start?
- Check connections again (are they tight? clean? correct terminals?)
- Ensure the Stanley unit is fully charged.
- Try connecting the black clamp directly to the negative terminal if you used a ground.
- Let the vehicle sit for a few minutes after connecting; sometimes the battery needs a moment to absorb the charge.
- If it still fails, the battery might be too far gone, or there could be another issue (bad starter, alternator, etc.). The jump starter isn’t a magic fix for all problems.
Step 4: Disconnecting (Reverse Order!)
Crucial: Always disconnect in the reverse order of connection.
- Turn Off the Stanley 450 Amp: Switch it off.
- Remove Black (-) Clamp: Disconnect the black clamp from the engine ground or negative terminal.
- Remove Red (+) Clamp: Disconnect the red clamp from the positive terminal.
- Stow Safely: Coil the cables neatly and put the unit away in your trunk.
Important: Once the vehicle is running, let it idle for at least 10-15 minutes to recharge the battery. If possible, drive it for 20-30 minutes. This helps the alternator fully charge the battery and prevents it from dying again quickly.
Charging and Maintaining Your Stanley 450 Amp Jump Starter
Your jump starter is only as good as its charge. Neglecting charging is like having a fire extinguisher with no powder. Here’s how to keep it ready:
Charging Methods and Time
The Stanley 450 Amp typically comes with two charging options:
- AC Wall Charger (Recommended for Full Charges): This is the primary method. Plug the included adapter into a standard wall outlet and connect it to the jump starter’s charging port. A full charge usually takes **12-24 hours**. Use this method regularly, especially if the unit has been used or stored for a while. It ensures a deep, complete charge.
- 12V DC Car Charger: Plug the 12V cable into your car’s cigarette lighter/power outlet (with the engine *running*). This is convenient for topping up while driving. However, charging via 12V is **much slower** (can take 24-48 hours for a full charge) and less efficient than AC. It’s best for maintaining charge, not for deep recovery after heavy use.
Pro Tip: Charge it after *every* use, even if it only provided a small boost. Don’t let it sit completely dead. Lithium-ion batteries (common in these units) don’t like deep discharges.
Storage and Care
- Charge Before Storage: Before storing for a long period (weeks or months), charge it to **about 50-70%**. Storing a fully charged lithium-ion battery for months can degrade it. Storing a completely dead one is worse.
- Cool, Dry Place: Store it in a cool, dry place away from extreme temperatures (don’t leave it in a hot car in summer or a freezing garage in winter). Ideal storage temperature is around 15-25°C (60-77°F).
- Protect Cables: Avoid kinking or crushing the cables. Store them coiled loosely.
- Check Periodically: Every 3-6 months, check the charge level (if it has a display) and recharge if it’s below 50%. This prevents deep discharge.
Signs Your Jump Starter Needs Attention
- Slow Charging or Won’t Hold Charge: Could indicate battery degradation. Lithium-ion batteries typically last 2-5 years with proper care.
- Unit Gets Excessively Hot During Charging or Use:** This is a warning sign. Stop using it and contact Stanley support.
- Clamps are Loose or Damaged:** Replace or repair them immediately.
- LED Light is Dim or Flickering:** Might indicate low internal battery or a fault.
Example:** I left my first jump starter in a hot trunk for a summer. The next time I needed it, it charged very slowly and wouldn’t deliver full power. Lesson learned: protect it from heat!
Troubleshooting Common Issues with the Stanley 450 Amp
Even the best tools have hiccups. Let’s address common problems with the Stanley 450 Amp jump starter instructions in mind:
Jump Starter Won’t Power On
- Check Charge Level: Is the unit completely dead? Try charging it with the AC adapter for at least 30 minutes, then try turning it on.
- Inspect Charging Port:** Look for debris, bent pins, or damage. Clean gently with compressed air.
- Try a Different Outlet:** The wall outlet or car socket might be faulty.
- Internal Fault:** If none of the above work, there might be an internal issue. Contact Stanley customer support. Don’t open the unit yourself.
Vehicle Won’t Start After Proper Connection
- Verify Connections (Again!):** This is the #1 cause. Double-check polarity and tightness. Try wiggling the clamps to ensure metal-to-metal contact.
- Check Jump Starter Charge:** Ensure it has sufficient power. A nearly dead jump starter might not deliver the needed surge.
- Try Ground Connection:** If connected to the negative terminal, try a solid engine ground instead.
- Battery Condition:** The battery might be too far gone (sulfated, internally shorted). The jump starter can’t revive a completely failed battery.
- Vehicle Issue:** The problem might not be the battery. Check for fuel, spark, or starter issues. Listen for any unusual sounds when cranking.
- Cold Weather:** Extremely cold temperatures reduce battery and jump starter efficiency. Try warming the battery area slightly (e.g., with a portable heater *away* from the battery) or use a battery blanket.
LED Light Not Working
- Low Jump Starter Battery:** The light might be too dim to see if the main battery is very low. Charge it.
- Faulty Light Bulb/LED:** The bulb might have burned out. This is usually not user-replaceable. Contact support.
- Internal Circuit Issue:** Could be a wiring problem or circuit board fault. Requires professional service.
12V Outlet Not Providing Power
- Check Jump Starter Charge:** Ensure it has sufficient power.
- Overload:** You might be trying to power a device that draws too much current. Check the device’s amperage rating and the outlet’s limit (usually around 10A).
- Faulty Outlet or Cable:** Test the outlet with a different 12V device. If it still doesn’t work, the outlet might be damaged. Try a different cable if using an adapter.
Reverse Polarity Protection Activated (Flashing Light)
This is a *good* thing! It means the safety feature is working. Simply:
- Turn off the jump starter.
- Disconnect the clamps.
- Recheck the battery terminals (positive and negative).
- Reconnect the clamps in the correct order (Red to positive, Black to negative/ground).
- Turn the jump starter back on.
The flashing light should stop, and you can proceed with starting.
Beyond Jump Starting: Getting the Most Out of Your Stanley 450 Amp
The Stanley 450 Amp is more than just a jump starter. It’s a versatile 12V power source. Here’s how to unlock its full potential:
Powering 12V Devices On the Go
The 12V outlet is your secret weapon:
- Phone Charging:** Use a standard 12V car charger adapter. Keep your phone charged during long drives or emergencies.
- Portable Cooler/Fridge:** Run a 12V cooler to keep drinks and snacks cold on road trips or camping.
- Air Compressor:** Inflate tires, air mattresses, or sports equipment. Ensure the compressor is 12V and check its amp draw (most Stanley 450 Amps can handle up to 10A).
- LED Work Light or Spotlight:** Use a separate 12V work light for repairs or camping.
- Portable Fan:** Stay cool in a hot car or tent.
- GPS or Dash Cam:** Power a secondary GPS or keep a dash cam running when the car is off (use a timer or low-power mode).
Pro Tip:** Use a 12V power distribution block (available cheaply online) to plug in multiple devices simultaneously. Just ensure the total current draw doesn’t exceed the jump starter’s outlet rating.
Emergency Preparedness
This is where it shines:
- Roadside Emergency Kit:** Keep it in your trunk with jumper cables, a tire inflator, a first-aid kit, and a flashlight. It’s the core of your power.
- Power Outage:** Use it to charge phones, run a small radio, or power a portable light during a blackout. (Note: It won’t power high-draw appliances like microwaves or space heaters.)
- Camping/Hiking:** Power small devices at a campsite. The LED light is great for setting up camp at night.
Comparing to Other Options (A Balanced View)
How does it stack up?
- Pros of Stanley 450 Amp:**
- Affordable price point compared to higher-amp models.
- Excellent safety features (reverse polarity, overload protection).
- Useful 12V outlet and bright LED light.
- Reliable brand reputation.
- Good for most standard vehicles.
- Cons / Areas for Improvement:**
- 450 peak amps might struggle with very large diesel engines or in extreme cold.
- AC charging takes 12-24 hours.
- Some models lack a battery level display (older versions).
- Not a replacement for a full battery replacement when the battery is truly dead.
It’s a fantastic mid-range option. If you primarily drive a standard car or SUV, it’s likely perfect. If you frequently work on large trucks or live in a very cold climate, you might consider a higher-amp model (600A+ or 1000A+), but they’re heavier and more expensive.
Data Table: Key Specifications and Features
| Feature | Specification | Notes |
|---|---|---|
| Peak Amps | 450 Amps | Short burst power for cranking. Sufficient for most cars, trucks, SUVs. |
| Cranking Amps (CCA) | 300 Amps (approx.) | Sustained power; relevant for cold starts. Check your vehicle’s manual. |
| 12V DC Outlet | Yes (12V, ~10A max) | Power phones, coolers, air compressors, fans, etc. |
| LED Work Light | Yes (Integrated) | Bright, focused beam for working on batteries at night. |
| Reverse Polarity Protection | Yes | Prevents damage from incorrect clamp connection. |
| Overload/Short Circuit Protection | Yes | Automatic power cut-off for safety. |
| Charging Methods | AC Wall Charger, 12V Car Charger | AC: 12-24 hrs. 12V: 24-48 hrs (slower). |
| Jumper Cables | Heavy-duty, color-coded clamps | Ensure good metal-to-metal contact. |
| Battery Type | Lithium-ion (internal) | Lightweight, but avoid deep discharges. |
| Dimensions | Approx. 8″ x 6″ x 3″ (varies by model) | Fits in most car trunks or under seats. |
| Weight | Approx. 5-6 lbs (varies by model) | Portable but substantial. |
Conclusion: Your Trusty Roadside Companion
Look, nobody *enjoys* a dead battery. But the Stanley 450 Amp Jump Starter, when used correctly following the Stanley 450 Amp jump starter instructions we’ve covered, transforms a stressful, expensive, and potentially dangerous situation into a manageable, quick fix. It’s peace of mind in a compact box. From the clear, step-by-step connection process and the essential safety features like reverse polarity protection to the incredibly useful 12V outlet and built-in work light, it’s designed with real-world usability in mind.
Remember the core principles: **Safety first** (safety glasses, correct connection order, checking for damage), **Proper charging and storage** (charge after use, store at 50-70%, protect from heat), and **Realistic expectations** (it’s great for most cars, but not a magic bullet for every problem or extremely large diesel engines). It’s not perfect – the charging time is a bit long, and it might struggle in extreme cold – but for the vast majority of drivers, it’s an incredibly reliable and valuable tool. Think of it as an investment in your independence and safety. No more waiting for a tow truck, no more relying on strangers, no more missed appointments. You’ve got the power, literally, to get back on the road. So, keep it charged, keep it accessible in your car, and know the simple steps we’ve walked through. The next time that dreaded click happens, you’ll know exactly what to do – safely, confidently, and with the help of your trusty Stanley 450 Amp. Safe travels!
Frequently Asked Questions
How do I use the Stanley 450 Amp Jump Starter to jump-start my car?
To use the Stanley 450 Amp Jump Starter, first ensure the device is fully charged. Connect the red clamp to the vehicle’s positive (+) battery terminal, the black clamp to a grounded metal surface, and press the power button to start the engine.
Can the Stanley 450 Amp Jump Starter be used on other devices besides cars?
Yes, this jump starter includes USB ports and a 12V DC outlet, making it compatible with smartphones, tablets, laptops, and small electronics. Always check the device’s power requirements before connecting.
How long does it take to fully charge the Stanley 450 Amp Jump Starter?
The Stanley 450 Amp Jump Starter typically takes 24-48 hours to fully charge using the included AC charger. A charging indicator light will turn green when the battery is fully charged.
What safety features does the Stanley 450 Amp Jump Starter have?
This model includes reverse polarity, over-current, and short-circuit protection to prevent damage to your vehicle or the device. An audible alarm alerts you if clamps are connected incorrectly.
How many jump starts can I get from a single charge of the Stanley 450 Amp?
On a full charge, the Stanley 450 Amp Jump Starter can deliver up to 10-12 jump starts for standard vehicles, depending on battery condition and engine size.
Where can I find the official Stanley 450 Amp Jump Starter instructions manual?
The official instruction manual is included in the product box or available for download on Stanley’s official website. Always refer to the manual for troubleshooting and detailed safety guidelines.