
Featured image for ravpower car jump starter instructions
Image source: i.ebayimg.com
Master your RavPower car jump starter with these simple, step-by-step instructions to safely jump-start your vehicle in minutes—no tools or expertise required. Always connect the clamps correctly (red to positive, black to negative) and power on the device before starting to avoid damage and ensure reliable performance. Keep this guide handy for emergencies and maximize your jump starter’s lifespan with proper use and storage.
Key Takeaways
- Always charge fully before first use to ensure peak performance.
- Connect red clamp first to positive terminal when jump starting.
- Check voltage compatibility between device and vehicle battery.
- Use safety mode to prevent reverse polarity damage.
- Store in cool, dry place to prolong battery lifespan.
- Test monthly to ensure readiness in emergencies.
📑 Table of Contents
- Why Every Driver Needs a Reliable Jump Starter
- Understanding Your RavPower Car Jump Starter
- Step-by-Step RavPower Car Jump Starter Instructions
- Charging and Maintaining Your RavPower Jump Starter
- Safety Tips and Common Mistakes to Avoid
- Advanced Uses: Beyond Jump Starting
- Final Thoughts: Be Prepared, Not Panicked
Why Every Driver Needs a Reliable Jump Starter
Imagine this: you’re running late for an important meeting, you hop in your car, turn the key, and… nothing. The engine doesn’t crank. The lights are dim. Your heart sinks. It’s a dead battery, and now you’re stranded. We’ve all been there. But what if you could fix that problem in under two minutes, without waiting for a tow truck or flagging down a stranger? That’s where a RavPower car jump starter comes in.
RavPower has become a trusted name in portable power solutions, and their jump starters are a game-changer for drivers. Whether you’re dealing with a cold winter morning, an old battery, or accidentally left your lights on overnight, a RavPower jump starter can get you back on the road fast. But here’s the thing: having the device is only half the battle. Knowing how to use it safely and effectively? That’s where most people get stuck. This guide walks you through RavPower car jump starter instructions step by step—so you’ll never feel helpless again.
Understanding Your RavPower Car Jump Starter
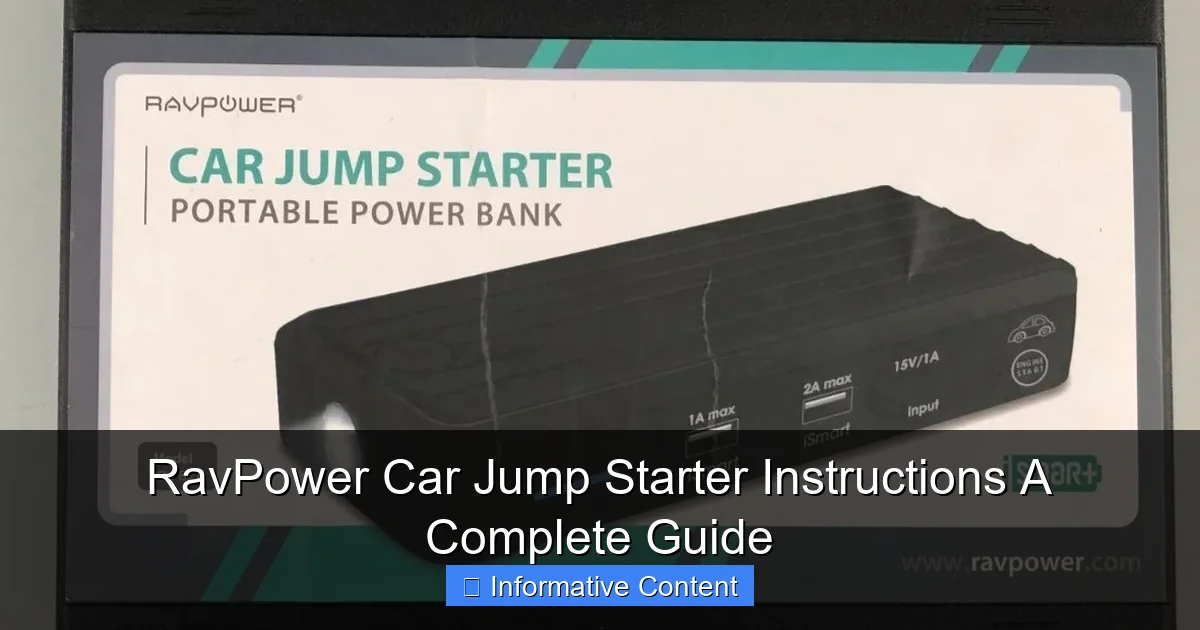
Before you plug in cables or press any buttons, it’s important to understand what you’re working with. RavPower offers several models (like the RP-PB043, RP-PB054, and RP-PB177), but they all share core features designed for safety, portability, and performance. Knowing your device’s capabilities helps you use it correctly and avoid common mistakes.
Visual guide about ravpower car jump starter instructions
Image source: ak-asset.jarir.com
Key Features of RavPower Jump Starters
- High-capacity lithium-ion battery: Most models range from 12,000mAh to 20,000mAh, enough to jump start vehicles multiple times on a single charge.
- Smart jumper cables with reverse polarity protection: Prevents damage if you accidentally connect the clamps backwards.
- LED flashlight with SOS and strobe modes: Super useful during nighttime emergencies or roadside repairs.
- USB-A and USB-C ports: Charge your phone, tablet, or other devices while on the go.
- LCD or LED display: Shows battery percentage and charging status (on select models).
- Compact and lightweight design: Fits easily in your glovebox or center console.
For example, the RavPower RP-PB054 packs 18,000mAh, can jump start cars up to 6.5L gas engines, and includes a digital display. It’s powerful enough for most sedans and SUVs but still small enough to carry in a backpack. The key takeaway? These aren’t just glorified power banks—they’re purpose-built tools with built-in safety tech.
What’s in the Box?
When you unbox your RavPower jump starter, you’ll typically find:
- The jump starter unit
- Smart jumper cable set (with clamps)
- USB charging cable (often USB-C to USB-A)
- Car charger adapter
- User manual
- Storage case (on some models)
Pro tip: Keep the manual handy—it includes model-specific warnings and troubleshooting tips. Also, store the jumper cables properly to avoid damaging the internal wiring. A tangled cable is a recipe for frustration when you’re in a hurry.
Step-by-Step RavPower Car Jump Starter Instructions
Now for the main event: how to actually use your RavPower jump starter. Whether you’re a first-time user or just need a refresher, follow these steps carefully. Safety first, always.
Step 1: Prepare the Vehicle and Jump Starter
Before connecting anything, make sure both the car and the jump starter are in the right state:
- Turn off the ignition and all electronics (radio, AC, lights).
- Engage the parking brake and put the car in park (or neutral for manual transmissions).
- Ensure the jump starter is charged. Ideally, it should be at 75% or higher. Check the LED display or indicator lights.
- Open the hood and locate the battery. Clean any corrosion from the terminals if possible (use a wire brush or baking soda paste).
Real-life example: I once tried to jump start a car with a jump starter at 30% battery. It didn’t work. The engine barely turned over. Lesson learned: always check the charge level first!
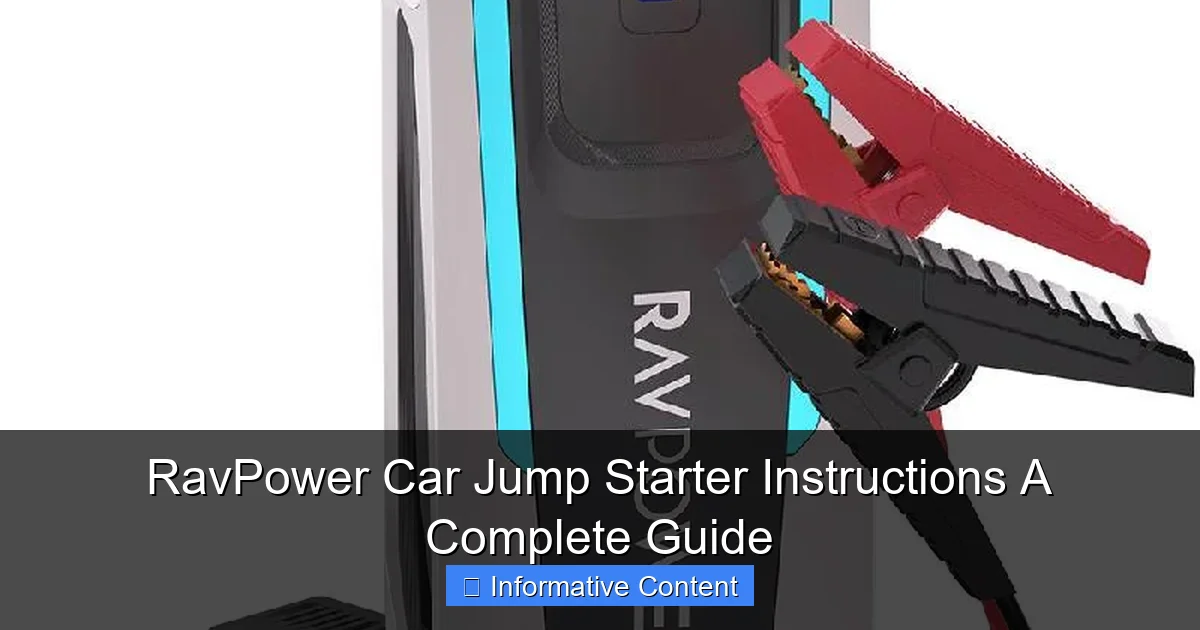
Step 2: Connect the Smart Jumper Cables
This is where many people make mistakes. But RavPower’s smart cables are designed to prevent errors. Here’s how to do it right:
- Plug the smart cable into the jump starter’s dedicated “Jump Start” port (usually labeled and color-coded).
- Identify the positive (+) and negative (-) terminals on your car battery. The positive is usually marked with a red cover or “+” sign.
- Attach the red clamp to the positive terminal first. Make sure it’s secure and metal-to-metal contact.
- Attach the black clamp to an unpainted metal part of the engine block or chassis—not the negative battery terminal. This helps prevent sparks near the battery, which can be dangerous if hydrogen gas is present.
Important: Never connect the black clamp directly to the negative terminal unless absolutely necessary (and only if the manual allows it). The engine block is safer and reduces risk of explosion.
Step 3: Power On the Jump Starter
Once the cables are connected, turn on the jump starter by pressing and holding the power button for 2–3 seconds. You should see indicator lights or an LCD screen light up.
Some models have a “Jump Start” mode that needs to be activated separately. For example, on the RP-PB054, you press and hold the “Jump Start” button until the LED flashes. This mode delivers high-current pulses safely and is essential for starting the engine.
Tip: If the jump starter doesn’t power on, double-check the connections. Loose clamps can prevent the device from activating its safety features.
Step 4: Start the Engine
Now the moment of truth. Get in the car, turn the key, and start the engine. It should crank and fire up within a few seconds. If it doesn’t start immediately:
- Wait 20–30 seconds and try again.
- Don’t crank for more than 3–4 seconds at a time to avoid overheating the starter motor.
- If the engine turns over but doesn’t start, check the fuel level, spark plugs, or other issues—don’t blame the jump starter.
Once the engine is running, keep it on for at least 15–20 minutes to recharge the car battery. This is crucial, especially if the battery was deeply discharged.
Step 5: Disconnect in the Right Order
After the engine is running smoothly, disconnect the jump starter in this order:
- Press the power button to turn off the jump starter.
- Remove the black clamp first from the engine block.
- Remove the red clamp from the positive terminal.
- Unplug the smart cable from the jump starter unit.
Why this order? It prevents accidental short circuits. If you remove the red clamp first while the black is still connected to ground, you risk sparking near the battery—which could ignite hydrogen gas.
Charging and Maintaining Your RavPower Jump Starter
A jump starter is only as good as its battery. If you let it sit dead for months, it won’t help you when you need it most. Proper charging and storage keep it ready for action.
How to Charge Your RavPower Jump Starter
Most models come with a USB charging cable and a car adapter. Here’s how to charge it:
- Use the included USB-C or micro-USB cable to connect to a wall charger (5V/2A or higher recommended).
- Plug into a laptop USB port in a pinch, but charging will be slower.
- Use the car adapter to charge while driving—great for long trips.
- Charging time varies: 4–6 hours for a full charge on most models.
Pro tip: Use a fast charger (like a 15W or 18W USB-C PD adapter) to cut charging time. The RP-PB054 supports PD charging and can go from 0% to 100% in under 3 hours.
Storage Tips for Longevity
Jump starters are sensitive to temperature and humidity. Follow these best practices:
- Store at room temperature (ideally 60°F–77°F / 15°C–25°C).
- Avoid freezing temps—lithium batteries can degrade below 32°F (0°C).
- Keep it in a dry place. Moisture can damage internal circuits.
- Charge to 50–80% before long-term storage (e.g., over winter). Full charge or zero charge for months can shorten battery life.
- Check and top off the charge every 3–4 months if stored for long periods.
Personal experience: I left my jump starter in the trunk during a cold Canadian winter. When I tried to use it in January, the battery was at 10% and wouldn’t charge. Took it inside for 24 hours to warm up—then it worked fine. Temperature matters!
Signs Your Jump Starter Needs Attention
Watch for these red flags:
- Slow charging or not holding a charge.
- LED lights flickering or not turning on.
- Overheating during charging or use.
- Physical damage (cracks, dents, frayed cables).
If you notice any of these, stop using it and contact RavPower support. Most models come with a 12–18 month warranty.
Safety Tips and Common Mistakes to Avoid
Even with smart technology, jump starting a car involves risks. A little knowledge goes a long way in preventing accidents.
Essential Safety Precautions
- Never jump start a damaged or leaking battery. Hydrogen gas can ignite. Evacuate the area and call a professional.
- Wear safety glasses and gloves. Sparks can fly, and battery acid is corrosive.
- Keep the jump starter away from water. It’s not waterproof. Rain or puddles can cause short circuits.
- Don’t leave the jump starter connected while the engine is running for long periods. It’s not a permanent power source.
- Never touch both clamps together. This creates a short circuit and can damage the unit.
Real story: A friend once tried to jump start a car while it was raining. The jump starter got wet, sparked, and wouldn’t turn on. Lesson? Use it under a hood or in dry conditions.
Common Mistakes (And How to Avoid Them)
| Mistake | Why It’s Bad | How to Fix |
|---|---|---|
| Connecting clamps in wrong order | Can cause sparks, damage electronics, or even battery explosion | Always connect red first, black to ground, disconnect black first |
| Using on a fully dead battery (below 2V) | Jump starter may not activate due to safety lockout | Try trickle charging for 10–15 minutes first, then attempt jump |
| Leaving the device in direct sunlight | High temps degrade lithium battery over time | Store in shade or interior; never leave on dashboard |
| Ignoring low battery warning | Jump starter may fail mid-use | Charge monthly, even if not used |
| Using damaged cables | Exposed wires can short circuit or shock | Inspect cables regularly; replace if frayed or cracked |
Another common issue: people try to jump start diesel engines with small jump starters. RavPower models like the RP-PB177 are rated for up to 7.0L diesel, but smaller ones (like the PB043) are for gas engines only. Always check the engine compatibility in your manual.
Advanced Uses: Beyond Jump Starting
Your RavPower jump starter is more than just a battery booster. It’s a multi-tool for emergencies and everyday convenience.
Use as a Power Bank
Need to charge your phone during a road trip? Plug it into the USB-A or USB-C port. Most models support 5V/2.4A output—fast enough for smartphones and tablets.
Tip: Use a USB-C to Lightning cable for iPhones to get faster charging. The jump starter can charge a phone 2–3 times on a full battery.
Emergency Lighting
The built-in LED flashlight has three modes:
- Standard: Bright white light for visibility.
- Strobe: Flashing light to signal for help.
- SOS: International distress signal (three short, three long, three short flashes).
I used the SOS mode once during a breakdown on a rural road. A passing truck driver noticed the flashing light and stopped to help. It’s not just about visibility—it’s about being seen.
Jump Start Motorcycles, ATVs, and Boats
Yes, you can use your RavPower on smaller engines! As long as the engine is within the voltage and size limits (usually 12V and under 6L), it should work. I’ve jump started my 125cc motorcycle with the RP-PB054—took less than 10 seconds.
Caution: For marine use, avoid saltwater exposure. Rinse the unit with fresh water if it gets wet, and dry thoroughly.
Final Thoughts: Be Prepared, Not Panicked
Having a RavPower car jump starter in your car isn’t just about convenience—it’s about peace of mind. Whether you’re commuting to work, heading out on a road trip, or just dealing with winter weather, knowing you can handle a dead battery makes all the difference.
By following these RavPower car jump starter instructions, you’re not just learning how to use a device. You’re gaining confidence, independence, and a little more control over your driving experience. And let’s be honest: no one likes waiting on the side of the road for help.
Remember: charge it regularly, store it safely, and practice the steps before you need them. The first time you use it shouldn’t be during an emergency. Run through the process at home—connect the cables, power it on, simulate the steps. It only takes a few minutes, but it could save you hours (and a lot of stress) later.
So go ahead—toss that old jumper cables in the trash. With a RavPower jump starter and this guide, you’re ready for anything the road throws at you. Drive safe, stay powered, and never get stranded again.
Frequently Asked Questions
How do I use the RavPower car jump starter for the first time?
To use your RavPower car jump starter, fully charge it via the included USB cable. Connect the clamps to your car battery (red to positive, black to negative), turn on the device, and start your engine. Always follow the safety guidelines in the manual.
What should I do if my RavPower jump starter won’t turn on?
Ensure the device is charged for at least 2 hours. If it still won’t power on, try resetting it by holding the power button for 10 seconds or check for firmware updates via the RavPower app.
Can I use the RavPower car jump starter on a 12V or 24V battery?
Most RavPower models (like the RP-PB054) support 12V vehicles only. Verify your model’s specifications before use—using it on a 24V system may damage the device or vehicle.
How often should I charge my RavPower jump starter when not in use?
Recharge every 3-6 months to maintain battery health, even if unused. The RavPower car jump starter instructions recommend storing it at 50% charge in a cool, dry place.
What safety features does the RavPower jump starter have?
It includes reverse polarity, over-current, and short-circuit protection. These features automatically cut power if clamps are incorrectly connected, preventing damage to your car or device.
Can I charge my phone with the RavPower jump starter?
Yes! Most models have USB ports to charge phones, tablets, or other devices. The RavPower car jump starter doubles as a power bank, making it ideal for emergencies.