
Featured image for portable jump starter not charging
Image source: autoexpro.com
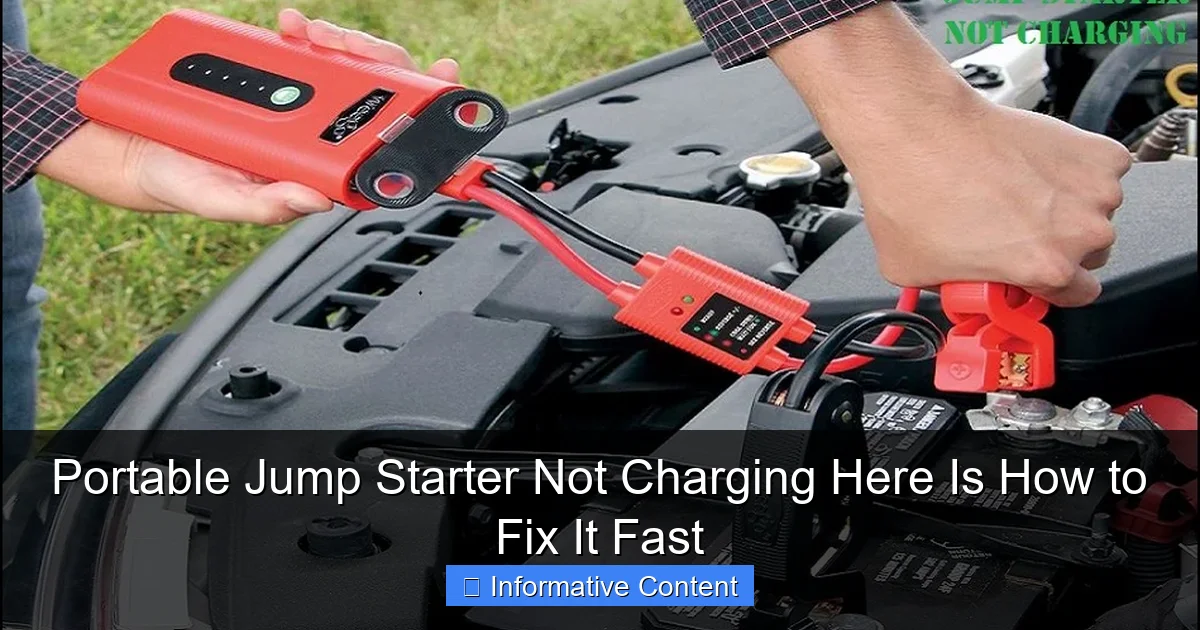
A portable jump starter not charging often stems from a depleted internal battery or faulty charging cable—check both first for a quick fix. Ensure the power source is functional and connections are clean, as dust or corrosion can block proper charging. Try a different outlet or USB-C cable, and if unresponsive, perform a reset using the manufacturer’s method to revive the unit fast.
Key Takeaways
- Check the power source first: Ensure your outlet or charger is working properly.
- Inspect cables and connections: Look for damage or loose links in the charging setup.
- Reset the jump starter: Use the reset button to restore default settings.
- Avoid extreme temperatures: Store and charge in moderate conditions to prevent damage.
- Update firmware if possible: Check manufacturer’s website for software updates.
- Test with another charger: Rule out issues with the original charging device.
📑 Table of Contents
- Why Your Portable Jump Starter Isn’t Charging (And How to Fix It)
- Check the Basics: Power Source and Charging Setup
- Diagnose the Internal Battery Health
- Software and Circuit Board Issues
- Environmental and Physical Factors
- When to Seek Professional Help or Replace It
- Conclusion: Don’t Panic—Fix It Fast
Why Your Portable Jump Starter Isn’t Charging (And How to Fix It)
Picture this: you’re about to head out for a weekend road trip, and your car battery is dead. You grab your trusty portable jump starter—your go-to lifeline for dead batteries—only to find that it won’t power on. You plug it into the charger, wait an hour, and nothing. Panic sets in. Sound familiar? You’re not alone. A portable jump starter not charging is one of the most frustrating issues drivers face, especially when you need it most.
Portable jump starters are supposed to be reliable, compact, and ready to go at a moment’s notice. But like any electronic device, they’re not immune to problems. Whether it’s a faulty charging port, a drained internal battery, or just a bad connection, the reasons your jump starter isn’t charging can vary. The good news? Most of these issues have simple, fast fixes—no need to rush to a mechanic or buy a new one just yet. In this guide, I’ll walk you through the most common causes and how to troubleshoot them step by step. Think of it as a friendly chat with someone who’s been there, done that, and fixed it (more than once).
Check the Basics: Power Source and Charging Setup
Is Your Charging Cable or Adapter the Problem?
Before you start blaming the jump starter itself, let’s rule out the simplest suspects: the charging cable, wall adapter, and power outlet. I once spent 20 minutes fiddling with a jump starter before realizing my USB-C cable was frayed at the connector. A quick swap with a known working cable solved the problem instantly.
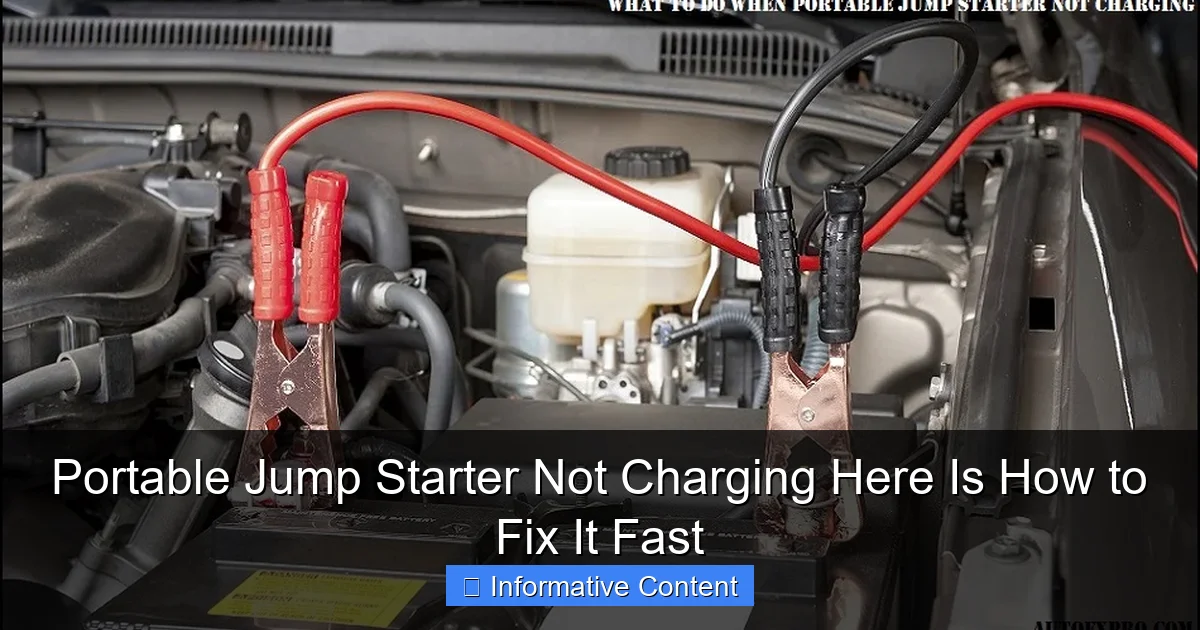
Visual guide about portable jump starter not charging
Image source: autoexpro.com
Here’s what to do:
- Test the cable and adapter with another device. Plug the same cable into your phone or tablet to see if it charges. If not, replace the cable or adapter.
- Try a different wall outlet. Sometimes outlets lose power or have loose connections. Plug your phone charger into the same outlet to confirm it works.
- Use the original charger if possible. Many jump starters are picky about input voltage. Using a third-party charger with incorrect amperage can lead to slow charging or no charging at all.
Inspect the Charging Port on the Jump Starter
Take a close look at the USB or DC charging port on your jump starter. Debris, dust, or bent pins can prevent a proper connection. I’ve seen people blow into the port like it’s an old video game cartridge—don’t do that. Instead:
- Use a can of compressed air to gently blow out dust or lint.
- Use a wooden toothpick or plastic spudger to carefully remove any stuck debris. Avoid metal objects—they can short the internal circuits.
- Wiggle the cable gently while it’s plugged in. If the light flickers or turns on briefly, the port may have a loose connection. This could mean internal damage, but it’s worth testing.
Check the Charging Indicator Light
Most portable jump starters have an LED indicator to show charging status. A solid red light usually means it’s charging; green means fully charged. If the light is off or blinking erratically, it’s a clue.
- No light at all? This could mean the power source isn’t reaching the device, or the internal battery is completely dead (more on that later).
- Flashing red or yellow? Some models use this to indicate a fault, low input voltage, or a battery that’s too cold to charge.
- Light turns on but goes off after a few seconds? This often points to a short circuit or a battery that’s reached its end of life.
Tip: Refer to your jump starter’s user manual for the specific meaning of indicator lights. Not all brands use the same color codes.
Diagnose the Internal Battery Health
Is the Battery Completely Drained or Dead?
Portable jump starters rely on internal lithium-ion or lithium-polymer batteries. These batteries can degrade over time, especially if left unused or stored in extreme temperatures. If your jump starter hasn’t been charged in months, the battery might be so deeply discharged that it won’t accept a charge.
This is called “deep discharge” or “deep cycle death.” It happens when the battery voltage drops below a safe threshold (usually around 2.5–3.0 volts per cell). Most chargers won’t activate if the battery is below this level—they think it’s damaged.
Here’s how to test:
- Use a multimeter to check the voltage across the charging terminals. If you get a reading below 3V (for a 12V system), the battery is likely deeply discharged.
- Try a “trickle charge” using a smart charger with a “recondition” or “recovery” mode. Some jump starters can be revived this way, but it’s not guaranteed.
- Leave it plugged in for 24–48 hours. Some chargers have a “soft start” mode that slowly brings a dead battery back to life. This isn’t a fix-all, but it’s worth a try.
Signs of Battery Degradation or Swelling
Even if the jump starter charges, a degraded battery won’t hold a charge for long. Look for these red flags:
- Swelling or bulging on the case. Lithium batteries can swell when they degrade or overheat. If your jump starter feels bloated or misshapen, stop using it immediately—this is a fire hazard.
- Short runtime. If it used to hold a charge for months but now dies in a week, the battery is losing capacity.
- Overheating during charging. A warm device is normal, but if it’s hot to the touch, there may be an internal short or failing cell.
Real-life example: My neighbor’s jump starter started smoking when he plugged it in. Turns out, the battery had swollen and punctured the casing. We safely disposed of it and replaced it with a new unit. Lesson learned: never ignore physical damage.
How to Extend Battery Lifespan
Want to avoid this in the future? Follow these best practices:
- Charge your jump starter every 3–6 months, even if you don’t use it.
- Store it in a cool, dry place—avoid attics, garages, or cars during summer.
- Use it occasionally to keep the battery active. A full charge-discharge cycle once a year helps maintain cell health.
- Avoid fully draining the battery. Most jump starters shut down at around 20% to protect the cells.
Software and Circuit Board Issues
Is the Charging Circuit or BMS Failing?
Modern jump starters aren’t just batteries—they have internal circuit boards with a Battery Management System (BMS). The BMS monitors voltage, temperature, and current to protect the battery from overcharging, short circuits, and thermal runaway.
If the BMS fails, the jump starter might appear dead even if the battery is fine. Common BMS-related symptoms:
- Device powers on briefly, then shuts off.
- Charging light turns on but the battery percentage doesn’t increase.
- Device overheats or shuts down when connected to a load (like a car battery).
Unfortunately, BMS issues are hard to fix at home. You’d need to open the case, identify the BMS module, and possibly replace it—which is risky and usually not cost-effective. But you can try a few things first:
- Reset the device by holding the power button for 10–15 seconds. Some models have a soft reset function.
- Try a different charging method. If your jump starter supports both USB and DC charging, switch between them. Sometimes one circuit works even if the other is faulty.
- Let it “rest” for 24 hours unplugged. A temporary BMS glitch might resolve itself.
Firmware Glitches and Digital Displays
Some high-end jump starters have digital screens showing battery percentage, voltage, and error codes. These can glitch due to firmware bugs or power surges.
For example, I once had a jump starter that displayed “0%” even after charging overnight. The battery was actually at 80%, but the firmware was stuck. Here’s how I fixed it:
- Fully drained the battery by using it to power a phone.
- Plugged it in and left it for 48 hours without touching it.
- The next time I powered it on, the screen showed 100%. The reset cleared the glitch.
Tip: If your model has a reset button or firmware update option (check the manual), use it. Some brands offer USB firmware updates via a computer.
Environmental and Physical Factors
Temperature Extremes: Too Hot or Too Cold
Portable jump starters are sensitive to temperature. Lithium batteries can’t charge safely below freezing (0°C / 32°F) or above 45°C (113°F). If you’ve left your jump starter in a hot car or a freezing garage, it might refuse to charge.
Here’s what to do:
- Bring the jump starter to room temperature (around 20–25°C / 68–77°F) before charging. Let it sit for at least an hour.
- Check the charging indicator after warming. Many models have a temperature sensor that blocks charging until conditions are safe.
- Avoid charging in direct sunlight or near heat sources. A jump starter left on a dashboard can overheat and shut down.
Personal story: I once tried to charge my jump starter after a winter camping trip. It was -10°C outside, and the device wouldn’t power on. I brought it inside, wrapped it in a blanket, and waited. After two hours, it started charging normally. Cold kills battery performance—literally.
Physical Damage and Water Exposure
Drops, impacts, or water exposure can damage internal components. Even a minor fall can loosen solder joints or crack circuit boards.
Look for:
- Cracks or dents on the case. If the internal battery or PCB is exposed, stop using it.
- Corrosion around the charging port or buttons. This can happen if the device gets wet or is stored in a humid environment.
- Unusual noises (crackling, buzzing) when charging. This could indicate a short circuit.
If you suspect water damage:
- Do not charge it. Water and electricity don’t mix.
- Wipe it down with a dry cloth and let it air dry for at least 48 hours.
- Use isopropyl alcohol (90%+) to clean corrosion from contacts. Apply with a cotton swab and let it dry completely.
When to Seek Professional Help or Replace It
Knowing When a DIY Fix Won’t Work
Not every problem can be solved at home. If you’ve tried all the above steps and your portable jump starter still isn’t charging, it might be time to call in the pros—or accept that it’s time for a new one.
Signs you need professional help:
- The battery is swollen or leaking.
- There’s a burning smell or smoke.
- You’ve opened the case and see damaged components (burn marks, loose wires).
- The device is under warranty and you want a free replacement.
Contact the manufacturer or retailer. Many brands offer 1–3 year warranties. Even if it’s out of warranty, some will offer repair services or discounts on a new model.
Choosing a Reliable Replacement
If you do need to replace your jump starter, here are key features to look for:
- Battery capacity (mAh): Aim for at least 10,000–15,000 mAh for reliable performance.
- Peak current (amps): 1,000–3,000 amps for most cars; higher for trucks or SUVs.
- Safety features: Reverse polarity protection, spark-proof clamps, overload protection.
- Charging options: USB-C, DC, solar (for outdoor use).
- Build quality: Look for rugged, waterproof (IP65 or higher) cases.
| Feature | Why It Matters | Recommended Minimum |
|---|---|---|
| Battery Capacity | Higher mAh = more jumps and longer runtime | 10,000 mAh |
| Peak Current | More amps = better for large engines | 1,000A |
| Charging Ports | USB-C and DC offer flexibility | USB-C + DC |
| Safety Protections | Prevents damage to car and device | Reverse polarity, overload, short circuit |
| Warranty | Peace of mind and support | 2+ years |
Final Thoughts on Longevity and Maintenance
A well-maintained jump starter can last 3–5 years. Treat it like an emergency tool—keep it charged, store it properly, and test it regularly. I keep mine in the trunk with a sticky note: “Charge every 3 months.” It’s saved me twice—once in a snowstorm, once at a gas station at midnight.
Conclusion: Don’t Panic—Fix It Fast
Finding your portable jump starter not charging is stressful, but it’s rarely a dead end. Most issues—from a bad cable to a deeply discharged battery—can be fixed with a little patience and the right steps. Start with the basics: check your charger, inspect the port, and verify the power source. Move on to battery health, temperature, and internal diagnostics. And if all else fails, know when to call for help or upgrade to a better model.
Remember: your jump starter is more than a tool—it’s peace of mind. Whether you’re stranded on a dark road or just want to avoid a dead battery in the morning, a working jump starter is worth the effort. So next time it won’t charge, don’t throw it out. Take a breath, follow these steps, and get back on the road. Because the best jump starter isn’t the most expensive one—it’s the one that works when you need it most.
Frequently Asked Questions
Why is my portable jump starter not charging?
Your portable jump starter may not be charging due to a faulty power adapter, damaged charging cable, or a drained internal battery. Check the connections and ensure the power source is working properly before assuming the unit is defective.
How do I fix a portable jump starter that won’t hold a charge?
First, try charging the jump starter for at least 24 hours using the original charger. If it still won’t hold a charge, the internal battery may be degraded and require replacement or professional servicing.
Can a dead car battery prevent my portable jump starter from charging?
No, a dead car battery won’t affect the charging of your portable jump starter since it charges via a wall outlet or USB, not the vehicle. Focus on the charger, cable, and power source instead.
What should I do if my portable jump starter shows a charging light but won’t turn on?
This could indicate a software glitch or battery management system issue. Try resetting the device by holding the power button for 10–15 seconds, or contact the manufacturer for support.
Is it safe to leave a portable jump starter charging overnight?
Most modern portable jump starters have overcharge protection, making overnight charging generally safe. However, always use the provided charger and avoid damaged cables to reduce risks.
How can I tell if my portable jump starter battery is completely dead?
If the unit shows no lights, fails to charge after 24 hours, and won’t power on or jump a vehicle, the internal battery may be fully depleted or damaged. Consider testing it with a multimeter or seeking a replacement.