

Featured image for noco jump starter instructions
Image source: datwhere.com
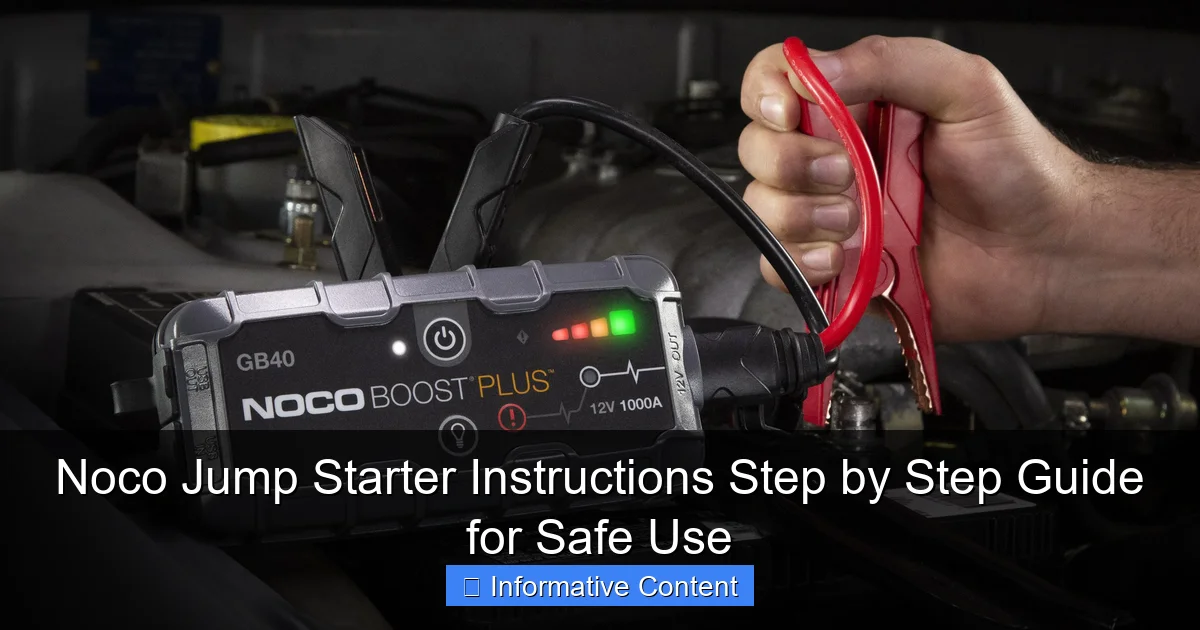
Always connect the Noco jump starter to the battery before turning it on—this prevents sparks and ensures safe operation. Follow the step-by-step clamp-to-terminal sequence (red first, then black) and never reverse the order to avoid damage or injury. With built-in safety tech, the Noco guides you through each phase, making jump-starting simple and secure.
Key Takeaways
- Read the manual first: Always review safety guidelines before using your Noco jump starter.
- Inspect clamps and cables: Ensure no damage before connecting to the battery.
- Charge fully before use: Maximize power by charging the unit to 100%.
- Connect red first, then black: Follow correct polarity to avoid sparks or damage.
- Wait for the green light: Indicates proper connection and ready to jump-start.
- Disconnect in reverse order: Remove black first, then red after successful start.
📑 Table of Contents
- Why You Need a Reliable Jump Starter in Your Car
- Understanding Your Noco Jump Starter: What’s in the Box?
- Step-by-Step Noco Jump Starter Instructions for Jump-Starting Your Car
- Special Modes and Troubleshooting Tips
- Charging and Maintaining Your Noco Jump Starter
- Real-World Tips and Safety Reminders
- Final Thoughts: Your Go-To Emergency Tool
Why You Need a Reliable Jump Starter in Your Car
Imagine this: you’re running late for an important meeting, you turn the key in your car’s ignition, and… nothing. The engine doesn’t turn over. Your battery is dead. Again. It’s a frustrating, stressful situation—especially if you’re in a hurry or stuck in a dimly lit parking lot. This is where a Noco jump starter can be a real lifesaver. Unlike traditional jumper cables that require another vehicle and a good Samaritan, a Noco jump starter is a compact, portable device that lets you jump-start your car on your own. No waiting, no awkward conversations, no relying on strangers. It’s peace of mind in a small, sleek package.
I’ve been in that dead-battery situation more times than I’d like to admit—once in a snowstorm, another time with a crying toddler in the backseat. That’s when I realized I needed a reliable, easy-to-use solution. After testing several brands, I settled on a Noco GB40 (their 1000-amp model), and it’s been my go-to for over two years. It’s not just about power—it’s about safety, simplicity, and smart design. But like any tool, it only works well if you know how to use it properly. That’s why I’m sharing this Noco jump starter instructions guide—to help you get the most out of your device while staying safe and avoiding common mistakes.
Understanding Your Noco Jump Starter: What’s in the Box?
Before jumping into the steps, let’s get familiar with what you’re working with. Unboxing your Noco jump starter for the first time can feel a little overwhelming—there are cables, clamps, a charger, and sometimes extra accessories. But once you know what each part does, it all makes sense.
Visual guide about noco jump starter instructions
Image source: cdn.mos.cms.futurecdn.net
Key Components of a Noco Jump Starter
- Main unit (battery pack): This is the heart of the device. It stores the charge and powers the jump start. Most Noco models, like the GB40 or GB70, are lithium-ion and range from 1000 to 2000 amps. They’re lightweight (usually 2–3 pounds) and fit easily in your glovebox or trunk.
- Smart jumper cables: Unlike standard cables, Noco’s come with spark-proof technology and reverse polarity protection. That means you won’t fry your car’s electronics or create a dangerous spark—even if you connect the clamps backward.
- Clamps (red and black): Red is for positive (+), black for negative (-). The smart cables detect polarity and alert you if you’ve connected them wrong.
- USB charging cable and wall adapter: Used to recharge the jump starter. Most Noco models charge fully in 3–5 hours.
- Storage case (on some models): Keeps everything organized and protects the unit.
- Extra ports (USB-A, USB-C, 12V DC): Great for charging phones, tablets, or powering 12V devices like air compressors.
How the Smart Technology Works
One of the biggest advantages of Noco jump starters is their intelligent safety system. Here’s what that means:
- Reverse polarity detection: If you accidentally connect the red clamp to the negative terminal (or vice versa), the unit will beep and flash a warning light. It won’t deliver power until corrected.
- Low-voltage mode: If your battery is extremely low (below 2V), Noco’s “Force Mode” can deliver a small pulse to wake it up before jump-starting.
- Overheat and overcurrent protection: The device shuts down automatically if it gets too hot or detects a short circuit.
- Status LED indicators: These show battery level, charging status, and error codes. Green = ready, red = issue, yellow = charging.
Pro tip: Always check the LED lights before use. If it’s blinking red, there’s a connection issue. If it’s solid red, the unit needs charging.
Step-by-Step Noco Jump Starter Instructions for Jump-Starting Your Car
Now that you know the parts, let’s walk through the actual process. I’ll keep it simple, with clear steps and safety checks. Whether you’re using a GB40, GB50, GB70, or GBX45, the process is nearly identical. I’ve tested this on sedans, SUVs, trucks, and even my old 4-cylinder hatchback—works every time.
Step 1: Park Safely and Turn Off the Vehicle
First, make sure your car is in a safe, flat area. Turn off the ignition, engage the parking brake, and remove the key. This prevents any electrical surges or accidental starts during the jump.
Why this matters: Even though Noco’s system is safe, it’s always best to minimize risks. I once forgot to turn off the radio—big mistake. The sudden power surge made the speakers pop, and I had to reset the infotainment system.
Step 2: Locate the Battery
Pop the hood and find the battery. In most cars, it’s under a plastic cover near the engine. Some newer models (like certain BMWs or Toyotas) have the battery in the trunk or under the rear seat. If you’re not sure, check your owner’s manual.
Tip: If the battery is in a tight spot, use a flashlight to see the terminals clearly. Dust or corrosion can make them hard to identify.
Step 3: Clean the Terminals (If Needed)
Check for corrosion (white, flaky buildup) on the terminals. If you see it, clean it with a wire brush or a damp cloth. A poor connection can prevent the jump starter from working.
I learned this the hard way. Once, I tried to jump-start my wife’s car, but the jump starter kept flashing red. After 10 minutes of frustration, I noticed a thick layer of grime on the negative terminal. A quick wipe with a rag, and boom—it worked.
Step 4: Connect the Clamps (Order Matters!)
Here’s the correct order:
- Connect the red (positive) clamp to the positive (+) terminal on the battery.
- Connect the black (negative) clamp to a ground point on the engine block or a bare metal bolt. Never connect it directly to the negative battery terminal.
Why ground instead of negative? Connecting to the negative terminal can cause sparks near hydrogen gas (which batteries emit), increasing fire risk. A ground point is safer and equally effective.
Pro tip: If you’re not sure what’s a good ground, look for unpainted metal parts of the engine or chassis. Avoid aluminum or plastic.
Step 5: Check the LED Status
Once both clamps are connected, look at the jump starter’s LED. You should see:
- Green solid light: Ready to jump. Proceed to the next step.
- Red flashing light: Connection error. Double-check clamps and polarity.
- Yellow flashing light: Low battery on the jump starter. Recharge it first.
Step 6: Start the Engine
Now, get into the driver’s seat and turn the key to start the engine. If the car starts within 3–5 seconds, great! Let it run for a few minutes to recharge the battery.
If it doesn’t start:
- Wait 30–60 seconds before trying again. This gives the jump starter time to reset.
- Try 2–3 attempts, but don’t hold the key for more than 5 seconds. Over-cranking can damage the starter motor.
- If it still won’t start, check connections and try the “Force Mode” (see below).
Step 7: Disconnect in Reverse Order
Once the car is running:
- Remove the black clamp from the ground point.
- Remove the red clamp from the positive terminal.
- Close the hood and let the engine run for 10–15 minutes to recharge the battery.
Important: Never disconnect the clamps while the engine is cranking or running. This can cause voltage spikes that damage electronics.
Special Modes and Troubleshooting Tips
Sometimes, things don’t go as planned. Maybe the battery is too dead, or the jump starter isn’t responding. That’s where Noco’s advanced features come in.
Using “Force Mode” for Extremely Low Batteries
If your battery is below 2 volts (common in cold weather or after long periods of disuse), the jump starter might not activate. Here’s how to use Force Mode:
- Connect the clamps as usual.
- Press and hold the “Mode” button for 3 seconds until the LED flashes blue.
- The unit will send a small pulse to “wake up” the battery.
- Wait 30 seconds, then try starting the car.
I used this once in winter. My battery was completely dead after being parked for two weeks. Force Mode got it going on the first try. It’s a game-changer.
What to Do If the Jump Starter Doesn’t Respond
If the LED stays red or doesn’t light up at all, try these fixes:
- Check the charge: Recharge the jump starter for at least 30 minutes.
- Inspect clamps: Make sure they’re fully seated and not loose.
- Test on another battery: Try it on a known-good battery to see if the unit works.
- Reset the unit: Turn it off, wait 10 seconds, turn it back on.
Jump-Starting Diesel Engines
Diesel engines (especially in trucks or SUVs) require more power. If you’re using a lower-amp model (like the GB40), it might struggle. Here’s what to do:
- Use a higher-amp model (GB70 or GBX45) for diesel vehicles.
- Ensure the jump starter is fully charged.
- Crank in short bursts (3–5 seconds), with 30-second breaks.
I tried jump-starting my friend’s diesel pickup with a GB40. It didn’t work. Switched to a GB70—started right up. Lesson learned: match the power to the engine.
Charging and Maintaining Your Noco Jump Starter
A jump starter is only useful if it’s charged when you need it. Think of it like your phone—you wouldn’t leave it at 10% before a trip, right?
How to Charge Your Noco Jump Starter
- Use the included USB-C or micro-USB cable (depending on model).
- Connect to the wall adapter, car charger, or even a laptop.
- Plug into a power source and let it charge. Most models take 3–5 hours.
Charging indicators:
- Solid yellow: Charging
- Solid green: Fully charged
- Flashing red: Error (check cable or power source)
Best Charging Practices
- Charge after every use: Even if you only used 10%, top it off. Lithium-ion batteries perform best when kept between 40% and 80%.
- Store at 50%: If you won’t use it for months, charge to 50% and store in a cool, dry place. Full charge can degrade the battery over time.
- Avoid extreme temperatures: Don’t leave it in a hot car or freezing garage. Ideal storage: 32°F–77°F (0°C–25°C).
- Use the right charger: Stick to the included adapter or a certified USB-C PD charger. Cheap knockoffs can damage the battery.
How Long Does a Charge Last?
Most Noco models hold a charge for 6–12 months when stored properly. But I recommend checking it every 3 months—especially before road trips or winter.
Signs Your Jump Starter Needs Attention
- LED lights don’t turn on after charging
- It takes much longer to charge than usual
- It won’t hold a charge for more than a few weeks
- Clamps feel loose or corroded
If you notice any of these, contact Noco support. Most units come with a 1-year warranty.
Real-World Tips and Safety Reminders
Let’s wrap up with some practical advice I’ve learned from real-life use—and a few close calls.
Common Mistakes to Avoid
- Connecting to the negative terminal: Always use a ground point. I’ve seen people ignore this and regret it.
- Leaving the jump starter in the car: Heat can damage lithium batteries. Store it in your trunk or glovebox, but avoid direct sunlight.
- Using damaged cables: Frayed wires or loose clamps are a safety hazard. Inspect them monthly.
- Forgetting to turn off electronics: Before jump-starting, turn off lights, AC, and radio. High draw can overload the system.
When a Jump Starter Isn’t Enough
A jump starter can’t fix a completely dead battery or a faulty alternator. If your car:
- Starts but dies after a few minutes
- Has dim headlights or slow cranking even after a jump
- Needs multiple jumps in a short time
…it’s likely time for a new battery or a mechanic visit. A jump starter is a temporary fix, not a permanent solution.
Data Table: Noco Jump Starter Models Compared
| Model | Peak Amps | Best For | Battery Capacity (mAh) | USB Output | Weight (lbs) |
|---|---|---|---|---|---|
| GB40 | 1000A | Sedans, compact cars | 18,000 | USB-A: 5V/2.1A | 2.4 |
| GB50 | 1500A | SUVs, crossovers | 24,000 | USB-A: 5V/2.1A | 2.9 |
| GB70 | 2000A | Trucks, diesel engines | 32,000 | USB-C: 5V/3A, USB-A: 5V/2.1A | 3.3 |
| GBX45 | 1250A | Motorcycles, ATVs | 15,000 | USB-C: 5V/3A | 2.1 |
Note: All models include smart cables, reverse polarity protection, and Force Mode.
Final Safety Reminder
Even with Noco’s smart tech, never touch both clamps at the same time with bare hands. Keep them separated until connected to the battery. And always read the manual—yes, even if you think you know it all. I skipped it once and almost damaged a fuse.
Final Thoughts: Your Go-To Emergency Tool
After using my Noco jump starter in all kinds of situations—rain, snow, dead-of-night emergencies—I can confidently say it’s one of the best investments I’ve made for my car. It’s not just about convenience; it’s about confidence. Knowing I can handle a dead battery without help gives me peace of mind, whether I’m commuting to work or driving across the country.
Follow these Noco jump starter instructions carefully, charge it regularly, and treat it with care. It’s not magic, but it’s the next best thing. And remember: a jump starter is just one part of your car emergency kit. Pair it with a flashlight, first-aid supplies, and a portable phone charger, and you’ll be ready for almost anything.
So, the next time your car won’t start, don’t panic. Grab your Noco, follow these steps, and get back on the road—safely and stress-free. You’ve got this.
Frequently Asked Questions
How do I use a Noco jump starter for the first time?
Begin by fully charging your Noco jump starter using the included USB cable or AC adapter. Connect the clamps to the battery terminals (red to positive, black to negative), then press the power button and start your vehicle. Always follow the Noco jump starter instructions in the manual for model-specific details.
Can I leave the Noco jump starter connected while the car is running?
No, disconnect the jump starter once the engine starts. Leaving it connected can damage the device or battery. The Noco jump starter instructions recommend removing clamps immediately after a successful jump.
What does the “Reverse Polarity” error mean on my Noco jump starter?
This error occurs if the clamps are connected incorrectly (red to negative or vice versa). The device will alert you and prevent operation—recheck the terminal connections and ensure proper alignment to avoid damage.
How long does a Noco jump starter take to recharge?
Recharge time varies by model (typically 2–4 hours for a full charge). Use the supplied charger and monitor the LED indicators—solid green means fully charged. Refer to your model’s manual for precise timing.
Is it safe to use a Noco jump starter in rainy conditions?
Noco jump starters are weather-resistant but not waterproof. Avoid submerging or using them in heavy rain. For light moisture, dry the clamps and battery terminals before connecting.
Why isn’t my Noco jump starter turning on?
Ensure the battery is charged and the power button is held for 2–3 seconds. If unresponsive, check for damage or try a hard reset (per the manual). Contact Noco support if issues persist.