
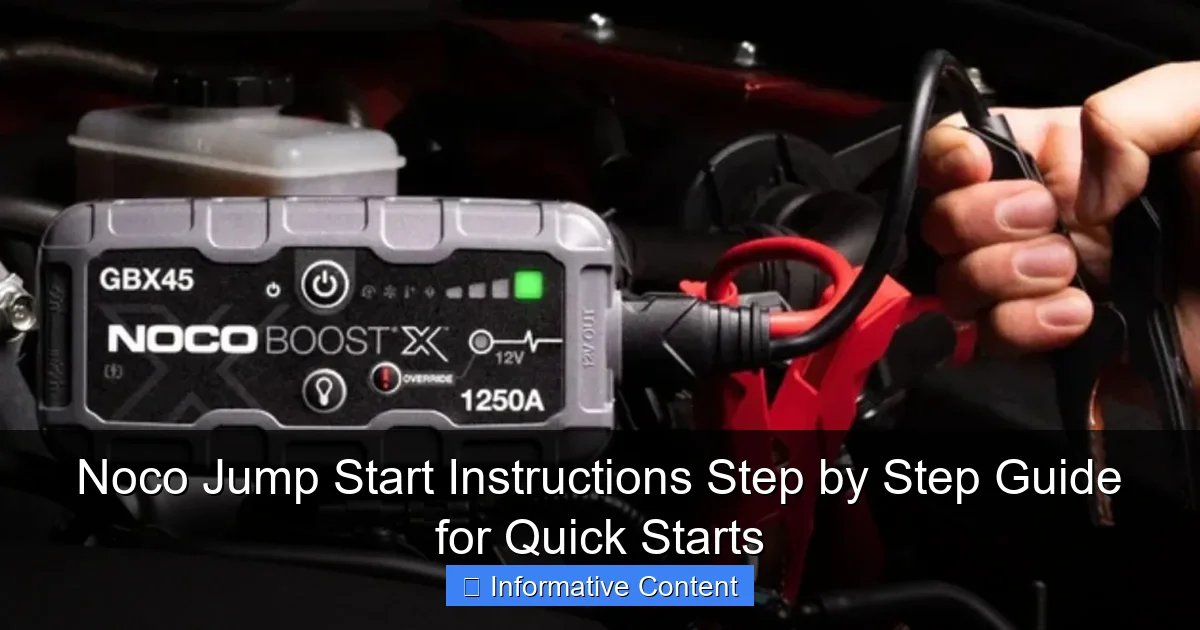
Featured image for noco jump start instructions
Image source: assets-global.website-files.com
Jump-starting your vehicle safely and efficiently starts with following the correct Noco jump start instructions. This step-by-step guide walks you through connecting the clamps, powering on the unit, and starting your engine—all while prioritizing safety and avoiding common mistakes. With Noco’s smart technology, you get reliable performance and peace of mind every time.
Key Takeaways
- Always connect clamps correctly: Red to positive, black to negative to avoid damage.
- Power on before connecting: Activate the Noco unit first for safety.
- Use boost mode for dead batteries: Ensures quick starts in emergencies.
- Check battery health first: Avoid jump-starting severely damaged or frozen batteries.
- Disconnect after engine starts: Remove clamps in reverse order to prevent surges.
📑 Table of Contents
- Why You Need a Reliable Jump Start Solution
- Understanding Your NOCO Jump Starter Model
- Preparing for a Jump Start: Safety First
- Step-by-Step NOCO Jump Start Instructions
- Troubleshooting Common NOCO Jump Start Issues
- Maintaining Your NOCO Jump Starter for Long-Term Use
- Data Table: NOCO Jump Starter Comparison
- Final Thoughts: Be Prepared, Not Panicked
Why You Need a Reliable Jump Start Solution
There’s nothing quite like the sinking feeling of turning the key in your car’s ignition and hearing nothing but silence. Whether it’s a cold winter morning or you accidentally left the headlights on overnight, a dead battery can throw your entire day into chaos. That’s where a dependable jump starter comes in—and few have earned as much trust as the NOCO jump start line.
Unlike traditional jumper cables that require another vehicle, NOCO jump starters are compact, portable, and packed with smart technology. They’re designed to safely deliver a powerful charge to your car battery without the risks associated with older methods. I remember one time, stuck in a grocery store parking lot with my phone at 2% and no one around to help. The NOCO GB40 saved the day—no cables, no hassle, just a quick press of a button and back on the road in minutes. This guide walks you through NOCO jump start instructions step by step, so you’re never left stranded again.
Understanding Your NOCO Jump Starter Model
Before diving into the NOCO jump start instructions, it helps to know which model you’re working with. NOCO offers several jump starters, each tailored to different needs—from compact units for motorcycles to heavy-duty models for trucks and SUVs. Understanding the differences ensures you use the right tool for the job.
Visual guide about noco jump start instructions
Image source: d3j17a2r8lnfte.cloudfront.net
Popular NOCO Jump Starter Models
- NOCO GB40: 1000 peak amps, ideal for cars, motorcycles, and small boats. Lightweight (just 2.4 lbs) and includes USB charging.
- NOCO GB70: 2000 peak amps, great for larger engines like V6 and V8 vehicles. Also features a 12V outlet and flashlight.
- NOCO GBX155: 4250 peak amps, built for commercial vehicles, trucks, and diesel engines. Rugged design with advanced safety features.
- NOCO Boost Sport (GB20): Ultra-compact, 500 peak amps. Perfect for emergency kits or small engines.
Each model shares core functionality but varies in power, size, and extras. For example, the GB40 is my go-to for daily use because it fits in my glove compartment and doubles as a phone charger. But if you drive a Ford F-150 or a diesel pickup, you’ll want something beefier like the GB70 or GBX155.
Key Features That Set NOCO Apart
What makes NOCO stand out isn’t just raw power—it’s the smart tech built in. Here are a few features you’ll appreciate once you start using your unit:
- Safety Protection: Reverse polarity, spark-proof, and short-circuit protection prevent damage to your vehicle or the jump starter.
- Ultra-Safe Technology: NOCO’s proprietary system detects battery voltage and automatically adjusts current flow for optimal charging.
- LED Flashlight: Most models include a bright, multi-mode flashlight—handy during nighttime emergencies.
- USB Power Bank: Charge your phone, tablet, or GPS while on the go.
- Rechargeable Lithium Battery: Unlike lead-acid jump boxes, NOCO units are lightweight and hold a charge for months.
One thing I love is how user-friendly the interface is. No complicated switches or confusing dials. Just clear indicators and intuitive controls. But remember: even the smartest device needs proper handling. That’s why following the NOCO jump start instructions carefully is crucial.
Preparing for a Jump Start: Safety First
Jumping a car might seem straightforward, but safety should always come first. A dead battery can be unpredictable—especially if it’s old or damaged. Taking a few minutes to prepare prevents accidents and ensures a smooth process.
Inspect Your Vehicle and Jump Starter
Start by parking on level ground, turning off the engine, and engaging the parking brake. Pop the hood and visually inspect the battery:
- Look for corrosion (white or green crusty buildup) on the terminals.
- Check for cracks, leaks, or bulging in the battery case—these mean the battery should be replaced, not jumped.
- Ensure the battery is a 12V system. Most cars are, but some hybrids or specialty vehicles use different voltages.
Now, check your NOCO jump starter:
- Make sure it’s charged at least 50% (ideally fully charged). A low jump starter won’t deliver enough power.
- Inspect the clamps for damage or debris. Clean them with a dry cloth if needed.
- Verify the LED indicators are functioning. Most NOCO models show battery level and status lights.
I learned this the hard way once. I tried jumping a car with a nearly dead NOCO unit—it powered on, but the charge was too weak to start the engine. Took an extra 20 minutes to recharge before it worked. Always check your jump starter’s battery first!
Wear Proper Gear and Clear the Area
Even though NOCO units are designed to be safe, it’s smart to take precautions:
- Wear rubber-soled shoes to reduce static electricity risk.
- Keep loose clothing and jewelry away from moving parts.
- Ensure the area around the battery is clear of flammable materials (like spilled oil or paper).
- If possible, do this outdoors or in a well-ventilated area—batteries can emit hydrogen gas, which is explosive.
Also, turn off all electronics in the car: radio, lights, AC, etc. This reduces the electrical load when you start the engine, giving the alternator a better chance to take over.
Know the Terminal Layout
Most car batteries have two terminals:
- Positive (+): Usually marked with a red cover or “+” sign.
- Negative (-): Often marked with a black cover or “-” sign.
If you can’t locate them, consult your vehicle’s manual. In some cases, the negative terminal may be connected to the chassis (ground). NOCO’s clamps are color-coded: red for positive, black for negative. Match them correctly—this is critical.
Step-by-Step NOCO Jump Start Instructions
Now comes the main event: actually jumping the car. Follow these NOCO jump start instructions in order for the safest, most effective result.
Step 1: Power On the NOCO Unit
Press and hold the power button on your NOCO jump starter until the LED lights up. You should see:
- The battery level indicator (e.g., 4 bars = 75–100% charged).
- The “Boost” or “Jump Start” mode activated (usually indicated by a car icon or “12V”).
Wait about 10 seconds for the system to initialize. Some models perform a self-check during this time.
Pro Tip: If the unit doesn’t power on, plug it into a charger for 15–30 minutes and try again. Lithium batteries can go into sleep mode if deeply discharged.
Step 2: Connect the Clamps Correctly
This step is crucial. Always connect red first, then black.
- Attach the red (positive) clamp to the positive terminal of the dead battery. Wiggle it slightly to ensure a solid connection.
- Attach the black (negative) clamp to an unpainted metal surface on the engine block or chassis—never to the dead battery’s negative terminal. This prevents sparks near the battery, reducing explosion risk.
I once made the mistake of attaching the black clamp directly to the negative terminal. The NOCO unit immediately flashed a “reverse polarity” warning—thankfully it stopped the process. That’s the kind of safety feature that gives you peace of mind.
Step 3: Wait and Monitor the Status
After connecting both clamps, wait 30–60 seconds. The NOCO unit will:
- Check for correct connections.
- Measure the battery’s voltage.
- Begin pre-charging the battery (you might hear a soft hum).
During this time, watch the LED indicators:
- Solid green: Ready to start the vehicle.
- Blinking red: Check connections or troubleshoot (see next section).
- Solid red: Error detected—disconnect and restart.
If you see a blinking red light, don’t panic. It usually means the clamps aren’t seated properly or the battery is too far gone. Try reattaching the clamps or letting the unit pre-charge longer.
Step 4: Start the Vehicle
Once the green light appears, it’s time to start the engine:
- Get in the car and turn the key to the “Start” position.
- Hold for 2–5 seconds. If the engine doesn’t turn over, wait 1–2 minutes and try again. Do not crank continuously for more than 5 seconds.
- When the engine starts, let it run for 30–60 seconds to allow the alternator to take over.
Success! The car is now running. But don’t disconnect the jump starter yet.
Step 5: Disconnect in Reverse Order
Always disconnect black first, then red.
- Remove the black (negative) clamp from the grounding point.
- Remove the red (positive) clamp from the battery terminal.
- Press the power button on the NOCO unit to turn it off.
Store the clamps back on the unit (they usually snap into place). Wipe down any dirt or moisture.
Pro Tip: Let the car run for at least 15–20 minutes or drive it for 30+ minutes to fully recharge the battery. If you turn it off immediately, it might not have enough juice to start next time.
Troubleshooting Common NOCO Jump Start Issues
Even with perfect NOCO jump start instructions, things can go wrong. Here are the most common issues and how to fix them.
Jump Starter Won’t Power On
Symptoms: No lights, no response when pressing the power button.
- Cause: Deeply discharged lithium battery.
- Fix: Charge the unit for at least 30 minutes using the included wall or car charger. If it still doesn’t respond, try charging in a warmer environment (cold temps can affect lithium performance).
I’ve had this happen after storing my GB40 in a cold garage all winter. A quick 20-minute charge brought it back to life.
Red Light Flashing After Connecting Clamps
Symptoms: Blinking red LED, unit won’t proceed to green.
- Cause 1: Loose or corroded connections.
- Fix: Reattach clamps firmly. Clean terminals with a wire brush if corroded.
- Cause 2: Reverse polarity (red to negative, black to positive).
- Fix: Disconnect immediately. Reconnect with correct polarity.
- Cause 3: Dead or damaged battery (voltage below 2V).
- Fix: The battery may be beyond saving. Try a longer pre-charge (up to 10 minutes), but if it fails, the battery needs replacement.
Engine Cranks But Won’t Start
Symptoms: You hear the starter turning, but the engine doesn’t fire.
- Cause 1: Insufficient charge from jump starter.
- Fix: Let the unit pre-charge the battery for 2–3 minutes before attempting to start. Some older batteries need more time.
- Cause 2: Fuel or ignition system issue (not battery-related).
- Fix: Check fuel level, spark plugs, or fuses. A jump starter only helps with battery power—it won’t fix mechanical problems.
One time, my neighbor’s car wouldn’t start even after a successful jump. Turned out the fuel pump was bad. The jump starter did its job—but the problem was deeper.
Unit Overheats or Shuts Down
Symptoms: Unit gets hot or automatically powers off during use.
- Cause: Overload from excessive cranking or faulty battery.
- Fix: Let the unit cool for 10–15 minutes. Avoid continuous cranking. If it keeps happening, the battery may be shorted internally.
NOCO units have thermal protection for a reason—don’t ignore it.
Maintaining Your NOCO Jump Starter for Long-Term Use
A NOCO jump starter is an investment. With proper care, it can last 3–5 years or more. Here’s how to keep it in top shape.
Charging and Storage Tips
- Charge every 3–6 months if not used regularly. Lithium batteries degrade faster when left discharged.
- Store in a cool, dry place (ideal temp: 50–77°F / 10–25°C).
- Keep away from direct sunlight, moisture, and extreme temperatures.
- Use the original charger or a high-quality USB-C/12V adapter.
I keep mine in a small padded bag in the trunk. It’s protected from bumps and temperature swings.
Cleaning and Inspection
- Wipe the unit with a dry, soft cloth after each use.
- Clean clamps with isopropyl alcohol if they get dirty.
- Inspect cables for fraying or damage every few months.
Never use water or harsh chemicals—they can damage internal components.
When to Replace Your NOCO Unit
Even the best jump starters don’t last forever. Replace yours if:
- It won’t hold a charge after 24 hours of charging.
- LEDs flicker or behave erratically.
- Clamps are cracked or loose.
- It’s more than 5 years old and performance has declined.
NOCO offers a 1-year warranty, but many users report units lasting much longer with care.
Data Table: NOCO Jump Starter Comparison
| Model | Peak Amps | Battery Type | USB Ports | Weight (lbs) | Best For |
|---|---|---|---|---|---|
| GB20 (Boost Sport) | 500 | Lithium | 1 (2.1A) | 1.6 | Motorcycles, small engines |
| GB40 | 1000 | Lithium | 2 (3.1A total) | 2.4 | Cars, SUVs, boats |
| GB70 | 2000 | Lithium | 2 (3.1A total) | 3.8 | V6/V8 vehicles, trucks |
| GBX155 | 4250 | Lithium | 2 (3.1A total) | 7.0 | Diesel, commercial vehicles |
Final Thoughts: Be Prepared, Not Panicked
Car troubles don’t wait for convenient moments. But with a NOCO jump starter and these NOCO jump start instructions, you’re always one step ahead. Whether it’s a frigid morning, a forgotten headlight, or a battery that just gave up, you now have the power to fix it yourself—no waiting for roadside assistance or flagging down strangers.
What I love most about NOCO is the blend of simplicity and safety. You don’t need to be a mechanic to use it. Just follow the steps, stay calm, and trust the technology. And when it works—like it did for me in that dark parking lot—it’s not just a tool. It’s peace of mind.
Keep your NOCO charged, your clamps clean, and your knowledge sharp. Because the next time your car won’t start, you won’t be helpless. You’ll be the one who knows exactly what to do.
Frequently Asked Questions
How do I use the Noco jump starter for the first time?
To use your Noco jump starter, first fully charge it using the included cable. Connect the clamps to the battery terminals (red to positive, black to negative), then turn on the device and start your vehicle. Always follow the Noco jump start instructions in your manual for safety.
Can I jump-start a car with a completely dead battery using a Noco jump starter?
Yes, Noco jump starters are designed to revive deeply discharged batteries, even at 0 volts, thanks to their “Force Mode” feature. Ensure proper clamp connection and hold the boost button for 5 seconds to activate low-voltage detection.
What does the error light mean on my Noco jump starter?
Error lights (e.g., red/green flashing) indicate reversed clamps, poor connection, or a faulty battery. Reconnect the clamps correctly and ensure clean terminal contact. Refer to the Noco jump start instructions for specific error codes.
How long does a Noco jump starter take to charge?
Most Noco models charge fully in 3-6 hours via USB-C or wall adapter. The LED indicator will turn solid green when complete. Avoid overcharging—disconnect once charged.
Is it safe to leave the Noco jump starter connected to the battery after starting?
No, disconnect the clamps immediately after the engine starts to prevent voltage feedback. Leaving it connected risks damaging the jump starter or vehicle electronics.
Can I use my Noco jump starter in cold weather?
Yes, Noco boosters operate in temperatures as low as -20°F (-29°C). Store it in a warm place before use if possible, as cold reduces battery efficiency temporarily.