
Featured image for noco boost jump starter instructions
Image source: xlraceparts.com
Master your Noco Boost jump starter with this clear, step-by-step guide designed to get your vehicle running safely and efficiently. From proper cable connection to identifying safety indicators, follow these expert-backed instructions to avoid common mistakes and extend your device’s lifespan.
Key Takeaways
- Always inspect clamps before connecting to avoid sparks or damage.
- Power on the unit only after correct cable placement.
- Match voltage settings to your vehicle’s battery for safety.
- Wait 30 seconds after connection before attempting ignition.
- Use safety mode if the battery is deeply discharged.
- Store properly in a cool, dry place to extend lifespan.
📑 Table of Contents
- Why You Need a Noco Boost Jump Starter (And How It Can Save Your Day)
- Getting to Know Your Noco Boost: What’s in the Box and Key Features
- Step-by-Step Noco Boost Jump Starter Instructions
- Advanced Tips and Common Mistakes to Avoid
- Charging, Maintenance, and Storage Best Practices
- Troubleshooting: What to Do When Things Go Wrong
- Final Thoughts: Why the Noco Boost Is a Must-Have (And How to Use It Right)
Why You Need a Noco Boost Jump Starter (And How It Can Save Your Day)
Picture this: It’s a freezing winter morning, you’re already running late for work, and when you turn the key in your car, nothing happens. The engine doesn’t crank, the lights are dim, and your heart sinks. You’ve just joined the millions of drivers who’ve faced a dead battery. But what if you didn’t need to wait for a tow truck or flag down a stranger for a jump? That’s where the Noco Boost Jump Starter comes in.
This compact, powerful device is a game-changer for anyone who drives. Whether you’re stuck in a parking lot, on a remote road, or just want peace of mind, a Noco Boost can get you back on the road in minutes. No jumper cables, no waiting, and no awkward small talk with a stranger who just happened to have the right car. But like any tool, it’s only as good as your ability to use it. That’s why understanding the Noco Boost jump starter instructions is critical. In this guide, I’ll walk you through everything you need to know—from setup to troubleshooting—so you can use your Noco Boost with confidence, even if you’ve never jumped a car before.
Getting to Know Your Noco Boost: What’s in the Box and Key Features
Unboxing and First Impressions
When you first open the box, you’ll find the Noco Boost unit, a set of smart jumper cables (with color-coded clamps), a USB charging cable, a wall charger, and a user manual. The device itself is surprisingly small—about the size of a thick paperback book—but don’t let its size fool you. It packs a punch. Most models range from 12,000 to 20,000 joules of peak power, enough to jump-start cars, trucks, SUVs, motorcycles, and even boats.
Visual guide about noco boost jump starter instructions
Image source: teklib.com
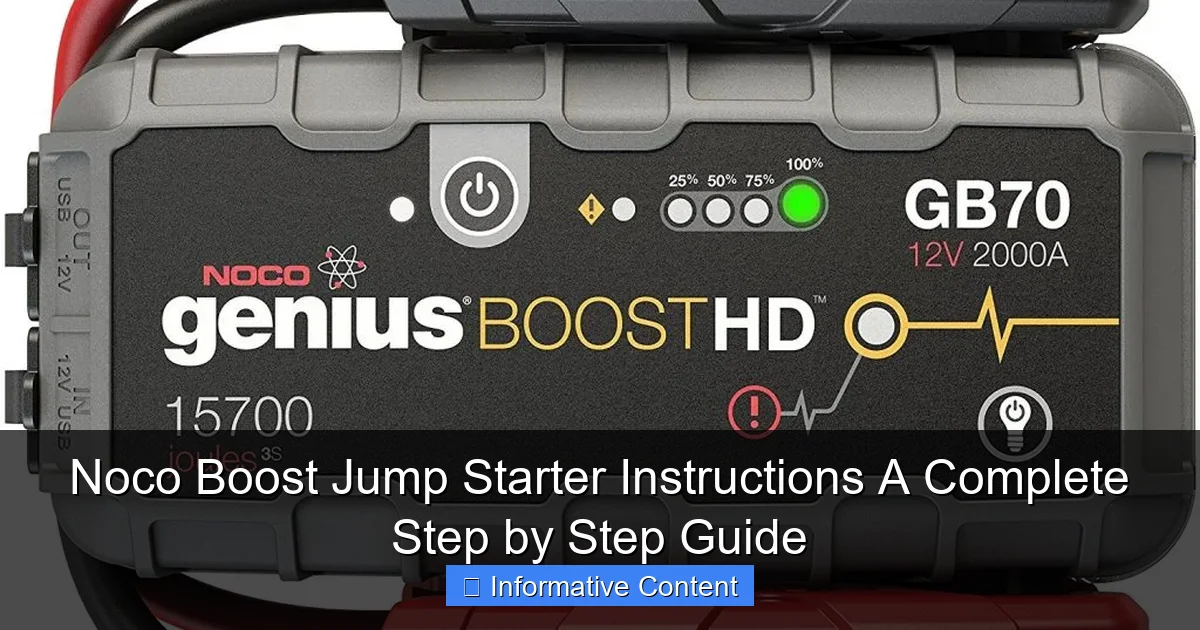
The build quality is solid. The outer shell is rubberized for grip and drop protection, and the clamps feel sturdy. One thing I love is the built-in LED flashlight with multiple modes (steady, SOS, and strobe), which comes in handy during nighttime emergencies. The display is simple: a series of indicator lights showing battery level, charging status, and safety alerts.
Key Features That Set Noco Boost Apart
- Safety First: Noco’s “spark-proof technology” and reverse polarity protection mean you can’t accidentally fry your car’s electronics or hurt yourself. The clamps won’t spark when connected to the battery, even if they’re reversed.
- Multi-Purpose Charging: Most models have USB-A and USB-C ports, letting you charge your phone, tablet, or GPS. Some even have a 12V outlet for powering small devices.
- Long Shelf Life: Unlike traditional car batteries, Noco Boost units hold a charge for months. Just recharge every 6–12 months to keep it ready.
- Weather Resistant: The rubberized casing and sealed ports protect against dust and moisture, making it ideal for roadside use.
Pro tip: Before your first use, fully charge your Noco Boost. It typically takes 3–5 hours using the included wall charger. The battery level lights will flash during charging and stay solid when full. Don’t skip this step—a fully charged unit ensures maximum power when you need it.
Step-by-Step Noco Boost Jump Starter Instructions
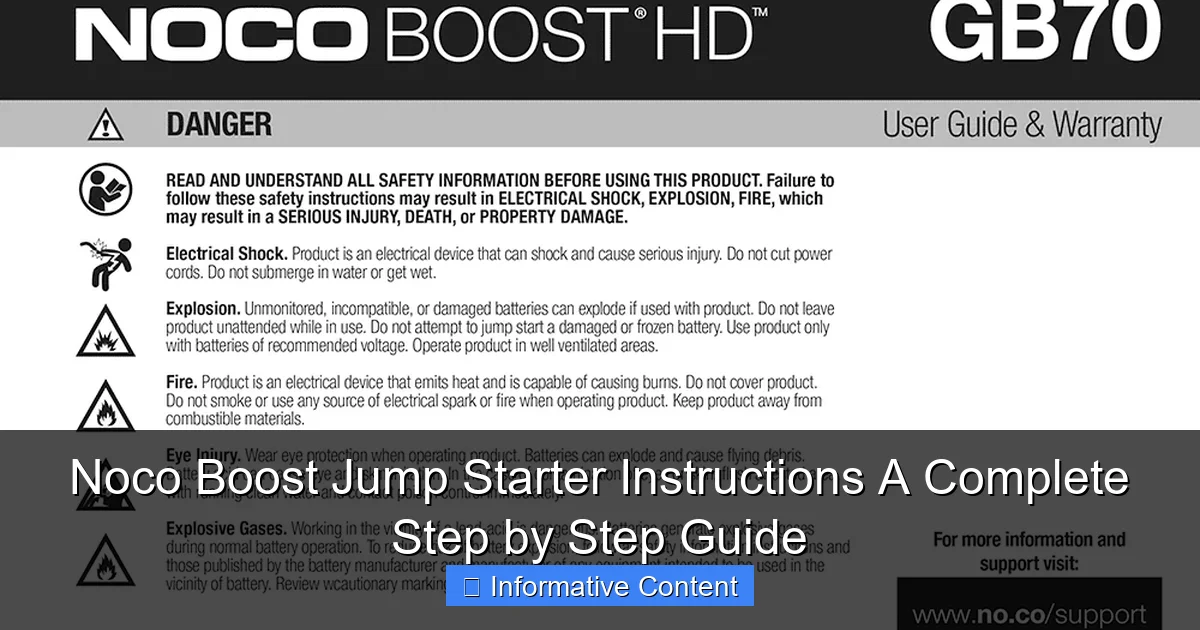
Step 1: Safety Checks Before You Begin
Before connecting anything, take a moment to assess the situation. Is the car in a safe location? Are you visible to other drivers? Turn on your hazard lights. Then, inspect the dead battery:
- Look for corrosion (white, green, or blue crust) on the terminals. If it’s severe, gently clean it with a wire brush or a baking soda/water paste.
- Check for cracks or leaks in the battery. If the battery is damaged, do NOT attempt a jump start—call for professional help.
- Ensure the ignition is OFF and all lights/accessories are turned off.
Remember: The Noco Boost has safety features, but it’s not a magic wand. Safety first, always.
Step 2: Connect the Jumper Cables to the Noco Boost
- Open the rubber port cover on the Noco Boost unit.
- Plug the smart jumper cable connector into the port. You’ll hear a click when it’s secure.
- Double-check that the clamps are free of debris. The red (positive) clamp has a “+” sign; the black (negative) has a “−”.
Why this matters: The smart cables are designed to communicate with the Noco Boost. If they’re loose or dirty, the unit might not power on.
Step 3: Connect the Clamps to the Battery (The Right Way)
Now comes the crucial part: connecting the clamps to the car battery. Follow this order:
- Red Clamp to Positive (+): Attach it to the positive terminal of the dead battery. It’s usually marked with a “+” and is the larger of the two terminals.
- Black Clamp to Ground: This is where many people make a mistake. Don’t connect the black clamp to the negative terminal. Instead, attach it to an unpainted metal surface on the car’s frame or engine block—a bolt, bracket, or bare metal part. This reduces the risk of sparks near the battery, where flammable gases might be present.
Real-world example: I once connected the black clamp to the negative terminal on my friend’s truck. The Noco Boost’s safety feature kicked in—it beeped and refused to power on. After I moved the clamp to the engine block, it worked perfectly. Lesson learned!
Step 4: Power On the Noco Boost and Start the Engine
- Press the power button on the Noco Boost. The LED display will light up, showing battery level and safety status.
- If all connections are correct, you’ll hear a single beep. If there’s an issue (like reversed clamps), the unit will beep repeatedly and show a red “X” light.
- Once the Noco Boost is powered on, turn the ignition to the “ON” position (don’t start yet). Wait 30–60 seconds to let the Noco Boost stabilize.
- Crank the engine. It should start within 3–5 seconds. If it doesn’t, wait 30 seconds and try again.
Pro tip: If the engine is slow to start, don’t crank for more than 5 seconds at a time. Wait 30 seconds between attempts to avoid overheating the Noco Boost or the starter motor.
Step 5: Disconnecting the Noco Boost (Reverse Order!)
Once the car is running, disconnect everything in reverse order:
- Turn off the car’s ignition.
- Unplug the jumper cables from the Noco Boost.
- Remove the black clamp from the ground point.
- Remove the red clamp from the positive terminal.
- Close the rubber port cover on the Noco Boost.
Important: Never disconnect the clamps while the engine is running. This can damage the Noco Boost or the car’s electronics.
Advanced Tips and Common Mistakes to Avoid
Using Your Noco Boost in Cold Weather
Winter is tough on batteries. If your Noco Boost is cold, its power output drops. Here’s how to handle it:
- Keep the Noco Boost in your car’s cabin (not the trunk) during winter. A warm device performs better.
- If it’s been in the cold, let it sit in the car for 10–15 minutes to warm up before use.
- For very cold batteries, try starting the engine in “short bursts” (3–4 seconds) with 30-second pauses.
My experience: I used my Noco Boost at -10°F (-23°C) once. The engine didn’t start on the first try, but after warming the Noco Boost in my car for 10 minutes, it worked on the second attempt.
Jump-Starting Larger Vehicles (Trucks, SUVs, Diesel Engines)
Not all Noco Boost models are equal. For larger engines, you’ll need a higher-capacity unit (e.g., Noco Boost HD or Boost Plus). Here’s what to know:
- Diesel engines: Require more cranking power. Use a Noco Boost with 12,000+ joules (e.g., GB70 or GB150).
- Multiple attempts: If the engine doesn’t start, wait 2–3 minutes between tries. This gives the Noco Boost time to “recharge” its internal capacitors.
- Parallel batteries: For trucks with dual batteries, connect the Noco Boost to the primary battery (usually the one with the starter cable).
Common Mistakes (And How to Fix Them)
- Connecting black clamp to negative terminal: This triggers the safety lockout. Move the clamp to the engine block.
- Not waiting 30 seconds before cranking: The Noco Boost needs time to stabilize. Patience is key!
- Leaving the Noco Boost connected after starting: This can drain the unit. Disconnect immediately.
- Using a low-charged Noco Boost: If the battery lights are blinking red, recharge it first.
Real-world fix: A friend once tried to jump-start his SUV with a nearly dead Noco Boost. It wouldn’t power on. After charging it for 20 minutes (using a portable solar charger), it worked perfectly.
Charging, Maintenance, and Storage Best Practices
How to Charge Your Noco Boost
Charging is simple, but there are a few things to keep in mind:
- Use the included wall charger or a USB-C cable (for models with USB-C ports).
- Charge in a cool, dry place. Avoid extreme heat or cold.
- Don’t charge for more than 24 hours. The Noco Boost has overcharge protection, but it’s good practice to unplug when full.
Pro tip: If you’re using a USB port in your car to charge, ensure the car is running. Some USB ports only work when the ignition is on.
Maintenance: Keeping Your Noco Boost in Top Shape
- Monthly check: Press the power button to check the battery level. Recharge if below 50%.
- Clean the clamps: Wipe them with a damp cloth after use. Avoid harsh chemicals.
- Inspect the cables: Look for fraying or damage. Replace the cables if they’re worn.
- Firmware updates: Some Noco Boost models have updatable firmware. Check the Noco website for updates.
Storage: Where and How to Store Your Noco Boost
Where you store your Noco Boost matters. Here’s the ideal setup:
- Temperature: Store between 32°F and 104°F (0°C to 40°C). Avoid freezing or boiling conditions.
- Location: Keep it in your car’s glove box, center console, or a dedicated storage bag (Noco sells one). Avoid the trunk—it gets too hot or cold.
- Long-term storage: Recharge every 6–12 months, even if unused.
My routine: I keep my Noco Boost in a small, labeled case in my car’s backseat. I check the battery level every month during my oil change. It’s become part of my car care ritual.
Troubleshooting: What to Do When Things Go Wrong
Common Error Messages and Fixes
| Error Light/Beep | Cause | Solution |
|---|---|---|
| Red “X” light + 3 beeps | Reverse polarity (clamps reversed) | Swap red and black clamps |
| Red “X” light + 1 beep | Low battery in Noco Boost | Recharge the Noco Boost |
| Red “X” light + 2 beeps | Short circuit (clamps touching) | Separate the clamps |
| Flashing red light | Overheating | Let the Noco Boost cool down for 15 minutes |
When Your Noco Boost Won’t Power On
- No lights or beeps: The internal battery might be deeply discharged. Try charging for 24 hours.
- Intermittent power: Check the jumper cable connection. Unplug and reinsert it.
- Water damage: If the unit got wet, dry it with a towel and let it air out for 24 hours. Do NOT charge until fully dry.
When the Engine Still Won’t Start
- Bad battery: If the car’s battery is completely dead (no lights, no clicks), the Noco Boost might not help. Replace the battery.
- Faulty starter motor: Listen for a clicking sound when cranking. If you hear it, the starter might be the issue.
- Loose battery terminals: Tighten the terminals with a wrench. Corrosion can also cause poor connections.
Real-world fix: I once tried to jump-start a car with a Noco Boost, but the engine just clicked. After tightening the battery terminals, it started on the second try.
Final Thoughts: Why the Noco Boost Is a Must-Have (And How to Use It Right)
After years of using the Noco Boost, I can say it’s one of the best investments I’ve made for my car. It’s not just a jump starter—it’s a safety net. Whether you’re a daily commuter, a road tripper, or someone who just wants peace of mind, knowing how to follow the Noco Boost jump starter instructions can make the difference between a minor inconvenience and a major headache.
Here’s my final advice: Treat your Noco Boost like a first-aid kit. Keep it charged, store it properly, and practice the steps so they become muscle memory. Read the manual (yes, really!), and don’t skip the safety checks. And if you ever run into an issue, don’t panic—the troubleshooting tips above will get you through it.
Remember, the Noco Boost isn’t just for emergencies. I’ve used mine to charge my phone during a power outage, light up a campsite, and even jump-start a friend’s motorcycle. It’s a versatile tool that earns its keep. So charge it up, stash it in your car, and drive with confidence. Because when life throws you a dead battery, you’ll be ready.
Frequently Asked Questions
How do I use the Noco Boost Jump Starter for the first time?
Before first use, fully charge your Noco Boost Jump Starter using the provided 12V DC charger or USB port. Connect the clamps to the corresponding battery terminals (red to positive, black to negative) and press the power button to activate the jump start mode.
What are the correct Noco Boost jump starter instructions for a safe jump start?
Ensure the device is powered off, connect the red clamp to the positive terminal and the black clamp to an unpainted metal surface. Turn on the Noco Boost, start the vehicle, and disconnect the clamps in reverse order once running.
Can I use the Noco Boost to charge my phone or other devices?
Yes, the Noco Boost Jump Starter doubles as a portable power bank. Use the USB output port to charge smartphones, tablets, or other small electronics, even when not jump-starting a vehicle.
How long does the Noco Boost take to charge fully?
Charging time varies by model but typically takes 3–5 hours using a 12V DC outlet or a 5V USB source. The LED indicator will turn solid green when fully charged.
What should I do if the Noco Boost won’t jump start my car?
Check that the clamps are securely connected and the device has sufficient charge. If the issue persists, ensure the vehicle battery isn’t completely dead and consult the troubleshooting section of your Noco Boost jump starter instructions.
Is it safe to leave the Noco Boost connected to a battery after jump starting?
No, always disconnect the clamps immediately after the engine starts. Leaving them connected can damage the jump starter or the vehicle’s electrical system.