
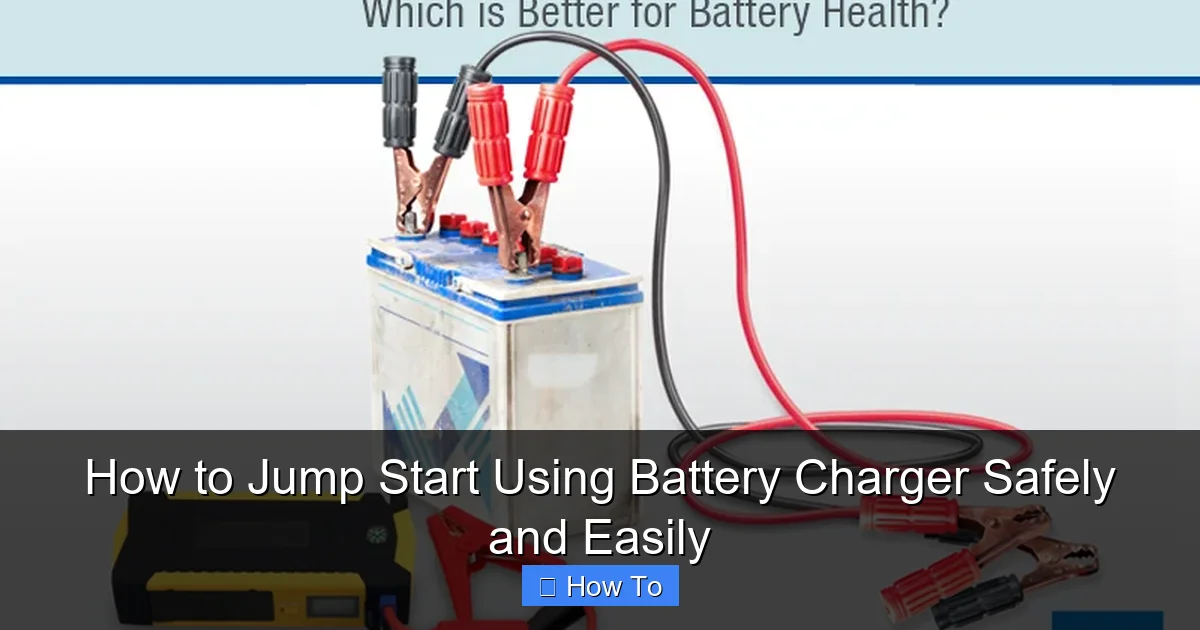
Featured image for how to jump start using battery charger
Image source: midtronics.com
Always connect the positive (red) clamp to the dead battery’s positive terminal first to ensure a safe and effective jump start using a battery charger. Follow with the negative (black) clamp to the engine block or unpainted metal—never the dead battery’s negative terminal—to prevent sparks and potential explosions. This simple, step-by-step method guarantees a quick, secure power transfer and minimizes risks to both you and your vehicle.
How to Jump Start Using Battery Charger Safely and Easily
Key Takeaways
- Always connect red first: Attach positive clamp to dead battery’s positive terminal.
- Secure ground connection: Clip black clamp to unpainted metal on the engine block.
- Verify charger compatibility: Match voltage and amperage to your vehicle’s requirements.
- Power up safely: Turn on charger only after all connections are secure.
- Wait before starting: Allow 5-10 minutes of charging for weak batteries.
- Reverse order removal: Disconnect black first, then red after turning off the charger.
- Test and inspect: Start engine and check battery health post-jump.
Why This Matters / Understanding the Problem
You’re late for work, the car won’t start, and you hear that dreaded click-click-click—yep, the battery’s dead. Again. It’s a situation we’ve all been in, and it’s stressful. But here’s the good news: learning how to jump start using battery charger safely and easily can save you time, money, and a whole lot of frustration.
Many people panic and call for help when a dead battery strikes. But with a few tools and a little know-how, you can handle it yourself—no roadside assistance needed. The key is doing it safely. I learned this the hard way after accidentally sparking my car’s battery while rushing. Not fun. Since then, I’ve refined my process, and now I want to share it with you.
Whether you’re using a traditional jump starter pack, a portable battery jump starter, or a battery charger, the goal is the same: get your car running without damaging the electrical system, risking injury, or making a mess. This guide walks you through how to jump start using battery charger safely and easily, step by step, with real-life tips I’ve picked up over years of roadside fixes.
We’ll cover everything from what tools to grab to how to avoid common mistakes—like connecting cables in the wrong order or using a faulty charger. By the end, you’ll feel confident and ready to tackle a dead battery with calm and clarity.
What You Need
Before we dive into the steps, let’s gather your gear. You don’t need a full garage to do this. A few essentials will get you started. Here’s what I keep in my trunk:
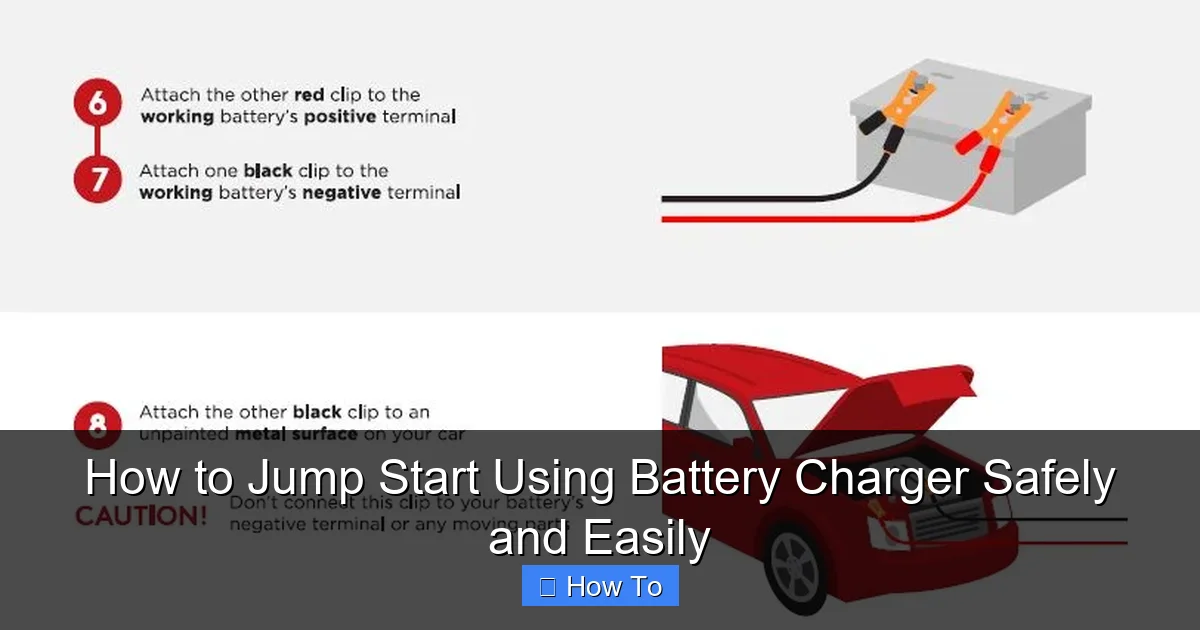
Visual guide about how to jump start using battery charger
Image source: tomobriengreenwood.com
- Jump starter pack or battery charger: A portable jump starter (like NOCO Boost, DBPOWER, or Schumacher) is ideal. It’s compact, doesn’t need another car, and is safer than jumper cables. If you prefer a traditional charger, make sure it’s a smart charger with safety features (overcharge protection, reverse polarity alert).
- Jumper cables (if using another vehicle): If you’re jump-starting with a helper car, get 10- to 12-gauge cables at least 12 feet long. Thicker cables = less resistance = better current flow.
- Safety gear: Rubber gloves and safety glasses. I keep a pair in my glovebox. You never know when a spark might fly.
- Owner’s manual: Every car is different. Some have special procedures (like battery under the back seat or a fuse box jump point). Check your manual.
- Flashlight: Dead battery at night? You’ll need light to see terminals clearly.
- Clean cloth or wire brush: Corrosion on battery terminals can block the connection. A quick wipe helps.
Pro tip: If you’re using a portable battery charger, charge it fully before storing it. I learned this after my jump starter failed because I hadn’t used it in six months. Now I plug it in monthly, even if I don’t need it.
And remember: not all chargers are jump starters. A trickle charger slowly recharges a dead battery over hours. A jump starter delivers a quick burst to crank the engine. For how to jump start using battery charger safely and easily, we’re focusing on jump-starting—not slow charging.
Step-by-Step Guide to How to Jump Start Using Battery Charger Safely and Easily
Step 1: Park Safely and Turn Off Everything
First things first: safety. Pull over to a safe spot—away from traffic, on level ground. Turn off the ignition, lights, radio, AC, and any accessories. Even a small power draw can interfere with the jump.
If you’re using a helper car, park it nose-to-nose (or side-by-side, depending on cable length) with at least 12 inches between the vehicles. Never let the cars touch. Metal contact can cause a short circuit.
Engage the parking brake and put both cars in “Park” (automatic) or “Neutral” (manual). This prevents rolling and keeps things stable.
I once forgot to set the parking brake and nearly rolled into another car while connecting cables. Not my finest moment. Now I double-check this step every time.
Step 2: Locate and Inspect the Battery
Pop the hood and find the battery. Most are under the hood, but some (like in older BMWs or some EVs) are in the trunk or under a seat. If you’re unsure, check your owner’s manual.
Look for the battery terminals: a red (+) and black (−) cap or marking. They should be clean and free of corrosion (white or green crusty stuff). If they’re dirty, clean them with a wire brush or a cloth.
Check for damage: cracked case, bulging sides, or leaking fluid. If you see any, do not jump-start. A damaged battery can explode. Replace it instead.
For modern cars with “no-maintenance” batteries, you might not see the actual terminals. Instead, look for labeled jump-start posts near the fuse box. These are safe to use and often marked with “+” and “−”.
Warning: Never touch both terminals at the same time with a metal tool. I once used a wrench to loosen a clamp and accidentally touched both terminals—spark, smoke, and a melted wrench handle. Lesson learned.
Step 3: Connect the Charger or Cables (Correct Order Matters!)
This is where most mistakes happen. The order of connections is critical for safety and to avoid damaging electronics.
If using a portable jump starter or battery charger with clamps:
- First: Attach the red (+) clamp to the positive terminal of the dead battery (or jump post).
- Second: Attach the black (−) clamp to a metal ground point—not the negative terminal. Use an unpainted bolt, engine bracket, or frame rail. This reduces sparking near the battery.
If using jumper cables with a helper car:
- First: Red (+) to dead battery’s positive terminal.
- Second: Red (+) to helper car’s positive terminal.
- Third: Black (−) to helper car’s negative terminal.
- Fourth: Black (−) to a ground point on the dead car (same as above—metal frame, not battery).
Why this order? Connecting the final black clamp to a ground point (not the dead battery’s negative terminal) prevents sparks near flammable hydrogen gas that batteries emit. It’s a small detail, but it’s a big safety win.
I used to connect the black clamp directly to the negative terminal. After reading a mechanic’s blog, I switched to grounding. No more scary sparks near the battery.
Step 4: Power On the Charger or Start the Helper Car
For a portable jump starter or smart charger:
- Turn on the device. Most have a “boost” or “jump start” mode. Follow the manufacturer’s instructions.
- Wait 2–5 minutes. This lets the charger stabilize and deliver a strong current. Some models have a “ready” light.
For jumper cables:
- Start the helper car and let it run for 2–3 minutes at idle (or slightly above). This builds voltage.
- Don’t rev the engine excessively. Too much current can damage the dead car’s electronics.
During this time, check the connections. If any clamp feels hot or starts smoking, disconnect immediately. That’s a sign of poor contact or a faulty battery.
Pro tip: If your jump starter has a “reverse polarity” warning light, pay attention. It means you’ve connected the clamps backward. Disconnect and fix it before proceeding.
Step 5: Start the Dead Car
Now it’s time to try starting the engine.
Turn the key (or push the start button). Don’t crank for more than 5 seconds at a time. If it doesn’t start, wait 30 seconds and try again. Repeated cranking can overheat the starter.
If the engine turns over but doesn’t start, check:
- Are all connections tight?
- Is the fuel tank empty?
- Is the battery completely dead (no lights, no radio)? A truly dead battery may need more charging time.
Once the engine starts, let it run for 1–2 minutes. This gives the alternator time to stabilize.
One winter, my car cranked but wouldn’t start. I realized the fuel was gelling in the cold. A quick warm-up in the garage fixed it. Always consider other issues beyond the battery.
Step 6: Disconnect in Reverse Order
This is just as important as connecting. Reverse the order:
For jumper cables:
- First: Remove black (−) from the ground point on the dead car.
- Second: Remove black (−) from the helper car’s negative terminal.
- Third: Remove red (+) from the helper car’s positive terminal.
- Fourth: Remove red (+) from the dead car’s positive terminal.
For a portable charger:
- First: Turn off and unplug the device.
- Second: Remove black (−) from the ground point.
- Third: Remove red (+) from the positive terminal.
Never let the clamps touch each other or metal parts while disconnecting. A spark can damage electronics or cause injury.
Step 7: Let the Car Run and Check the Charging System
After starting, keep the engine running for at least 15–20 minutes. This lets the alternator recharge the battery. If you turn it off right away, it might not start again.
While running, check:
- Are the lights bright (not dim)?
- Does the radio work?
- Is there a battery warning light on the dashboard?
If the battery light stays on, the alternator might not be charging. Drive to a mechanic ASAP. A jump start won’t fix a bad alternator.
For best results, drive the car for 30+ minutes. Short trips don’t fully recharge the battery.
Warning: Don’t rev the engine right after a jump. The charging system needs time to stabilize. I once revved my engine to “help” the battery, and it caused a voltage spike that fried my ECU. Cost me $800.
Pro Tips & Common Mistakes to Avoid
Over the years, I’ve made (and fixed) every mistake in the book. Here are the ones I see most often—and how to avoid them.
- Mistake: Using cheap, thin jumper cables. Thin cables can’t carry enough current. They overheat and fail. Invest in 10- or 12-gauge cables, or better yet, a quality portable jump starter.
- Mistake: Connecting to the negative terminal directly. Always use a ground point. It’s safer and reduces sparking.
- Mistake: Leaving the jump starter on too long. Most portable units have a time limit (usually 10–30 seconds of cranking). Overuse can overheat the device. Follow the manual.
- Mistake: Jumping a frozen battery. If the battery is frozen (common in winter), don’t jump it. The internal plates can crack. Thaw it first, or replace it.
- Mistake: Not checking the battery after a jump. A jump start is a temporary fix. If the battery dies again soon, it’s likely worn out. Test it or replace it.
- Mistake: Using a damaged charger. If your jump starter has cracks, leaks, or won’t hold a charge, toss it. A faulty device can be dangerous.
Pro tips:
- Keep your jump starter charged. I plug mine in every 30 days, even if I don’t use it.
- Label your cables. I wrote “+” and “−” on my jumper cables with a marker. No more guessing.
- Use a battery maintainer. If your car sits for weeks (like a classic or weekend ride), use a trickle charger to keep the battery healthy.
- Check terminals regularly. A quick wipe every oil change prevents corrosion buildup.
- Store tools in a case. I keep my jump starter, gloves, and flashlight in a waterproof bag. No more digging through the trunk.
I once jumped a friend’s car in the rain. Water got into the connections and caused a short. Now I use a plastic bag to cover the terminals while jumping in wet weather. Simple, but it works.
FAQs About How to Jump Start Using Battery Charger Safely and Easily
Q: Can I use a battery charger to jump start my car?
Yes, but only if it has a “jump start” or “boost” mode. Regular trickle chargers are too slow. Look for a smart charger with high cranking amps (300–1000A). For how to jump start using battery charger safely and easily, a dedicated jump starter is faster and safer.
Q: What if my car has a “no-maintenance” battery with no visible terminals?
Many modern cars use sealed batteries with jump points near the fuse box. Check your manual for the location. Use these labeled posts instead of the battery itself. They’re designed for safe jumping.
Q: Can I jump start a car with a completely dead battery?
Sometimes. If the battery is truly dead (no lights, no radio), it may not accept a jump. But many “dead” batteries just need a little charge to start. A jump starter can often revive them. If it doesn’t work after 3 tries, the battery may be too far gone.
Q: Is it safe to jump start in the rain?
Yes, but be extra careful. Water increases the risk of short circuits. Keep connections dry with a plastic bag or tarp. Wear gloves and avoid puddles. If possible, wait for better weather.
Q: How long should I let the car run after a jump?
At least 15–20 minutes at idle. For a full recharge, drive for 30+ minutes. Short trips don’t give the alternator enough time to restore the battery’s charge.
Q: Can I damage my car by jump starting it?
Only if you do it wrong. Common causes: reverse polarity, poor connections, or using a faulty charger. Follow the steps in this guide, and you’ll be fine. Modern cars have protection circuits, but it’s better to be safe than sorry.
Q: What’s the difference between a jump starter and a battery charger?
A jump starter delivers a quick burst of power to crank the engine. A battery charger slowly recharges the battery over hours. For how to jump start using battery charger safely and easily, a jump starter is your best bet for emergencies.
Final Thoughts
Learning how to jump start using battery charger safely and easily isn’t just about fixing a dead battery—it’s about gaining confidence and independence. No more waiting for help or paying for roadside assistance. You’ve got this.
Remember: safety first. Use the right tools, connect in the correct order, and double-check everything. A few minutes of caution can prevent a costly mistake.
Keep your gear charged, your cables labeled, and your mind calm. When that dreaded click happens, you’ll know exactly what to do.
And here’s my final piece of advice: after a jump, don’t just drive away. Take 5 minutes to test the battery. If it dies again, it’s time for a replacement. A jump start is a temporary fix—but knowing when to replace the battery is the real win.
Now go ahead—toss that jump starter in your trunk, charge it up, and drive with peace of mind. You’ve got the skills. You’ve got the tools. And you’ve got this guide to back you up.
Stay safe, and happy driving!