
Featured image for how to jump start car using battery charger
Image source: i.ytimg.com
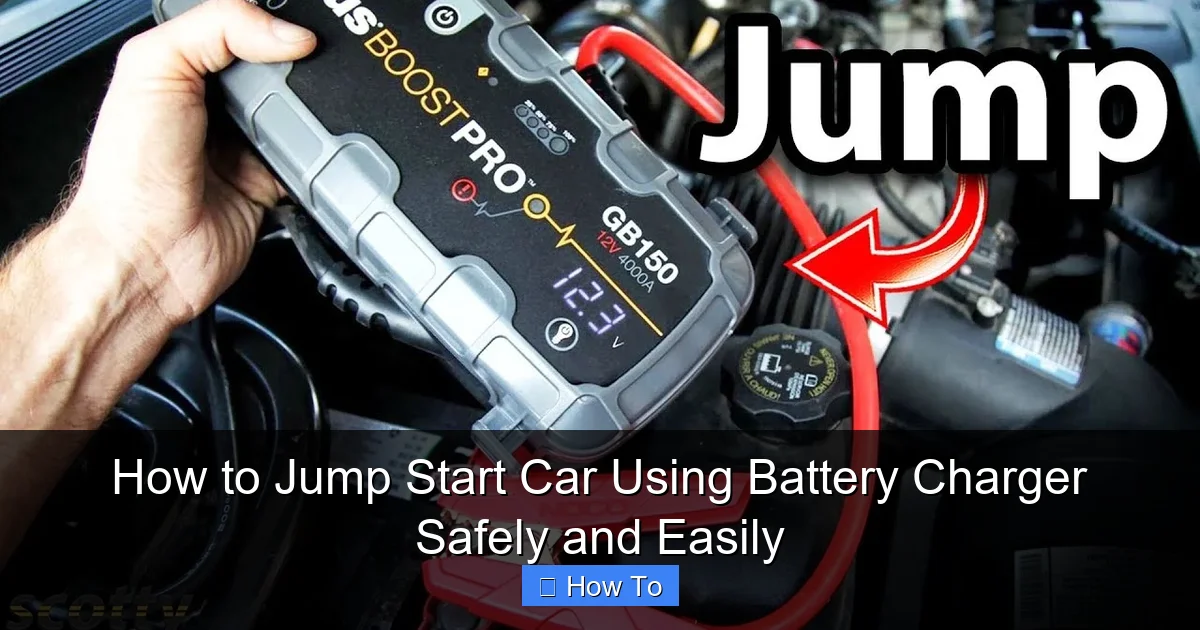
Always connect the battery charger to a dead car battery only after ensuring both vehicles are off and in park, with emergency brakes engaged—safety first. Attach the red clamp to the positive terminal and the black clamp to an unpainted metal surface, then plug in and power the charger according to the manufacturer’s settings for a fast, damage-free jump start that protects your vehicle’s electrical system.
How to Jump Start Car Using Battery Charger Safely and Easily
Key Takeaways
- Turn off the ignition before connecting the charger to avoid electrical damage.
- Connect red clamp first to the positive terminal, then the black to ground.
- Set charger to correct voltage (12V or 6V) to prevent battery damage.
- Start the engine only after the charger shows a sufficient charge level.
- Disconnect clamps in reverse order to ensure safety and avoid sparks.
- Let the engine run for 15–20 minutes to recharge the battery fully.
Why This Matters / Understanding the Problem
You’re running late for work. The coffee’s cold, your keys are in hand—and then it happens. The dreaded click when you turn the ignition. Your car won’t start. A dead battery is one of the most common (and frustrating) car issues, but here’s the good news: you don’t always need another car or jumper cables.
Using a battery charger to jump start your car is not only safer in many situations, but it also gives you more control. No frantic calls to friends, no risky roadside connections. Just you, your charger, and a few simple steps. But—and this is important—doing it wrong can damage your car or even cause injury.
That’s why knowing how to jump start car using battery charger safely and easily isn’t just a handy skill—it’s essential for every driver. Whether you’re in your garage, a parking lot, or at home, this method works reliably when done right. I’ve used it more times than I’d like to admit (thanks, winter mornings!), and I’ve learned what works—and what doesn’t.
In this guide, I’ll walk you through the process step by step, sharing real-life tips, common pitfalls, and the exact tools you’ll need. No fluff, no jargon. Just practical advice from someone who’s been stranded with a dead battery at 6 a.m.
What You Need
Before we dive in, let’s gather everything you’ll need. The beauty of using a battery charger is that it’s a one-person job, and the setup is minimal. Here’s your checklist:
Visual guide about how to jump start car using battery charger
Image source: cdn.hswstatic.com
- A working battery charger (portable jump starter or traditional trickle/boost charger)
- Your car’s owner’s manual (for safety specs and battery location)
- Rubber gloves and safety glasses (optional but recommended for extra protection)
- A clean, dry workspace (parking lot, garage, or driveway—just not on a slope)
- Access to a power outlet (for traditional plug-in chargers)
- Wire brush or battery terminal cleaner (if terminals are corroded)
Now, a quick note on chargers: There are two main types:
- Portable jump starters (also called lithium jump packs): Compact, battery-powered, no outlet needed. Great for emergencies.
- Plug-in battery chargers: Require an electrical outlet. Often include trickle, boost, and float modes. Better for long-term charging.
For how to jump start car using battery charger safely and easily, both work—but your choice depends on your situation. If you’re in a hurry or off-grid, go portable. If you’re at home and want a full charge, a plug-in charger is ideal.
Pro Insight: I keep a portable jump starter in my trunk year-round. It’s saved me twice—once during a blizzard when no one could reach me. But for routine maintenance, I use a plug-in charger overnight to keep the battery healthy.
Step-by-Step Guide to How to Jump Start Car Using Battery Charger Safely and Easily
Alright, let’s get into the nitty-gritty. This process is straightforward, but order matters. Skipping a step can lead to sparks, damage, or even a failed start. Follow these steps exactly, and you’ll be back on the road in no time.
Step 1: Park Safely and Turn Off Everything
First things first—safety starts before you even touch the charger. Make sure your car is in a safe, flat area. If you’re on a street, pull over completely, turn on hazard lights, and use wheel chocks if available.
- Turn off the ignition, headlights, radio, AC, and any other electronics.
- Engage the parking brake and put the car in park (or first gear if manual).
- Pop the hood and secure it with the prop rod.
Why? A running electrical system can cause voltage spikes when you connect the charger. Turning everything off reduces this risk. Plus, it prevents draining the new charge before you even start.
Warning: Never attempt to jump start a car while it’s running or if the battery is visibly damaged (cracked case, leaking fluid). That’s a recipe for disaster.
Step 2: Locate and Inspect the Battery
Not all batteries are under the hood. Some are in the trunk, under seats, or behind panels (looking at you, BMWs). Check your owner’s manual if you’re unsure.
Once you find it, take a close look:
- Are the terminals corroded? (White or green crusty stuff?)
- Are the cables loose or frayed?
- Is there any swelling or leaking?
If you see corrosion, clean it with a wire brush or terminal cleaner. A bad connection can prevent the charger from working properly. If the battery looks damaged, don’t jump start it—replace it instead.
For how to jump start car using battery charger safely and easily, a clean, intact battery is non-negotiable.
Personal Tip: I once tried to jump start a car with heavily corroded terminals. The charger wouldn’t connect properly, and it took me 20 minutes to realize the issue. Clean terminals = faster, safer charging.
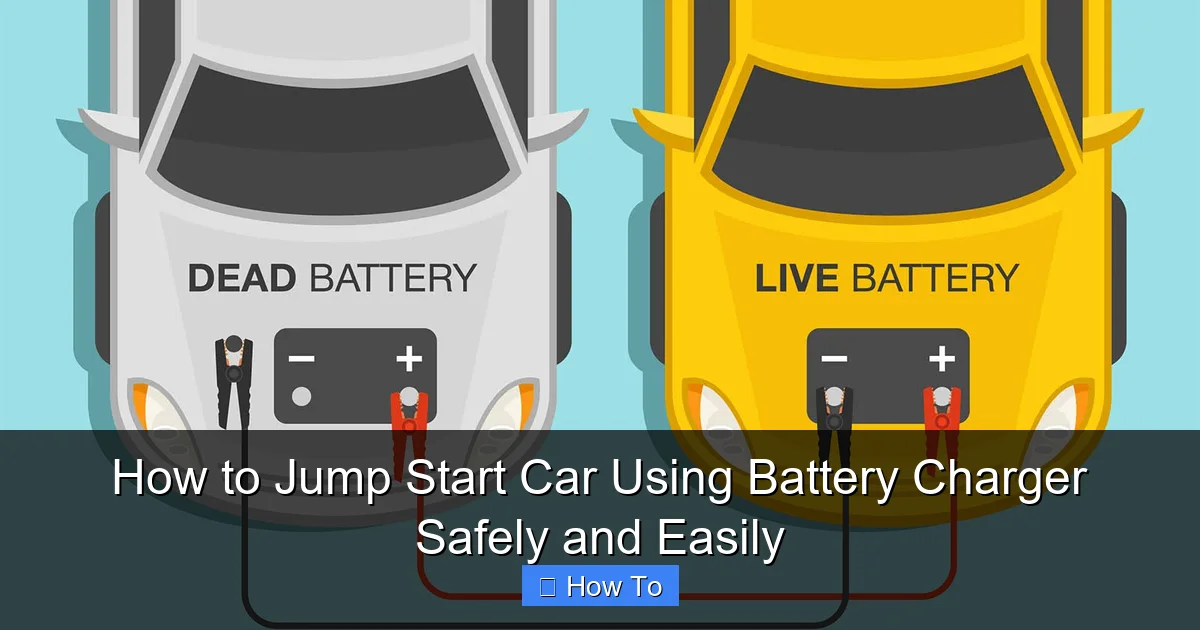
Step 3: Connect the Charger Cables (Red First, Then Black)
Now it’s time to hook up the charger. This is where most people make mistakes. Always connect red (positive) first, then black (negative). Here’s why:
- Red to positive (+) terminal: This is the “hot” side. Connecting it first avoids sparks near the battery.
- Black to negative (-) terminal: The negative side is grounded to the car’s chassis. But—here’s a pro move—connect it to a metal part of the engine block or frame, not directly to the battery’s negative terminal.
Why the engine block? Because batteries emit hydrogen gas, and sparks near the terminal could ignite it. By grounding to the chassis, you reduce that risk.
For portable jump starters, the process is the same—just make sure the unit is turned off before connecting.
Safety Check: Double-check that the cables aren’t touching each other or any moving parts (like belts or fans). A short circuit can fry your charger or worse.
Step 4: Set the Charger to the Correct Mode
This step depends on your charger type:
- Portable jump starter: Turn it on. Most have a “jump start” or “boost” button. Follow the on-screen prompts.
- Plug-in charger: Plug it into the outlet, then set the mode. For a dead battery, use “boost” or “start” mode (usually 10–30 amps). If the battery is just low, “trickle” or “maintenance” mode (2–6 amps) is better.
Check your charger’s manual for the right amperage. Too high, and you risk overheating. Too low, and it’ll take forever.
Once set, the charger will show a light or message confirming it’s working. Some even have a “reverse polarity” warning if you connected the cables backward (which is why red first is so important!).
Common Mistake: I once left a charger in “boost” mode for hours, thinking it’d fully charge the battery. Nope. It fried the internal components. Always switch to “trickle” after a jump start for long-term charging.
Step 5: Wait for the Charger to Do Its Job
Patience is key. A completely dead battery can take 10–30 minutes to reach a “start-able” level. Don’t rush it.
- For portable jump starters: Wait until the unit shows it’s ready (usually a green light or “safe to start” message).
- For plug-in chargers: Wait 15–20 minutes on boost mode, then try starting.
During this time, the charger is sending a controlled surge of power to the battery. It’s like giving your car a controlled “kick” to wake it up.
Don’t try to start the car before the charger signals it’s ready. You could damage the charger or the car’s electrical system.
Pro Tip: I keep a small timer or my phone handy to track the charging time. It’s easy to get distracted and wait too long (or not long enough).
Step 6: Try Starting the Car
Now comes the moment of truth. With the charger still connected:
- Turn the ignition to “on” (but don’t start yet). Check if the dashboard lights up.
- Start the engine. If it turns over, great! If not, wait another 5–10 minutes and try again.
If the car starts, let it run for at least 5 minutes before turning it off. This gives the alternator time to take over and recharge the battery.
For plug-in chargers: Once the car starts, disconnect the charger in reverse order (black first, then red). For portable jump starters, turn off the unit, then disconnect the cables.
Warning: Never disconnect the charger while the engine is running. This can cause a voltage spike that damages sensitive electronics (like your ECU or infotainment system).
Step 7: Disconnect the Charger and Drive
After the car runs for 5 minutes:
- Turn off the engine.
- Remove the black (negative) cable first, then the red (positive).
- Store the cables neatly on the charger.
Now, take a short drive—at least 20–30 minutes—to let the alternator fully recharge the battery. Avoid quick trips or using high-power electronics (like AC or heated seats) during this time.
If you used a plug-in charger, you can switch to “trickle” or “maintenance” mode and leave it connected for a few hours to top off the battery. This is ideal if the battery was deeply discharged.
Real-Life Example: After jump starting my car last winter, I only drove 5 minutes to the gas station. The battery died again the next day. A full 30-minute drive fixed the issue permanently.
Pro Tips & Common Mistakes to Avoid
Now that you’ve got the basics, let’s talk about the real-world nuances that can make or break your jump start.
- Don’t use a charger on a frozen battery: If the battery is frozen (common in winter), it can explode when charged. Thaw it first in a warm garage.
- Check your charger’s voltage: Most car batteries are 12V. Using a 24V charger on a 12V system is dangerous.
- Keep the charger dry: Water and electricity don’t mix. Even a damp garage floor can be risky.
- Use the right clamps: Alligator clips are standard, but some chargers have spring-loaded clamps. Make sure they’re clean and gripping tightly.
- Store your charger properly: Portable jump starters lose charge over time. Recharge them every 3–6 months, even if unused.
Personal Insight: I once used a cheap, off-brand charger that overheated and melted the plastic casing. Now, I only buy from reputable brands like NOCO, Schumacher, or CTEK. Spend a little more—it’s worth it for safety.
Common mistakes I’ve seen (and made):
- Connecting black to the negative terminal: This increases spark risk. Always ground to the chassis.
- Leaving the charger on too long: Boost mode isn’t for long-term charging. Switch to trickle mode afterward.
- Ignoring the owner’s manual: Some cars have specific jump start procedures (like disabling the alarm first). Always check.
- Using a damaged charger: Frayed wires or loose clamps are fire hazards. Inspect before use.
For how to jump start car using battery charger safely and easily, attention to detail is everything. It’s not just about getting the car started—it’s about doing it without risk.
FAQs About How to Jump Start Car Using Battery Charger Safely and Easily
Got questions? I’ve got answers. Here are the ones I hear most often—from friends, family, and even mechanics.
Q1: Can I jump start a car with a completely dead battery?
Yes, but it depends. If the battery is truly dead (0V), some chargers won’t detect it. Try a “force start” mode (if your charger has it) or use a higher-amp boost setting. If it’s just deeply discharged (8–10V), a standard boost should work.
I’ve revived batteries that wouldn’t start for weeks—but if it’s sulfated (crystalized inside), it’s likely beyond saving.
Q2: How long should I charge before trying to start?
For a portable jump starter: 5–10 minutes usually works. For plug-in chargers: 15–30 minutes on boost mode. But don’t guess—check your charger’s indicator. If it shows “ready” or “safe to start,” you’re good.
Pro tip: If the battery is old (3+ years), it may not hold a charge. A jump start might get you moving, but replacement is likely needed.
Q3: Can I leave the charger connected while driving?
No. Never drive with a charger connected. The alternator’s output can damage the charger. Only use the charger to start the car, then disconnect and let the alternator take over.
I once saw a guy try this with a portable charger. It overheated and shut off mid-drive. Not worth the risk.
Q4: What if the car starts but dies again?
That means the battery isn’t holding a charge. Possible causes:
- Old or damaged battery (needs replacement)
- Faulty alternator (not recharging the battery)
- Loose or corroded connections
Drive to a mechanic or auto parts store for a battery/alternator test. Many offer this for free.
Q5: Are portable jump starters better than plug-in chargers?
It depends on your needs. Portable jump starters are faster and more convenient for emergencies—no outlet needed. But plug-in chargers are better for long-term maintenance and deep charging.
I use both: portable for emergencies, plug-in for routine care.
Q6: Can I use a car battery charger on a motorcycle or ATV?
Yes, but use a low-amp setting (1–2A) and monitor closely. Smaller batteries can overheat quickly. Also, some chargers have a “motorcycle mode” to prevent overcharging.
Q7: What’s the safest way to store my charger?
Store it in a cool, dry place. For portable jump starters, recharge every 3–6 months to maintain battery health. For plug-in chargers, keep the cables coiled neatly to prevent damage.
Avoid extreme temperatures—both heat and cold can degrade the charger’s performance.
Final Thoughts
Learning how to jump start car using battery charger safely and easily isn’t just about fixing a problem—it’s about gaining confidence behind the wheel. No more panic, no more waiting for help. Just you, your charger, and the knowledge that you can handle it.
Remember: safety first, patience second. Follow the steps in order, double-check your connections, and never rush the process. And if you’re ever unsure—consult your owner’s manual or a professional.
My final advice? Keep a charger in your car at all times. It’s one of the cheapest, most useful tools you can own. Whether it’s a portable jump starter or a compact plug-in unit, it’s peace of mind in a box.
Now go ahead—tackle that dead battery with confidence. You’ve got this.