
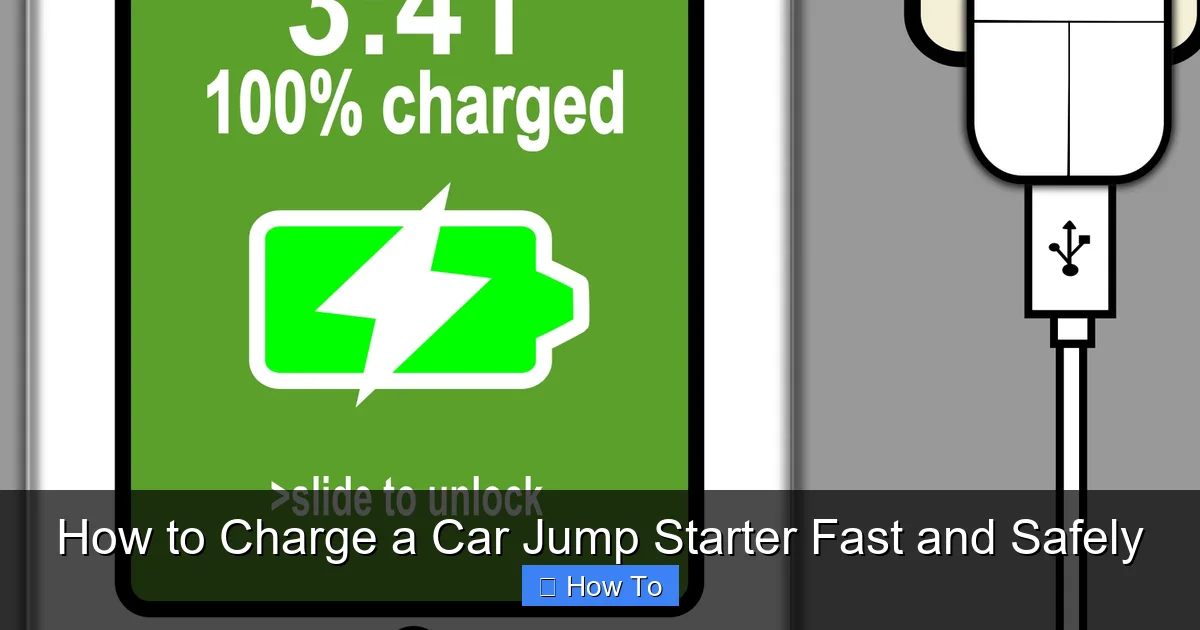
Featured image for how to charge a car jump starter
Image source: openclipart.org
Charging a car jump starter quickly and safely starts with using the correct charger and power source—always follow the manufacturer’s guidelines to avoid damage or safety hazards. For fastest results, plug into a stable 120V wall outlet and avoid using extension cords or power strips, which can reduce charging efficiency. Never overcharge; most modern jump starters have built-in protection, but monitoring the charge cycle ensures optimal performance and longevity.
“`html
How to Charge a Car Jump Starter Fast and Safely
Key Takeaways
- Use the original charger for optimal speed and battery safety.
- Charge in a cool, dry place to prevent overheating and damage.
- Fully charge after each use to maintain peak performance.
- Avoid overcharging by unplugging once the indicator shows full.
- Check battery level regularly to ensure readiness in emergencies.
- Store with 50-80% charge if not used for extended periods.
Why This Matters / Understanding the Problem
Picture this: It’s a cold winter morning, you’re running late for work, and your car won’t start. You grab your trusty portable jump starter—only to find it’s completely dead. Sound familiar? That’s exactly what happened to me last January. I had charged it just two weeks earlier, or so I thought. Turns out, I wasn’t doing it right.
Jump starters are lifesavers when your battery gives up, but they’re only useful if they’re actually charged. And not just “kinda charged”—we’re talking fully ready to deliver that emergency boost. The good news? Learning how to charge a car jump starter fast and safely isn’t rocket science. With the right approach, you can keep your device in peak condition and avoid being stranded.
Many people assume jump starters charge like phones—plug them in, wait a few hours, and forget about them. But lithium-ion batteries (the ones in most modern jump starters) need a little more TLC. Overcharging, undercharging, or using the wrong charger can shorten their lifespan—or worse, cause safety hazards.
In this guide, I’ll walk you through everything I’ve learned from trial, error, and a few close calls. Whether you’re a first-time owner or just want to optimize your routine, you’ll walk away knowing exactly how to charge a car jump starter fast and safely—without the guesswork.
What You Need
Before we dive into the steps, let’s make sure you have the essentials. You don’t need a garage full of tools—just a few basics:
Visual guide about how to charge a car jump starter
Image source: static.pakwheels.com
- Your portable jump starter – Obviously! Check the brand and model so you know its specs.
- The original charging cable – Most come with a USB-C or micro-USB cable. If you’ve lost it, check the manual for compatible replacements.
- A reliable power source – A wall outlet is best. Avoid cheap USB ports on laptops or car adapters unless specified by the manufacturer.
- A dry, cool place to charge – Heat and moisture are battery killers. Never charge your jump starter in a hot car or damp garage.
- Optional: A multimeter – Handy if you want to double-check voltage levels, especially for older models.
Pro tip: Always refer to your jump starter’s user manual. Every model is slightly different, and manufacturers often include specific charging instructions tailored to their battery chemistry.
Step-by-Step Guide to How to Charge a Car Jump Starter Fast and Safely
Step 1: Check the Current Charge Level
Before plugging anything in, take a moment to see where your jump starter stands. Most units have LED indicators—usually four lights—that show battery level. One light might mean 25%, all four mean 100%.
If your device doesn’t have lights, some models beep or display a digital readout when you press the power button. Others require you to attempt a test jump (not recommended unless absolutely necessary!).
Why does this matter? Charging a nearly full jump starter wastes time and can stress the battery. If it’s already at 75% or higher, you might only need a quick top-off instead of a full overnight charge.
Step 2: Use the Right Charger and Cable
This is where many people go wrong. Your jump starter likely came with a specific charger or cable—and you should use it. Generic USB cables or fast chargers not designed for your device can deliver too much current, overheating the battery.
For example, my NOCO Boost Plus GB40 came with a USB-C cable and a 5V/2A wall adapter. I once tried using my phone’s 18W fast charger, thinking it would speed things up. Big mistake. The jump starter got warm, and the charging slowed down as a safety precaution.
Stick to the manufacturer’s recommended input (usually printed on the device or in the manual). If you’ve lost the original gear, look for a replacement that matches the voltage (typically 5V) and amperage (often 1A–2A).
Step 3: Plug Into a Stable Power Source
Not all outlets are created equal. Avoid extension cords, power strips with surge protectors (some interfere with low-current devices), or car USB ports unless your jump starter explicitly supports 12V charging.
I learned this the hard way during a road trip. I plugged my jump starter into my car’s USB port while driving, thinking it would charge slowly but surely. After three hours, it had gained only 10%. Car USB ports often deliver less than 1A—way too weak for efficient charging.
Wall outlets provide consistent, clean power. If you’re traveling, consider a compact travel adapter with a built-in USB-A or USB-C port rated for at least 2A output.
Step 4: Charge in a Safe Environment
Battery safety starts with location. Never charge your jump starter:
- In direct sunlight
- Inside a hot car (temperatures can exceed 140°F in summer!)
- Near flammable materials
- In humid or damp areas (like a basement without dehumidification)
I keep mine on a wooden shelf in my home office—cool, dry, and away from kids and pets. If you must charge it in your garage, choose a shaded spot and avoid concrete floors (they can get cold and affect battery performance).
Step 5: Monitor the Charging Process
Most modern jump starters take 2–4 hours to fully charge from empty. Don’t just plug it in and forget it. Check the LED lights every hour or so.
When all lights are solid (not blinking), charging is complete. Some models automatically stop drawing power once full—this is called “trickle cutoff” and protects against overcharging. But not all units have this feature, so don’t assume.
If your device gets unusually hot (too hot to touch), unplug it immediately. That’s a red flag. Let it cool down, then inspect the cable and power source. If the problem persists, contact the manufacturer—it could be a faulty battery.
Step 6: Unplug and Store Properly
Once fully charged, unplug the cable right away. Leaving it connected indefinitely—even if the device says it’s “safe”—can degrade the battery over time.
Store your jump starter in a cool, dry place with a charge level between 50% and 80% if you won’t use it for weeks or months. Storing at 100% for long periods stresses lithium-ion cells, while storing at 0% can cause permanent damage.
Every 2–3 months, give it a quick top-off to maintain health. Think of it like watering a plant—not too much, not too little.
Pro Tips & Common Mistakes to Avoid
Pro Tip: Charge your jump starter after every use—even if you only used it for 30 seconds. Partial discharges are easier on the battery than deep ones, and keeping it topped up ensures it’s ready when you need it.
Warning: Never attempt to charge a jump starter that’s been dropped, cracked, or exposed to water. Lithium batteries can swell, leak, or even catch fire if damaged. Safety first!
One mistake I see often? People assume “fast charging” means using the highest-wattage charger available. But jump starters aren’t smartphones. Their internal circuits are designed for specific input rates. Pushing too much power through them can trigger thermal protection—or worse, cause a failure.
Another common error: charging in extreme temperatures. Cold slows chemical reactions in batteries, making charging inefficient. Heat accelerates degradation. Ideal charging temperature? Between 50°F and 86°F (10°C–30°C).
Lastly, don’t rely solely on the LED indicators. Over time, they can become less accurate. If your jump starter fails to start a car despite showing full charge, it might be time for a replacement—or at least a deeper diagnostic check.
FAQs About How to Charge a Car Jump Starter Fast and Safely
Q: Can I leave my jump starter plugged in overnight?
A: It depends. Many modern units have overcharge protection, so leaving it plugged in for 8–10 hours is usually fine. However, it’s best practice to unplug once fully charged to maximize battery lifespan. If your model lacks this feature (check the manual), definitely don’t leave it connected indefinitely.
Q: How long does it take to charge a car jump starter?
A: Typically 2–4 hours from empty to full, depending on capacity and charger output. Smaller units (like 1000A peak) charge faster than larger ones (3000A+). Always refer to your manual for exact times.
Q: Can I charge my jump starter in my car?
A: Only if it explicitly supports 12V DC input via a cigarette lighter adapter. Most portable jump starters are designed for AC wall charging. Using a car USB port often provides insufficient current, leading to very slow or ineffective charging.
Q: What if my jump starter won’t charge at all?
A: First, check the cable and power source with another device. If those work, try a different outlet. If it still won’t charge, the internal battery may be dead or the charging port damaged. Contact customer support—many brands offer warranties.
Q: Is it safe to charge a jump starter in winter?
A: Yes, but not in freezing conditions. If your jump starter has been stored in a cold garage, bring it inside and let it warm to room temperature before charging. Charging a cold lithium battery can cause internal damage.
Q: Do I need to fully discharge my jump starter before recharging?
A: No! Unlike older nickel-based batteries, lithium-ion cells don’t suffer from “memory effect.” In fact, frequent full discharges shorten their lifespan. Partial charges are perfectly fine—and recommended.
Q: How often should I charge my jump starter if I don’t use it?
A: Every 2–3 months. Lithium batteries self-discharge over time (about 2–3% per month). A quick top-off keeps the chemistry stable and ensures reliability when you need it most.
Final Thoughts
Mastering how to charge a car jump starter fast and safely isn’t just about convenience—it’s about peace of mind. That little device could be the difference between missing an important meeting and getting back on the road in minutes.
By following these steps—using the right gear, monitoring the process, and storing it properly—you’ll extend your jump starter’s life and ensure it’s always ready when duty calls. Remember: a well-maintained jump starter is a reliable jump starter.
So next time you’re packing for a road trip or bracing for winter storms, take five minutes to check that charge level. Your future self will thank you. And if you’ve got a favorite tip or a charging horror story, drop it in the comments—I’d love to hear how you keep your gear in top shape.
“`