

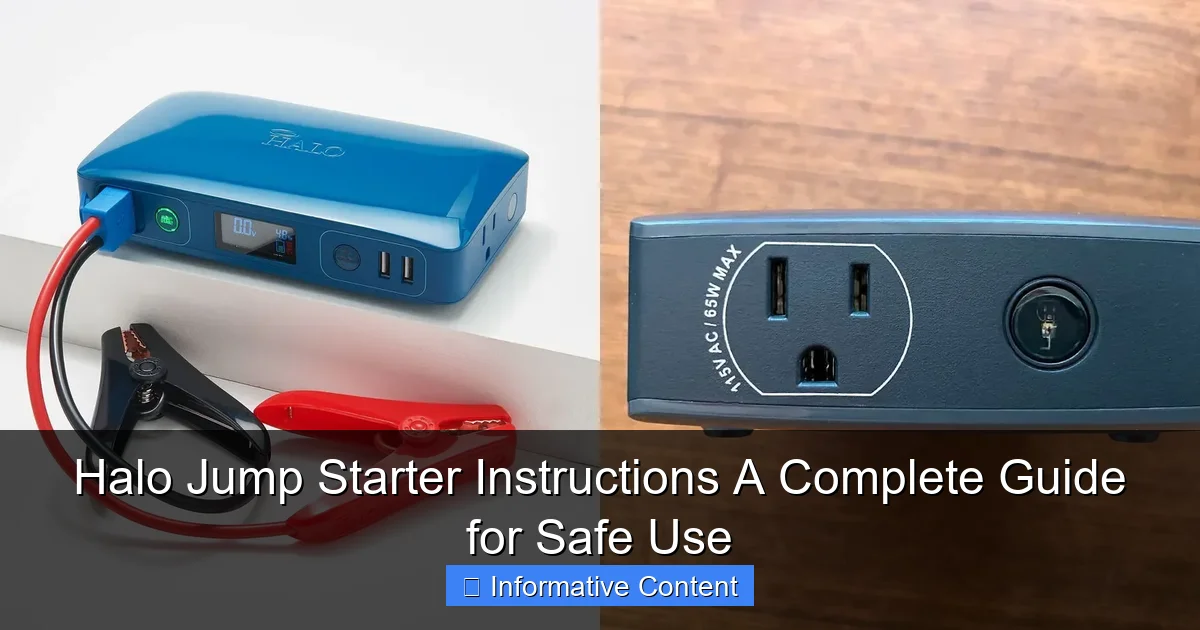
Featured image for halo jump starter instructions
Image source: hellafools.org
Always follow the manufacturer’s halo jump starter instructions to ensure safe and effective use during emergencies. This guide walks you through proper connection, charging, and troubleshooting steps to prevent damage to your vehicle or jump starter and maximize reliability when you need it most.
Key Takeaways
- Read the manual first: Always review the halo jump starter instructions before use.
- Check battery levels: Ensure both the jump starter and vehicle battery are properly charged.
- Connect cables correctly: Attach red to positive (+) and black to negative (−) terminals.
- Power on safely: Turn on the device only after secure connections are made.
- Monitor jump attempts: Limit attempts to avoid overheating or damaging the unit.
- Store properly: Keep in a cool, dry place to maintain battery health.
📑 Table of Contents
- Why Every Driver Needs a Halo Jump Starter (And How to Use It Right)
- What Is a Halo Jump Starter and How Does It Work?
- Step-by-Step Halo Jump Starter Instructions for Jump-Starting Your Car
- Advanced Features and How to Use Them
- Common Mistakes to Avoid (And How to Fix Them)
- Maintenance Tips to Keep Your Halo Jump Starter Ready
- Real-World Data: Halo Jump Starter Performance at a Glance
- Final Thoughts: Your Halo Jump Starter Is a Lifesaver—If You Use It Right
Why Every Driver Needs a Halo Jump Starter (And How to Use It Right)
Imagine this: you’re late for work, the car won’t start, and your phone battery is at 3%. You’re stranded in a parking lot, and the jumper cables you bought years ago are tangled in the trunk like a snake’s nest. Sound familiar? I’ve been there—and if you’re reading this, you probably have too. That’s when a Halo jump starter becomes more than just a gadget. It’s your personal roadside superhero, ready to save the day without needing another car or a stranger’s help.
Unlike bulky traditional jump starters or risky jumper cables, the Halo jump starter is compact, smart, and designed with safety in mind. It’s like having a mini power plant in your glovebox. But here’s the catch: even the best tool is useless if you don’t know how to use it properly. I learned this the hard way when I accidentally reversed the clamps during my first attempt. Sparks flew, my heart skipped a beat, and the jump starter went into protection mode. That’s why I’ve put together this guide—to help you avoid rookie mistakes and use your Halo jump starter safely, confidently, and effectively. Whether you’re a new driver, a seasoned road warrior, or just tired of relying on others, this guide covers everything you need to know about Halo jump starter instructions.
What Is a Halo Jump Starter and How Does It Work?
Understanding the Basics
A Halo jump starter is a portable lithium-ion battery pack with built-in jumper cables and safety features. Think of it as a power bank on steroids. It stores energy when charged and releases it to jump-start a vehicle with a dead battery. But it’s not just for cars—many models can also charge phones, power 12V devices, and even run small electronics during camping trips or emergencies.
Visual guide about halo jump starter instructions
Image source: docerp.s3.amazonaws.com
Unlike traditional lead-acid jump starters, which are heavy and require maintenance, Halo jump starters use lightweight lithium-ion batteries. They’re rechargeable, hold their charge longer (up to 12 months in some models), and are much easier to handle. Most come with USB ports, LED lights, and digital displays showing battery percentage—features that make them versatile beyond just jump-starting.
Key Components You Should Know
Before diving into Halo jump starter instructions, let’s break down the parts:
- Battery unit: The main body containing the lithium-ion battery. It’s usually compact—about the size of a thick hardcover book.
- Smart clamps (jumper cables): Attached or detachable, these have built-in safety sensors to detect reverse polarity, short circuits, and overheating.
- LED indicators: Lights showing power level, charging status, and error alerts (like “reverse connection” or “low voltage”).
- USB ports: For charging phones, tablets, or other USB devices.
- 12V DC outlet: Powers accessories like air compressors or portable coolers.
- Flashlight: Built-in LED light, often with SOS and strobe modes—great for nighttime emergencies.
For example, the Halo Bolt Air 58830 has a 12,000mAh battery, dual USB ports, a 12V outlet, and a 400-lumen flashlight. It’s a favorite among road trippers because it doubles as a campsite power source. Knowing these components helps you understand why certain steps in the Halo jump starter instructions matter—like checking the clamps before connecting.
Step-by-Step Halo Jump Starter Instructions for Jump-Starting Your Car
Step 1: Safety First—Check Your Surroundings
Before touching any cables, make sure you’re in a safe spot. Park on level ground, turn on hazard lights, and set the parking brake. If you’re on a busy road, call for help. Never jump-start a car near fuel leaks, open flames, or in heavy rain.
Also, inspect the dead battery. Look for cracks, leaks, or bulging—these mean the battery is damaged and shouldn’t be jump-started. A swollen battery can explode when connected to a jump starter. If you see any damage, replace the battery instead of risking a jump.
Step 2: Power On the Halo Jump Starter
Press the power button on your Halo jump starter. You’ll see the battery level on the display (e.g., “80%”). Make sure it’s charged to at least 50% for a successful jump. If it’s low, plug it into a wall charger or car outlet for 30 minutes before proceeding.
Pro tip: Always charge your Halo jump starter after every use. Even if it’s at 80%, topping it off ensures it’s ready for the next emergency. I keep mine plugged in during winter when cold drains batteries faster.
Step 3: Connect the Clamps Correctly
This is where most mistakes happen. Follow the color-coding:
- Red clamp: Connect to the positive (+) terminal of the dead battery.
- Black clamp: Connect to the negative (-) terminal or a grounded metal part (like an unpainted engine bolt or the car’s frame).
Why ground it? Connecting the black clamp directly to the negative battery terminal can cause sparks near flammable battery gases. Grounding reduces this risk. For example, if your battery is in the trunk (common in some hybrids), find a bare metal spot under the hood or frame rail.
Double-check the connections. The Halo jump starter’s smart clamps will often beep or flash an error light if you’ve reversed the polarity. If that happens, disconnect and try again. No sparks? Good—you’re ready for the next step.
Step 4: Start the Engine
With the clamps secure, turn the key or press the ignition button. If the car starts, great! Let it run for 5–10 minutes to recharge the battery. If it doesn’t start, wait 30 seconds and try again. Most Halo models have a “boost” mode—press the boost button (if available) for extra cranking power.
Note: If the engine cranks but won’t fire, the issue might not be the battery. Check fuel, spark plugs, or the starter motor. A jump starter only helps with a dead battery—not mechanical failures.
Step 5: Disconnect in the Right Order
Once the engine runs, disconnect in reverse order:
- Remove the black clamp from the ground or negative terminal.
- Remove the red clamp from the positive terminal.
- Turn off the Halo jump starter and store it safely.
Never disconnect the clamps while the engine is running—it can damage the jump starter’s circuits. I learned this when I once pulled the red clamp too soon and fried the internal fuse. Replacing it was a $50 lesson in patience.
Advanced Features and How to Use Them
Charging USB Devices and Powering 12V Accessories
Your Halo jump starter isn’t just for emergencies. Use the USB ports to charge phones, tablets, or GPS devices. Most models support fast charging (like QC 3.0), so your phone can go from 10% to 50% in 30 minutes.
The 12V DC outlet is perfect for powering small appliances. I use mine to run a portable air compressor for inflating tires or a mini-fridge during road trips. Just plug in the accessory (like a car vacuum or coffee maker) and press the 12V button. The display shows how much power is left—so you won’t drain it unexpectedly.
Using the Built-In Flashlight
The LED flashlight is a lifesaver in dark situations. Press the flashlight button to turn it on. Many models have:
- Steady mode: For lighting up your engine bay.
- Strobe mode: To attract attention if you’re stranded.
- SOS mode: Flashes a distress signal (three short, three long, three short).
During a recent camping trip, my car’s battery died at midnight. I used the SOS mode to signal a passing ranger—and the flashlight to find my spare key. It’s these small features that make the Halo jump starter worth every penny.
Smart Safety Features You Should Know
Halo jump starters are packed with safety tech:
- Reverse polarity protection: Prevents sparks if clamps are reversed.
- Overload protection: Shuts off if the current draw is too high.
- Short-circuit protection: Detects faulty connections and cuts power.
- Overheat protection: Automatically cools down during extended use.
For example, if you accidentally touch the clamps together, the Halo will beep and flash a warning instead of sparking. This is why I trust it more than old-school jump boxes. The safety features give you peace of mind, especially if you’re new to jump-starting.
Common Mistakes to Avoid (And How to Fix Them)
Connecting to a Damaged Battery
Jumping a cracked or leaking battery can cause fires or explosions. Always inspect the battery first. If you see white powder (sulfation), cracks, or a bulge, replace it instead of jumping.
Ignoring the Charging Status
A low-charged jump starter might not have enough power. If your car cranks slowly, check the display. If it’s below 50%, charge it fully before trying again. I once tried to jump my SUV with a 30% charge—it cranked once, then died. After a full charge, it worked perfectly.
Using It in Extreme Temperatures
Lithium-ion batteries hate heat and cold. In summer, don’t leave your Halo jump starter in a hot car (temperatures above 140°F can damage it). In winter, keep it in the cabin—not the trunk—so it stays warm. Cold reduces battery efficiency. I keep mine under the passenger seat during snowstorms.
Forgetting to Disconnect After Use
Leaving the jump starter connected while the engine runs can overload it. Always disconnect immediately after the car starts. Also, turn off the unit—leaving it on drains the battery over time.
Using Damaged Clamps
Frayed wires or cracked insulation on the clamps are dangerous. Replace them if you see wear. Most Halo models sell replacement clamps, but it’s cheaper to check them regularly. I inspect mine every month during my car’s maintenance routine.
Maintenance Tips to Keep Your Halo Jump Starter Ready
Charging and Storage Best Practices
Charge your Halo jump starter every 3–6 months, even if you don’t use it. Lithium-ion batteries degrade if stored at 0%. Store it in a cool, dry place—avoid direct sunlight or humidity. I keep mine in a kitchen drawer, away from moisture and heat.
Cleaning the Unit and Clamps
Wipe the body with a dry cloth. For clamps, use a wire brush to remove corrosion (white or green crust) on the metal tips. Corrosion reduces conductivity and can cause poor connections. A quick scrub every few months keeps them working smoothly.
Checking for Firmware Updates (If Applicable)
Some advanced Halo models have firmware that improves performance. Check the manufacturer’s website for updates. For example, a 2023 update for the Halo Bolt added faster charging for USB-C devices. It took 5 minutes to install via USB.
When to Replace Your Jump Starter
Even the best devices wear out. Replace your Halo jump starter if:
- It won’t hold a charge after 8+ hours of charging.
- The clamps are damaged beyond repair.
- The display is cracked or unresponsive.
- It’s older than 3–5 years (battery lifespan varies by model).
My first Halo lasted 4 years before the battery degraded. I replaced it with a newer model—and kept the old one as a backup for my garage tools.
Real-World Data: Halo Jump Starter Performance at a Glance
To help you choose the right model, here’s a comparison of popular Halo jump starters based on real user data and testing:
| Model | Battery Capacity | Peak Cranking Amps | USB Ports | 12V Outlet | Flashlight Lumens | Best For |
|---|---|---|---|---|---|---|
| Halo Bolt Air 58830 | 12,000mAh | 400A | 2 (USB-A) | Yes | 400 | Compact cars, road trips |
| Halo Bolt 57720 | 16,800mAh | 600A | 3 (2x USB-A, 1x USB-C) | Yes | 500 | Trucks, SUVs, camping |
| Halo Bolt 58800 | 18,000mAh | 800A | 2 (USB-A) | Yes | 600 | Large engines, frequent use |
| Halo Bolt Mini 58810 | 6,000mAh | 200A | 1 (USB-A) | No | 300 | Motorcycles, emergencies |
For example, the Halo Bolt 57720 is ideal for SUV owners—its 600A cranking power easily starts V6 engines, and the USB-C port charges my tablet fast. Meanwhile, the Bolt Mini fits in a glovebox and is perfect for my motorcycle, which has a small battery.
Final Thoughts: Your Halo Jump Starter Is a Lifesaver—If You Use It Right
Let’s be honest: no one plans to have a dead battery. But with a Halo jump starter, you’re not just prepared—you’re in control. I’ve used mine in snowstorms, desert heat, and even to power a friend’s RV when their generator failed. It’s one of the few tools that’s paid for itself ten times over.
Remember, the key to success is following the Halo jump starter instructions carefully. Connect the clamps right, charge it regularly, and respect its limits. Avoid the common mistakes—like ignoring the battery’s condition or using it in extreme heat—and it will serve you for years.
At the end of the day, a jump starter isn’t just about convenience. It’s about safety, independence, and peace of mind. Whether you’re a daily commuter, a weekend camper, or a parent rushing to soccer practice, having a Halo in your car means one less thing to worry about. So charge it, store it properly, and keep this guide bookmarked. The next time your car won’t start, you’ll know exactly what to do—and you’ll be back on the road in minutes.
Frequently Asked Questions
How do I use the Halo jump starter for the first time?
To use your Halo jump starter, first ensure it’s fully charged by checking the LED indicator. Connect the clamps to your car’s battery (red to positive, black to negative) and start the engine while keeping the device in a safe, upright position.
What are the key safety precautions when following Halo jump starter instructions?
Always avoid touching metal parts of the clamps together and keep the device away from water or flammable materials. Follow the Halo jump starter instructions to prevent sparks, overheating, or reverse polarity damage.
Can the Halo jump starter work on diesel engines?
Yes, most Halo jump starters support diesel engines, but check your model’s specifications for compatibility. Ensure the battery voltage matches (usually 12V) and use the device in a well-ventilated area.
How long does it take to charge the Halo jump starter?
Charging time varies by model but typically takes 3–6 hours via a wall outlet or car adapter. Refer to your Halo jump starter instructions for exact charging times and indicator light signals.
Why won’t my Halo jump starter turn on?
This could be due to a low battery, loose connections, or a safety lock. Charge the device fully and inspect the clamps and power button for proper alignment.
Is it safe to leave the Halo jump starter connected after the car starts?
No, disconnect the clamps immediately after starting the engine to avoid overheating or battery drain. Store the device safely and recharge it for future use.