
Featured image for halo bolt jump starter instructions
Image source: everstartjumpstarter.com
Master your Halo Bolt jump starter in minutes with this clear, step-by-step guide designed for safety and success. From charging the device to jump-starting your car, follow simple instructions to avoid common mistakes and get back on the road fast.
Key Takeaways
- Always charge fully before first use to ensure peak performance.
- Connect red clamp first to the dead battery’s positive terminal.
- Never reverse clamps—incorrect polarity risks damage or sparks.
- Wait 30 seconds after connecting before attempting to jump-start.
- Use safety features like built-in surge protection during operation.
- Store in cool, dry place to prolong battery life and reliability.
📑 Table of Contents
- What Is the Halo Bolt Jump Starter and Why You Need One
- Understanding Your Halo Bolt Jump Starter: Features and Components
- How to Use the Halo Bolt Jump Starter: Step-by-Step Instructions
- Charging and Maintaining Your Halo Bolt Jump Starter
- Common Mistakes and Troubleshooting
- Beyond Jump-Starting: Other Ways to Use Your Halo Bolt
- Final Thoughts: Why the Halo Bolt Is Worth It
What Is the Halo Bolt Jump Starter and Why You Need One
Imagine this: You’re rushing to an important meeting, the kids are late for school, or you’re about to head out on a weekend road trip. You turn the key in your car, and—nothing. The engine doesn’t even crank. Your battery is dead. Again. It’s frustrating, stressful, and honestly, a little embarrassing when you have to flag down a stranger to give you a jump. That’s where the Halo Bolt Jump Starter comes in.
The Halo Bolt isn’t just another portable jump starter—it’s a compact, powerful, and surprisingly versatile device that can jump-start your car, charge your phone, power small electronics, and even light up dark spaces. Whether you’re a busy parent, a frequent traveler, or someone who just wants peace of mind, having a Halo Bolt in your car or emergency kit can save you time, hassle, and potentially a costly tow. I first discovered mine during a winter storm when my SUV battery died overnight. With temperatures below freezing and no jumper cables in sight, the Halo Bolt got me back on the road in under two minutes. That’s when I realized this little box is a game-changer.
Understanding Your Halo Bolt Jump Starter: Features and Components
What’s in the Box?
When you unbox your Halo Bolt Jump Starter, you’ll typically find the following components:

Visual guide about halo bolt jump starter instructions
Image source: autoboosting.com
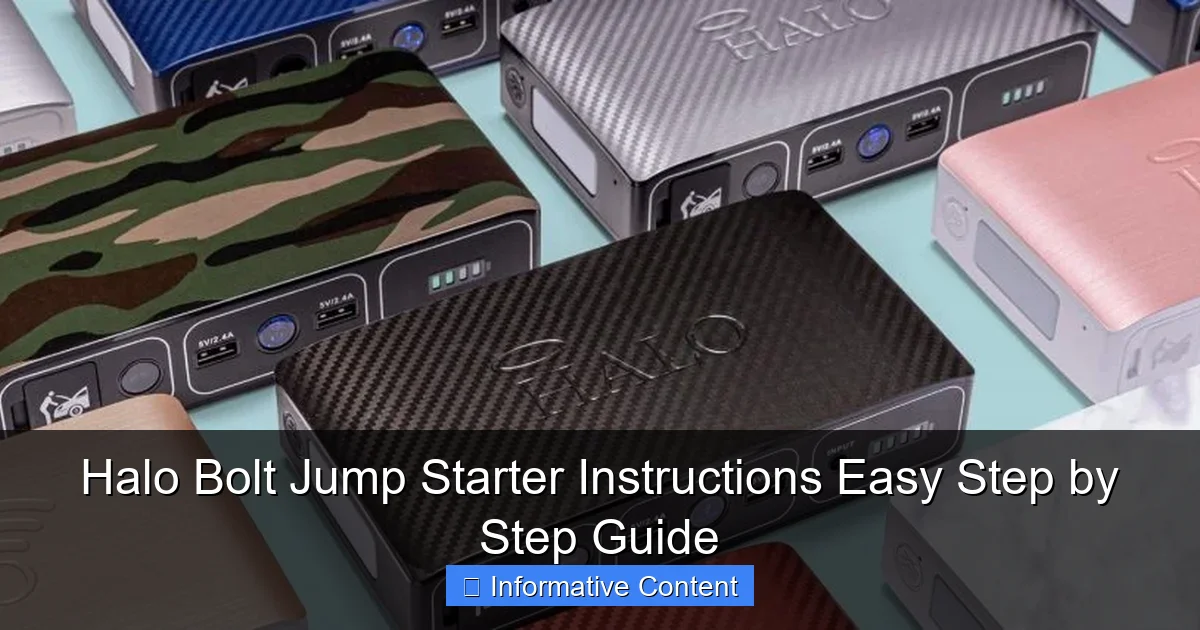
- The main Halo Bolt unit (available in 500A, 750A, or 1000A peak current models)
- Smart jumper cables with built-in protection (clamps)
- USB-A to USB-C charging cable
- Wall charger (varies by model)
- Carrying case or pouch
- User manual
One thing I love is that the jumper cables are integrated into the unit—no more tangled messes in your trunk. The clamps are color-coded (red for positive, black for negative) and have a smart safety system that prevents sparks and reverse polarity, which is a huge plus for beginners.
Key Features and What They Mean
The Halo Bolt isn’t just a one-trick pony. It’s packed with features that make it useful beyond just jump-starting:
- Jump-Starting Power: The Halo Bolt 500A can jump-start most 4- and 6-cylinder gas engines (up to 5.0L). The 750A and 1000A models handle larger engines, including V8s and diesel trucks.
- USB Charging Ports: Dual USB-A ports (5V/2.4A) let you charge phones, tablets, GPS units, or Bluetooth speakers. Some models include a USB-C port for faster charging.
- AC Outlet (on select models): A built-in 110V AC inverter powers small appliances like laptops, fans, or even a mini fridge—great for camping or emergencies.
- LED Flashlight: A 3-mode LED light (steady, strobe, SOS) is perfect for nighttime breakdowns or power outages.
- Digital Display: Shows battery percentage, charging status, and error codes (e.g., “E1” for reverse polarity).
- Safety Protections: Over-current, over-voltage, short-circuit, and reverse polarity protection keep you and your devices safe.
One tip: Always check your Halo Bolt’s charge level before a trip. I once assumed mine was full and found it at 30% during a dead battery scare. Now I charge it monthly, even if I haven’t used it.
How to Use the Halo Bolt Jump Starter: Step-by-Step Instructions
Step 1: Prepare Your Vehicle and Halo Bolt
Before you start, make sure your Halo Bolt is charged. A fully charged unit will have a green or blue indicator light (depending on the model). If it’s low, plug it in using the wall charger or your car’s 12V outlet for at least 3–4 hours. I keep mine plugged in overnight once a month, just to be safe.
Next, turn off your car’s ignition and remove the key. This is critical—never attempt a jump start with the engine running. Open the hood and locate your car battery. Look for the positive (+) terminal (usually marked in red) and the negative (-) terminal (black or grounded metal).
Step 2: Connect the Jumper Cables
Here’s the part that intimidates a lot of people, but it’s actually simple:
- Connect Red to Positive: Attach the red clamp to the positive (+) terminal of your car battery. You’ll hear a soft click when it’s secure.
- Connect Black to Ground: Attach the black clamp to an unpainted metal surface on the engine block or frame—not the negative terminal. This reduces spark risk. I use a bolt on the alternator bracket or a strut tower.
- Check the Halo Bolt Display: The screen should light up and show “Ready” or “Connected.” If you see “E1” (reverse polarity) or “E2” (poor connection), disconnect and reattach the clamps correctly.
Pro Tip: If your battery terminals are corroded, clean them with a wire brush or baking soda paste before connecting. A poor connection can prevent the jump from working.
Step 3: Start the Engine
Once the clamps are secure and the Halo Bolt shows “Ready,” you’re good to go:
- Get in the car and turn the ignition to “Start.”
- Let the engine crank for no more than 3–5 seconds. If it doesn’t start, wait 60 seconds before trying again. This gives the Halo Bolt time to reset and prevents overheating.
- If it starts, great! Leave the engine running for 10–15 minutes to recharge the battery.
- If it doesn’t start after 2–3 attempts, check the clamps and try again. Still no luck? Your battery or alternator might need professional attention.
I once had a stubborn SUV that took three tries. The third time, I revved the engine slightly (after it started) to help the alternator kick in. Worked like a charm.
Step 4: Disconnect and Stow
After a successful jump:
- Turn off the car.
- Disconnect the black clamp first, then the red.
- Stow the cables neatly in the Halo Bolt’s built-in compartment.
- Recharge the Halo Bolt as soon as possible—it uses about 30–50% of its charge per jump.
Remember: Never leave the clamps connected while driving. The Halo Bolt isn’t designed to charge your car battery long-term.
Charging and Maintaining Your Halo Bolt Jump Starter
How to Charge the Halo Bolt
Charging is straightforward, but a few best practices keep your device healthy:
- Use the Original Charger: The Halo Bolt’s wall adapter is optimized for its lithium battery. Using a third-party charger may slow charging or damage the unit.
- Charge Fully Before First Use: Even if the unit shows 50%, charge it to 100% before the first jump. This “conditions” the battery.
- Charge After Every Use: Even if you only used 10% of the charge, plug it in. Lithium batteries degrade faster if left in a low state.
- Charge Monthly: If you haven’t used it in a while, charge it every 30 days. I set a reminder on my phone.
The charging time varies by model:
| Model | Charging Time (Wall Charger) | Charging Time (Car Charger) |
|---|---|---|
| Halo Bolt 500A | 3–4 hours | 5–6 hours |
| Halo Bolt 750A | 4–5 hours | 6–7 hours |
| Halo Bolt 1000A | 5–6 hours | 7–8 hours |
Long-Term Maintenance Tips
To get the most out of your Halo Bolt:
- Store in a Cool, Dry Place: Avoid extreme heat (like a hot garage) or freezing temperatures. Ideal storage temp: 40°F–85°F (5°C–30°C).
- Keep the Terminals Clean: Wipe the clamps with a dry cloth after use. Moisture or dirt can cause corrosion.
- Check the Display: If the screen flickers or shows “E3” (low internal battery), it’s time to replace the unit. Halo Bolt batteries typically last 3–5 years.
- Update Firmware (if applicable): Some newer models support firmware updates via USB. Check the Halo website for details.
I once left my Halo Bolt in a car trunk during a heatwave. The display dimmed, and it took longer to charge. Lesson learned: treat it like a smartphone—keep it out of extreme temps.
Common Mistakes and Troubleshooting
Top 5 Mistakes People Make
Even with clear instructions, small errors can cause problems. Here’s what to watch for:
- Connecting to the Wrong Terminals: Always double-check red to + and black to ground. Reverse polarity triggers an “E1” error.
- Using on a Frozen Battery: A frozen battery won’t accept a jump. Warm it up first (e.g., with a battery blanket) or replace it.
- Ignoring the 60-Second Rule: Repeated cranking without waiting can overheat the Halo Bolt. Let it rest between attempts.
- Using on a Damaged Battery: If the battery case is cracked or leaking, don’t jump it. The risk of explosion is real.
- Leaving It Disconnected: Always reconnect the Halo Bolt to your car’s battery after a jump—otherwise, you’re just draining the starter.
Troubleshooting Error Codes
The Halo Bolt’s display helps diagnose issues. Here’s what common codes mean:
- E1: Reverse polarity. Swap the clamps.
- E2: Poor connection. Clean terminals and reattach.
- E3: Internal battery low. Recharge or replace the unit.
- E4: Overheating. Let the unit cool down for 15 minutes.
- No Display: The unit is dead. Try charging it for 30 minutes.
One time, my Halo Bolt showed “E4” after two quick jump attempts. I waited 10 minutes, and it reset. Now I use a timer to enforce the 60-second rule.
Beyond Jump-Starting: Other Ways to Use Your Halo Bolt
Charging Your Devices on the Go
The Halo Bolt is a portable powerhouse. With its USB ports, you can:
- Charge your phone (up to 3–4 full charges for a smartphone).
- Power a tablet or e-reader.
- Run a GPS or dash cam.
- Charge wireless earbuds or a smartwatch.
I used mine to charge my phone during a 3-hour power outage. The AC outlet (on the 750A model) even powered a small fan—lifesaver in a blackout!
Emergency and Outdoor Uses
The Halo Bolt shines in emergencies and outdoor scenarios:
- Car Camping: Power a portable fridge, lantern, or radio.
- Road Trips: Keep kids’ devices charged on long drives.
- Storm Preparedness: Use the LED flashlight during outages.
- Boating/Fishing: Jump-start small boat engines (check compatibility first).
Pro Tip: Pair it with a solar charger (sold separately) for off-grid use. I take mine on weekend hikes—it’s lighter than a generator and just as useful.
Limitations to Keep in Mind
While the Halo Bolt is versatile, it has limits:
- Not for Large Trucks: The 1000A model can handle most trucks, but diesel semis need industrial jump starters.
- AC Outlet Wattage: The inverter is only 150W—don’t try to run a microwave or space heater.
- Short Runtime: The LED flashlight lasts 10–12 hours, but high-drain devices (like laptops) drain the battery fast.
Knowing these limits helps you use the Halo Bolt safely and effectively.
Final Thoughts: Why the Halo Bolt Is Worth It
The Halo Bolt Jump Starter is more than just a backup plan—it’s a reliable, multi-functional tool that earns its spot in your car, home, or emergency kit. From the simple, foolproof jump-starting process to the added benefits of USB charging, AC power, and emergency lighting, it solves problems before they become crises. I’ve used mine to help neighbors, power a birthday party projector, and even run a coffee maker during a camping trip (yes, really).
Is it perfect? No. The charging time could be faster, and the AC outlet is limited. But compared to the stress, cost, and hassle of a dead battery, the Halo Bolt is a bargain. Whether you’re a cautious driver, an outdoor enthusiast, or just someone who likes being prepared, this device delivers peace of mind—one jump at a time. Keep it charged, store it properly, and don’t wait for a dead battery to realize how much you need it. Trust me, when that moment comes, you’ll be glad you did.
Frequently Asked Questions
How do I use the Halo Bolt jump starter for the first time?
Begin by fully charging your Halo Bolt using the included AC adapter. Once charged, connect the jumper cables to the battery terminals (red to positive, black to negative) and start your vehicle—no need to power on the device manually, as it activates automatically.
Can the Halo Bolt jump starter charge other devices too?
Yes! The Halo Bolt doubles as a portable power bank with USB ports to charge phones, tablets, and other electronics. Simply use the included USB cable and select the appropriate output port for your device.
What are the safety features of the Halo Bolt jump starter instructions recommend watching for?
The Halo Bolt includes reverse polarity, overcurrent, and short-circuit protection. Always double-check cable connections and ensure the clamps don’t touch before starting the engine, as outlined in the Halo Bolt jump starter instructions.
How long does the Halo Bolt take to fully recharge?
Recharging typically takes 3–5 hours via the AC adapter. For faster results, use a 12V car charger (sold separately), which can fully charge the device in about 2–3 hours.
Is the Halo Bolt jump starter compatible with all vehicle types?
The Halo Bolt works with most 12V vehicles, including cars, trucks, motorcycles, and boats. Always verify your vehicle’s voltage and ensure the engine size is within the recommended range (up to 6L for gasoline, 4L for diesel).
What should I do if my Halo Bolt doesn’t jump-start the car?
Check the battery charge level and ensure the cables are securely connected. If the issue persists, try pre-charging the vehicle’s battery slightly with the Halo Bolt’s power bank mode before attempting another jump start.