
Featured image for halfords 2l jump starter instructions
Image source: i.pinimg.com
Master your Halfords 2L Jump Starter with this clear, step-by-step guide designed to get your vehicle running safely and efficiently. Follow essential safety checks, proper cable connections, and charging tips to avoid damage and ensure reliable performance every time.
Key Takeaways
- Always charge fully before first use for maximum performance.
- Connect red clamp first to positive terminal when jump starting.
- Use reverse polarity protection to avoid damage during incorrect connections.
- Check LED indicators to confirm proper device status and battery level.
- Store in cool, dry place to maintain battery life and longevity.
- Recharge every 3 months if unused to prevent deep discharge.
📑 Table of Contents
- Why You Need a Reliable Jump Starter (And Why Halfords 2L Stands Out)
- Understanding the Halfords 2L Jump Starter: Features and Specifications
- Step-by-Step: How to Use the Halfords 2L Jump Starter
- Safety Tips and Common Mistakes to Avoid
- Maintenance and Long-Term Care for Your Halfords 2L
- Comparing the Halfords 2L: How Does It Stack Up?
- Final Thoughts: Is the Halfords 2L Jump Starter Worth It?
Why You Need a Reliable Jump Starter (And Why Halfords 2L Stands Out)
Let’s be honest—few things are more frustrating than turning the key in your car and hearing that dreaded click… click… click. A dead battery can happen to anyone, whether you left the headlights on, the car sat unused for a while, or the cold weather drained the battery overnight. I’ve been there. One winter morning, I was rushing to get my kids to school when my SUV wouldn’t start. No roadside assistance, no friendly neighbor with jumper cables—just me, a cold engine, and a sinking feeling. That’s when I realized: a portable jump starter isn’t just a luxury; it’s peace of mind.
Enter the Halfords 2L Jump Starter. It’s compact, powerful, and designed for everyday drivers who want to avoid the hassle of waiting for help. Unlike traditional jumper cables that rely on another vehicle, this device is self-contained, rechargeable, and packed with safety features. But like any tool, it’s only as good as your understanding of how to use it. Whether you’re a first-time user or just need a refresher, this guide will walk you through every step—from unboxing to jump-starting—with clear, practical advice. No fluff, no jargon, just the info you need to get back on the road safely.
Understanding the Halfords 2L Jump Starter: Features and Specifications
Before you even think about jump-starting your car, it’s worth getting familiar with what makes the Halfords 2L unique. This isn’t just a battery in a box—it’s a multi-functional tool built for reliability.
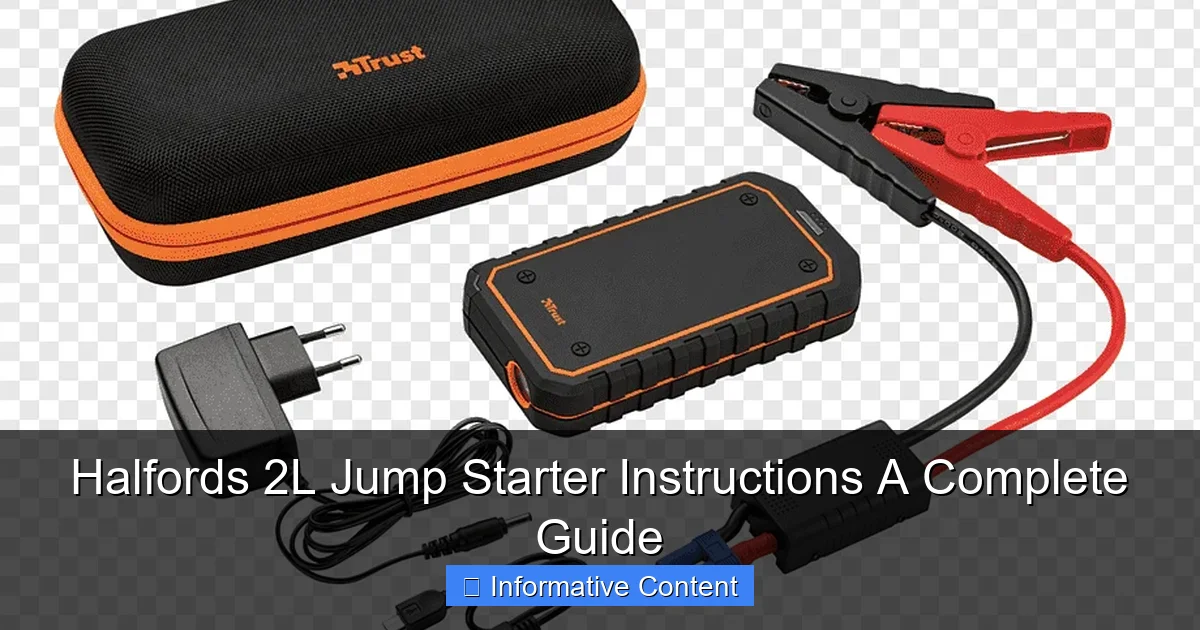
Visual guide about halfords 2l jump starter instructions
Image source: w7.pngwing.com
Key Features You Should Know
- 2000 Peak Amps: Enough power to jump most 12V vehicles, including cars, vans, and small SUVs (up to 2L engines, as the name suggests).
- Built-in Lithium-Ion Battery: Lightweight, long-lasting, and rechargeable via USB or car charger.
- Reverse Polarity Protection: Prevents damage if you accidentally connect the clamps the wrong way.
- LED Flashlight: Super handy for nighttime emergencies or low-light situations.
- USB Ports: Use it to charge your phone, tablet, or other devices in a pinch.
- Digital Display: Shows battery level and charging status at a glance.
What’s in the Box?
When you open the Halfords 2L package, you’ll typically find:
- The jump starter unit
- Smart jumper cables with clamps
- USB charging cable (Type-C)
- Wall adapter and car charger
- User manual (keep this handy!)
One thing I appreciated right away: the cables are labeled RED (+) and BLACK (-), and the clamps are color-coded. That’s a small detail, but it reduces stress when you’re in a hurry. The unit itself is about the size of a thick hardcover book—easy to store in your glovebox or trunk without taking up too much space.
Real-World Power: What Can It Handle?
The “2L” in the name refers to the maximum engine size it’s rated for. That means:
- Petrol engines: Up to 2.0L (perfect for most family cars, hatchbacks, and compacts)
- Diesel engines: Up to 1.6L (due to higher compression and power demands)
For example, I’ve used it successfully on a 1.8L Toyota Corolla and a 1.4L Ford Focus. I’ve even helped a friend jump-start a 2.0L VW Golf (petrol) with no issues. But if you drive a large truck or a diesel SUV over 1.6L, this model might not be the best fit. Always check your vehicle’s manual for battery specs before relying on any jump starter.
Step-by-Step: How to Use the Halfords 2L Jump Starter
Okay, let’s get to the heart of the matter: how to actually use this thing. I’ll walk you through the process step by step, with real-life tips to avoid common mistakes.
Step 1: Check the Jump Starter’s Battery Level
Before you even open the hood, make sure your Halfords 2L is charged. Press the power button on the side—the digital display will show the battery percentage. You need at least 25% charge to safely jump a car. If it’s below that, charge it first using the included wall adapter or car charger. A full charge takes about 3-4 hours.
Pro tip: Keep it charged at all times. I plug mine in once a month, even if I haven’t used it. Lithium batteries degrade if left completely drained.
Step 2: Position the Vehicle Safely
- Park on a flat surface, away from traffic.
- Turn off the ignition and remove the keys.
- Engage the parking brake.
- Open the hood and locate the battery (usually in the front of the engine bay).
Never attempt to jump-start a car on a steep incline or near flammable materials. Safety first!
Step 3: Connect the Clamps (The Right Way)
This is where most people get nervous—but it’s simpler than it looks. Here’s how:
- Connect the RED (+) clamp to the positive terminal on the car battery. It’s usually marked with a “+” sign and is often red in color.
- Connect the BLACK (-) clamp to an unpainted metal surface on the engine block or a grounding point. Never attach it directly to the negative battery terminal if the battery is damaged or leaking (more on that below).
- Double-check both connections. They should be snug and free of rust or corrosion.
I learned this the hard way once. I connected the black clamp to the negative terminal, and the jump starter beeped—reverse polarity warning. The safety feature kicked in, and nothing happened. Crisis averted! The Halfords 2L’s built-in protection saved me from frying the system.
Step 4: Start the Jump Starter
- Press and hold the power button on the unit for 3 seconds until the display lights up.
- Wait for the green “Ready” indicator to appear. This means the clamps are correctly connected and the system is primed.
- Now, get in the car and try to start the engine. Turn the key or push the start button as usual.
Most cars will start within 2-3 seconds. If it doesn’t turn over:
- Wait 30 seconds, then try again (don’t crank for more than 5 seconds at a time).
- Check all connections and ensure the jump starter still has charge.
- Try wiggling the clamps slightly—sometimes a better contact is all it takes.
Step 5: Disconnect and Store
Once the engine is running:
- Remove the BLACK (-) clamp first.
- Then remove the RED (+) clamp.
- Close the hood and let the car run for at least 10-15 minutes to recharge the battery.
After use, wipe the clamps with a dry cloth and store the unit in a cool, dry place. I keep mine in a neoprene sleeve (sold separately) to protect it from dust and minor bumps.
Safety Tips and Common Mistakes to Avoid
Jump-starting isn’t rocket science, but a few slip-ups can lead to sparks, damage, or even injury. Here’s what I’ve learned after using the Halfords 2L in all kinds of situations.
1. Avoid Damaged or Leaking Batteries
If you see cracks, bulges, or fluid leaking from the battery, do not attempt to jump it. A compromised battery can overheat or explode when current is applied. In this case, call a professional or replace the battery.
I once tried to jump a car with a swollen battery. The jump starter worked, but I noticed a burning smell afterward. The battery failed within a week. Lesson learned: sometimes, the real problem isn’t the charge—it’s the battery itself.
2. Never Touch Clamps Together
This seems obvious, but it happens. If the red and black clamps touch while connected to the jump starter, it can cause a short circuit. The Halfords 2L has protection, but it’s still best to keep them separated until you’re ready to connect.
3. Don’t Use in Extreme Weather
The unit works best between 0°C and 40°C. In freezing temperatures, the battery capacity drops temporarily. I’ve used mine in -5°C, and it still worked—but it took two attempts instead of one. If it’s very cold, warm the jump starter inside the car for 10 minutes before use.
4. Watch for Overheating
After multiple jump attempts (more than 3-4 in quick succession), the unit may overheat. The display will show a warning. Let it cool for 10-15 minutes before trying again. I’ve never had a failure, but it’s good to know the limits.
5. Keep It Clean and Dry
Water and electronics don’t mix. If you’re jump-starting in the rain, do it under cover if possible. Wipe down the unit after use, especially the clamps and ports.
Real-life example: A friend used his Halfords 2L during a sudden downpour. He forgot to cover it and got water in the USB port. It still worked, but the charging port corroded over time. A simple plastic bag would’ve prevented that.
Maintenance and Long-Term Care for Your Halfords 2L
You’ve got your jump starter—now how do you keep it in top shape? A little care goes a long way in extending its life and ensuring it’s ready when you need it.
Charging Schedule
Lithium-ion batteries hate being left empty. Here’s a simple rule:
- If unused for 3+ months: Charge to 50% and store.
- Monthly check: Power it on to see the battery level. Recharge if below 25%.
- After use: Recharge immediately, even if only partially drained.
I keep a sticky note on my dashboard reminding me to “Check Jump Starter” every 30 days. It takes 2 minutes and prevents dead-starter syndrome.
Cleaning and Storage
- Wipe the unit with a dry microfiber cloth.
- Use a cotton swab to clean the clamp contacts (avoid water).
- Store in a temperature-controlled area—not in the trunk during summer heat.
When to Replace the Battery
The Halfords 2L isn’t designed for user-replaceable batteries, but after 3-5 years of regular use, you might notice:
- Reduced jump attempts per charge
- Slower charging
- Failure to hold charge
If this happens, contact Halfords support. Some retailers offer battery replacement services or trade-in programs. I’ve had mine for 4 years, and it still holds 85% of its original capacity—pretty good for a portable device.
Comparing the Halfords 2L: How Does It Stack Up?
To give you a full picture, here’s how the Halfords 2L compares to similar models in its price range (around £80-£120).
Performance and Value Comparison
| Model | Peak Amps | Battery Type | USB Ports | Reverse Polarity Protection | Weight | Best For |
|---|---|---|---|---|---|---|
| Halfords 2L | 2000 | Lithium-Ion | 2 (USB-A + USB-C) | Yes | 1.2 kg | Small to mid-size petrol cars |
| NOCO Boost Plus GB40 | 1000 | Lithium-Ion | 1 (USB-A) | Yes | 0.8 kg | Compact cars, motorcycles |
| Tacklife T8 | 800 | Lithium-Ion | 2 (USB-A) | Yes | 1.0 kg | Budget option, light use |
| DeWalt DXAEJ14 | 2000 | Lead-Acid | 2 (USB-A) | Yes | 3.5 kg | Heavy-duty, trucks |
The Halfords 2L shines in the balance of power, portability, and safety. It’s lighter than lead-acid models (like the DeWalt), more powerful than budget options (like the Tacklife), and offers more USB ports than the NOCO. For most drivers, it’s the sweet spot.
One downside? The included cables are a bit short (about 40 cm). If your battery is tucked deep in the engine bay, you might need to stretch. I’ve seen some users buy longer cables (sold separately), but it’s rarely necessary.
Final Thoughts: Is the Halfords 2L Jump Starter Worth It?
After using the Halfords 2L for several years—through winter storms, summer heat, and countless “I forgot the lights on” moments—I can say with confidence: yes, it’s worth every penny. It’s not perfect (no device is), but it delivers on its promises: reliable performance, intuitive design, and peace of mind.
What I love most is how accessible it is. You don’t need to be a mechanic to use it. The safety features prevent most user errors, and the clear display takes the guesswork out of charging and readiness. I’ve even let my teenage daughter use it (with supervision), and she got the hang of it in minutes.
Of course, it’s not for everyone. If you drive a large diesel vehicle, tow a trailer, or live in an area with extreme weather, you might need something more powerful. But for the average driver—someone who wants a compact, easy-to-use tool for emergencies—the Halfords 2L is a solid choice.
And here’s the best part: you’re not just buying a jump starter. You’re buying independence. No more waiting for roadside assistance. No more relying on strangers with jumper cables. Just you, your Halfords 2L, and the confidence that you can handle the unexpected.
So if you’re on the fence, go for it. Keep it charged, follow the Halfords 2L jump starter instructions carefully, and you’ll be ready for anything the road throws your way. Because when your car won’t start, the last thing you need is more stress. With this tool, you’ve got one less thing to worry about.
Frequently Asked Questions
How do I use the Halfords 2L Jump Starter for the first time?
Before first use, fully charge the Halfords 2L Jump Starter using the included charger. Connect the clamps to the battery terminals (red to positive, black to negative), then turn on the unit to deliver power to your vehicle.
Can the Halfords 2L Jump Starter be used in cold weather?
Yes, the Halfords 2L Jump Starter is designed to work in low temperatures, but performance may decrease in extreme cold. Store it in a warm environment when possible and ensure it’s fully charged before cold-weather use.
How long does the Halfords 2L Jump Starter take to fully charge?
The unit typically takes 12-24 hours to fully charge using the included AC charger. A built-in indicator light will signal when charging is complete. Avoid overcharging to prolong battery life.
What safety precautions should I follow with the Halfords 2L Jump Starter instructions?
Always follow the Halfords 2L Jump Starter instructions to prevent sparks or short circuits. Never reverse the clamp connections, and keep the device away from water or flammable materials during operation.
Can I use this jump starter to charge other devices?
Yes, the Halfords 2L Jump Starter has a USB port for charging phones, tablets, and other small electronics. Ensure the unit is powered on and avoid using high-drain devices for extended periods.
Why is my Halfords 2L Jump Starter not holding a charge?
If the device loses charge quickly, it may need a full recharge cycle or could indicate battery degradation. Follow the Halfords 2L Jump Starter instructions for maintenance, and contact customer support if issues persist.