

Featured image for gooloo jump starter instructions
Image source: ca.gooloo.com
Master your Gooloo jump starter in minutes with this simple, step-by-step guide designed for quick and safe vehicle jumps. From powering on to connecting clamps correctly, follow these clear instructions to avoid common mistakes and ensure reliable performance every time.
Key Takeaways
- Always charge fully before first use for optimal performance.
- Connect red clamp first to positive terminal when jump-starting.
- Check voltage compatibility to avoid damaging your vehicle’s system.
- Use safety gloves to protect hands during the jump-start process.
- Store in cool, dry place to extend battery lifespan and reliability.
- Test monthly to ensure readiness during emergencies.
📑 Table of Contents
- Why a Gooloo Jump Starter Might Save Your Day
- Understanding Your Gooloo Jump Starter: What’s in the Box?
- Step-by-Step Gooloo Jump Starter Instructions: Jump-Starting Your Car
- Charging and Maintaining Your Gooloo Jump Starter
- Advanced Features: Beyond Jump-Starting
- Common Mistakes and How to Avoid Them
- Final Thoughts: Is a Gooloo Jump Starter Worth It?
Why a Gooloo Jump Starter Might Save Your Day
Imagine this: you’re rushing to an important meeting, the kids are late for school, or you’re about to leave on a weekend camping trip. You turn the key in the ignition—nothing. Just a sad, clicking sound. Your car battery has died, and you’re stuck. This is where a Gooloo jump starter comes to the rescue. Unlike traditional jump-starting methods that rely on another vehicle, a Gooloo jump starter is a portable, self-contained power pack that can bring your dead battery back to life in minutes—no second car needed.
I remember the first time I used my Gooloo jump starter. I was stranded in a grocery store parking lot late at night, my phone at 3%, and no one around. I pulled out the compact device, followed the instructions (thankfully, they were clear), and within five minutes, my car was running again. No stress, no waiting, no awkward requests for help from strangers. That experience sold me on the value of having a reliable jump starter in your car at all times. But like any tool, it only works well if you know how to use it properly. That’s why I’ve put together this Gooloo jump starter instructions guide—to help you avoid panic and get back on the road fast, every time.
Understanding Your Gooloo Jump Starter: What’s in the Box?
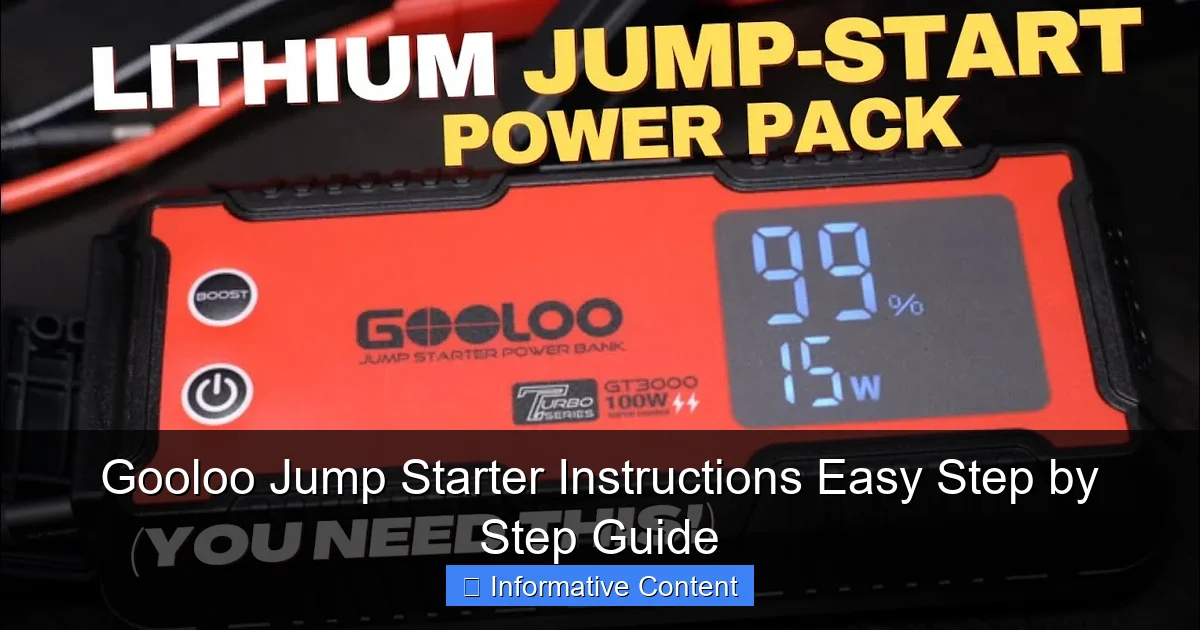
Before you jump into using your Gooloo jump starter, it helps to know what you’re working with. These devices come in various models—like the GT4000, GT3000, or the newer GT5000—but most share the same core features. Let’s break down what you’ll typically find when you open the box.
Visual guide about gooloo jump starter instructions
Image source: i.ytimg.com
Key Components and Their Functions
- Jump Starter Unit: The main powerhouse. It houses the lithium-ion battery, safety circuits, and charging ports. Compact and lightweight, it easily fits in your glove compartment or center console.
- Smart Jumper Cables: These aren’t your grandpa’s jumper cables. Gooloo’s cables have built-in protection against reverse polarity, short circuits, and overcurrent. The clamps are color-coded (red for positive, black for negative) and often feature LED indicators.
- USB Charging Cables: Most models include a USB-A to USB-C cable for recharging the unit. Some even come with wall and car chargers.
- User Manual: Don’t skip this! It has model-specific Gooloo jump starter instructions, including safety warnings and troubleshooting tips.
- Carrying Case: A durable pouch or hard case to keep everything organized and protected.
Common Models and Their Power Output
Gooloo offers different models based on engine size and intended use. Here’s a quick comparison to help you choose (or understand what you already have):
| Model | Peak Current | Engine Compatibility | Additional Features |
|---|---|---|---|
| GT3000 | 3000A | Up to 9.0L gas, 7.0L diesel | 12V/10A outlet, LED flashlight |
| GT4000 | 4000A | Up to 10.0L gas, 8.0L diesel | USB-C PD 18W, digital display |
| GT5000 | 5000A | Up to 12.0L gas, 10.0L diesel | Wireless charging, 12V/15A outlet |
Note: Always check your vehicle’s engine size before using. Overloading the jump starter can damage both the device and your car’s electrical system.
What Makes Gooloo Different?
Compared to cheaper knockoffs, Gooloo jump starters stand out due to their intelligent safety systems. Features like reverse polarity protection, spark-proof clamps, and temperature monitoring mean you’re less likely to fry your battery or start a fire. Plus, many models double as power banks—perfect for charging phones, tablets, or even laptops on the go. I’ve used mine to power my GPS during a long road trip when my car charger failed. That versatility is a game-changer.
Step-by-Step Gooloo Jump Starter Instructions: Jump-Starting Your Car
Now, let’s get into the heart of the matter: how to use your Gooloo jump starter to bring a dead battery back to life. Follow these steps carefully, and you’ll be back on the road in no time.
Step 1: Safety First—Park and Prepare
- Park safely: Pull over to a flat, well-lit area. Turn on your hazard lights. If you’re on a busy road, set up flares or reflectors if available.
- Turn off the engine and accessories: Make sure the ignition, radio, lights, and AC are all off. This reduces the load on the battery during jump-starting.
- Engage the parking brake: Prevents the car from rolling while you work.
- Open the hood: Locate the battery. In some cars, it’s under the hood; in others (like some BMWs or Hondas), it’s in the trunk or under a seat.
Step 2: Power On the Gooloo Unit
Press and hold the power button on your Gooloo jump starter for 3–5 seconds until the LED screen or indicator lights up. Most models will display the battery level (e.g., 80%). If it’s below 50%, consider charging it first—low charge can reduce jump-starting effectiveness.
Pro tip: I keep mine charged to at least 70% at all times. I plug it in every two weeks, even if I haven’t used it. Lithium-ion batteries degrade faster when left fully discharged.
Step 3: Connect the Jumper Cables (Correct Order!)
This is where most mistakes happen. Follow the order exactly:
- Connect the red (positive) clamp to the positive terminal on your car battery. It’s usually marked with a “+” and is larger than the negative.
- Connect the black (negative) clamp to a grounded metal part of the engine block or chassis—NOT the negative battery terminal. A good spot is a bolt or bracket away from moving parts or the battery itself. Why? To reduce the risk of sparks near flammable gases the battery may emit.
Example: On my 2018 Toyota RAV4, I clip the black clamp onto the engine mounting bracket near the firewall. It’s clean, metal, and far from the battery.
Step 4: Check the Gooloo Unit for Readiness
Once both clamps are securely connected, the Gooloo jump starter should display a green “Ready” light or message. If it shows a red light, check for:
- Reverse polarity (swapped clamps)
- Loose connection
- Corroded or dirty battery terminals
Clean the terminals with a wire brush if needed. A poor connection is a common cause of failure.
Step 5: Start the Engine
- Enter the car and turn the key to the “Start” position.
- If the engine doesn’t start on the first try, wait 20–30 seconds before trying again. This gives the Gooloo unit time to reset its safety circuits.
- After 3 failed attempts, disconnect and wait 3 minutes. Then reconnect and try again.
Success tip: I’ve found that giving the engine a little throttle (gently press the gas pedal) during startup helps, especially in cold weather. Just don’t floor it—gentle pressure is enough.
Step 6: Disconnect in Reverse Order
Once the engine is running, disconnect in this order:
- Remove the black (negative) clamp from the ground point.
- Remove the red (positive) clamp from the battery.
- Turn off the Gooloo unit (press and hold the power button).
Never disconnect the clamps while the engine is running—this can cause a voltage spike that damages electronics.
Charging and Maintaining Your Gooloo Jump Starter
A jump starter is only as good as its charge. Neglecting maintenance can lead to failure when you need it most. Here’s how to keep your Gooloo unit in top shape.
How to Recharge Your Gooloo Unit
Most models charge via USB-C or a DC car charger. Here’s the process:
- Use the included cable or a high-quality USB-C to USB-C cable (for faster charging).
- Plug into a wall outlet (5V/2A or higher) or your car’s USB port.
- The LED screen or indicator lights will show charging progress. A full charge usually takes 3–6 hours, depending on the model and battery level.
- Once fully charged, disconnect the cable. Overcharging is prevented by built-in protection, but it’s good practice to unplug when done.
Example: My GT4000 takes about 4 hours to charge from 20% to 100% using a 18W wall adapter. I charge it every 3–4 weeks, even if it’s not low, to maintain battery health.
Best Practices for Long-Term Storage
- Store at 40–80% charge: Fully charging or fully draining before storage accelerates battery degradation. I keep mine around 60%.
- Keep in a cool, dry place: Avoid extreme heat (like a hot car in summer) or freezing temperatures. Ideal range: 32°F–104°F (0°C–40°C).
- Charge every 2–3 months: If unused, lithium-ion batteries slowly lose charge. Top it off to prevent deep discharge.
- Clean the clamps and ports: Wipe with a dry cloth to prevent corrosion or debris buildup.
Troubleshooting Common Charging Issues
What if your Gooloo won’t charge? Try these fixes:
- No LED lights? Check the cable and power source. Try a different outlet or USB port.
- Charging very slowly? Use a higher-wattage charger (e.g., 18W instead of 5W).
- Unit gets hot during charging? Stop immediately. It could be a faulty battery. Contact Gooloo support.
Advanced Features: Beyond Jump-Starting
Gooloo jump starters aren’t just for emergencies. They’re multi-functional power tools. Let’s explore the extra features that make them worth the investment.
Using the 12V/10A or 12V/15A Outlet
Need to power a tire inflator, air mattress pump, or portable fridge? Many Gooloo models have a 12V outlet (similar to a car cigarette lighter).
- Plug in your device (ensure it’s rated for 12V and under 10A or 15A, depending on your model).
- Turn on the Gooloo unit. The outlet should power up.
- Monitor battery usage—high-draw devices drain the battery fast.
Pro tip: I used my GT4000 to inflate a flat tire on my trailer during a camping trip. Saved me a $100 roadside assistance call!
Charging Your Devices: Phone, Tablet, Laptop
Most models have USB-A and USB-C ports for charging electronics.
- Use a standard USB cable to charge phones or tablets.
- For laptops, use a USB-C to USB-C cable and ensure your model supports Power Delivery (PD). The GT4000 and GT5000 can charge most laptops at 18W or 30W.
Example: My MacBook Air charges from 20% to 80% in about 90 minutes using the GT5000’s USB-C port. Not as fast as a wall charger, but perfect for emergencies.
Using the Built-In LED Flashlight
Need light while working under the hood at night? The flashlight is a lifesaver.
- Press and hold the flashlight button for 3 seconds to turn it on.
- Tap to cycle through modes: high beam, low beam, strobe (for emergencies).
- It’s bright enough to light up a car engine or a dark campsite.
Personal experience: I once had to change a flat tire in the rain at midnight. The Gooloo flashlight lit up the wheel well perfectly—no fumbling with my phone’s dim light.
Common Mistakes and How to Avoid Them
Even with clear Gooloo jump starter instructions, mistakes happen. Here are the most common ones—and how to prevent them.
Connecting Clamps in the Wrong Order
Reversing the red and black clamps can damage the jump starter and your car. Gooloo’s smart cables have protection, but it’s better to be safe.
- Solution: Double-check the color codes and labels before connecting. Red to positive, black to ground.
- Tip: Say it out loud: “Red to plus, black to block.”
Jumping a Battery That’s Beyond Recovery
A jump starter won’t fix a completely dead or sulfated battery. If the battery is over 5 years old, has visible damage, or won’t hold a charge after a jump, replace it.
- Signs of a bad battery: Slow cranking even after a jump, frequent need for jump-starts, swollen case.
- Solution: After a successful jump, drive for at least 30 minutes to recharge the battery. If it dies again, get it tested or replaced.
Leaving the Unit in a Hot Car
Leaving your Gooloo in a car on a 90°F day can cause overheating and shorten battery life.
- Solution: Store it in the glove compartment or a shaded area. Never leave it in direct sunlight.
Ignoring the Battery Level
Trying to jump-start a large engine with a low-charged Gooloo unit can fail.
- Solution: Check the battery level before use. Charge to at least 70% for best results.
Final Thoughts: Is a Gooloo Jump Starter Worth It?
After months of using my Gooloo jump starter—for actual jumps, camping trips, and even powering my work laptop on the go—I can say it’s one of the most practical tools I’ve owned. The Gooloo jump starter instructions are straightforward, the device is reliable, and the added features make it far more than just a battery booster.
Sure, there are cheaper options out there. But when it comes to safety, durability, and peace of mind, Gooloo stands out. I’ve used mine in freezing winters, scorching summers, and even during a thunderstorm (with the hood up—don’t recommend, but it worked). The smart protection systems give me confidence, and the compact design means it’s always within reach.
Whether you’re a daily commuter, a road-tripper, or just someone who wants to avoid the stress of a dead battery, a Gooloo jump starter is a smart investment. Just remember: keep it charged, follow the Gooloo jump starter instructions carefully, and store it properly. With that, you’ll never be stranded again. And when you do need it—you’ll be glad you took the time to learn how to use it right.
Frequently Asked Questions
How do I use the Gooloo jump starter for the first time?
Begin by fully charging your Gooloo jump starter using the included USB cable or adapter. Once charged, connect the clamps to the battery terminals (red to positive, black to negative) and start your vehicle. Always follow the safety instructions in the manual to avoid sparks or short circuits.
Can I use the Gooloo jump starter on different vehicle types?
Yes, the Gooloo jump starter is designed for cars, trucks, motorcycles, boats, and more, as long as the engine displacement is within the product’s rated capacity. Check the manual for specific compatibility details and Gooloo jump starter instructions for unique engine types.
What should I do if my Gooloo jump starter won’t turn on?
Ensure the device is sufficiently charged—connect it to a power source for at least 4–6 hours. If it still doesn’t power on, try resetting it by holding the power button for 10 seconds or contact Gooloo customer support for troubleshooting.
How long does the Gooloo jump starter hold its charge?
When fully charged and stored properly, the Gooloo jump starter can retain up to 80% of its charge for 3–6 months. For best results, recharge it every 3 months if unused, as noted in the Gooloo jump starter instructions.
Is it safe to leave the Gooloo jump starter connected after starting?
No, disconnect the clamps immediately after the engine starts to prevent potential damage to the jump starter or vehicle electronics. Leaving it connected unnecessarily may drain the battery or trigger safety mechanisms.
How do I maintain my Gooloo jump starter for long-term use?
Store it in a cool, dry place away from direct sunlight and extreme temperatures. Clean the clamps and ports regularly with a dry cloth, and follow the maintenance tips in the Gooloo manual to extend battery life.