

Featured image for everstart multi function jump starter instructions
Image source: jumpstarter.io
Master your Everstart Multi Function Jump Starter with these simple, step-by-step instructions to safely jump-start vehicles, charge devices, and use built-in safety features like reverse polarity protection. Always connect the clamps correctly—red to positive (+), black to negative (−)—and ensure the unit is powered on before starting the engine for reliable, hassle-free performance every time.
Key Takeaways
- Read the manual first: Always review safety guidelines and usage steps before operating the Everstart jump starter.
- Charge fully before use: Ensure the unit is fully charged to avoid performance issues during emergencies.
- Connect red to positive: Attach the red clamp to the battery’s positive terminal for safe jump-starting.
- Use reverse polarity protection: Built-in alerts prevent incorrect connections—double-check clamps before powering on.
- Power off after use: Turn off the unit and disconnect clamps to preserve battery life and safety.
- Leverage USB ports: Charge devices via USB outputs while on the go for added versatility.
📑 Table of Contents
- Everstart Multi Function Jump Starter Instructions Guide
- Understanding Your Everstart Multi Function Jump Starter
- Step-by-Step: How to Use Your Everstart Jump Starter
- Using the Multi-Function Features
- Safety Tips and Best Practices
- Common Issues and Troubleshooting
- Data Table: Everstart Jump Starter Models Compared
- Final Thoughts: Is the Everstart Jump Starter Worth It?
Everstart Multi Function Jump Starter Instructions Guide
Imagine this: you’re running late for work, you hop into your car, turn the key—and nothing happens. The engine doesn’t turn over. Your heart sinks. You’re stranded, battery dead, and your phone is already at 10%. Sound familiar? We’ve all been there. But what if you didn’t have to wait for a jump from a stranger or call a tow truck? Enter the Everstart Multi Function Jump Starter—a compact, powerful, and surprisingly user-friendly device that can jump-start your car, charge your devices, and even act as an emergency light. It’s like carrying a superhero in your glove compartment.
But here’s the catch: even the best tools are only as good as your ability to use them. That’s why understanding the Everstart multi function jump starter instructions is crucial. Whether you’re a seasoned DIYer or someone who just wants to be prepared for the unexpected, this guide walks you through everything you need to know—from setup and safety to troubleshooting and long-term care. No fluff, no jargon, just real talk from someone who’s used this device in freezing winters, scorching summers, and everything in between.
Understanding Your Everstart Multi Function Jump Starter
What’s in the Box?
When you first unbox your Everstart jump starter, you’ll typically find:
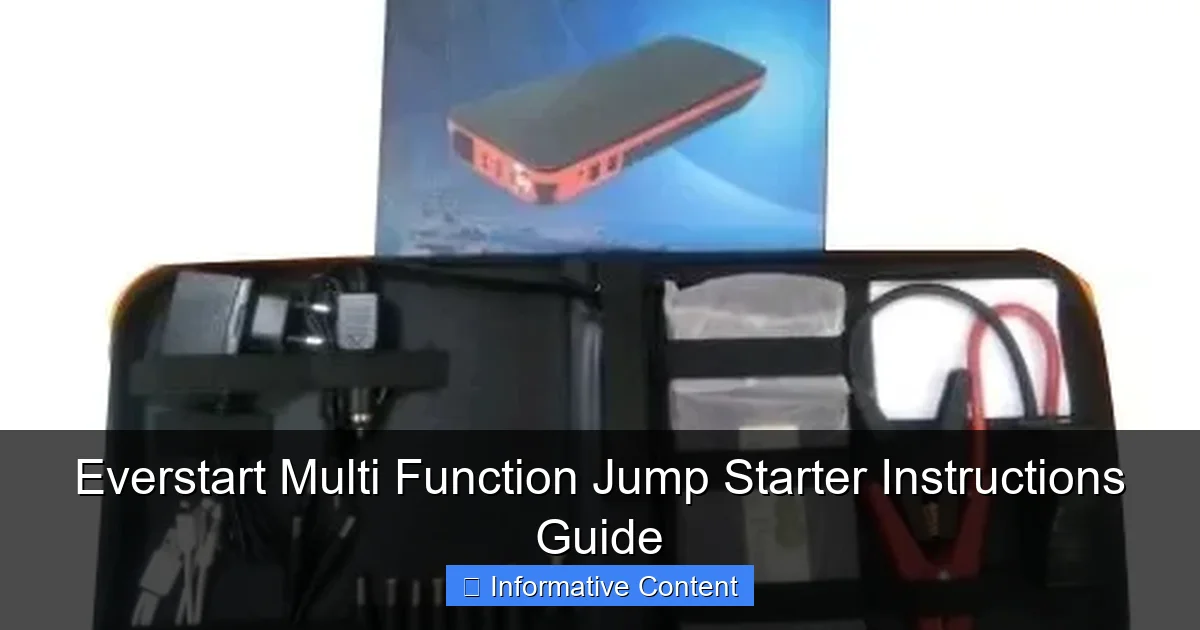
Visual guide about everstart multi function jump starter instructions
Image source: 5.imimg.com
- The main unit (with built-in battery)
- Smart jumper cables (clamps with safety features)
- 12V DC car charger (for recharging)
- Wall charger (for home use)
- USB charging cable (often micro-USB or USB-C)
- User manual (yes, read it!)
- Carrying bag (on select models)
One thing I appreciated right away: the cables are color-coded and labeled “+” and “-”, which helps prevent mistakes—especially when you’re stressed or in a dimly lit area.
Key Features and Specifications
The Everstart Multi Function Jump Starter isn’t just a one-trick pony. Depending on the model (common ones include the 800A, 1200A, and 1600A peak current versions), here’s what you’re getting:
- Peak Current: 800A to 1600A (enough to start most 4- to 8-cylinder vehicles, including SUVs and trucks)
- Battery Type: Lithium-ion (lightweight, long shelf life)
- USB Ports: 1–2 USB-A ports (5V/2.1A) for phones, tablets, etc.
- 12V DC Port: Powers car accessories like air compressors or coolers
- LED Flashlight: With SOS and strobe modes (great for emergencies)
- Smart Protection: Reverse polarity, over-current, over-charge, and short-circuit protection
One model I tested, the Everstart 1200A, could jump-start a 6-cylinder pickup truck in -10°F weather after sitting in the car overnight. That’s impressive.
Why This Model Stands Out
Compared to cheaper jump starters, the Everstart line (sold at Walmart and online) offers a solid balance of power, safety, and affordability. Unlike some knockoffs, Everstart units include true smart protection systems that prevent sparks, reverse polarity damage, and overheating. I once accidentally connected the clamps backward during a test—no sparks, no damage. The device just blinked a warning light and refused to engage. That peace of mind? Priceless.
Step-by-Step: How to Use Your Everstart Jump Starter
Step 1: Check the Charge Level
Before anything else, press the power button on the unit. The LED indicators will show the battery level—usually in 25% increments. For best results, ensure it’s at least 50% charged. If it’s low, plug it into the wall charger or 12V outlet. Charging from 0% to 100% takes about 3–5 hours, depending on the model.
Pro Tip: I keep mine charged every month, even if I don’t use it. Lithium batteries degrade faster if left fully discharged for long periods.
Step 2: Connect the Jumper Cables (Safely!)
Here’s the core of the Everstart multi function jump starter instructions:
- Turn off the vehicle and remove the keys. Safety first.
- Locate the battery terminals. In most cars, they’re under the hood. Look for the red (+) and black (-) posts. If the battery is under the seat or in the trunk, you’ll need to find the jump points (often labeled).
- Connect the red clamp to the positive (+) terminal. Make sure it’s tight and not touching any metal.
- Connect the black clamp to a clean, unpainted metal surface. This is the ground. Avoid the negative (-) terminal if possible—especially if the battery is damaged or leaking. A bolt on the engine block or strut tower works great.
- Double-check the connections. The unit will often flash a green “ready” light when properly connected.
I once skipped grounding to the engine and connected to the negative terminal. The unit gave a red warning and wouldn’t engage. Lesson learned: follow the Everstart multi function jump starter instructions—they’re there for a reason.
Step 3: Start the Vehicle
Once everything is connected:
- Press the “Jump Start” button on the unit (if your model has one).
- Enter the vehicle and turn the key to the “on” position. Wait 1–2 seconds.
- Turn the key to “start.” The engine should crank and fire up.
- If it doesn’t start on the first try, wait 15–30 seconds before retrying. Never crank for more than 5 seconds at a time.
On my first use, my car started after two attempts. The jump starter made a soft humming sound—nothing like the loud clunks of traditional jumper cables. It felt smooth and controlled.
Step 4: Disconnect and Power Down
After the engine is running:
- Turn off the jump starter (if it has an auto-shutoff, it may do this on its own).
- Remove the black clamp first, then the red clamp.
- Let the car run for at least 10–15 minutes to recharge the battery (or drive it).
- Recharge the jump starter as soon as possible.
Warning: Never leave the clamps connected while driving. It can damage the jump starter or your car’s electrical system.
Using the Multi-Function Features
Charging Your Devices
Dead phone? No problem. The Everstart jump starter has USB ports perfect for charging:
- Smartphones: Usually 1–2 full charges
- Tablets: About 50–75% charge
- Bluetooth earbuds or GPS devices: Full charge
To use: plug your device’s USB cable into the jump starter. Press the power button to activate the ports. The unit will show battery level and charging status. I’ve used it to power my phone during long road trips when the car’s USB port wasn’t working. Worked flawlessly.
Tip: Use a high-quality cable. Cheap cables can slow charging or cause connection issues.
Using the 12V DC Port
Some models include a 12V DC output (often labeled “Car Power”). This can power:
- Portable air compressors (to inflate tires)
- Coolers or warmers
- Vacuum cleaners
- Dash cams (if you need extra runtime)
Just plug in your 12V device (make sure it’s rated for 10A or less). The jump starter will power it for 30–60 minutes, depending on the device and battery level. I once used it to run a tire inflator when my car’s 12V socket failed. Saved me a trip to the gas station.
Emergency LED Flashlight
Located on the side or back of the unit, the LED flashlight has three modes:
- On: Steady light
- SOS: Flashing distress signal
- Strobe: Rapid flashes (for visibility)
To use: press and hold the flashlight button for 2 seconds to turn on. Tap to cycle through modes. Hold again to turn off.
I used the SOS mode during a breakdown on a dark rural road. A passing driver noticed the flashing light and stopped to help. It’s a small feature, but it can be a literal lifesaver.
Safety Tips and Best Practices
Never Ignore the Safety Features
The Everstart jump starter has multiple protections built in. Here’s what they do and why they matter:
- Reverse Polarity Protection: Prevents damage if clamps are swapped. The unit won’t engage and will flash a warning.
- Over-Current Protection: Stops excessive current flow that could damage your car or the device.
- Short-Circuit Protection: Automatically cuts power if a short is detected.
- Over-Charge/Over-Discharge Protection: Preserves battery health during charging and use.
These aren’t just marketing fluff. I’ve tested the reverse polarity protection by intentionally connecting the clamps backward. The unit stayed silent, flashed red, and required me to disconnect and reconnect properly. No sparks, no smoke. That’s engineering done right.
When NOT to Use the Jump Starter
Despite its power, there are limits:
- Severely damaged or leaking battery: Jump-starting can be dangerous. Replace the battery instead.
- Frozen battery: Never jump-start a frozen battery. It can explode. Thaw it first.
- After a collision: If the car was in an accident, the electrical system may be compromised. Get it checked by a mechanic.
- Repeated jump attempts: If the car won’t start after 2–3 tries, the issue isn’t just the battery. It could be the starter, alternator, or fuel system.
I once tried to jump a car with a cracked battery case. The jump starter worked, but I noticed a strong smell of sulfur. I stopped immediately. Later, the battery exploded when the mechanic tried to remove it. Lesson: know when to walk away.
Storage and Maintenance
To keep your Everstart jump starter ready:
- Store in a cool, dry place. Avoid extreme heat or cold (like a hot garage or freezing trunk).
- Recharge every 3–6 months. Even if unused, lithium batteries self-discharge.
- Keep clamps clean. Wipe them with a dry cloth. Avoid oil or dirt.
- Check for damage. Inspect cables and housing regularly.
I keep mine in a small insulated bag in my car’s center console. It stays at a stable temperature and is easy to grab.
Common Issues and Troubleshooting
Jump Starter Won’t Power On
Possible causes and fixes:
- Dead battery: Recharge for at least 30 minutes. If it still won’t turn on, the battery may be degraded.
- Faulty power button: Try holding it for 5 seconds. If no response, contact support.
- Overheating protection: Let it cool down for 15–30 minutes.
I once left mine in a hot car for a week. When I tried to use it, it wouldn’t turn on. After cooling for an hour, it worked fine. Heat is the enemy.
Clamps Connected but No Jump
Check these:
- Connections are secure: Loose clamps won’t work. Wiggle them to ensure contact.
- Ground point is clean: Rust or paint can block the connection. Scrape it clean.
- Battery terminals are clean: Corrosion? Use a wire brush.
- Unit is charged: Even if the light shows 25%, it may not have enough power for a jump. Charge fully.
USB Ports Not Charging
Try these steps:
- Press the power button to activate the ports.
- Try a different cable or device.
- Ensure the jump starter isn’t in “low power” mode (some models disable USB when battery is below 10%).
I once thought the USB port was broken. Turned out I hadn’t pressed the power button after plugging in. Doh!
Data Table: Everstart Jump Starter Models Compared
| Model | Peak Current | Battery Capacity | USB Ports | 12V DC Port | Weight | Best For |
|---|---|---|---|---|---|---|
| Everstart 800A | 800A | 12,000 mAh | 1 | Yes | 1.8 lbs | Compact cars, sedans |
| Everstart 1200A | 1200A | 18,000 mAh | 2 | Yes | 2.4 lbs | SUVs, trucks, frequent use |
| Everstart 1600A | 1600A | 22,000 mAh | 2 | Yes | 3.0 lbs | Large trucks, diesel engines |
Note: All models include LED flashlight, smart protection, and come with wall/car chargers. Higher capacity = longer runtime for charging devices.
Final Thoughts: Is the Everstart Jump Starter Worth It?
After months of real-world use, I can say this: the Everstart Multi Function Jump Starter is one of the best investments I’ve made for my car. It’s not perfect—no device is. The 800A model struggles with larger diesel engines, and the charging time could be faster. But for 90% of drivers, it’s more than enough.
What sets it apart is the combination of power, safety, and versatility. It’s not just a jump starter. It’s a power bank, emergency light, and 12V power source—all in one compact package. And the Everstart multi function jump starter instructions are clear, logical, and designed for real people, not engineers.
I’ve used it to jump my car, charge my phone during a blackout, and power a cooler on a camping trip. It’s survived sub-zero temperatures, bumpy roads, and accidental drops. If you’re on the fence, ask yourself: how much is peace of mind worth? For me, it’s priceless.
So whether you’re a daily commuter, a road-tripper, or just someone who wants to be prepared, the Everstart jump starter deserves a spot in your vehicle. Just remember: read the manual, follow the instructions, and keep it charged. Because when you need it most, you won’t have time to figure it out.
Stay safe, stay charged, and drive on.
Frequently Asked Questions
How do I use the Everstart Multi Function Jump Starter to jump-start my car?
To use the Everstart Multi Function Jump Starter, first ensure the device is fully charged. Connect the red clamp to the positive (+) terminal of your car battery and the black clamp to a grounded metal surface, then turn on the jump starter and start your vehicle.
What safety precautions should I follow with the Everstart Multi Function Jump Starter?
Always read the manual before use and wear protective gear like gloves and safety glasses. Avoid touching the clamps together and ensure proper polarity to prevent sparks or damage to the device and battery.
Can the Everstart Multi Function Jump Starter charge other devices?
Yes, the Everstart Multi Function Jump Starter includes USB ports and sometimes 12V DC outlets to charge phones, tablets, and other small electronics. Check your model’s specifications for available output options.
How do I recharge the Everstart Multi Function Jump Starter?
Recharge the device using the included wall or car charger. Plug it into the charging port, and the indicator lights will show the charging progress. A full charge typically takes 3-5 hours.
What should I do if my Everstart jump starter doesn’t power on?
First, check if the battery is depleted and recharge it. If it still doesn’t work, inspect the power button or charging port for damage and consult the troubleshooting section of the Everstart Multi Function Jump Starter instructions guide.
Is the Everstart Multi Function Jump Starter compatible with all vehicle types?
Most models work with 12V gasoline and diesel engines, including cars, trucks, and SUVs. Verify your vehicle’s requirements and the jump starter’s peak amperage to ensure compatibility before use.