
Featured image for duralast jump starter instructions
Image source: everstartjumpstarter.com
Always connect the Duralast jump starter to a compatible 12V vehicle battery with the correct polarity—red to positive (+) and black to negative (−)—to prevent damage or injury. Follow the included duralast jump starter instructions closely, ensuring the unit is powered off during connection and the cables are securely clipped before turning it on. This simple process revives dead batteries safely, but skipping steps can lead to sparks, battery damage, or personal harm.
Key Takeaways
- Read the manual first: Always review Duralast jump starter instructions before use to avoid damage or injury.
- Inspect cables and clamps: Check for frays or corrosion to ensure safe, effective connections.
- Charge fully before use: Ensure the unit is fully charged to deliver maximum jump-starting power.
- Connect red to positive: Attach red clamp to battery’s positive terminal to prevent short circuits.
- Never reverse polarity: Reversing clamps can damage electronics and void the warranty.
- Use in dry conditions: Avoid wet or damp areas to reduce risk of electric shock.
📑 Table of Contents
- Why You Need a Duralast Jump Starter (And Why It’s Worth the Investment)
- Getting to Know Your Duralast Jump Starter
- Step-by-Step Duralast Jump Starter Instructions
- Troubleshooting Common Jump Start Issues
- Maintaining Your Duralast Jump Starter for Longevity
- Beyond Jump Starting: Other Useful Features
- Final Thoughts: Confidence Through Preparation
Why You Need a Duralast Jump Starter (And Why It’s Worth the Investment)
Imagine this: you’re running late for work, the kids need to get to school, and as you turn the key—nothing. Just that dreaded clicking sound. Your car battery is dead, and your morning just went from manageable to mayhem. It’s moments like these that make a Duralast jump starter feel like a superhero in your trunk. I’ve been there—stuck in a grocery store parking lot with a dead battery and no one around to help. That’s when I realized: a portable jump starter isn’t just a nice-to-have; it’s a must-have for any driver.
Duralast jump starters have become a trusted name in the automotive world, known for their reliability, safety features, and ease of use. But here’s the catch: even the best jump starter won’t help if you don’t know how to use it properly. Missteps during a jump start can damage your vehicle, ruin the jump starter, or even cause personal injury. That’s why understanding Duralast jump starter instructions is crucial. This guide will walk you through everything—from unboxing your unit to safely jump-starting your car, maintaining the device, and avoiding common pitfalls. Whether you’re a first-time user or just need a refresher, consider this your go-to resource.
Getting to Know Your Duralast Jump Starter
Before you even think about using your Duralast jump starter, it’s important to get familiar with what you’ve got in your hands. Not all Duralast models are the same, but they share core features that make them stand out. Let’s break down what you should look for and understand.
Visual guide about duralast jump starter instructions
Image source: content.propertyroom.com
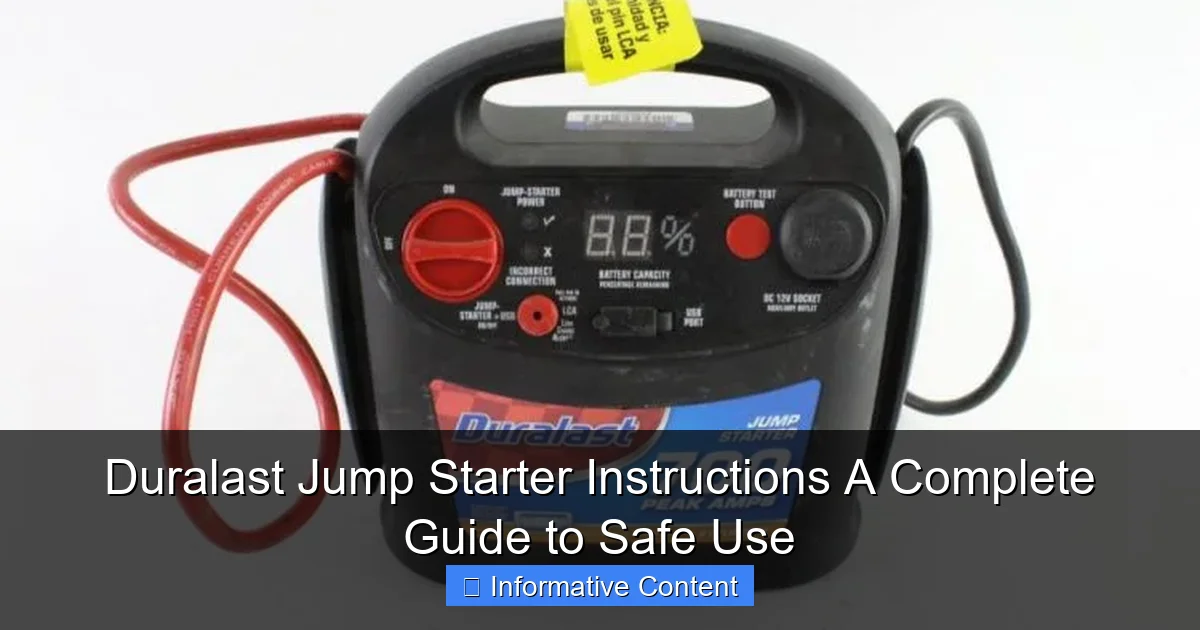
Understanding the Key Components
When you open the box, you’ll typically find:
- The main jump starter unit (usually compact and lightweight)
- Smart jumper cables with clamps
- USB charging cables (often Type-C or Micro-USB)
- A wall charger and/or car charger adapter
- User manual and safety guide
- A carrying case (on higher-end models)
The unit itself usually has an LED display showing battery percentage, voltage, and sometimes diagnostic indicators. The jumper cables are “smart” because they include built-in protection—like reverse polarity, over-voltage, and short-circuit prevention. This means if you accidentally connect the clamps backward, the device won’t spark or blow up. (Yes, that’s happened to me before with older models—not fun!)
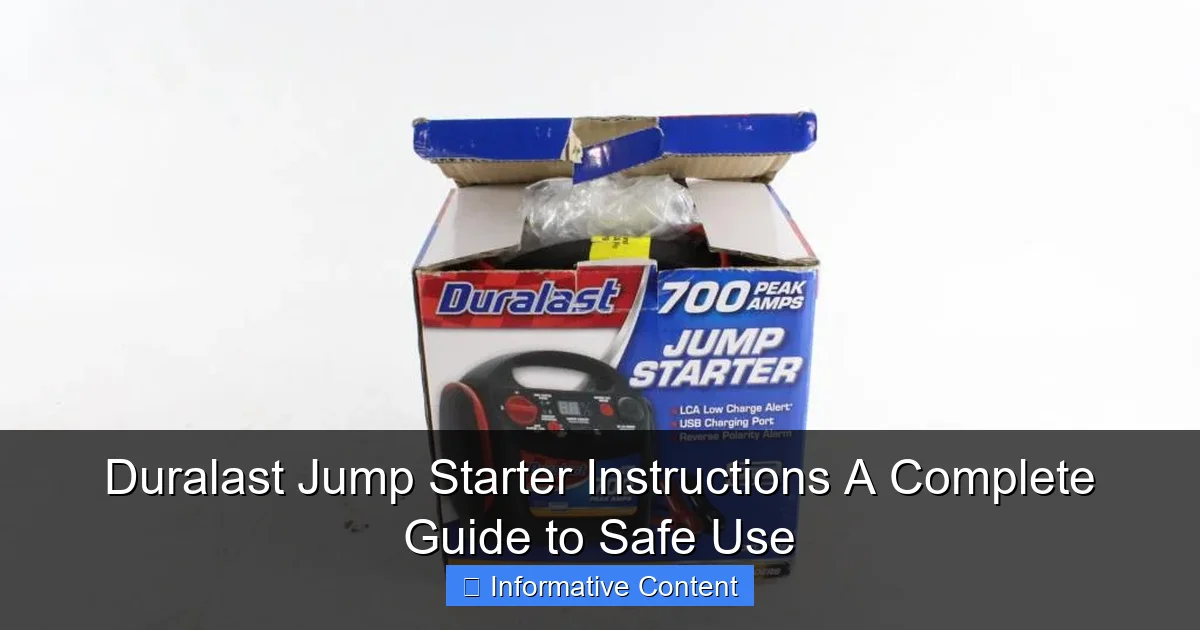
Model Differences: What to Look For
Duralast offers several models, such as the Duralast 1200A, Duralast 2000A, and the Duralast 3000A. The number refers to peak amperage—the higher the number, the more powerful the unit. Here’s a quick breakdown:
- 1200A: Ideal for compact cars, sedans, and small SUVs. Can jump-start most 4- to 6-cylinder engines.
- 2000A: Great for mid-size SUVs, trucks, and larger engines. Handles 8-cylinder engines with ease.
- 3000A: Best for heavy-duty trucks, diesel engines, and commercial vehicles. Also useful for jump-starting multiple vehicles in a row.
Pro tip: Match your jump starter to your vehicle’s engine size. Using a 1200A on a diesel truck might not work—and could drain your jump starter fast. Always check your vehicle’s manual or Duralast’s compatibility chart before buying.
Smart Features You Might Not Know About
Modern Duralast jump starters aren’t just for jump-starting. They often come with:
- USB ports: Charge your phone, tablet, or GPS while on the go.
- LED flashlight: Handy during nighttime emergencies or roadside repairs.
- Digital voltmeter: Lets you check your car battery’s voltage without a separate tool.
- Jump start counter: Some models track how many times you’ve used it—great for maintenance reminders.
I once used my Duralast’s flashlight to change a flat tire at midnight. The built-in light was brighter than my phone’s flashlight, and it saved me from fumbling in the dark. These extra features make the jump starter a true multi-tool for emergencies.
Step-by-Step Duralast Jump Starter Instructions
Now that you know your device, let’s get to the heart of the matter: how to use it safely and effectively. Follow these Duralast jump starter instructions carefully to avoid mistakes and ensure a smooth jump start.
Step 1: Safety First – Precautions Before Starting
Before touching any cables or clamps, take a moment to assess the situation:
- Park on a flat surface and turn off the engine (if it’s running).
- Engage the parking brake and put the vehicle in park (automatic) or neutral (manual).
- Turn off all electronics—radio, AC, headlights, etc.
- Wear safety glasses if available. Sparks can happen, even with smart clamps.
- Keep the jump starter away from water and wet surfaces.
One time, I tried jump-starting in a light drizzle. The jump starter worked, but I noticed moisture near the clamps afterward. Not ideal. Always try to work in a dry area if possible.
Step 2: Power On and Check Battery Level
Turn on your Duralast jump starter. Most models have a power button on the side or top. The LED screen should light up and show the battery percentage.
- If it’s below 50%, charge it first. A low battery won’t deliver enough power.
- Some models have a “boost” mode for low-battery situations, but it’s not a long-term fix.
Tip: Always charge your jump starter after use. Even if it’s 80% full, top it off. Lithium batteries perform best when kept between 20% and 80%, but for emergency use, full charge is best.
Step 3: Connect the Jumper Cables (Correct Order Matters!)
This is where many people go wrong. The order of connection is critical for safety and effectiveness.
- Connect the red (positive) clamp to the positive terminal on your car battery. Look for a “+” sign or red plastic cover.
- Connect the black (negative) clamp to a metal ground point on the engine block or chassis—not the negative terminal. This reduces sparking risk near the battery.
- Ensure the clamps are secure and not touching each other.
- Plug the cable connector into the jump starter’s port (usually labeled “JUMP” or “12V”).
Wait—don’t turn the key yet! The jump starter needs a few seconds to detect the connection. Some models beep or show a “Ready” light.
Step 4: Start the Engine
Now you’re ready to start the car:
- Turn the ignition key or press the start button.
- If the engine doesn’t start on the first try, wait 15–30 seconds and try again. Don’t crank continuously.
- Most Duralast models allow 3–5 attempts before needing a rest.
Once the engine starts, let it run for at least 1–2 minutes to stabilize. The alternator will start charging the battery.
Step 5: Disconnect in Reverse Order
Once the car is running, disconnect the jump starter—but in reverse order:
- Unplug the cable from the jump starter.
- Remove the black clamp first (from the ground point).
- Remove the red clamp last (from the positive terminal).
Never remove the red clamp first—it can cause a spark near the battery, which is dangerous.
Step 6: Power Off and Store
Turn off the jump starter and store it in a dry, cool place. If it’s been used heavily, let it cool for 10–15 minutes before charging.
Real-world example: I once helped a neighbor jump-start his truck. We followed these steps exactly, and it started on the second try. The key was grounding the black clamp to the engine block, not the battery. That small detail made all the difference.
Troubleshooting Common Jump Start Issues
Even with perfect Duralast jump starter instructions, things can go wrong. Here are the most common issues and how to fix them.
Jump Starter Won’t Power On
- Cause: Dead internal battery.
- Fix: Plug it into a wall charger for at least 30 minutes. Some models need a “reset” by holding the power button for 10 seconds.
- Pro tip: If it’s been stored for months, it may have gone into deep sleep mode. A full charge usually wakes it up.
No Spark or “Low Battery” Warning
- Cause: Jump starter battery is too low, or the connection is poor.
- Fix: Recharge the jump starter fully. Clean the battery terminals with a wire brush. Ensure clamps are tight and on bare metal.
- Note: Corroded terminals are a common culprit. I once spent 20 minutes troubleshooting, only to realize the battery was coated in white powder—classic corrosion.
Engine Cranks but Won’t Start
- Cause: The battery may be so dead that the jump starter can’t deliver enough voltage. Or the issue isn’t the battery at all—could be fuel, spark plugs, or a bad starter.
- Fix: Try 2–3 jump attempts with 30 seconds between each. If it still won’t start, the problem may be deeper. Call a mechanic.
- Tip: Listen for the sound. A healthy crank is strong and steady. A weak, slow crank means the battery or starter is still the issue.
Reverse Polarity Alarm (Beeping)
- Cause: Clamps are connected backward.
- Fix: Turn off the jump starter, disconnect both clamps, and reconnect correctly. The alarm should stop.
- Good news: Duralast’s smart clamps prevent damage, but don’t make a habit of it!
Overheating or Smell of Burning
- Cause: Overuse or a short circuit.
- Fix: Turn it off immediately. Let it cool for 20–30 minutes. Do not use again until inspected.
- Warning: If you smell plastic or burning, stop using it and contact Duralast support. This could be a safety hazard.
One time, I left my jump starter in the trunk during a 100°F summer day. When I used it, it overheated and shut off. Lesson learned: store it in the cabin or a shaded area.
Maintaining Your Duralast Jump Starter for Longevity
A jump starter is an investment. With proper care, it can last 3–5 years or more. Here’s how to keep it in top shape.
Regular Charging: The #1 Rule
- Charge every 3–6 months, even if unused.
- After every use, recharge to 100%.
- Use the included charger. Avoid third-party fast chargers—they can damage the battery.
Think of it like a phone battery. Lithium-ion degrades when left fully drained or constantly at 100%. But for emergencies, full charge is best.
Cleaning and Storage Tips
- Wipe the unit with a dry, soft cloth. Avoid water or cleaning sprays.
- Clean clamps with a wire brush or sandpaper to remove corrosion.
- Store in a cool, dry place. Avoid extreme heat or cold (like a garage in winter).
- Use the carrying case if available—it protects against dust and impacts.
Inspect Cables and Clamps Regularly
- Check for frayed wires, loose connections, or bent clamps.
- If the cable insulation is cracked, replace it immediately.
- Test the flashlight and USB ports periodically to ensure all functions work.
Firmware Updates (Yes, Really!)
Some newer Duralast models support firmware updates via USB. Check the Duralast website for your model. Updates can improve safety features and performance.
I once ignored a firmware update for my 2020 model. A few months later, I had an issue with the voltmeter. A quick update fixed it—and added a new “battery health” feature. Worth the 5 minutes!
Beyond Jump Starting: Other Useful Features
Your Duralast jump starter is more than just a battery booster. Here are some underused features that can save your day.
Powering Devices on the Go
- Use the USB ports to charge your phone during long trips or emergencies.
- Some models have a 12V outlet (like a cigarette lighter) to power small devices.
- Great for camping, road trips, or power outages.
Emergency Flashlight Modes
- Most Duralast jump starters have a flashlight with steady, strobe, and SOS modes.
- Use strobe or SOS to signal for help on the side of the road.
- I used the SOS mode once when my car broke down on a dark highway. A passing motorist noticed the flashing light and called for help.
Battery Voltage Testing
- Use the voltmeter to check your car battery’s health.
- A healthy battery reads 12.6V when off and 13.5–14.5V when running.
- If it’s below 12.4V, the battery may need replacement.
Jump-Starting Other Vehicles
- Your Duralast can jump-start motorcycles, ATVs, boats, and even lawnmowers (if within amp limits).
- Always check the engine size and voltage requirements.
- Pro tip: Keep it in your garage for small engine emergencies.
| Feature | Use Case | Model Compatibility |
|---|---|---|
| USB Charging | Phone, tablet, GPS | All models |
| 12V Outlet | Portable cooler, inflator | 2000A and 3000A |
| LED Flashlight | Nighttime emergencies | All models |
| Voltmeter | Battery health check | 2000A and 3000A |
| Reverse Polarity Protection | Safe clamps connection | All models |
Final Thoughts: Confidence Through Preparation
Owning a Duralast jump starter isn’t just about having a tool—it’s about having peace of mind. I’ve used mine more times than I can count, from helping stranded friends to saving my own skin during a cross-country move. But the real value comes from knowing how to use it correctly. Following these Duralast jump starter instructions isn’t just about getting your car started; it’s about doing it safely, efficiently, and without stress.
Remember, preparation is everything. Keep your jump starter charged, store it properly, and practice the steps at home—maybe even simulate a jump start with your car off. That way, when the real emergency hits, you’ll be ready. And don’t forget: these devices are versatile. From charging your phone to lighting your way, your Duralast is a true roadside companion.
So next time you hear that dreaded click, don’t panic. Grab your jump starter, follow the steps, and get back on the road. Because being prepared isn’t just smart—it’s empowering. And honestly, there’s no better feeling than solving a problem on your own, especially when it means getting home on time, picking up the kids, or making that important meeting. That’s the real power of a well-used Duralast jump starter.
Frequently Asked Questions
How do I use my Duralast jump starter for the first time?
Begin by fully charging your Duralast jump starter using the included AC or DC adapter. Connect the clamps to the battery terminals (red to positive, black to negative) and turn on the unit to deliver a jump—no tools required.
What safety precautions should I follow with Duralast jump starter instructions?
Always read the manual and wear safety goggles. Ensure the jump starter is off before connecting clamps, and avoid touching metal parts to prevent sparks or short circuits.
Can I use a Duralast jump starter on a 12V and 24V vehicle?
Most Duralast models are designed for 12V systems only—check your unit’s label. Using it on an incompatible voltage may damage the jump starter or vehicle.
Why won’t my Duralast jump starter hold a charge?
This could be due to prolonged storage without use or a faulty battery. Recharge it fully and test again; if the issue persists, contact Duralast support for troubleshooting.
How long does a Duralast jump starter take to fully charge?
Charging time varies by model but typically takes 3–5 hours. Refer to your Duralast jump starter instructions for exact times and indicator light meanings.
Is it safe to leave the Duralast jump starter plugged in overnight?
Yes, most Duralast units have overcharge protection. However, always follow the manufacturer’s guidelines in the Duralast jump starter instructions to prolong battery life.