
Featured image for duralast 600 amp jump starter instructions
Image source: 946e583539399c301dc7-100ffa5b52865b8ec92e09e9de9f4d02.ssl.cf2.rackcdn.com
The Duralast 600 Amp Jump Starter delivers reliable, quick power boosts for dead batteries—when used correctly. Follow the step-by-step instructions to safely connect the clamps, power on the unit, and jump-start your vehicle in minutes. Always prioritize safety by reading the manual and ensuring proper polarity to avoid damage or injury.
Key Takeaways
- Read the manual first: Always review safety guidelines before using the Duralast 600 Amp Jump Starter.
- Check battery levels: Ensure the jump starter is fully charged for maximum performance.
- Connect clamps correctly: Attach red to positive (+) and black to negative (-) terminals first.
- Power on after connection: Turn on the device only after clamps are securely attached.
- Wait before starting: Allow 30 seconds after connection for voltage stabilization.
- Disconnect safely: Remove clamps in reverse order after engine starts.
📑 Table of Contents
- Why a Reliable Jump Starter Is a Must-Have for Every Driver
- Getting to Know Your Duralast 600 Amp Jump Starter
- Step-by-Step Duralast 600 Amp Jump Starter Instructions
- Maximizing Safety and Avoiding Common Mistakes
- Beyond Jump-Starting: Other Useful Features
- Maintenance, Storage, and Long-Term Care
- Final Thoughts: Why the Duralast 600 Amp Is Worth It
Why a Reliable Jump Starter Is a Must-Have for Every Driver
Let’s face it—few things are more frustrating than turning the key in your car and hearing that dreaded click…click…click of a dead battery. Whether you left the dome light on overnight, your battery is aging, or you’ve been through a long winter with short trips, a dead battery can strike at the worst possible time. That’s why having a dependable jump starter like the Duralast 600 Amp Jump Starter in your trunk isn’t just a convenience—it’s peace of mind. I remember one rainy night, miles from a gas station, when my car refused to start after a quick grocery run. I had jumper cables, but no one stopped to help. That’s when I realized: I needed a self-contained solution. Enter the Duralast 600 Amp—a compact, powerful, and surprisingly easy-to-use device that’s now a permanent part of my emergency kit.
Unlike traditional jumper cables that require a second vehicle, the Duralast 600 Amp Jump Starter works independently. It’s like carrying a spare battery in a box—one that can jump-start most gasoline and diesel engines up to 6.5L. Whether you drive a compact sedan, a full-size truck, or even a small boat, this jump starter can give you that quick power boost when you need it most. But here’s the catch: like any tool, it works best when you know how to use it properly. That’s why I’ve put together this Duralast 600 Amp Jump Starter instructions guide—to help you get the most out of this handy device, avoid common mistakes, and stay safe during emergencies.
Getting to Know Your Duralast 600 Amp Jump Starter
Unboxing and First Impressions
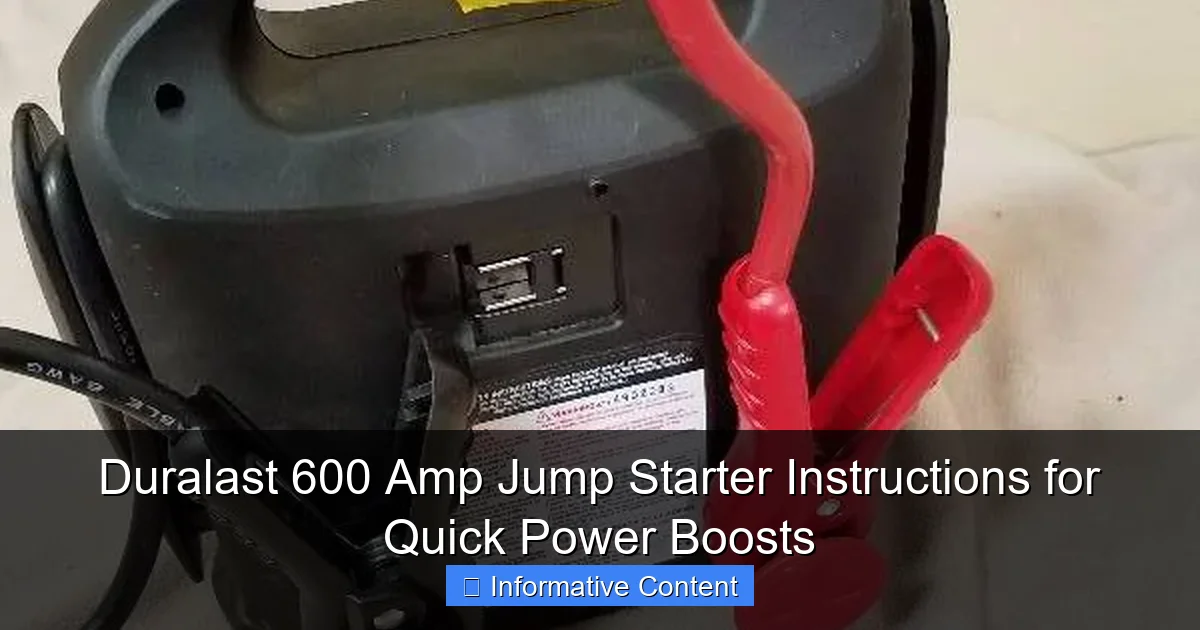
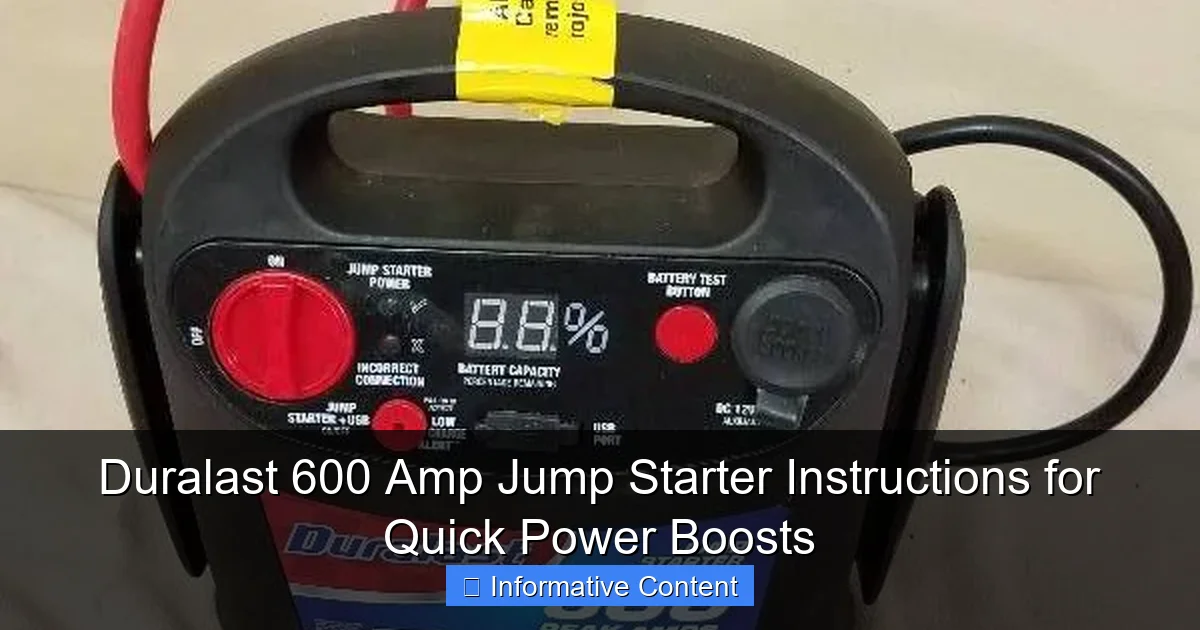
When you open the box, you’ll find the jump starter unit, smart battery clamps, a wall charger, a 12V car charger, and a user manual. The unit itself is surprisingly compact—about the size of a large hardcover book—and weighs around 3 pounds. It feels solid, with a rugged plastic shell that can handle a few bumps in the trunk. The front panel features an LED flashlight, a digital voltage display, and a power button. The clamps are color-coded (red for positive, black for negative) and have a rubberized grip for better handling.
Visual guide about duralast 600 amp jump starter instructions
Image source: 946e583539399c301dc7-100ffa5b52865b8ec92e09e9de9f4d02.ssl.cf2.rackcdn.com
One thing I appreciated right away: the clamps are “smart.” That means they have built-in safety features like reverse polarity protection, short-circuit protection, and spark-proof technology. This is a big deal, especially if you’re new to jump-starting. I’ve heard horror stories of sparks flying and batteries smoking because someone connected the cables backward. With the Duralast 600 Amp, that risk is drastically reduced.
Key Features and Specifications
Before you jump into using it, it’s helpful to understand what this device can do. Here’s a quick rundown of the core specs:
- Peak Current: 600 Amps (ideal for 4–6 cylinder engines, and some V8s under 6.5L)
- Battery Type: Lithium-ion (longer shelf life, lighter than lead-acid)
- Capacity: 18,000 mAh (enough for multiple jump attempts)
- USB Ports: 2 (5V/2.1A and 5V/1A) for charging phones, tablets, etc.
- Flashlight: 3 modes (steady, SOS, strobe)
- Charging Time: ~3 hours via wall charger, ~5 hours via car charger
- Operating Temperature: -4°F to 140°F (-20°C to 60°C)
One standout feature? The digital voltage display. It shows the battery’s current charge level in real time. This is super helpful when you’re not sure if it’s ready to jump-start a car. For example, if you see “12.6V,” it’s fully charged. Below “10V,” and it might struggle to start a larger engine. I’ve used mine to check my car’s battery health too—just connect the clamps and press the voltage test button.
Who Is This Jump Starter For?
The Duralast 600 Amp is perfect for:
- Daily drivers who want a backup plan
- Frequent road-trippers or RV owners
- People living in cold climates (lithium-ion performs better in cold than lead-acid)
- Boat or ATV owners (it’s water-resistant, not waterproof)
- Anyone who wants to avoid the hassle of flagging down another car
That said, if you drive a large diesel truck (over 6.5L) or a commercial vehicle, you might need a higher-amp model. But for most passenger vehicles, 600 amps is more than enough.
Step-by-Step Duralast 600 Amp Jump Starter Instructions
Step 1: Charge the Jump Starter Fully
Before you need it, make sure your Duralast 600 Amp is fully charged. Plug it into the wall charger or 12V car outlet. The LED indicator will glow red while charging and turn green when complete. I recommend charging it every 3–6 months, even if you haven’t used it. Lithium-ion batteries lose charge over time, and you don’t want to discover it’s dead when you’re stranded.
Pro Tip: Keep the jump starter in a cool, dry place. Avoid leaving it in a hot trunk all summer or a freezing garage all winter. Extreme temperatures degrade battery performance.
Step 2: Park Safely and Prepare the Vehicle
When your car won’t start, safety first. Pull over to a safe location, turn on your hazard lights, and set the parking brake. Make sure the ignition is off and all lights are off. Open the hood and locate the battery. If the battery is corroded or leaking, do not attempt to jump-start. That’s a sign it needs replacement.
Real-World Example: Last winter, my friend tried to jump-start his SUV in a snowy parking lot. He didn’t realize the battery terminals were covered in ice and grime. When he connected the clamps, a spark ignited some fumes—luckily, no one was hurt, but it scared him enough to learn his lesson. Now he always wipes the terminals with a clean cloth first.
Step 3: Connect the Smart Clamps (Order Matters!)
Here’s the critical part—follow this order exactly:
- Connect the red (positive) clamp to the positive (+) terminal on the dead battery.
- Connect the black (negative) clamp to an unpainted metal surface on the engine block or frame (not the negative battery terminal). This grounds the circuit and reduces sparking.
The smart clamps have a safety feature: if they detect reverse polarity (e.g., red to negative), the unit will beep and flash red. Simply unplug and reconnect correctly. No sparks, no damage.
Step 4: Power On and Wait
Press the power button on the jump starter. The LED display will light up. Wait 30 seconds to 1 minute. This gives the jump starter time to stabilize and deliver a strong surge when you start the engine. During this time, the clamps may feel warm—that’s normal.
Step 5: Start the Engine
Now, get in the car and turn the key. The engine should crank and start within a few seconds. If it doesn’t start on the first try, wait 30 seconds and try again. Do not crank continuously for more than 5 seconds—this can overheat the starter motor.
Pro Tip: If the engine doesn’t start after 2–3 attempts, stop and check the connections. Loose clamps are a common culprit. Also, make sure the jump starter still has charge. If the voltage display shows below 10V, recharge it first.
Step 6: Disconnect and Store
Once the engine is running, disconnect in reverse order:
- Remove the black (negative) clamp first.
- Remove the red (positive) clamp.
- Turn off the jump starter (if it doesn’t auto-shutoff).
Let the engine run for at least 15–20 minutes to recharge the car battery. If possible, take a longer drive. Avoid turning off the engine right away—it needs time to build up charge.
Maximizing Safety and Avoiding Common Mistakes
Why Safety Features Matter
The Duralast 600 Amp isn’t just powerful—it’s designed with safety in mind. The smart clamps prevent:
- Reverse Polarity: Connecting clamps backward won’t damage your car or the jump starter.
- Short Circuits: The clamps won’t spark if they touch each other.
- Overload Protection: The unit shuts down if it detects excessive current draw.
- Overheat Protection: It won’t operate if internal temps are too high.
I once accidentally left the clamps touching while the jump starter was on. Instead of a dangerous spark, the unit just beeped and shut off. That’s the kind of peace of mind you can’t put a price on.
Common Mistakes (And How to Avoid Them)
- Connecting to the Wrong Terminal: Always double-check the + and – markings. If in doubt, look for a “+” symbol on the battery or a red cover.
- Using on a Flooded Engine: If the engine is flooded (too much fuel), jump-starting won’t help. Let it sit for 10–15 minutes first.
- Ignoring the Battery Health: A jump starter won’t fix a completely dead or damaged battery. If your car won’t hold a charge, replace the battery.
- Storing in Extreme Temperatures: Heat and cold degrade lithium-ion batteries. Store it in your home or garage when possible.
- Using Damaged Cables or Clamps: Inspect the clamps and cables regularly. If the insulation is cracked or the clamps are loose, replace them.
What to Do If the Jump Starter Fails
Even the best tools can fail. If your Duralast 600 Amp doesn’t work:
- Check the charge level (should be at least 10V).
- Inspect the clamps for damage.
- Try connecting to a different ground point.
- Ensure the car’s ignition is off during connection.
- Contact Duralast support if the unit won’t power on.
One time, my jump starter wouldn’t turn on. I assumed it was dead, but it turned out the power button needed a firm press. A quick reset (holding the button for 10 seconds) fixed it. Always try the simple fixes first.
Beyond Jump-Starting: Other Useful Features
Charging Your Devices On the Go
The Duralast 600 Amp has two USB ports, making it a portable power bank. I’ve used it to charge my phone during road trips, power a GPS unit, and even run a small fan in my camper. The 18,000 mAh capacity means you can charge a smartphone 4–5 times or a tablet 1–2 times.
Pro Tip: Use the 2.1A port for faster charging. The 1A port is better for low-power devices like Bluetooth headphones.
Emergency Flashlight with 3 Modes
The built-in LED flashlight is a lifesaver in dark parking lots or breakdowns at night. Press the flashlight button to cycle through:
- Steady Mode: Bright, continuous light (great for under-the-hood work).
- SOS Mode: Blinks in a distress pattern (ideal for signaling help).
- Strobe Mode: Rapid flashes (useful for attracting attention).
I once used the SOS mode when my car broke down on a rural road at midnight. A passing driver noticed the blinking light and stopped to help. That flashlight literally saved my night.
Battery Health Monitoring
Remember that voltage display? It’s not just for the jump starter. Connect the clamps to your car’s battery (with the engine off) and press the voltage test button. Here’s what the readings mean:
| Battery Voltage | Health Status | Action Needed |
|---|---|---|
| 12.6V – 12.7V | Fully charged, healthy | None |
| 12.4V | 75% charged | Drive for 30+ minutes to recharge |
| 12.0V – 12.2V | Weak, needs recharge | Charge or replace soon |
| Below 11.9V | Dead or failing | Replace battery |
This feature helped me catch a failing battery before it left me stranded. I noticed the voltage was consistently around 12.1V after driving. A quick trip to the auto shop confirmed it needed replacement—just in time.
Maintenance, Storage, and Long-Term Care
How to Store It Properly
To keep your Duralast 600 Amp in top shape:
- Store at 50–70% charge (around 12.4V) if not using for months.
- Keep in a temperature-controlled environment (not a hot trunk).
- Charge every 3–6 months to prevent deep discharge.
- Keep the clamps clean and free of corrosion.
I keep mine in a small tool bag in my closet. It’s out of the way but easy to grab in an emergency.
Troubleshooting and Warranty Info
The Duralast 600 Amp typically comes with a 1–2 year warranty. Common issues and fixes:
- Unit won’t turn on: Try a reset (hold power button for 10 seconds).
- Clamps not making contact: Clean terminals with a wire brush.
- Slow charging: Use the wall charger instead of the car charger.
- LED display dim: Recharge the unit—low power affects the display.
If problems persist, contact Duralast customer support. Most issues can be resolved with a quick phone call or email.
When to Replace Your Jump Starter
Lithium-ion batteries degrade over time. If you notice:
- Significantly reduced jump attempts per charge
- Longer charging times
- Physical swelling or damage
It might be time to replace it. Most units last 3–5 years with regular use.
Final Thoughts: Why the Duralast 600 Amp Is Worth It
After using the Duralast 600 Amp Jump Starter for over a year, I can confidently say it’s one of the best investments I’ve made for my car. It’s saved me from being stranded more than once, and the added features—like the flashlight and USB charging—make it a true multi-tool. The Duralast 600 Amp Jump Starter instructions are simple, but the device itself is powerful, safe, and reliable.
Is it perfect? No. The car charger is a bit slow, and the unit can feel a little bulky in smaller trunks. But those are minor trade-offs for the peace of mind it provides. Whether you’re a daily commuter, a weekend adventurer, or just someone who wants to be prepared, this jump starter is worth every penny.
So, the next time you’re tempted to skip that “just-in-case” purchase, remember: a few minutes of setup could save you hours of stress. Keep your Duralast 600 Amp charged, store it safely, and follow these instructions. When that dreaded silence hits the ignition, you’ll be ready—with a quick power boost and a plan.
Frequently Asked Questions
How do I use the Duralast 600 Amp Jump Starter safely?
Always connect the clamps in the correct order: red to the dead battery’s positive (+) terminal, black to an unpainted metal surface on the vehicle. Ensure the jump starter is powered off during connections to prevent sparks.
Can the Duralast 600 Amp Jump Starter charge other devices?
Yes, it includes USB ports and a 12V outlet for charging phones, tablets, or small electronics. Use the device while the jump starter is powered on, even without a car battery connected.
How do I check the battery level on my Duralast 600 Amp Jump Starter?
Press the power button once to illuminate the LED indicator. Four lights mean fully charged, while fewer lights indicate lower battery levels—recharge using the included AC adapter.
What should I do if the Duralast 600 Amp Jump Starter won’t jump my car?
Ensure the clamps are securely connected and the battery isn’t completely dead. If issues persist, charge the jump starter fully and retry, or test the vehicle’s battery for deeper issues.
How long does it take to recharge the Duralast 600 Amp Jump Starter?
Recharging takes 12–24 hours via the AC adapter, depending on the remaining charge. Avoid using the jump starter while charging to ensure optimal performance and battery life.
Is the Duralast 600 Amp Jump Starter suitable for diesel engines?
Yes, the 600-amp peak power can handle most gasoline and small diesel engines. For larger diesel engines, confirm your model meets the required CCA (Cold Cranking Amps) specifications.