

Featured image for buture jump starter instructions
Image source: ibuture.com
Master your Buture jump starter with this clear, step-by-step guide designed to get your vehicle running safely and efficiently every time. Follow simple instructions—from proper cable connection to safe power delivery— to avoid damage and ensure reliable performance in emergencies. Compact, powerful, and user-friendly, the Buture jump starter makes roadside rescues stress-free.
Key Takeaways
- Read the manual first: Always review safety guidelines before use.
- Charge fully before use: Ensure 100% battery for optimal performance.
- Connect red to positive: Attach clamps correctly to avoid damage.
- Power on after connection: Activate jump starter only when ready.
- Start engine immediately: Begin cranking within 30 seconds of powering on.
- Disconnect safely: Remove clamps in reverse order after successful start.
📑 Table of Contents
- Why You Need a Buture Jump Starter (And How It Saves the Day)
- Understanding Your Buture Jump Starter: Features and Components
- Preparing to Jump Start: Safety First, Always
- Step-by-Step Buture Jump Starter Instructions
- Troubleshooting Common Buture Jump Starter Issues
- Beyond Jump Starting: Other Uses for Your Buture
- Final Thoughts: Your Reliable Roadside Partner
Why You Need a Buture Jump Starter (And How It Saves the Day)
Let’s face it—no one plans for a dead car battery. I remember one freezing December morning, rushing to get my kids to school, only to hear that dreaded click-click-click when I turned the key. The car wouldn’t start, my phone battery was at 3%, and my neighbor was on vacation. Sound familiar? That’s when I discovered the Buture jump starter, a compact powerhouse that’s now a permanent fixture in my trunk.
Jump starters have evolved from clunky, intimidating tools to sleek, user-friendly devices—and Buture stands out in this crowded market. Whether you’re a seasoned driver or a new car owner, knowing how to use a jump starter properly can save you time, stress, and expensive tow truck bills. In this guide, I’ll walk you through Buture jump starter instructions step by step, sharing real-world tips and tricks I’ve learned over years of use. No jargon, no fluff—just clear, practical advice to get you back on the road safely.
Understanding Your Buture Jump Starter: Features and Components
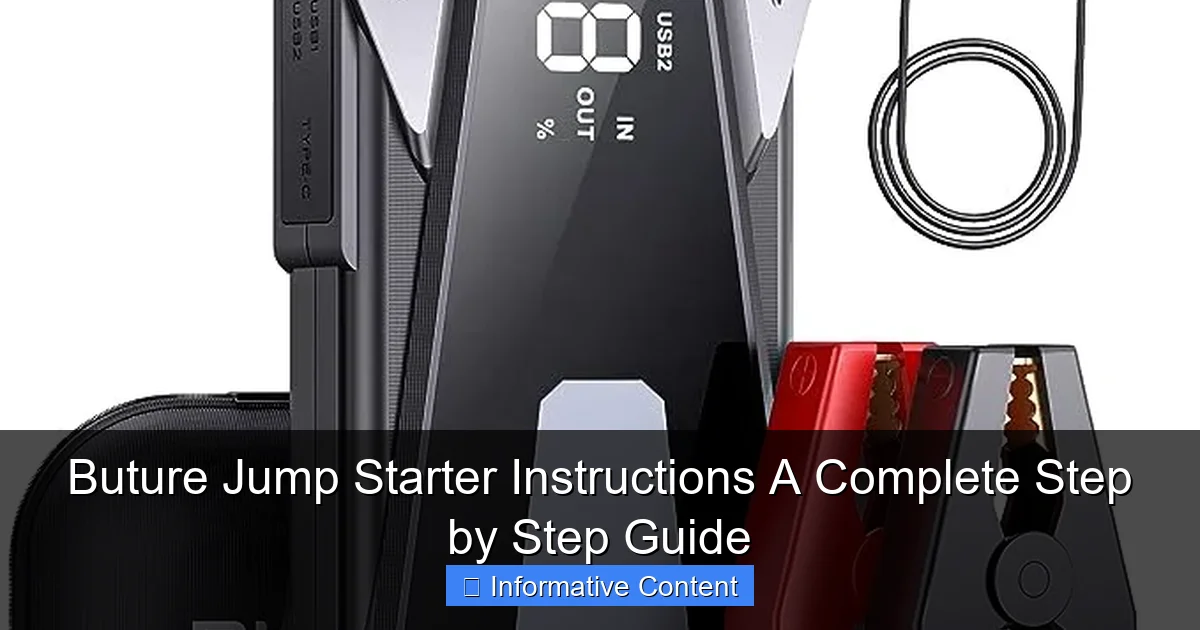
Before you even think about jumping a car, take a moment to get familiar with your Buture jump starter. It’s not just a battery in a box—it’s a multi-functional tool designed with safety and convenience in mind.
Visual guide about buture jump starter instructions
Image source: batteryjumpstarterpro.com
What’s in the Box?
- Jump starter unit – Usually compact (about the size of a thick paperback book), lightweight, and often with a built-in LED flashlight.
- Smart jumper cables – Unlike traditional clamps, Buture’s cables often have reverse polarity protection and spark-proof connectors.
- USB charging cables – For recharging the jump starter itself or powering devices like phones or tablets.
- Carrying case – Keeps everything organized and protected.
- User manual – Keep this handy; it includes model-specific details and safety warnings.
For example, the Buture 1200A model I use has a 12,000mAh lithium battery, a 3-mode LED light (steady, SOS, strobe), and dual USB ports. It’s rated for gasoline engines up to 6.5L and diesel engines up to 4.0L—perfect for most cars, SUVs, and even small trucks.
Key Safety Features
Buture jump starters come with several built-in protections that make them safer than older models:
- Reverse polarity alert – If you accidentally connect the clamps backwards, an alarm sounds and the unit won’t power on.
- Overload and overheat protection – Prevents damage to the jump starter or your car’s electrical system.
- Short-circuit protection – Stops sparks and surges during connection.
- Spark-proof technology – No more dangerous sparks when connecting to the battery.
These features are a game-changer, especially for beginners. I once connected the clamps wrong (yes, really) and the Buture just blinked a red light—no sparks, no damage. That’s peace of mind in a compact device.
Capacity and Charging
Buture jump starters typically range from 8,000mAh to 20,000mAh. Higher capacity means more jump attempts per charge and faster device charging. My 12,000mAh model gives me about 20-25 jumps on a full charge—plenty for a year of occasional use.
Pro tip: Always recharge your Buture after using it, even if it was only a quick jump. Lithium batteries last longer when kept between 20%-80% charge. I plug mine in the night before long trips as a safety net.
Preparing to Jump Start: Safety First, Always
Jumping a car might seem simple, but safety should always come first. A dead battery is often a symptom of a larger issue, and improper use can damage your car or even cause injury.
Inspect the Dead Battery
Before connecting anything, pop the hood and check the battery:
- Look for corrosion (white, green, or blue crusty buildup) on the terminals. If present, gently clean with a battery terminal brush or baking soda/water paste.
- Check for cracks or leaks in the battery case. If you see damage, do not jump—replace the battery instead.
- Ensure the battery is secure and not loose in its tray. Vibration can cause internal damage.
I once skipped this step and tried to jump a battery with a hairline crack. The car started, but the battery failed completely a week later. Lesson learned: always inspect first.
Park Safely and Prepare the Environment
- Park on level ground and engage the parking brake. Turn off the ignition and all lights/accessories.
- Keep flammable materials away—no gas cans, rags, or tools near the battery.
- Wear safety glasses (optional but smart). Battery gases can be explosive.
- If in a public area, turn on hazard lights to alert others.
One winter, I jumped a car on a busy street. A passerby saw my hazards and offered to help—small gestures make a big difference when you’re stressed.
Check the Buture’s Charge Level
Most Buture models have an LED battery indicator (e.g., 4 lights = 75-100% charge). Never attempt a jump if the charge is below 50%. A weak jump starter might not provide enough power, leaving you stranded again.
Real-world example: I once tried to jump a friend’s SUV with a Buture at 40% charge. The engine turned over but didn’t start. A quick recharge to 90% fixed the issue—patience pays off.
Step-by-Step Buture Jump Starter Instructions
Now for the main event: using your Buture jump starter to bring your car back to life. Follow these steps carefully, and you’ll be driving in minutes.
Step 1: Turn Off the Buture and Connect the Clamps
- Ensure the Buture is powered off (no lights on the unit).
- Connect the red clamp to the positive (+) terminal of the dead battery.
- Connect the black clamp to a ground point—not the negative battery terminal. Use an unpainted metal surface like the engine block, strut tower, or a bolt. This reduces sparking risk.
Why ground matters: Connecting the black clamp to the negative terminal can cause sparks near hydrogen gas (released by batteries). Grounding to metal away from the battery is safer.
Step 2: Power On the Buture
- Press and hold the power button for 2-3 seconds until the unit lights up.
- Check the display: you should see the battery level and a “Ready” or “OK” indicator.
- If the Buture detects reversed clamps, it will flash a warning. Reconnect correctly and try again.
My Buture has a “Boost” button for stubborn starts. I press it when the engine turns slowly—it delivers a short burst of extra power.
Step 3: Start the Engine
- Enter the car and turn the key to the “Start” position.
- Hold for 3-5 seconds. If the engine doesn’t start, wait 30 seconds before retrying. Over-cranking can overheat the starter.
- Once started, let the engine idle for 2-3 minutes to stabilize.
Pro tip: If the car starts but dies immediately, the battery may be too damaged to hold a charge. Drive to a shop ASAP.
Step 4: Disconnect in the Right Order
- Turn off the Buture using the power button.
- Remove the black clamp first (from the ground point).
- Remove the red clamp from the positive terminal.
- Store the clamps and cables neatly in the case.
Disconnecting in reverse order prevents short circuits. I once removed the red clamp first and got a spark—my heart skipped a beat!
Step 5: Recharge and Store
- Recharge the Buture as soon as possible. Even a partial recharge helps.
- Store it in a cool, dry place. Avoid extreme temperatures (e.g., a hot car in summer).
- Check the charge level every 3 months if unused.
I keep my Buture in the trunk’s side pocket, away from direct sun and moisture. It’s ready when I need it.
Troubleshooting Common Buture Jump Starter Issues
Even the best devices can have hiccups. Here’s how to handle common problems without panic.
“The Buture Won’t Turn On”
- Check the charge: Plug it into a wall charger for 2-3 hours. A fully dead battery might take longer.
- Inspect the power button: Debris can block the button. Clean gently with a toothpick.
- Reset the unit: Some models have a reset pinhole. Insert a paperclip for 5 seconds.
My Buture once wouldn’t power on after a road trip. A 2-hour charge fixed it—I’d left it in the trunk for weeks without recharging.
“The Engine Turns but Won’t Start”
- Wait longer between attempts: Let the Buture “rest” for 1-2 minutes between tries.
- Use the ‘Boost’ mode: Delivers extra power for cold starts or weak batteries.
- Check fuel and ignition: A dead battery isn’t always the issue. Listen for fuel pump whirring when you turn the key to “On.”
I once spent 10 minutes trying to jump a car before realizing the gas gauge was on empty. Oops.
“Clamps Are Loose or Sparking”
- Clean the clamps: Use a wire brush to remove corrosion or dirt.
- Check for damage: Bent or cracked clamps should be replaced.
- Ensure tight contact: Wiggle the clamps gently—they should grip firmly.
Sparking can also mean a faulty battery. If sparks persist, stop and seek professional help.
“The Buture Gets Hot During Use”
- Normal heat: Some warmth is expected, especially during multiple jumps.
- Excessive heat: Stop immediately. Let it cool for 15 minutes. If it’s too hot to touch, contact Buture support.
My Buture gets warm during use but cools quickly. I’ve never had overheating issues.
Beyond Jump Starting: Other Uses for Your Buture
Your Buture isn’t just for emergencies. It’s a versatile power bank that can save the day in countless ways.
Charging Devices on the Go
- Use the USB ports to charge phones, tablets, GPS devices, or dashcams.
- Some models have a 12V DC output for car coolers, tire inflators, or portable fridges.
On a camping trip, I powered my phone for 2 days using the Buture. It’s a lifesaver when outlets are scarce.
Emergency Lighting
- The LED flashlight has 3 modes: steady (for repairs), SOS (for emergencies), and strobe (for visibility).
- Use it during roadside repairs, power outages, or hiking.
One rainy night, I used the SOS mode to signal a passing driver after a flat tire. The flashing light got their attention quickly.
Powering Small Tools
- Some Buture models can run air compressors, fans, or work lights (check the manual for wattage limits).
- Use the 12V outlet to charge power tool batteries (with an adapter).
I’ve used my Buture to inflate a spare tire and power a small work light while fixing a trailer hitch. Handy!
Data Table: Buture Jump Starter Models Comparison
| Model | Peak Current | Battery Capacity | Engine Support | USB Ports | Special Features |
|---|---|---|---|---|---|
| Buture 800A | 800A | 8,000mAh | Gasoline: 5.0L | 1 USB-A, 1 USB-C | LED flashlight, spark-proof clamps |
| Buture 1200A | 1200A | 12,000mAh | Gasoline: 6.5L, Diesel: 4.0L | 2 USB-A | Boost mode, 3-mode LED, 12V DC output |
| Buture 1500A | 1500A | 15,000mAh | Gasoline: 7.0L, Diesel: 5.0L | 1 USB-A, 1 USB-C | Jump count: 30+, wireless charging pad |
| Buture 2000A | 2000A | 20,000mAh | Gasoline: 8.0L, Diesel: 6.0L | 2 USB-A, 1 USB-C | LCD screen, 15W fast charging, car cooler compatible |
This table helps you choose the right Buture for your vehicle. For example, if you drive a diesel pickup, the 1500A or 2000A model is ideal. For a compact car, the 800A is sufficient.
Final Thoughts: Your Reliable Roadside Partner
Using a Buture jump starter isn’t just about fixing a dead battery—it’s about gaining confidence. No more waiting for strangers, no more expensive tow trucks, and no more stress when the engine won’t turn over. With the right Buture jump starter instructions, you’re in control.
From inspecting the battery to troubleshooting common issues, every step in this guide is designed to make the process simple and safe. And remember: your Buture is more than a jump starter. It’s a power bank, a flashlight, and a multi-tool for life’s unexpected moments. Treat it well—recharge it regularly, store it properly, and keep it accessible.
So next time you hear that dreaded click-click-click, don’t panic. Grab your Buture, follow these steps, and get back on the road. You’ve got this. Safe travels!
Frequently Asked Questions
How do I use the Buture jump starter for the first time?
Before using your Buture jump starter, fully charge it using the included USB-C cable. Connect the clamps to the battery terminals (red to positive, black to negative) and press the power button to initiate the jump-start process.
What safety precautions should I follow with Buture jump starter instructions?
Always wear protective eyewear and ensure the jump starter is away from flammable materials. Follow the Buture jump starter instructions carefully to avoid short circuits or sparks during use.
Can the Buture jump starter charge other devices?
Yes, the Buture jump starter doubles as a power bank with USB ports to charge phones, tablets, and other gadgets. Simply connect your device using a compatible USB cable while the jump starter is powered on.
Why won’t my Buture jump starter turn on?
Check if the battery is depleted and recharge it fully. If the issue persists, ensure the power button is held for 3-5 seconds, as quick presses may not activate the unit.
How long does the Buture jump starter hold its charge?
The Buture jump starter retains 80% of its charge for up to 6 months when unused. For best results, recharge it every 3 months to maintain optimal battery health.
What vehicles are compatible with the Buture jump starter?
It works with most 12V gasoline engines (up to 7.0L) and diesel engines (up to 5.5L), including cars, motorcycles, and boats. Always verify your vehicle’s specs match the jump starter’s rated output.