
Featured image for bright starts jumper playset instructions
Image source: hip2save.com
Setting up your Bright Starts Jumper Playset is quick and hassle-free with the clear, step-by-step instructions designed specifically for busy parents. No tools or extra parts are needed—just snap, lock, and jump to give your little one a safe, bouncy play experience in minutes.
Key Takeaways
- Follow the manual: Always refer to the included instructions for safe, correct assembly.
- Check all parts: Verify all components are present before starting setup.
- Secure the frame: Ensure legs lock firmly to prevent wobbling during use.
- Adjust height properly: Match seat height to your baby’s leg length for comfort.
- Inspect regularly: Check for wear, loose parts, or damage before each use.
- Clean as directed: Wipe with mild soap and water to maintain hygiene.
📑 Table of Contents
- Why the Bright Starts Jumper Playset Is a Parent’s Best Friend
- Getting Started: What’s in the Box and Initial Prep
- Step-by-Step Assembly Guide (With Real-Life Tips)
- Safety Checks and Maintenance: Keeping Your Jumper in Top Shape
- Maximizing Fun and Development: Tips for Engaging Play
- Common Issues and Troubleshooting (From a Parent’s Perspective)
- Final Thoughts: Why This Guide Makes All the Difference
Why the Bright Starts Jumper Playset Is a Parent’s Best Friend
Let’s be honest—parenting is a full-time job with zero paid breaks. Between feeding, napping schedules, and trying to keep your sanity, finding a way to keep your little one entertained and safe is a top priority. That’s where the Bright Starts Jumper Playset comes in. I remember the first time I set mine up for my 5-month-old. I was skeptical—how could a simple jumper keep a baby engaged for more than five minutes? But within seconds of bouncing, my daughter was giggling, kicking, and reaching for the toys. It was like magic.
The Bright Starts Jumper Playset is more than just a bouncer. It’s an interactive, sensory-rich environment designed to support your baby’s development while giving you a few precious minutes to breathe, fold laundry, or even sip a hot cup of coffee (gasp!). Whether you’re a first-time parent or adding another little one to your crew, this playset is a game-changer. But here’s the catch: setup can be a little confusing at first. That’s why I’ve put together this Bright Starts Jumper Playset instructions guide—to walk you through every step, share real-life tips, and help you avoid the common mistakes I made (like accidentally skipping a crucial safety step).
Getting Started: What’s in the Box and Initial Prep
Unboxing the Bright Starts Jumper Playset
Before you dive into assembly, take a moment to unbox and inspect everything. I learned this the hard way—once, I started building without checking the parts list and realized halfway through that I was missing a leg. Not ideal when your baby is already excited and waiting!
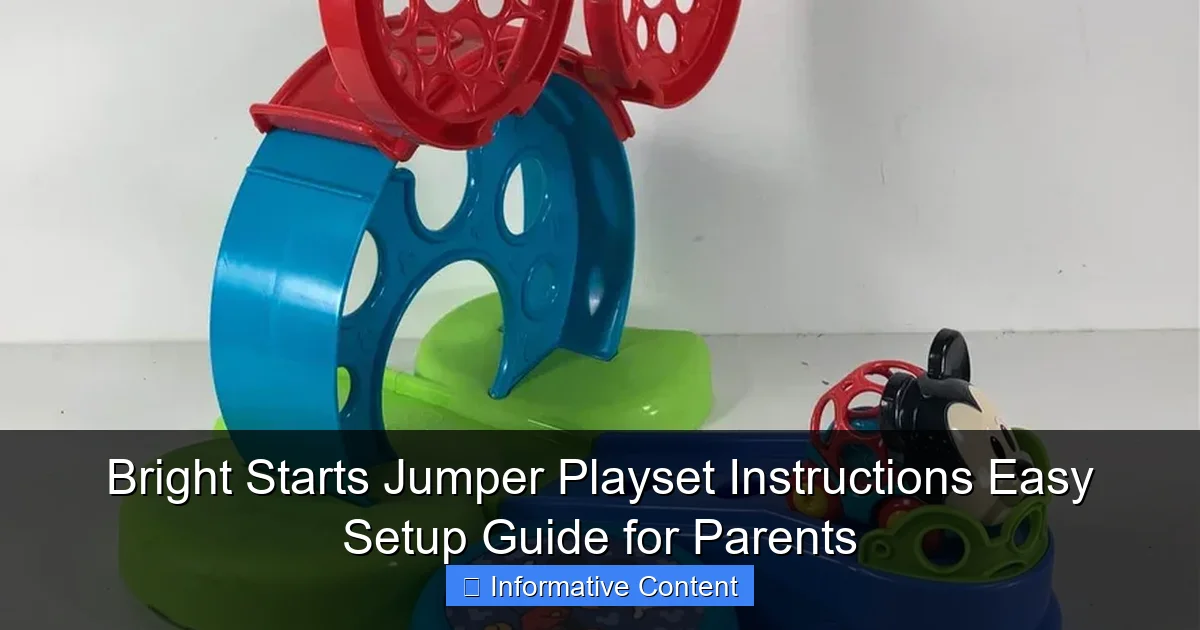
Visual guide about bright starts jumper playset instructions
Image source: goodbuygear.com
Here’s what you should find in the box:
- Seat unit with attached toy tray
- Four adjustable legs (usually color-coded for easy matching)
- Spring clips or bungee cords (depending on model)
- Instruction manual (keep this handy!)
- Optional: Additional hanging toys (some models include themed sets)
- Hardware bag (screws, washers, etc.)
Pro tip: Lay everything out on a clean, flat surface—ideally on a carpet or soft blanket. This keeps small parts from rolling away and gives you space to work. I like to use a large towel to prevent scratches on hardwood floors.
Check the Model and Manual
Bright Starts offers several jumper models (like the Playful Parade, Jungle Jumperoo, and Fun in the Sun). Each has slightly different Bright Starts Jumper Playset instructions, so make sure you’re following the right manual. The model number is usually on a sticker on the back of the seat or in the manual.
For example, the Jungle Jumperoo uses bungee cords for bounce, while the Playful Parade uses metal springs. This affects both setup and safety checks. Don’t assume all models are the same—I once borrowed a friend’s manual for a different model and almost installed the springs backward. Yikes.
Baby Readiness: Is Your Little One Ready?
Before you even start assembling, make sure your baby is physically ready for a jumper. The general rule of thumb:
- Age: 4–12 months (varies slightly by model)
- Weight: Up to 25 lbs (check your specific model)
- Developmental milestones: Baby should be able to sit up unassisted and have good head and neck control.
I waited until my daughter could sit without toppling over—around 5.5 months. Jumping too early can strain their developing spine. Trust me, it’s worth the wait. Also, never leave your baby unattended in the jumper, even for a second. Safety first, always.
Step-by-Step Assembly Guide (With Real-Life Tips)
Attaching the Legs: The Foundation of Safety
This is the most critical part of the Bright Starts Jumper Playset instructions. The legs must be securely locked in place to prevent tipping. Here’s how I do it:
- Identify the front and back legs. Most models have a wider base at the back for stability.
- Align the leg with the socket on the seat base. You’ll hear a “click” when it’s properly locked.
- Press down firmly until the leg snaps into place. I use my palm, not my fingers, to avoid pinching.
- Repeat for all four legs. Double-check each one by gently tugging—no wobbling allowed!
Common mistake: Skipping the “tug test.” I once thought I heard a click, but one leg was only halfway in. My baby leaned forward, and the jumper tilted. Scary! Now I test each leg with a firm pull before letting her in.
Installing the Bounce Mechanism (Springs or Bungees)
Here’s where models differ. Let’s break it down:
- Metal Spring Models (e.g., Playful Parade): Attach the springs to the seat’s metal hooks and the leg brackets. Use the provided clips to secure. Make sure the springs aren’t twisted—this affects bounce quality.
- Bungee Cord Models (e.g., Jungle Jumperoo): Loop the bungee through the seat’s anchor points and the leg rings. Tighten so there’s about 1–2 inches of stretch when pulled. Over-tightening can reduce bounce; too loose, and it’s unsafe.
Pro tip: If using bungee cords, check for fraying or wear every few weeks. Replace immediately if damaged. I learned this after noticing a tiny tear—better safe than sorry.
Attaching the Toy Tray: Fun Meets Function
The toy tray is where the magic happens. To install:
- Locate the tray’s hinge points on the seat’s front edge.
- Slide the tray’s arms into the slots until they click.
- Secure with the provided screws (if applicable). Some models use snap-in trays—no tools needed.
- Attach hanging toys to the tray’s loops or clips. I like to space them out so my baby can reach with both hands.
Real-life tip: Rotate toys weekly to keep things fresh. My daughter gets bored fast, so I swap in new ones (like a crinkly elephant or a spinning sun) every few days. It’s like a mini sensory upgrade!
Adjusting Height: One Size Doesn’t Fit All
Most Bright Starts jumpers have 3–5 height settings. Adjust based on your baby’s leg length:
- When seated, your baby’s feet should touch the floor flat, with knees slightly bent.
- To adjust: Press the release buttons on the legs and slide to the desired setting. Listen for the click.
- Test by placing your baby in the seat. If their feet dangle, go down a notch. If their legs are too bent, go up.
My experience: I started at the middle setting, but my daughter was a little short for it. Dropping to the lowest level made a huge difference—she could bounce freely without straining.
Safety Checks and Maintenance: Keeping Your Jumper in Top Shape
Daily Safety Checklist
Before every use, run through this quick list. It takes 30 seconds but could prevent a serious accident:
- Legs: Are all four securely locked? No wobbling?
- Bounce mechanism: Are springs untwisted or bungees not frayed?
- Seat: Is the fabric clean and intact? No loose threads?
- Toys: Are all securely attached? No small parts within reach?
- Floor: Is the surface flat and non-slip? Avoid carpets with long fibers that can catch the legs.
Real-life example: Once, I noticed a toy had come loose and was dangling by a thread. I caught it just before my baby reached it—close call!
Cleaning and Storage Tips
Spills happen. Here’s how to keep your jumper fresh:
- Seat fabric: Most are wipeable. Use a damp cloth with mild soap. Avoid soaking—water can seep into the frame.
- Toy tray: Remove and wash in warm soapy water. Rinse thoroughly and air dry.
- Frame: Wipe with a dry microfiber cloth. Don’t use harsh cleaners—they can degrade plastic or metal.
- Storage: If disassembling, store in a dry place. I keep mine in a closet, but I’ve heard of parents using under-bed storage bags.
Pro tip: Label the legs with colored tape if you disassemble often. I use red for front, blue for back—makes reassembly a breeze.
When to Replace or Retire the Jumper
Even the best jumpers don’t last forever. Retire yours if:
- Your baby exceeds the weight limit (usually 25 lbs).
- The frame is bent or cracked.
- Springs/bungees show significant wear.
- Toys are missing or broken beyond repair.
I kept mine for my second baby, but only after a full safety inspection. It’s tempting to hand it down, but safety should never be compromised.
Maximizing Fun and Development: Tips for Engaging Play
Creating a Sensory-Rich Environment
The Bright Starts Jumper Playset isn’t just for bouncing—it’s a developmental tool. Here’s how I boost engagement:
- Rotate toys: Introduce new textures, colors, and sounds weekly.
- Add music: Play upbeat songs or nursery rhymes. My daughter loves “If You’re Happy and You Know It.”
- Mirror play: Attach a baby-safe mirror to the tray. She loves making faces!
- Interactive time: Sit in front of her and clap, wave, or sing. Social interaction is key.
My favorite hack: I hang a ribbon from the tray so she can pull and release it—great for hand-eye coordination.
Structured Playtime: How Long Should They Jump?
Experts recommend:
- 5–10 minutes at a time (to avoid overstimulation or joint strain).
- 2–3 sessions per day (morning, afternoon, and after naps).
- Watch for cues: If your baby seems tired, fussy, or loses interest, take a break.
I set a timer on my phone. When it buzzes, we switch to tummy time or a book. Keeps things balanced.
Involving Siblings and Family
If you have older kids, let them join the fun—safely:
- Have them sit nearby and play peekaboo.
- Let them gently spin a hanging toy (with supervision).
- Take turns singing songs together.
My 3-year-old loves being the “music teacher” and picks songs for her sister. It’s adorable and builds sibling bonds.
Common Issues and Troubleshooting (From a Parent’s Perspective)
Jumper Won’t Bounce Properly
Symptoms: Stiff bounce, uneven movement, or no bounce at all.
Fixes:
- Check if springs/bungees are twisted or loose. Reattach if needed.
- Ensure the seat is centered on the frame. Off-center weight can cause stiffness.
- Verify height settings. Too high or low affects bounce dynamics.
My fix: Once, the bungee cords were looped incorrectly—flipping them solved the problem instantly.
Legs Wobble or Don’t Lock
Symptoms: Jumper rocks when baby moves.
Fixes:
- Press legs firmly into sockets until they click.
- Clean the socket with a dry cloth—dust can prevent locking.
- If the leg is damaged, contact Bright Starts for a replacement.
Pro tip: I keep a spare set of legs from a retired jumper—just in case.
Toys Fall Off Frequently
Symptoms: Toys detach during play.
Fixes:
- Use zip ties or baby-safe silicone bands to secure hanging toys.
- Check if the toy’s clip is damaged. Replace if bent.
- Opt for toys with wider clips or loops.
I use colorful silicone hair ties—they’re stretchy, safe, and easy to remove.
| Common Issue | Likely Cause | Quick Fix |
|---|---|---|
| No bounce | Twisted springs or loose bungees | Reattach and straighten |
| Wobbly legs | Not fully locked or dirty socket | Press firmly or clean with dry cloth |
| Toys falling | Weak or damaged clips | Secure with zip ties or replace |
| Seat fabric tears | Sharp toys or rough use | Patch with baby-safe fabric tape or retire |
| Height adjustment stuck | Button not fully pressed | Press both sides simultaneously |
Final Thoughts: Why This Guide Makes All the Difference
Setting up the Bright Starts Jumper Playset doesn’t have to be stressful. With the right Bright Starts Jumper Playset instructions, a little patience, and these real-world tips, you’ll have a safe, fun, and engaging space for your baby in no time. I’ve been there—frustrated with a wobbly leg, confused by tangled bungees, or worried about safety. But now, I can assemble it in under 10 minutes and feel 100% confident it’s secure.
Remember, this isn’t just a toy. It’s a tool for development, a moment of peace for you, and a source of endless joy for your little one. Whether you’re using it for 5 minutes or an hour, every bounce counts. So take your time, follow the steps, and don’t hesitate to reach out to Bright Starts support if something feels off. Parenting is hard enough—your jumper shouldn’t add to the stress.
And here’s my final piece of advice: Enjoy it. Those giggles, the first time they reach for a toy, the proud look when they realize they can make the music play—those moments are priceless. The Bright Starts Jumper Playset isn’t just about keeping your baby busy. It’s about creating memories, one bounce at a time.
Frequently Asked Questions
How do I assemble the Bright Starts Jumper Playset?
Follow the step-by-step instructions in the manual, starting with attaching the frame legs and securing the jumping mat. Ensure all locking mechanisms click into place for safe use. The process typically takes 10-15 minutes with included tools.
Are the Bright Starts Jumper Playset instructions available online?
Yes, you can download a PDF version of the Bright Starts Jumper Playset instructions from the official website under the “Support” or “Manuals” section. Keep your model number handy for accurate results.
What’s the best way to clean the jumper seat and mat?
Wipe the seat and mat with a damp cloth and mild soap, avoiding harsh chemicals. For fabric parts, spot-clean only and air-dry completely before reassembling the Bright Starts Jumper Playset.
How do I adjust the height for my growing baby?
Locate the adjustable straps on the frame and move them to one of the three height settings. Always check the manual to confirm the correct setup for your child’s age and weight.
Why won’t the toy bar attach securely to the frame?
Double-check that the connectors are aligned with the frame slots and fully snapped in. Refer to the Bright Starts Jumper Playset instructions for toy bar placement diagrams.
Is there a weight limit for this jumper?
Most models support babies up to 25 lbs (11.3 kg) who can sit upright unassisted. Review the product manual or packaging for exact specifications for your model.