
Featured image for bright starts jumper instructions
Image source: down-th.img.susercontent.com
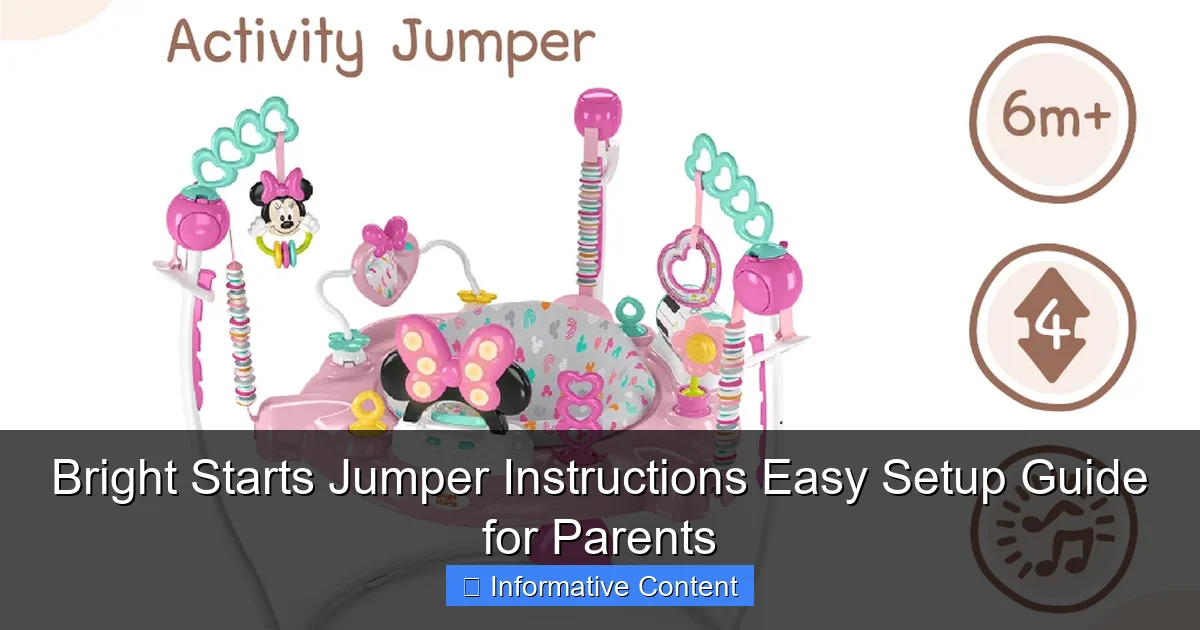
Setting up your Bright Starts jumper is quick and hassle-free with the clear, step-by-step instructions designed specifically for busy parents. From secure assembly to safety checks and usage tips, this guide ensures your little one can start bouncing safely in minutes—no guesswork required.
Key Takeaways
- Read the manual first: Always review instructions before assembly to avoid mistakes.
- Check parts list: Verify all components are included before starting setup.
- Secure frame locks: Ensure all joints click into place for safety.
- Adjust height properly: Set seat height so baby’s feet touch the floor.
- Inspect toys regularly: Tighten or replace loose accessories to prevent hazards.
- Clean weekly: Wipe down fabric and frame to maintain hygiene.
📑 Table of Contents
- Why Every Parent Needs a Bright Starts Jumper (And How to Set It Up Right)
- Getting Started: Unboxing and Initial Prep
- Step-by-Step Assembly: From Frame to First Bounce
- Safety First: Critical Checks Before First Use
- Using the Jumper: Daily Tips for Maximum Fun and Safety
- Troubleshooting Common Issues (And How to Fix Them)
- When to Stop Using the Jumper (And What to Do Next)
Why Every Parent Needs a Bright Starts Jumper (And How to Set It Up Right)
As a parent, I remember the first time my baby started bouncing in her Bright Starts jumper. It wasn’t just a toy—it was a lifeline. That magical moment when she discovered her legs could send her soaring upward, giggling like she’d unlocked a secret superpower, was unforgettable. But before that joy could begin, there was a moment of truth: setting it up. Like many parents, I stood over the box, surrounded by parts, straps, and instructions that seemed more like a puzzle than a guide. I’ve been there. I know the mix of excitement and mild panic that comes with assembling baby gear. That’s why I’m writing this: to help you skip the confusion and get straight to the fun.
Bright Starts jumpers are beloved for good reason. They combine entertainment, motor skill development, and a much-needed break for parents. But even the most intuitive product can feel overwhelming when you’re sleep-deprived and juggling a fussy infant. The Bright Starts jumper instructions might seem straightforward, but small details can make a big difference in safety, comfort, and how long your little one actually uses it. Whether you’re setting up the Bright Starts Bounce & Play Activity Jumper, the Walk-A-Bout Jumper, or another model, this guide walks you through every step—from unboxing to first bounce—with real-life tips, troubleshooting advice, and the kind of practical wisdom you’d get from a seasoned parent.
Getting Started: Unboxing and Initial Prep
What’s in the Box?
When you open your Bright Starts jumper, take a deep breath. The box might look like a jumble of plastic, metal, and fabric, but each piece has a purpose. Here’s what you’ll typically find:

Visual guide about bright starts jumper instructions
Image source: i.pinimg.com
- Frame pieces (usually 3–5 curved metal or plastic tubes)
- Seat unit (with fabric seat pad and safety harness)
- Springs or bungee cords (depending on the model)
- Activity tray (with toys, lights, sounds, or mirrors)
- Leg extensions or height adjusters (for floor models)
- Instruction manual (in multiple languages)
- Tool (usually a small wrench or hex key)
Pro tip: Lay everything out on a clean, flat surface—like your living room floor or a large table. This makes it easier to spot missing parts and reduces the chance of losing small pieces under the couch. I once spent 20 minutes hunting for a tiny spring that had rolled under the dog bed. Lesson learned.
Checking for Damage and Missing Parts
Before you start building, inspect each component. Look for:
- Cracks in plastic or metal parts
- Frayed straps or torn fabric on the seat
- Missing screws, springs, or clips
- Damaged activity tray (especially if it has electronic features)
If anything looks off, contact Bright Starts customer service. They’re usually responsive and often send replacement parts for free. I once had a spring break after 6 months, and they mailed a new one within a week—no questions asked.
Choosing the Right Location
Where you set up your jumper matters. Consider:
- Floor type: Hardwood, tile, or low-pile carpet work best. Thick rugs can make the jumper unstable.
- Clearance: Make sure there’s at least 2–3 feet of space around the jumper so baby can swing safely.
- Nearby hazards: Avoid placing it near stairs, sharp furniture edges, or dangling cords.
- Sunlight: Don’t place it in direct sunlight for long—it can overheat the plastic and make the seat uncomfortable.
One parent I know set up her jumper near a coffee table. Her baby loved reaching for the toys… until she accidentally kicked the table and knocked over a glass of water. Not fun. Learn from her mistake.
Step-by-Step Assembly: From Frame to First Bounce
Building the Frame (Most Models)
The frame is the backbone of your jumper. Here’s how to assemble it:
- Connect the base tubes: Most Bright Starts jumpers have a three- or four-point base. Fit the curved tubes into the plastic connectors at the bottom. You should hear a click or feel a firm snap. If it’s loose, double-check the orientation—some tubes are marked “L” or “R.”
- Attach the vertical posts: These go into the center connector. Again, listen for a click. Some models have a locking pin or screw to secure them. Don’t skip this step—loose vertical posts can wobble dangerously.
- Check stability: Gently wiggle the frame. It should feel solid, not rickety. If it wobbles, disassemble and reassemble, making sure all parts are fully seated.
Real talk: I once rushed this step and didn’t fully snap in a vertical post. When my 8-month-old started bouncing, the frame shifted slightly. Not dangerous, but scary. Take your time here.
Installing the Seat Unit
The seat is where the magic happens. Here’s how to attach it:
- Locate the seat hooks: On most models, there are two metal or plastic hooks on the back of the seat frame.
- Attach to the vertical posts: Slide the hooks over the top of the vertical posts. You might need to lift the seat slightly to fit it.
- Secure with straps: Some models have a safety strap that wraps around the back of the frame. Buckle it tight.
- Check the harness: Make sure the 5-point harness is threaded correctly through the seat. The straps should be snug but not twisted.
Tip: Before placing your baby in, test the seat by pushing down gently on the front and back. It should bounce smoothly without sticking or making odd noises.
Adding the Activity Tray
The activity tray is the fun part—but it needs to be secure.
- Snap the tray into the frame: Most trays attach to the vertical posts with plastic clips. Press firmly until you hear a click.
- Check for wobble: Give the tray a gentle shake. If it wobbles, re-clip it. A loose tray can distract baby or even fall off.
- Test the toys: If your model has lights or sounds, press the buttons to make sure they work. Some trays need batteries—check the manual.
Bonus: Rotate the toys occasionally to keep your baby engaged. My daughter loved the mirror toy, but after a few weeks, she got bored. Swapping it with a rattle or teether kept her interested longer.
Adjusting Height and Tension
Not all babies are the same size. Adjust the jumper to fit your little one:
- Height adjustment: Most floor models have leg extensions. Loosen the knobs, slide the legs to the right height, and retighten. Your baby’s feet should just touch the floor when seated.
- Bounce tension: Some models let you adjust spring tightness. For younger babies, use less tension. As they grow, tighten the springs for more bounce.
- Seat recline: A few models have adjustable seat angles. Use a more upright position for older babies who can sit unassisted.
Pro tip: Measure your baby’s height from shoulder to toe. If they’re under 26 inches, start at the lowest setting. Over 28 inches? Use the highest. This prevents strain on their developing hips.
Safety First: Critical Checks Before First Use
Harness and Seat Inspection
This is non-negotiable. Every time you use the jumper:
- Check the harness: Make sure it’s snug. You should fit one finger between the strap and baby’s chest. Too loose, and they can slump. Too tight, and they’ll be uncomfortable.
- Inspect the seat fabric: Look for tears, fraying, or loose stitching. Replace the seat if damaged.
- Test the buckles: Press the release buttons. They should click open easily and snap shut securely.
One mom shared a story: Her baby wiggled out of the harness because a strap had twisted. The baby didn’t fall, but it was terrifying. Always double-check.
Frame and Floor Stability
A wobbly jumper is a danger zone.
- Check for cracks: Look at all plastic and metal joints. Even hairline cracks can spread.
- Test on a flat surface: Place the jumper on a level floor. If it rocks, use furniture pads or shims to stabilize it.
- Watch for floor marks: Some jumpers can scratch hardwood. Place a small rug or mat under it.
I once set up a jumper on a slightly uneven floor. The frame rocked, and my baby kept leaning to one side. Not safe. A $5 rug fixed the problem.
Activity Tray Safety
Toys should entertain—not harm.
- Secure all toys: Make sure rattles, mirrors, and teethers are firmly attached. Loose toys can become choking hazards.
- Remove small parts: If a toy breaks, take it out immediately. Even “teething” toys can have small pieces.
- Check for sharp edges: Run your hand over the tray. It should feel smooth.
One parent found a loose screw in her baby’s mouth after a toy broke. Scary, right? Always inspect the tray daily.
Using the Jumper: Daily Tips for Maximum Fun and Safety
How Long and How Often?
Bright Starts recommends 15–20 minutes per session, 1–2 times a day. Why?
- Hip development: Too much bouncing can stress developing joints. Short sessions are safer.
- Engagement: Babies lose interest after 20 minutes. Use the time wisely.
- Alternatives: Pair jumper time with tummy time, floor play, or walks to avoid overuse.
Real example: My friend used the jumper for 30-minute sessions. Her baby loved it, but the pediatrician noticed mild hip tightness. She cut back to 15 minutes and added more floor time. Problem solved.
Engaging Your Baby
Make the most of those 15 minutes:
- Talk and sing: Narrate what they’re doing. “Look, you’re bouncing! Can you reach the lion?”
- Rotate toys: Swap in new rattles or books every few days.
- Use mirrors: Babies love seeing themselves. Point out their smile or waving hands.
- Play music: If the tray has sounds, play different tunes to keep them curious.
Pro tip: Sit nearby and interact. It’s not just play—it’s bonding.
Cleaning and Maintenance
A clean jumper is a safe jumper.
- Wipe down the tray daily with a damp cloth. Use mild soap for sticky spots.
- Wash the seat pad weekly. Most are machine-washable (check the tag). Air dry.
- Check springs and clips monthly. Lubricate with silicone spray if they squeak.
- Store properly: If disassembling, keep all parts in a labeled bag. Don’t lose the tiny screws!
I once left the seat outside in the rain. The fabric mildewed. Now I keep a small towel nearby to wipe spills right away.
Troubleshooting Common Issues (And How to Fix Them)
“My Baby Won’t Bounce!”
Possible causes and fixes:
- Too young: Babies need to be able to hold their head up (around 4–6 months). Wait a few weeks.
- Wrong height: If their feet don’t touch the floor, they can’t push off. Adjust the legs.
- Low tension: Tighten the springs. Some models have a knob to adjust tightness.
- Uncomfortable seat: Check for twisted straps or a recline that’s too far back.
One dad thought his baby hated the jumper. Turned out the seat was too reclined. He adjusted it upright, and his son started bouncing like crazy.
“The Jumper Wobbles”
Fixes:
- Uneven floor: Use furniture pads or a rug.
- Loose frame: Reassemble the base. Make sure all tubes are fully snapped in.
- Worn springs: If they’re stretched or rusty, replace them.
I used a yoga mat under the jumper on our hardwood floor. It stopped the wobble and protected the floor.
“Toys Keep Falling Off”
Solutions:
- Check clips: Some toys attach with plastic clips. Press them in fully.
- Use tape: For stubborn toys, a small piece of double-sided tape can help (remove before washing).
- Contact Bright Starts: If a toy breaks, ask for a replacement.
One mom used a hair tie to secure a loose rattle. Not ideal, but it worked until she got a new one.
“My Baby Slides Forward”
Prevent slumping:
- Adjust harness tightness: Snug, but not restrictive.
- Use a rolled towel: Place it behind baby’s back for extra support (remove after use).
- Check seat angle: Make sure it’s upright enough for their age.
A rolled receiving blanket behind my daughter’s back kept her from sliding. Just remember to remove it—it’s not a permanent fix.
When to Stop Using the Jumper (And What to Do Next)
Bright Starts jumpers are designed for babies who can hold their head up (around 4–6 months) until they can walk. Most kids outgrow them by 12–15 months. Here’s how to know it’s time to retire it:
| Sign | What It Means | Next Step |
|---|---|---|
| Baby can walk | They need more mobility | Switch to push toys or a walker |
| Baby exceeds weight limit (usually 25–30 lbs) | Jumper may not support them | Donate or pass it on |
| Baby shows disinterest | They’re ready for new challenges | Try activity centers or play gyms |
| Jumper shows wear (cracks, loose parts) | Safety risk | Dispose of it safely |
I kept my jumper until my daughter started walking at 11 months. She’d bounce for 5 minutes, then try to climb out. That was my cue to move on. I donated it to a friend, and she got another 6 months of use out of it. Win-win.
Remember: The Bright Starts jumper instructions are just the start. Your instincts, observations, and daily checks are just as important. This isn’t just a toy—it’s a tool for development, joy, and a few minutes of quiet for you. Set it up right, use it wisely, and enjoy every giggle, kick, and bounce. Your baby’s not just playing. They’re learning, growing, and having the time of their little life. And you? You’re doing an amazing job. Now go make that first bounce count.
Frequently Asked Questions
How do I assemble the Bright Starts jumper according to the instructions?
Follow the step-by-step diagrams in the Bright Starts jumper instructions manual, starting with attaching the frame legs and securing the seat. Ensure all locking mechanisms click into place before use. Most models require no tools for assembly.
What’s the best way to adjust the height of the Bright Starts jumper?
The Bright Starts jumper has 3-4 height settings—locate the spring-loaded buttons on the frame legs and adjust while ensuring even alignment. Refer to the Bright Starts jumper instructions for recommended height based on your baby’s size.
How do I safely attach the toy bar in the Bright Starts jumper?
Align the toy bar clips with the frame’s designated slots and press firmly until they lock. Always double-check that the bar is secure before placing your baby in the jumper to prevent accidental detachment.
Can I machine wash the Bright Starts jumper seat pad?
Yes, the seat pad is machine washable—remove it using the quick-release tabs and wash on a gentle cycle with mild detergent. Air dry completely before reattaching to avoid mold or mildew.
Why is my Bright Starts jumper wobbling during use?
Wobbling usually occurs if the floor isn’t level or the frame isn’t fully locked. Recheck the Bright Starts jumper instructions to ensure all joints are properly snapped into place and the floor is even.
How do I fold the Bright Starts jumper for storage or travel?
Press the folding buttons on the frame legs (if your model has them) and collapse the jumper inward. Consult your Bright Starts jumper instructions for model-specific folding steps to avoid damaging the frame.