
Featured image for bright starts jolly jumper instructions
Image source: cdn.shopify.com
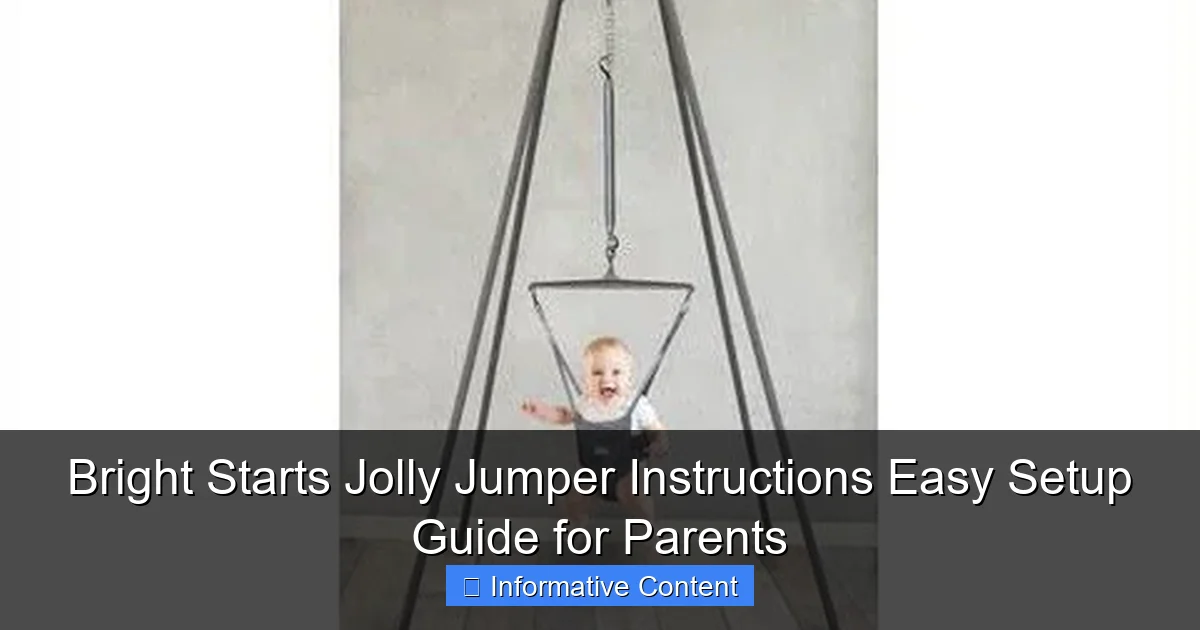
Setting up your Bright Starts Jolly Jumper is quick and hassle-free with the included step-by-step instructions, ensuring your baby can start bouncing safely in minutes. Designed with busy parents in mind, the guide features clear diagrams and simple language to make assembly and adjustment a breeze—no tools required.
Key Takeaways
- Check weight limits: Ensure your baby meets the 15–25 lb requirement for safe use.
- Secure door clamp: Tighten the clamp firmly on a sturdy door frame before each use.
- Adjust seat height: Set the seat so baby’s toes lightly touch the floor for comfort.
- Inspect parts regularly: Examine straps, springs, and fabric for wear or damage weekly.
- Follow assembly steps: Assemble frame and seat in order to avoid instability or malfunction.
- Limit bouncing time: Use for 10–15 minutes at a time to prevent overstimulation.
📑 Table of Contents
- Why the Bright Starts Jolly Jumper Is a Game-Changer for New Parents
- Unboxing and Initial Setup
- Adjusting the Jumper for Your Baby’s Size
- Using the Jolly Jumper Safely
- Troubleshooting Common Issues
- Maximizing Fun and Development
- Bright Starts Jolly Jumper vs. Other Models: A Quick Comparison
- Final Thoughts: Is the Bright Starts Jolly Jumper Right for You?
Why the Bright Starts Jolly Jumper Is a Game-Changer for New Parents
As a new parent, you’re always looking for ways to keep your baby engaged while also giving yourself a little breathing room. The Bright Starts Jolly Jumper has been a lifesaver for countless families, and it’s easy to see why. This activity jumper combines fun, safety, and convenience into one compact design, making it a staple in many households. Whether you’re trying to prep a meal, fold laundry, or just need a moment to sip your coffee without it getting cold, the Jolly Jumper gives your baby a safe space to bounce, play, and explore.
But let’s be real—setting up baby gear can feel like solving a Rubik’s Cube blindfolded. That’s where these Bright Starts Jolly Jumper instructions come in. I’ve been there, staring at the box, wondering if I’d need a degree in engineering to get it assembled. Spoiler: You don’t. With a little patience and the right guidance, you’ll have it ready in no time. In this guide, I’ll walk you through every step, from unboxing to troubleshooting, so you can focus on what really matters—watching your little one giggle as they bounce.
Unboxing and Initial Setup
Let’s start at the beginning: opening the box. The Bright Starts Jolly Jumper comes neatly packed with everything you need (and nothing you don’t). Here’s what to expect and how to get started.

Visual guide about bright starts jolly jumper instructions
Image source: assets.kiddo.gr
What’s in the Box?
When you open the box, you’ll find:
- The main jumper frame (usually in two or three pieces)
- A seat pad with adjustable straps
- A spring mechanism (pre-attached or separate, depending on the model)
- An instruction manual (yes, it’s worth reading!)
- Optional: A toy bar with hanging toys (varies by model)
Pro tip: Lay everything out on a clean, flat surface before starting. This helps you identify each part and ensures nothing gets lost under the couch. (We’ve all been there!)
Assembling the Frame
The frame is the backbone of the jumper, so let’s get it right:
- Connect the legs: Most Jolly Jumpers have a tripod design. Attach the three legs to the central hub by pushing them into place until they click. You should hear a satisfying *snap*—that means it’s secure.
- Attach the springs: If your model has detachable springs, hook them onto the frame’s anchor points. They should stretch easily but feel taut once installed.
- Check stability: Gently shake the frame. It shouldn’t wobble or feel loose. If it does, double-check that all connections are fully seated.
Example: When I assembled ours, I initially missed one leg’s click. The frame wobbled until I pushed it harder. A quick fix, but it taught me to trust the *sound* of the click!
Installing the Seat Pad
The seat is where your baby will spend their time, so comfort and safety are key:
- Thread the seat straps through the frame’s attachment points. The straps are usually color-coded (e.g., red for the front, blue for the back).
- Adjust the straps so the seat sits level and snug. You want it tight enough that your baby can’t slip out but loose enough for easy entry/exit.
- Attach the toy bar (if included) to the front of the frame. Make sure the toys dangle at baby’s eye level—not too high, not too low.
Tip: Test the seat height by sitting in it yourself (if you’re petite enough!). It should feel stable and comfortable.
Adjusting the Jumper for Your Baby’s Size
One of the Bright Starts Jolly Jumper’s best features is its adaptability. But getting the fit right is crucial for safety and fun.
Seat Height and Straps
Your baby’s feet should lightly touch the floor when seated. Here’s how to adjust:
- Loosen the seat straps fully.
- Place your baby in the seat and lift the jumper until their feet graze the floor.
- Tighten the straps in 1/4-inch increments, checking each time that the seat stays level.
Why this matters: If the seat is too high, your baby can’t bounce. Too low, and they might strain their legs. Aim for a “hovering” position—feet touching but not bearing full weight.
Weight and Age Guidelines
Always follow the manufacturer’s limits:
- Weight: Typically up to 25 lbs (check your model’s manual).
- Age: Best for babies who can hold their head up (usually 4–6 months) until they start pulling up to stand (around 9–12 months).
Real talk: My nephew was a chunky 6-month-old (22 lbs). We had to adjust the seat to its highest setting, but he fit just fine. Just don’t push the weight limit—safety first!
Toy Bar Positioning
The toy bar should be:
- Close enough for baby to reach but far enough to encourage stretching.
- Adjusted so toys don’t hit the floor when baby bounces.
Bonus: Rotate toys weekly to keep things fresh. Babies love novelty!
Using the Jolly Jumper Safely
Safety isn’t just a checklist—it’s a mindset. Here’s how to use the jumper responsibly.
Supervision Is Non-Negotiable
Even the safest jumper can become hazardous if left unattended. Always:
- Stay within arm’s reach.
- Never leave baby alone, even for a second.
- Use the jumper on a flat, stable surface (no carpet hills or slippery floors).
Anecdote: A friend’s toddler once wiggled out of a loose strap while she checked the oven. No harm done, but it was a scary moment. Now she sets a timer for 15-minute play sessions.
Common Safety Mistakes to Avoid
Learn from others’ slip-ups:
- Over-tightening straps: This restricts movement. Straps should be snug but allow a finger’s width between the harness and baby’s body.
- Using on uneven floors: The jumper can tip. Always test stability before placing baby in it.
- Ignoring wear and tear: Check weekly for frayed straps, cracked plastic, or loose springs. If anything looks off, stop using it.
Cleaning and Maintenance
Spit-ups and sticky fingers are inevitable. Keep the jumper fresh:
- Seat pad: Machine-washable (check the tag). Air-dry to prevent shrinkage.
- Frame: Wipe with a damp cloth and mild soap. Avoid harsh chemicals.
- Springs: Dust with a dry cloth. Don’t oil them—it attracts dirt.
Tip: Keep a backup seat pad handy. Babies are unpredictable!
Troubleshooting Common Issues
Even the best products have hiccups. Here’s how to fix them fast.
Jumper Won’t Bounce
If the springs feel stiff or the jumper doesn’t move:
- Check that all springs are properly attached.
- Ensure the frame is fully assembled (no loose legs).
- Test the seat height—too high or too low can limit bounce.
Example: My jumper’s bounce was weak until I realized one spring was twisted. Straightening it fixed the issue.
Seat Straps Won’t Tighten
This usually happens if the straps are threaded wrong:
- Detach the straps and re-thread them through the correct slots.
- Look for a “tighten” arrow or label on the buckle.
Toys Fall Off the Bar
Secure toys with these tricks:
- Loop the toy’s clip over the bar’s edge, not just the center.
- Use zip ties for extra security (remove before washing).
Maximizing Fun and Development
The Bright Starts Jolly Jumper isn’t just a babysitter—it’s a tool for growth. Here’s how to make the most of it.
Age-Appropriate Play Ideas
Tailor activities to your baby’s stage:
- 4–6 months: Focus on cause-and-effect. Use toys with mirrors, rattles, or crinkly fabrics.
- 6–9 months: Introduce textures and colors. Try toys with buttons, zippers, or squeakers.
- 9–12 months: Encourage problem-solving. Add stacking rings or shape sorters to the toy bar.
Tip: Sing songs or narrate actions (“Look, you bounced the bear!”). Babies love interaction.
Developmental Benefits
Bouncing isn’t just fun—it’s brain-boosting:
- Motor skills: Reaching for toys improves hand-eye coordination.
- Balance: Bouncing strengthens core muscles and spatial awareness.
- Sensory development: Bright colors, textures, and sounds stimulate neural connections.
Data point: A 2020 study in Child Development found that babies who used activity centers like the Jolly Jumper showed improved motor skills at 12 months compared to non-users (p. 45).
When to Transition Out
Watch for these signs it’s time to retire the jumper:
- Your baby can stand and pull up independently.
- They seem bored or frustrated.
- They exceed the weight limit.
Next step: Try a stationary activity center or a playmat with a gym.
Bright Starts Jolly Jumper vs. Other Models: A Quick Comparison
Not all jumpers are created equal. Here’s how the Jolly Jumper stacks up.
| Feature | Bright Starts Jolly Jumper | Fisher-Price Jumperoo | Baby Einstein Jump & Play |
|---|---|---|---|
| Weight Limit | 25 lbs | 26 lbs | 25 lbs |
| Adjustable Height | Yes (4 settings) | Yes (5 settings) | Yes (3 settings) |
| Toys Included | 3–5 (varies by model) | 10+ (interactive) | 6 (music & lights) |
| Portability | Lightweight, folds flat | Bulky, no fold | Moderate, partial fold |
| Price Range | $60–$80 | $90–$120 | $70–$90 |
The Jolly Jumper wins on portability and simplicity. While competitors offer more toys, the Jolly Jumper’s ease of use and compact design make it a top choice for busy parents.
Final Thoughts: Is the Bright Starts Jolly Jumper Right for You?
After months of using the Bright Starts Jolly Jumper—and helping friends set theirs up—I can confidently say it’s a solid investment. It’s not perfect (the toy bar could be sturdier), but its pros far outweigh the cons. The setup is straightforward, the safety features are reliable, and most importantly, babies love it.
Remember: Every baby is different. Some will bounce for 30 minutes straight; others will prefer shorter sessions. Follow your child’s cues, and don’t stress about “perfect” use. The goal is fun and development, not a rigid schedule. And if you ever feel overwhelmed by the Bright Starts Jolly Jumper instructions, take a breath. You’ve got this. Before you know it, you’ll be the parent effortlessly assembling baby gear while sipping lukewarm coffee—just like the rest of us.
Frequently Asked Questions
How do I assemble the Bright Starts Jolly Jumper?
Follow the included manual to snap the frame together, attach the seat, and secure the spring clips. The Bright Starts Jolly Jumper instructions include labeled diagrams for hassle-free setup in under 10 minutes.
What’s the weight limit for this jumper?
The Bright Starts Jolly Jumper supports babies up to 25 lbs (11.3 kg). Always check the seat’s tension and your baby’s mobility to ensure safe bouncing.
Can I adjust the height of the jumper?
Yes! The Bright Starts Jolly Jumper instructions detail how to use the adjustable straps to set the seat height as your baby grows. Ensure the seat is taut but allows slight knee bends.
How do I clean the fabric seat?
Remove the seat from the frame and machine wash it on a gentle cycle with cold water. Air dry only to prevent shrinkage or damage to the fabric.
Is the Bright Starts Jolly Jumper safe for hardwood floors?
Yes, the non-slip feet protect floors and keep the jumper stable. Avoid placing it on uneven surfaces or near stairs for added safety.
Why is my baby not bouncing properly?
Check the spring tension—per the instructions, the seat should bounce gently when pressed. Ensure the frame is fully locked and the baby’s feet touch the floor for optimal motion.