
Featured image for basaf car jump starter instructions
Image source: i.pinimg.com
Master your Basaf car jump starter with this simple, step-by-step guide designed to get your vehicle running safely and efficiently. Follow clear instructions for proper connection, power activation, and troubleshooting to avoid damage and ensure reliable performance every time.
Key Takeaways
- Read the manual first: Always review safety guidelines before using the Basaf jump starter.
- Charge fully before use: Ensure the device is 100% charged for peak performance.
- Connect red to positive: Attach the red clamp to the battery’s positive terminal first.
- Start the vehicle quickly: Begin cranking within 30 seconds of connection to avoid damage.
- Disconnect after success: Remove clamps in reverse order once the engine starts.
- Store properly post-use: Recharge and keep in a cool, dry place for longevity.
📑 Table of Contents
- Why a Basaf Car Jump Starter Could Be Your Best Roadside Buddy
- Getting to Know Your Basaf Car Jump Starter
- Preparing for a Jump Start: Safety First
- Step-by-Step Basaf Car Jump Starter Instructions
- Troubleshooting Common Issues
- Maintaining Your Basaf Jump Starter for Longevity
- Final Thoughts: Be Prepared, Stay Safe
Why a Basaf Car Jump Starter Could Be Your Best Roadside Buddy
We’ve all been there. You’re running late for work, or maybe you just got back from a long trip, and you turn the key—only to hear that dreaded click-click-click. Your car battery is dead. Again. It’s frustrating, embarrassing, and worst of all, it makes you feel helpless, especially if you’re stuck in a remote parking lot or on the side of a quiet road. That’s when a portable jump starter like the Basaf car jump starter feels like a miracle.
I remember the first time my battery died in a grocery store parking lot. I had to call a friend, wait 45 minutes, and awkwardly explain why I couldn’t move my car. Since then, I’ve sworn by portable jump starters. The Basaf model, in particular, has become a staple in my car emergency kit. It’s compact, reliable, and—most importantly—easy to use. But I’ve also noticed that many people, even those who own one, don’t fully understand how to use it safely or effectively. That’s why I’m sharing this step-by-step Basaf car jump starter instructions guide. Whether you’re a first-time owner or just need a refresher, this guide will walk you through everything from unboxing to jump-starting your car with confidence.
Getting to Know Your Basaf Car Jump Starter
Unboxing and Initial Setup
When you first open the box, you’ll find more than just the jump starter. The Basaf kit typically includes:

Visual guide about basaf car jump starter instructions
Image source: i.pinimg.com
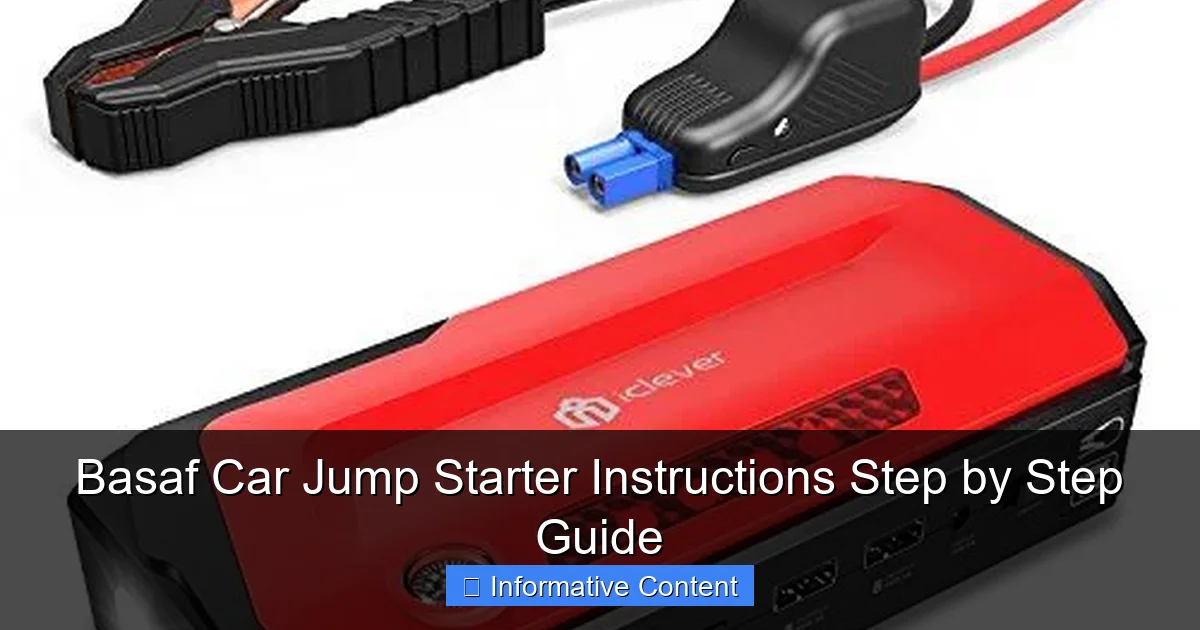
- The main jump starter unit (about the size of a large smartphone or small tablet)
- Smart jumper cables with color-coded clamps (red for positive, black for negative)
- A USB charging cable (usually USB-C or micro-USB)
- A wall charger and car charger adapter
- A carrying case (often compact and padded)
- A user manual (don’t skip this—it’s your best friend)
<
Before your first use, charge the unit fully. Plug it into the wall or your car’s 12V outlet using the provided charger. Most Basaf models take 3–5 hours to charge completely. A full charge usually shows a solid green light or all LED indicators lit. Pro tip: Charge it after every use, even if you didn’t use it. Lithium-ion batteries perform best when kept at 50–100% charge.
Understanding the Buttons, Lights, and Features
The Basaf jump starter is designed with simplicity in mind, but it still has several features worth knowing:
- Power Button: Press and hold for 2–3 seconds to turn the unit on. A quick press cycles through modes (jump start, flashlight, USB power).
- LED Indicators: These show battery level (usually 4 bars). Green = 75–100%, yellow = 25–75%, red = below 25%. Always check this before attempting a jump.
- USB Ports: Most Basaf models have one or two USB-A ports and sometimes a USB-C for charging phones, tablets, or other devices.
- Flashlight: A built-in LED light with multiple modes (steady, SOS, strobe)—perfect for nighttime emergencies.
- Safety Protection: Basaf units include reverse polarity, short circuit, overcharge, and overcurrent protection. This means even if you accidentally connect the clamps backward, the unit won’t spark or damage your car.
One thing I love is how intuitive the interface is. I once had to help a neighbor in the dark, and within two minutes, I had the flashlight on and the unit powered up. No fumbling, no confusion.
Common Models and Their Specs
Basaf offers several models, but the most popular ones fall into these categories:
| Model | Peak Current | Battery Capacity | USB Ports | Flashlight | Best For |
|---|---|---|---|---|---|
| Basaf 1200A | 1200A | 18,000mAh | 2 USB-A, 1 USB-C | Yes (3 modes) | Compact cars, SUVs, motorcycles |
| Basaf 1500A | 1500A | 20,000mAh | 2 USB-A, 1 USB-C | Yes (3 modes) | Large SUVs, trucks, vans |
| Basaf 800A (Mini) | 800A | 12,000mAh | 1 USB-A | Yes (2 modes) | Small cars, daily drivers |
Choose based on your vehicle’s engine size. For example, a 1200A model works great for a Honda Civic, but a Ford F-150 might need the 1500A. Always check your car’s manual for cold-cranking amps (CCA) requirements.
Preparing for a Jump Start: Safety First
Assess the Situation Before You Act
Before you even pull out your Basaf jump starter, take a moment to evaluate:
- Is the car in a safe location? (e.g., not on a busy road, not on a steep incline)
- Are the headlights, radio, or AC turned on? If so, turn them off. This reduces electrical load.
- Check for visible battery damage—leaking fluid, cracked case, or bulging terminals. If you see any, do not attempt a jump. Call a mechanic.
- Is the battery terminal clean? Corrosion (white/green powder) can interfere with connection. Use a wire brush or baking soda paste to clean it if needed.
I once skipped this step and tried to jump a car with a corroded terminal. The Basaf unit sparked and shut off—thankfully, its safety protection worked. But it delayed me 20 minutes while I cleaned the terminals. Lesson learned: always inspect first.
Wear Proper Safety Gear
You don’t need a full hazmat suit, but a few simple items help:
- Gloves: Nitrile or mechanic’s gloves protect your hands from acid and dirt.
- Safety Glasses: Batteries can vent gas or even explode if shorted. Glasses shield your eyes.
- Stable Footing: Stand on flat, dry ground. Avoid jumping in the rain if possible.
And here’s a tip: Keep a small cleaning kit (wire brush, baking soda, rag) in your car. I keep mine in the same bag as the Basaf unit. It’s saved me twice.
Check Your Basaf Unit’s Readiness
Before connecting anything:
- Turn on the Basaf jump starter. Check the LED battery level. Never attempt a jump with less than 50% charge.
- Ensure the clamps are clean and undamaged.
- Verify the jumper cables are securely attached to the unit.
- Set the unit on a flat, stable surface near the battery—but not touching metal parts.
One common mistake? Placing the jump starter on the engine block. This can cause vibration damage or short circuits. I keep mine on the fender or a plastic battery cover.
Step-by-Step Basaf Car Jump Starter Instructions
Step 1: Position the Jump Starter Correctly
Place the Basaf unit on a stable, non-conductive surface near the battery. Avoid placing it on the engine, metal fenders, or anywhere it could vibrate loose. I usually put mine on the plastic battery cover or the inner fender liner.
Why this matters: If the unit touches metal and the clamps are connected, it could create a short circuit—even with safety protection.
Step 2: Connect the Jumper Cables (Red First!)
This is the most critical part. Always follow this order:
- Connect the red (positive) clamp to the positive (+) terminal of the dead battery.
- Connect the black (negative) clamp to a ground point—not the negative terminal.
What’s a ground point? A clean, unpainted metal surface on the engine block, chassis, or a designated grounding bolt. Avoid the negative terminal if possible. Why? It reduces the risk of sparks near the battery, which could ignite hydrogen gas.
I once saw someone connect both clamps to the battery terminals. The Basaf unit flashed a warning light and shut off—safety protection in action. But it scared them half to death. So, always connect black to ground.
Step 3: Power On the Basaf Unit
Press and hold the power button for 2–3 seconds. The unit will beep and light up. You should see the LED indicators showing battery level.
Now, check the display or indicator lights. Some models have a “Ready” light or a green checkmark when the connection is safe. If you see a red light or warning (like “Reverse Polarity”), disconnect immediately and recheck your connections.
One time, I got a “Short Circuit” warning. Turns out, the black clamp was touching the positive terminal. A quick fix, but the unit’s alert saved me from damage.
Step 4: Start the Engine
With everything connected and the Basaf unit powered on:
- Get in the car.
- Turn the ignition to “Start.” You might hear a click or the engine cranking.
- If it doesn’t start right away, wait 10–15 seconds, then try again. Never crank for more than 5–7 seconds straight.
If the engine starts, great! Let it run for 1–2 minutes to stabilize. If it doesn’t start after 3 tries, stop. The battery might be too far gone, or there could be another issue (like a bad starter).
Step 5: Disconnect in Reverse Order
Once the engine is running:
- Turn off the Basaf unit (press and hold the power button).
- Disconnect the black (negative) clamp first.
- Then disconnect the red (positive) clamp.
- Stow the cables neatly in the case.
Important: Never disconnect the red clamp while the engine is running. It can cause a voltage spike that damages electronics.
After disconnecting, I always give the Basaf unit a quick wipe and recharge it. This keeps it ready for next time.
Troubleshooting Common Issues
“The Car Won’t Start—What Now?”
If your engine doesn’t turn over, don’t panic. Try these fixes:
- Check the Basaf charge level: Recharge it if below 50%.
- Recheck connections: Loose or corroded terminals are common culprits.
- Wait 2–3 minutes: The battery might need a moment to accept charge.
- Try a different ground point: Sometimes the first spot wasn’t clean enough.
- Use the “Boost” mode (if available): Some Basaf models have a boost feature for deeply discharged batteries.
I once spent 10 minutes troubleshooting a no-start issue, only to realize the Basaf unit had dropped to 40% charge after a long trip. A quick 15-minute recharge fixed it.
“The Basaf Unit Shows a Warning Light”
Basaf jump starters have smart diagnostics. Here’s what common warnings mean:
- Reverse Polarity: Red and black clamps are swapped. Disconnect and reconnect correctly.
- Short Circuit: Clamps are touching or connected to the wrong points. Check connections.
- Low Battery: The unit needs charging. Recharge before use.
- Overheat: The unit is too hot. Let it cool for 10–15 minutes.
Most warnings are easy to fix. Just follow the manual—it’s worth keeping in the car.
“The Battery Dies Again the Next Day”
A successful jump doesn’t mean your battery is healthy. If it dies again, it likely needs replacement. Other signs of a bad battery:
- Slow cranking even after a jump
- Frequent need for jumps
- Battery is more than 3–5 years old
After a jump, drive for at least 20–30 minutes to recharge the battery. Or use a battery maintainer. I keep a trickle charger in my garage for this reason.
Maintaining Your Basaf Jump Starter for Longevity
Charging and Storage Tips
To keep your Basaf unit in top shape:
- Recharge it every 3–6 months, even if unused. Lithium-ion batteries degrade if left dead.
- Store in a cool, dry place (not the glovebox in summer).
- Avoid extreme temperatures. Don’t leave it in the car during a heatwave.
- Use the original charger or a high-quality replacement.
I keep mine in my trunk, in a small insulated bag. It stays at a stable temperature and is protected from dust.
Cleaning and Care
After each use:
- Wipe the unit with a dry cloth.
- Check clamps for dirt or corrosion. Clean with a wire brush if needed.
- Inspect cables for fraying or damage.
One winter, I noticed the clamps were stiff from road salt. A quick wipe with a damp cloth (then dried thoroughly) fixed it.
When to Replace Your Jump Starter
Even the best units don’t last forever. Replace your Basaf jump starter if:
- It won’t hold a charge
- LED lights don’t work
- It takes more than 8 hours to charge
- It fails to jump-start a car with a known good battery
Most last 3–5 years with proper care. I’ve had mine for four years and it still works like new.
Final Thoughts: Be Prepared, Stay Safe
A Basaf car jump starter isn’t just a gadget—it’s peace of mind. Whether you’re a daily commuter, a weekend adventurer, or just someone who wants to avoid the stress of a dead battery, having one in your car is a smart move. But as I’ve learned from experience, knowing how to use it is just as important as owning it.
Follow these Basaf car jump starter instructions carefully: inspect first, connect safely, start confidently, and maintain regularly. It’s not just about getting your car running—it’s about doing it without risking damage to your vehicle, your jump starter, or yourself.
And remember: a jump starter is a tool, not a cure-all. If your battery keeps dying, get it tested. If your alternator is failing, see a mechanic. But for those unexpected moments—late-night breakdowns, cold mornings, or forgotten headlights—your Basaf unit will be there, ready to help.
So, charge it, store it, and keep this guide handy. The next time your car won’t start, you’ll know exactly what to do. And that? That’s true freedom on the road.
Frequently Asked Questions
How do I use the Basaf car jump starter for the first time?
Begin by fully charging the Basaf jump starter using the provided USB-C cable. Connect the clamps to the battery terminals (red to positive, black to negative), then start the vehicle—the smart clamps will prevent reverse polarity damage.
What safety features does the Basaf car jump starter have?
The Basaf jump starter includes spark-proof technology, reverse polarity and overcharge protection, and automatic power cut-off to ensure safe operation. These features make it beginner-friendly and reduce risks during use.
Can the Basaf jump starter work in cold weather?
Yes, the Basaf car jump starter is designed with low-temperature resistance, performing reliably in temperatures as low as -4°F (-20°C). For best results, store it indoors when not in use to maintain battery health.
How do I charge my phone with the Basaf jump starter?
The Basaf jump starter doubles as a power bank—use the USB-A or USB-C ports to charge devices. Simply connect your phone’s charging cable to the port and press the power button to activate.
How long does the Basaf car jump starter hold its charge?
The Basaf jump starter retains 80% charge for up to 6 months in standby mode. Recharge it every 3–4 months if unused to ensure peak performance when needed.
What should I do if the Basaf jump starter fails to start my car?
Ensure the clamps are securely connected and the battery isn’t deeply discharged. Try recharging the jump starter fully and attempt again—if issues persist, consult the manual or contact Basaf support.