
Featured image for avapow jump starter how to charge
Image source: static.slickdealscdn.com
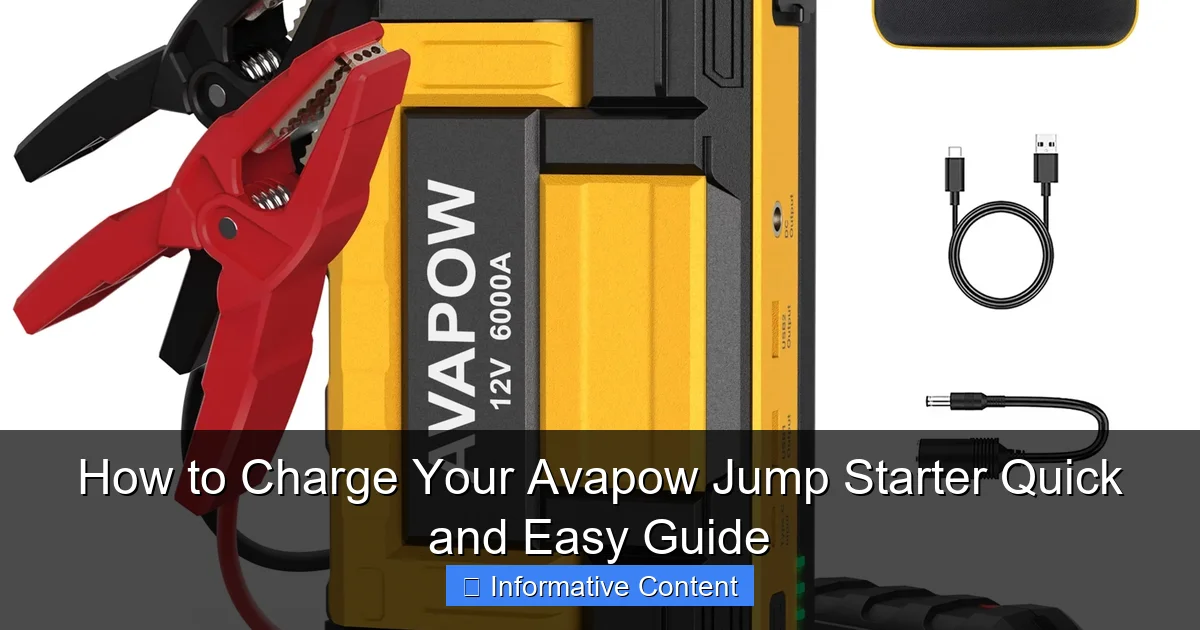
Charging your Avapow jump starter is simple and fast—just connect it to a standard wall outlet using the included AC adapter, and the built-in LED indicator will show real-time charging progress. For maximum efficiency, always charge until the indicator shows a full battery, ensuring reliable performance when you need a jump start most.
Key Takeaways
- Use the included USB-C cable: ensures fast and reliable charging for your Avapow jump starter.
- Charge when indicator lights flash: signals low battery and the need for immediate recharging.
- Plug into a wall outlet or power bank: choose a stable power source for optimal charging speed.
- Avoid overcharging: unplug once fully charged to preserve battery lifespan and safety.
- Check charge status with LED indicators: monitor progress and confirm readiness before use.
- Store in a cool, dry place: maintains battery health when not in use.
- Recharge every 3 months: prevents power loss during emergencies due to self-discharge.
📑 Table of Contents
- How to Charge Your Avapow Jump Starter: Quick and Easy Guide
- Understanding Your Avapow Jump Starter: What You Need to Know Before Charging
- Step-by-Step: How to Charge Your Avapow Jump Starter (The Right Way)
- Charging Options: Wall, Car, and Solar (Yes, Solar!)
- Common Charging Mistakes (And How to Avoid Them)
- Maintaining Your Avapow: Tips for Long-Term Performance
- Final Thoughts: Keep Your Avapow Ready for Anything
How to Charge Your Avapow Jump Starter: Quick and Easy Guide
Let’s face it—there’s nothing worse than being stuck on the side of the road with a dead car battery. You’re late for work, it’s freezing outside, and you’re fumbling with jumper cables that seem to have a mind of their own. That’s why portable jump starters like the Avapow have become such game-changers. They’re compact, powerful, and don’t require another vehicle to get you back on the road. But here’s the catch: just like any electronic device, your Avapow jump starter needs to be charged properly to stay reliable when you need it most.
Think of it like your phone. You wouldn’t leave it at 10% and expect it to work during an emergency, right? The same goes for your jump starter. Whether you’ve just bought a new Avapow or you’ve had one in your trunk for months, knowing how to charge your Avapow jump starter the right way is crucial. It’s not just about plugging it in—it’s about understanding the charging process, avoiding common mistakes, and making sure it’s always ready to go when you need it. In this guide, I’ll walk you through everything you need to know, step by step, so you never get stranded again.
Understanding Your Avapow Jump Starter: What You Need to Know Before Charging
Before we dive into the actual charging process, let’s take a moment to get familiar with your Avapow jump starter. These devices are more than just glorified batteries—they’re packed with smart features designed to keep you safe and efficient. But to use them properly, you need to understand their components and what makes them tick.

Visual guide about avapow jump starter how to charge
Image source: amproad.ca
Key Components and Features
- Battery Type: Most Avapow models use lithium-ion batteries. These are lightweight, hold a charge well, and are less prone to memory effect compared to older battery types. But they’re also sensitive to overcharging and extreme temperatures.
- Charging Ports: You’ll typically find a USB-C port for charging the jump starter itself, plus USB-A ports for charging your phone, tablet, or other devices. Some models even have a 12V DC output for car accessories.
- LED Display: Many Avapow models come with a digital or LED screen that shows the battery percentage, charging status, and error codes. This is your best friend when monitoring charge levels.
- Safety Features: Reverse polarity protection, short-circuit protection, and overcharge protection are built-in to prevent damage to your car or the device itself.
For example, I once left my Avapow A18 model in my car during a heatwave. When I checked it a week later, the display was flashing a “Low Temp/High Temp” warning. Turns out, extreme heat (above 120°F) can damage lithium-ion batteries. That’s why understanding these features helps you avoid costly mistakes.
Why Proper Charging Matters
Charging your Avapow correctly isn’t just about convenience—it’s about longevity and reliability. Overcharging, using the wrong charger, or charging in extreme conditions can shorten the battery’s lifespan or even cause it to fail when you need it most.
Here’s a real-life scenario: A friend of mine thought he could “top off” his jump starter by leaving it plugged in overnight with a cheap phone charger. The next day, the battery wouldn’t hold a charge. After some troubleshooting, we realized the charger wasn’t providing the correct voltage. Lesson learned: always use the right charger and follow the recommended charging time.
Step-by-Step: How to Charge Your Avapow Jump Starter (The Right Way)
Now that we’ve covered the basics, let’s get into the nitty-gritty: how to charge your Avapow jump starter safely and effectively. Whether you’re using the included charger or a third-party option, these steps will ensure your device stays in top condition.
Step 1: Gather the Right Equipment
First things first—make sure you have the right tools. The Avapow jump starter typically comes with:
- A USB-C charging cable (sometimes labeled as a “charging cord”)
- A wall adapter (usually 5V/2A or 9V/2A)
- An optional car charger (12V DC to USB-C)
Pro tip: Always use the original charger or a high-quality replacement. Generic chargers might seem fine, but they can deliver inconsistent voltage, which stresses the battery over time. I once tried using a random USB-C cable from my drawer—it took twice as long to charge and didn’t reach 100%.
Step 2: Connect the Charger
Here’s how to do it:
- Locate the USB-C port on your Avapow (usually on the side or back).
- Plug the USB-C end of the cable into the jump starter.
- Connect the other end to the wall adapter, then plug it into a standard outlet.
If you’re using a car charger, plug the adapter into your vehicle’s 12V socket (cigarette lighter), then connect the USB-C cable to the jump starter.
Note: Some models have a charging indicator light (often blue or red). A steady red light usually means charging; blue means fully charged. Check your manual for specifics.
Step 3: Monitor the Charging Process
Most Avapow jump starters take 3 to 6 hours to fully charge, depending on the model and battery capacity. Here’s what to look for:
- The LED display will show a rising percentage (e.g., 25%, 50%, 75%, 100%).
- Some models have a blinking light that changes from red to green when fully charged.
- Avoid covering the device while charging—it needs airflow to prevent overheating.
Real-world tip: I like to charge mine in the kitchen where I can check it periodically. If the device gets warm (not hot), that’s normal. But if it’s too hot to touch, unplug it and let it cool down.
Step 4: Unplug When Fully Charged
Once the display shows 100% or the light turns green, unplug the charger. Do not leave it connected overnight. While most Avapow models have overcharge protection, it’s still a good habit to avoid unnecessary strain on the battery.
Example: My neighbor once left his jump starter plugged in for 24 hours. The battery degraded faster over time. After switching to a timer outlet, his device lasted much longer.
Optional: Use a Smart Plug or Timer
To automate the process, consider using a smart plug (like a Kasa or TP-Link) or a mechanical timer. Set it to turn off after 6 hours, so you never have to worry about overcharging.
Charging Options: Wall, Car, and Solar (Yes, Solar!)
One of the best things about Avapow jump starters is their flexibility. You’re not limited to just wall charging—there are several ways to keep your device powered up, depending on your situation.
Wall Charging (Most Common)
This is the go-to method for most users. It’s fast, reliable, and gives the most consistent charge. Just make sure:
- Use a 5V/2A or 9V/2A adapter (check your model’s manual).
- Avoid charging near water or in damp areas (like a bathroom).
- Keep the device on a hard, flat surface (not on a bed or couch).
I keep my Avapow on a small shelf in my home office. It’s close to an outlet, dry, and I can check it every time I pass by.
Car Charging (Great for Road Trips)
If you’re on the go, charging via your car’s 12V socket is super convenient. Here’s how:
- Start your car (or turn the ignition to “accessory” mode).
- Plug the car charger into the 12V socket.
- Connect the USB-C cable to your Avapow.
Note: Charging speed may be slower in the car, especially if your alternator isn’t putting out full power. But it’s perfect for topping off between uses.
Personal experience: On a recent road trip, my Avapow dropped to 60% after jump-starting a friend’s SUV. I charged it in the car during a 2-hour drive, and it was back to 100% by the time we reached our destination.
Solar Charging (For Emergencies and Off-Grid Use)
Did you know some Avapow models can be charged with a solar panel? It’s true—if you have a compatible solar charger (usually 5V/2A or higher), you can use sunlight to recharge your jump starter.
How it works:
- Connect the solar panel’s USB output to your Avapow’s USB-C port.
- Place the panel in direct sunlight.
- Expect slower charging (8–12 hours on a sunny day).
Why this matters: During a camping trip last summer, I used a 20W solar panel to charge my Avapow after it drained from powering a portable fridge. It wasn’t fast, but it worked—and saved me from being stranded.
Pro tip: Not all solar panels are equal. Look for one with a built-in charge controller to prevent overvoltage.
Which Method Should You Use?
Here’s a quick comparison to help you decide:
| Charging Method | Speed | Best For | Limitations |
|---|---|---|---|
| Wall Charger | Fast (3–6 hrs) | Home, office | Needs outlet access |
| Car Charger | Medium (4–8 hrs) | Road trips, emergencies | Slower, requires car power |
| Solar Charger | Slow (8–12 hrs) | Off-grid, camping | Weather-dependent |
Common Charging Mistakes (And How to Avoid Them)
Even the best of us make mistakes. But when it comes to charging your Avapow jump starter, a small error can lead to big problems. Let’s go over the most common pitfalls—and how to steer clear of them.
Using the Wrong Charger
We’ve all been there: “Oh, I’ll just use this random USB cable.” But not all chargers are created equal. Using a low-quality or incompatible charger can:
- Charge the battery too slowly
- Overheat the device
- Damage the battery over time
What to do: Always use the original charger or a certified replacement (look for “PD” or “Power Delivery” on the label). If you lose the original, buy one directly from Avapow or a reputable retailer.
Leaving It Charging Overnight
While Avapow jump starters have overcharge protection, it’s not foolproof. Lithium-ion batteries degrade faster if they’re constantly kept at 100%. Think of it like leaving your phone plugged in all the time—it’s convenient, but not great for the battery.
Solution: Set a timer or use a smart plug. Or simply unplug it when it hits 100%.
Charging in Extreme Temperatures
This is a big one. Charging your Avapow in:
- Hot environments (e.g., a car in summer) can cause overheating and reduce battery life.
- Cold environments (below 32°F) can slow down charging and even damage the battery.
Tip: If your jump starter feels hot, let it cool down before charging. In winter, store it in a temperature-controlled space (like your home or garage).
Ignoring the Manual
I get it—no one likes reading manuals. But the Avapow manual includes specific details like:
- Recommended charging voltage and current
- Error codes (e.g., “E1” for low voltage)
- Storage tips
Example: My Avapow A20 model has a “Low Self-Discharge” mode that activates after 6 months of inactivity. The manual explains how to reactivate it—something I’d have missed otherwise.
Not Checking the Battery Regularly
Even if you don’t use your jump starter often, it can lose charge over time. Lithium-ion batteries self-discharge at about 1–5% per month.
Best practice: Check the battery level every 2–3 months. If it’s below 50%, give it a quick charge to keep it healthy.
Maintaining Your Avapow: Tips for Long-Term Performance
Charging your Avapow correctly is just one part of the puzzle. To keep it working reliably for years, you need a simple maintenance routine. Think of it like changing the oil in your car—small steps, big payoff.
Regular Charging Schedule
Even if you haven’t used your jump starter, charge it every 2–3 months. This prevents deep discharge, which can permanently damage lithium-ion batteries.
I set a reminder on my phone every 8 weeks. It takes 5 minutes to check the battery and plug it in if needed.
Clean the Ports
Dust and debris can block the USB-C port, making charging difficult. Use a soft brush or compressed air to clean it every few months.
Store It Properly
When not in use, store your Avapow in a:
- Dry, cool place (ideally 50–77°F)
- Hard case or protective sleeve (to prevent drops)
- Location you’ll remember (e.g., with your emergency kit)
I keep mine in a small toolbox in my trunk. It’s protected, organized, and easy to find in an emergency.
Update Firmware (If Applicable)
Some newer Avapow models have firmware that can be updated via a USB connection to a computer. Check the Avapow website for updates—they often include performance improvements and bug fixes.
Test It Occasionally
Don’t wait until your car won’t start to test your jump starter. Every few months, try:
- Charging your phone with it
- Using the flashlight feature
- Checking the battery level
This way, you’ll catch any issues before they become emergencies.
Final Thoughts: Keep Your Avapow Ready for Anything
At the end of the day, your Avapow jump starter is only as good as its charge. By following the steps in this guide—using the right charger, avoiding common mistakes, and maintaining it properly—you’ll ensure it’s always ready to save the day.
Remember, charging your Avapow isn’t a one-time thing. It’s an ongoing habit, like checking your tire pressure or changing your oil. But with just a few minutes of attention every few months, you’ll avoid the stress of being stranded with a dead battery.
So go ahead—plug it in, set a reminder, and rest easy knowing you’ve got a reliable backup plan. Because when life throws you a curveball (or a dead battery), you’ll be ready. And that’s the peace of mind every driver deserves.
Frequently Asked Questions
How do I charge my Avapow jump starter for the first time?
For the first charge, connect the included USB-C cable to a power source and plug it into your Avapow jump starter. It’s recommended to fully charge it for at least 4-6 hours before initial use to ensure optimal battery performance.
What type of charger should I use to charge the Avapow jump starter?
Use the provided USB-C cable with a standard 5V/2A wall adapter or a computer USB port. Avoid using fast chargers unless specified, as they may affect the battery life of your Avapow jump starter.
How long does it take to fully charge the Avapow jump starter?
Charging time typically takes 3 to 5 hours depending on the model and power source. The LED indicator will turn solid green when the Avapow jump starter is fully charged and ready to use.
Can I charge the Avapow jump starter while using it?
No, it’s not recommended to charge and use the Avapow jump starter simultaneously. Always disconnect it from the power source before attempting to jump-start a vehicle to ensure safety and prevent damage.
How do I know when my Avapow jump starter is fully charged?
The built-in LED indicator will show the charging status—blinking during charging and turning solid green when complete. This makes it easy to monitor the charge level of your Avapow jump starter.
Is it safe to leave the Avapow jump starter charging overnight?
Yes, the Avapow jump starter has built-in protection against overcharging, so leaving it plugged in overnight is generally safe. However, it’s best to unplug it once fully charged to extend battery lifespan.