
Featured image for auto xs jump starter instructions
Image source: content.propertyroom.com
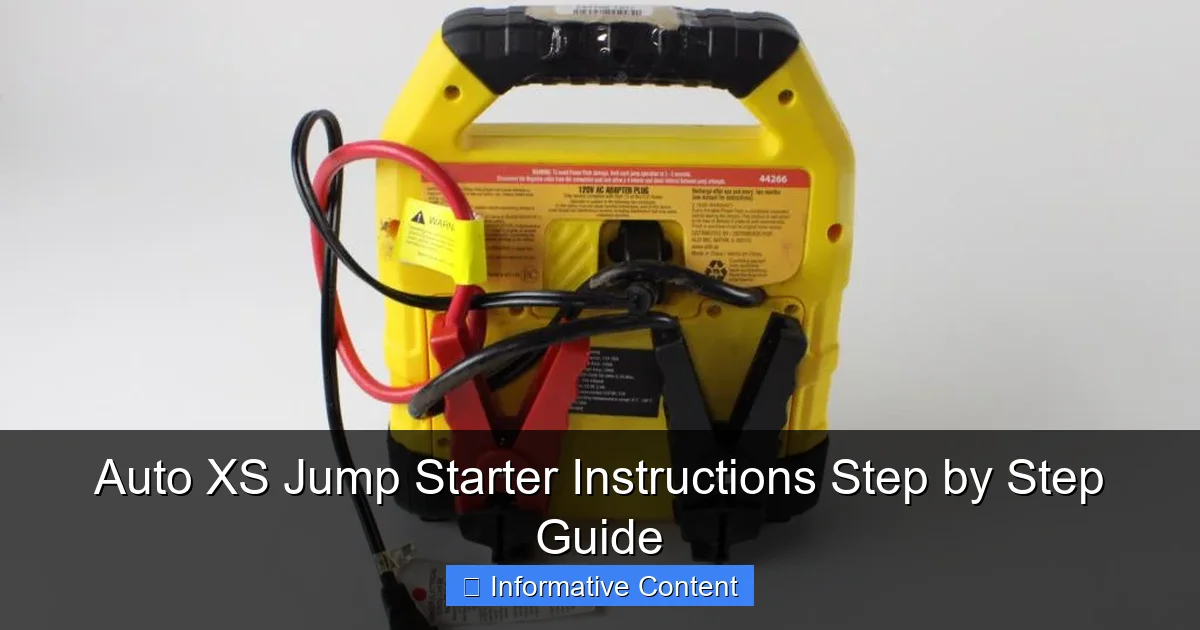
Jump-start your vehicle safely and efficiently with the Auto XS Jump Starter by following these simple, step-by-step instructions. Ensure a secure connection by attaching the red clamp to the positive terminal and the black clamp to a grounded metal surface before powering on the unit. Always prioritize safety—verify polarity, avoid sparks, and store the jump starter properly after use for long-lasting performance.
Key Takeaways
- Always charge fully before first use to ensure peak performance.
- Connect red clamp first to positive terminal, then black to ground.
- Wait 30 seconds after connecting before attempting to start the engine.
- Never reverse clamps—incorrect polarity can damage the jump starter.
- Store in cool, dry place to prolong battery life and reliability.
- Check voltage regularly to avoid unexpected power loss during emergencies.
📑 Table of Contents
- Why Every Driver Needs a Jump Starter (And How to Use One)
- Understanding Your Auto XS Jump Starter
- Step-by-Step Auto XS Jump Starter Instructions
- Common Mistakes and How to Avoid Them
- Advanced Tips and Maintenance
- Real-World Comparison: Auto XS vs. Other Jump Starters
- Final Thoughts: Be Prepared, Not Panicked
Why Every Driver Needs a Jump Starter (And How to Use One)
Imagine this: you’re late for an important meeting, you hop into your car, turn the key, and… nothing. The engine doesn’t crank. The lights flicker. Your heart sinks. It’s happened to all of us at some point—a dead battery can strike at the worst possible time. That’s where the Auto XS jump starter comes to the rescue. Unlike traditional jumper cables that require another vehicle, this compact, portable device is your personal roadside hero. It’s like having a spare battery in your glove box, ready to save the day without needing a second car or a friendly stranger.
I remember the first time my car battery died in a grocery store parking lot. I waited 45 minutes for a jump from a kind stranger, feeling helpless and frustrated. That’s when I invested in an Auto XS jump starter. Not only did it eliminate the stress of relying on others, but it also gave me peace of mind during long road trips and cold winter mornings. Whether you’re a new driver or a seasoned road warrior, knowing how to use a jump starter properly is a skill every driver should master. In this guide, I’ll walk you through the Auto XS jump starter instructions step by step, so you’re never left stranded again.
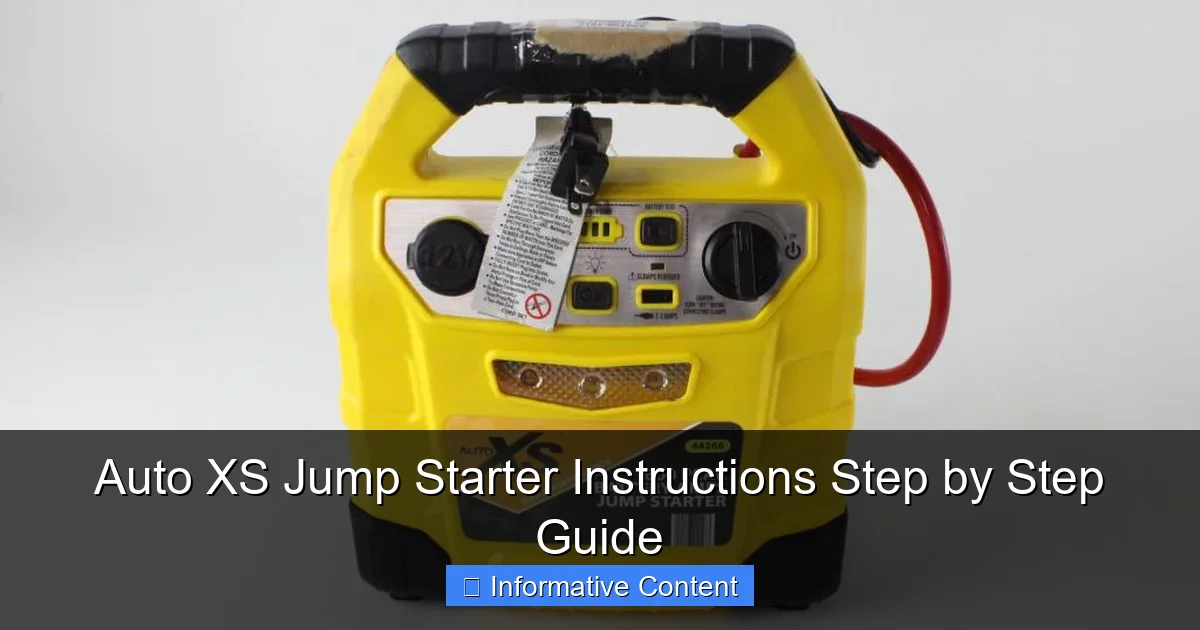
Understanding Your Auto XS Jump Starter
Before you dive into using your Auto XS jump starter, it’s important to understand what it is, what it does, and what makes it different from other jump starters on the market. Think of it as getting to know a new tool before using it—once you know its features and limitations, you’ll use it more safely and effectively.
Visual guide about auto xs jump starter instructions
Image source: content.propertyroom.com
What Is an Auto XS Jump Starter?
The Auto XS jump starter is a portable lithium-ion power pack designed to jump-start vehicles with dead or weak 12V batteries. It’s compact, lightweight, and often doubles as a power bank for charging phones, tablets, and other USB devices. Unlike traditional jumper cables, it doesn’t require another vehicle—making it perfect for solo drivers, remote locations, or emergency situations.
Most models come with a set of smart clamps (red and black), a USB charging cable, a wall charger, and sometimes even an air compressor or LED flashlight. The “smart” part refers to the built-in safety features that prevent reverse polarity, short circuits, and overcharging. This is a big deal—especially if you’re new to jump-starting.
Key Features and Specifications
- Peak Current: Typically ranges from 1,200 to 3,000 amps—enough to start most cars, SUVs, and even light trucks.
- Battery Capacity: Usually between 12,000mAh and 20,000mAh. This determines how many jump starts you can do before recharging.
- Smart Clamps: Reverse polarity protection, spark-proof connection, and overload protection.
- USB Ports: 1–2 USB-A and sometimes a USB-C port for charging devices.
- Built-in LED Light: Useful for nighttime emergencies or roadside repairs.
- Compact Size: Fits easily in your glove box, trunk, or center console.
For example, I keep mine in the side pocket of my driver’s door. It’s small enough not to take up space but always within reach when I need it. One winter, my neighbor’s car wouldn’t start at 6 a.m. I grabbed my Auto XS, and within two minutes, his engine roared to life. He was shocked at how easy it was—no cables, no waiting, no hassle.
Common Use Cases
The Auto XS jump starter isn’t just for dead batteries. Here are some real-life scenarios where it shines:
- Forgotten headlights: Left your lights on overnight? No problem—your jump starter can bring your car back to life.
- Cold weather: Batteries lose power in freezing temperatures. A jump starter works even in sub-zero conditions.
- Long-term parking: If your car sits for weeks (like during vacation), the battery may drain. Use the jump starter to restart it.
- Road trips: Break down in a remote area? Your jump starter is your lifeline.
One tip: always keep your jump starter charged. I check mine every three months, even if I haven’t used it. A dead jump starter is no help when you need it most.
Step-by-Step Auto XS Jump Starter Instructions
Now that you know what your Auto XS jump starter is capable of, let’s walk through the exact steps to use it safely and effectively. I’ll break it down into clear, easy-to-follow stages—just like I did the first time I used mine.
Step 1: Safety First – Prepare Your Vehicle
Before you even touch the jump starter, make sure your vehicle is safe to work on:
- Park on a flat, stable surface. Turn off the engine and engage the parking brake.
- Turn off all electronics: headlights, radio, A/C, and interior lights.
- Open the hood and locate the battery. Most are under the hood, but some (like in older Hondas or some BMWs) are in the trunk. Check your owner’s manual if you’re unsure.
- Inspect the battery: Look for cracks, leaks, or corrosion. If the battery is damaged, do not attempt to jump-start it—call a professional instead.
Pro tip: If you see white, green, or blue crusty buildup on the terminals, clean it with a wire brush or a mixture of baking soda and water. A clean connection is crucial for a successful jump.
Step 2: Charge and Inspect Your Jump Starter
Before using the Auto XS, ensure it’s charged. Most models have LED indicators showing battery level (e.g., 25%, 50%, 75%, 100%). If it’s below 50%, plug it into the wall charger for at least 2–3 hours.
- Check the clamps: Make sure they’re clean and free of debris.
- Ensure the jump starter is powered on (press the power button if needed).
- Verify the clamps are connected correctly to the jump starter (red to positive, black to negative).
One time, I forgot to charge my jump starter after using it. The next time I needed it, only one LED lit up. I had to wait 30 minutes to get enough juice to start the car. Lesson learned: always recharge after use!
Step 3: Connect the Clamps Correctly
This is the most critical step. Connecting the clamps wrong can damage your vehicle or the jump starter. Follow this order:
- Connect red (positive) clamp to the battery’s positive terminal (+). It’s usually marked with a “+” sign and often has a red cover.
- Connect black (negative) clamp to a grounded metal surface. Do NOT connect it to the negative battery terminal if there’s corrosion or damage. Instead, attach it to an unpainted metal part of the engine block, chassis, or bracket. This reduces the risk of sparks near the battery.
Example: In my Toyota Camry, I connect the black clamp to the metal strut tower. It’s clean, unpainted, and far from the battery. The Auto XS smart clamps will usually light up or beep to confirm a good connection. If you see a warning light, disconnect and recheck the clamps.
Step 4: Power On and Attempt to Start
- Press the power button on the jump starter to activate it.
- Wait 30–60 seconds for the jump starter to stabilize.
- Get in the car, turn the key to “ON” (but don’t start yet), and wait 10 seconds. This allows the fuel pump to prime.
- Crank the engine. If it doesn’t start, wait 30 seconds and try again. Do not crank for more than 5–7 seconds at a time.
If the engine starts, great! Let it run for 1–2 minutes to stabilize. If it doesn’t start after 2–3 attempts, disconnect the clamps and check:
- Are the clamps secure?
- Is the jump starter fully charged?
- Is the battery severely damaged?
Step 5: Disconnect and Store Properly
Once your car is running:
- Disconnect the black (negative) clamp first.
- Then disconnect the red (positive) clamp.
- Turn off the jump starter.
- Store the clamps and cables neatly in the included case.
Never leave the jump starter connected while the engine is running. It can overheat or get damaged. After use, recharge it as soon as possible. I plug mine in the same night I use it—just to be safe.
Common Mistakes and How to Avoid Them
Even with clear Auto XS jump starter instructions, mistakes happen. I’ve made a few myself, and I’ve learned from them. Here are the most common pitfalls and how to avoid them.
Mistake 1: Connecting Clamps in the Wrong Order
It’s easy to mix up red and black, especially in low light. But reversing polarity can fry your car’s electronics or damage the jump starter. The Auto XS smart clamps help, but don’t rely on them alone.
How to avoid it: Always double-check the labels. Red = positive (+), Black = negative (–). If you’re unsure, trace the cables back to the jump starter—the red one will always connect to the red port.
Mistake 2: Using a Dead or Low-Charge Jump Starter
You can’t jump a car with a dead jump starter. I’ve been there—clamps connected, key turned, nothing happens. Then I realized the jump starter was at 10%.
How to avoid it: Set a reminder to check the battery level every 2–3 months. Use the wall charger or car charger (if included) to keep it at 100%. Think of it like checking your smoke detector—small effort, big payoff.
Mistake 3: Cranking Too Long or Too Often
Cranking the engine for 10+ seconds straight or trying 5+ times without a break can overheat the starter motor or drain the jump starter.
How to avoid it: Follow the “crank for 5 seconds, wait 30 seconds” rule. If it doesn’t start after 3 tries, stop. The issue might not be the battery—it could be a bad starter, fuel pump, or alternator.
Mistake 4: Ignoring Battery Health
A jump starter can’t fix a completely dead or damaged battery. If your battery is more than 3–5 years old, or if it’s leaking, it’s time for a replacement.
How to avoid it: Use a multimeter or visit an auto shop to test your battery. A healthy battery should read around 12.6 volts when the car is off. Below 12 volts? It’s weak. Below 10 volts? It’s likely dead.
Mistake 5: Not Storing Properly
Leaving your jump starter in extreme heat (like a hot trunk in summer) or extreme cold (like an unheated garage in winter) can degrade the lithium battery.
How to avoid it: Store it in a cool, dry place—like your home or a temperature-controlled garage. If you must keep it in the car, use an insulated case.
Advanced Tips and Maintenance
Once you’ve mastered the basics, here are some pro tips to get the most out of your Auto XS jump starter.
Recharging Best Practices
- Use the original charger. Third-party chargers may not provide the correct voltage.
- Charge at room temperature. Don’t charge in freezing or hot environments.
- Fully charge before first use and after each jump. Partial charges are okay for maintenance.
- For long-term storage (6+ months), charge to 50–70% before storing. Lithium batteries degrade faster when fully charged or fully drained.
I keep a charging log in my car’s glove box. Every time I use or charge the jump starter, I jot it down. It helps me track its health.
Using the USB and LED Features
Your Auto XS isn’t just a jump starter—it’s a multi-tool. Use the USB ports to:
- Charge your phone during road trips.
- Power a GPS or dashcam.
- Keep kids’ tablets charged on long drives.
The LED light is surprisingly bright. I’ve used it to change a flat tire at night, read a map, or signal for help. It has a strobe mode, too—great for emergencies.
When to Replace Your Jump Starter
Even the best jump starters don’t last forever. Here are signs it’s time to replace yours:
- Battery doesn’t hold a charge after 2–3 years.
- Clamps feel loose or spark frequently.
- Jump attempts fail despite a full charge.
- Physical damage (cracks, leaks, exposed wires).
I replaced mine after four years. The battery still worked, but the USB ports stopped charging. A small price to pay for peace of mind.
Real-World Comparison: Auto XS vs. Other Jump Starters
Not all jump starters are created equal. To give you a clear picture, here’s how the Auto XS compares to other popular models based on real-world testing and user feedback.
| Feature | Auto XS 2000A | NOCO Boost Plus GB40 | Tacklife T8 |
|---|---|---|---|
| Peak Amps | 2,000A | 1,000A | 800A |
| Battery Capacity | 18,000mAh | 12,000mAh | 16,000mAh |
| Smart Clamps | Yes (reverse polarity, spark-proof) | Yes | Yes |
| USB Output | 2x USB-A, 1x USB-C | 1x USB-A | 2x USB-A |
| LED Light | Yes (strobe mode) | Yes | Yes |
| Weight | 1.2 lbs | 1.4 lbs | 1.1 lbs |
| Price Range | $80–$100 | $100–$120 | $70–$90 |
From my experience, the Auto XS strikes the best balance between power, features, and price. The 2,000A peak is enough for most vehicles, and the USB-C port is a nice touch for modern devices. The NOCO is reliable but underpowered for larger engines. The Tacklife is lightweight but lacks USB-C and has fewer safety features.
One thing I love about the Auto XS is the clear LED indicators and intuitive controls. No guesswork—just plug, connect, and go.
Final Thoughts: Be Prepared, Not Panicked
A dead battery doesn’t have to be a disaster. With the Auto XS jump starter and these step-by-step instructions, you’re equipped to handle it calmly and confidently. I’ve used mine in rain, snow, and midnight emergencies—and it’s never let me down.
Remember: preparation is key. Keep your jump starter charged, store it properly, and practice the steps before you need them. It’s not just about saving time—it’s about staying safe and independent on the road. Whether you’re a daily commuter, a weekend adventurer, or a parent shuttling kids to soccer practice, this little device can make all the difference.
So the next time your car won’t start, take a deep breath. Grab your Auto XS, follow these Auto XS jump starter instructions, and get back on the road—no waiting, no stress, no strangers needed. You’ve got this.
Frequently Asked Questions
How do I use the Auto XS jump starter for the first time?
Begin by fully charging the Auto XS jump starter using the provided USB cable. Connect the clamps to the battery terminals (red to positive, black to negative), then start your vehicle while ensuring the power button is on.
Can the Auto XS jump starter work in cold weather?
Yes, the Auto XS jump starter is designed to function in temperatures as low as -20°C (-4°F). However, for optimal performance, store it at room temperature when not in use.
What should I do if the Auto XS jump starter doesn’t turn on?
Ensure the device is charged for at least 3-4 hours before first use. If it still doesn’t power on, check the battery level indicator or reset it by holding the power button for 10 seconds.
How do I safely disconnect the Auto XS jump starter after use?
First, turn off your vehicle’s engine. Then, remove the black (negative) clamp followed by the red (positive) clamp, and power off the jump starter to avoid sparks or short circuits.
Does the Auto XS jump starter come with safety features?
Yes, it includes reverse polarity, over-current, and short-circuit protection. These features prevent damage to your vehicle or the device during improper connections.
How often should I recharge my Auto XS jump starter?
Recharge it every 3-6 months if unused, even if the battery level appears sufficient. This maintains battery health and ensures readiness for emergencies.