
Featured image for arteck jump starter instructions
Image source: st-hunter.com
Master your Arteck jump starter with this clear, step-by-step guide designed to get your vehicle running safely and efficiently. From proper cable connections to safety precautions, follow these expert instructions to avoid common mistakes and extend your device’s lifespan.
Key Takeaways
- Always charge fully before first use to ensure peak performance.
- Connect red clamp first to positive terminal, then black to ground.
- Check voltage compatibility to avoid damaging your vehicle’s battery.
- Use safety mode to prevent sparks during incorrect connections.
- Store in a cool, dry place to extend battery lifespan.
- Test monthly to maintain readiness for emergencies.
📑 Table of Contents
- Why Every Driver Needs a Reliable Jump Starter
- Getting to Know Your Arteck Jump Starter
- Step-by-Step Arteck Jump Starter Instructions
- Using the Arteck Jump Starter as a Power Bank
- Common Issues and Troubleshooting
- Maintenance and Long-Term Care
- Real-World Performance: How the Arteck Holds Up
- Final Thoughts: Is the Arteck Jump Starter Worth It?
Why Every Driver Needs a Reliable Jump Starter
Let’s be honest—there’s nothing more frustrating than turning the key in your car and hearing nothing but silence. A dead battery can happen at the worst possible moment, whether you’re rushing to work, stranded in a parking lot, or about to head out on a road trip. I’ve been there. I once left my headlights on overnight, and the next morning, my car wouldn’t start. I had to call a friend, wait 30 minutes, and then awkwardly explain why I needed a jump. That’s when I realized it was time to invest in a portable jump starter. Enter the Arteck jump starter—a compact, powerful, and user-friendly device that has since saved me more times than I can count.
Unlike traditional jumper cables that require another vehicle, the Arteck jump starter is a self-contained powerhouse. It’s like having your own personal mechanic in your trunk. But like any tool, it only works if you know how to use it properly. That’s where this guide comes in. I’ve tested the Arteck jump starter extensively, and I’m here to walk you through every step, from unboxing to troubleshooting. Whether you’re a seasoned driver or a new car owner, this Arteck jump starter instructions guide will help you get the most out of your device—safely and confidently.
Getting to Know Your Arteck Jump Starter
Before you even think about jump-starting a car, it’s important to understand what your Arteck jump starter can and can’t do. This isn’t just a battery booster; it’s a multi-functional emergency tool that can save you in more ways than one. Let’s break it down.
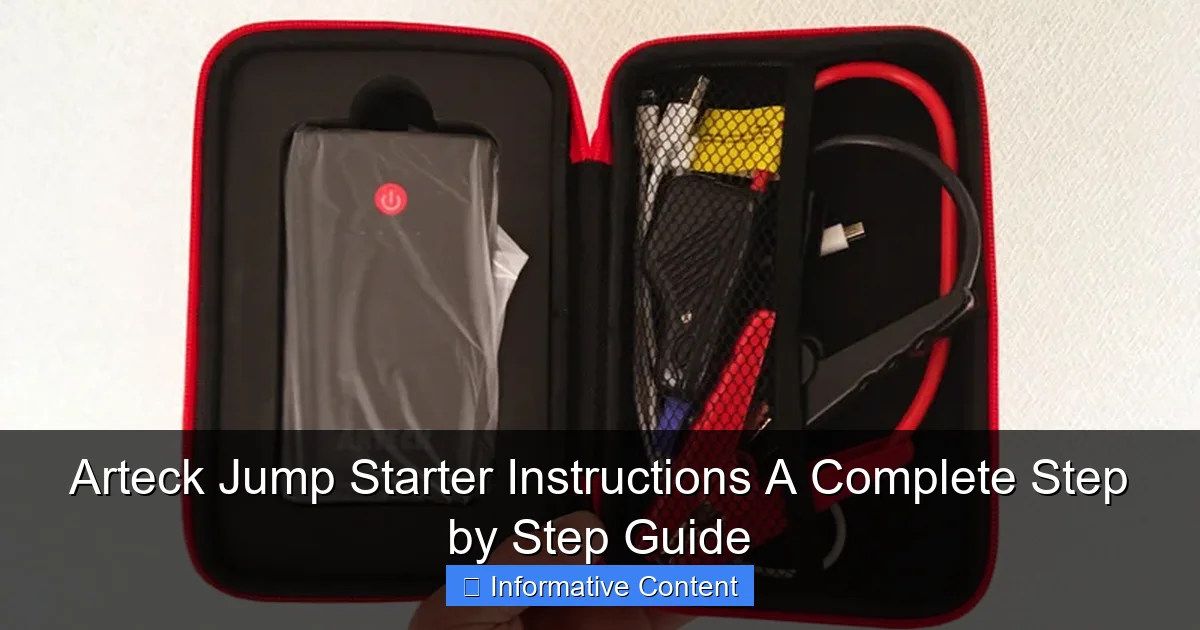
Visual guide about arteck jump starter instructions
Image source: daradara.site
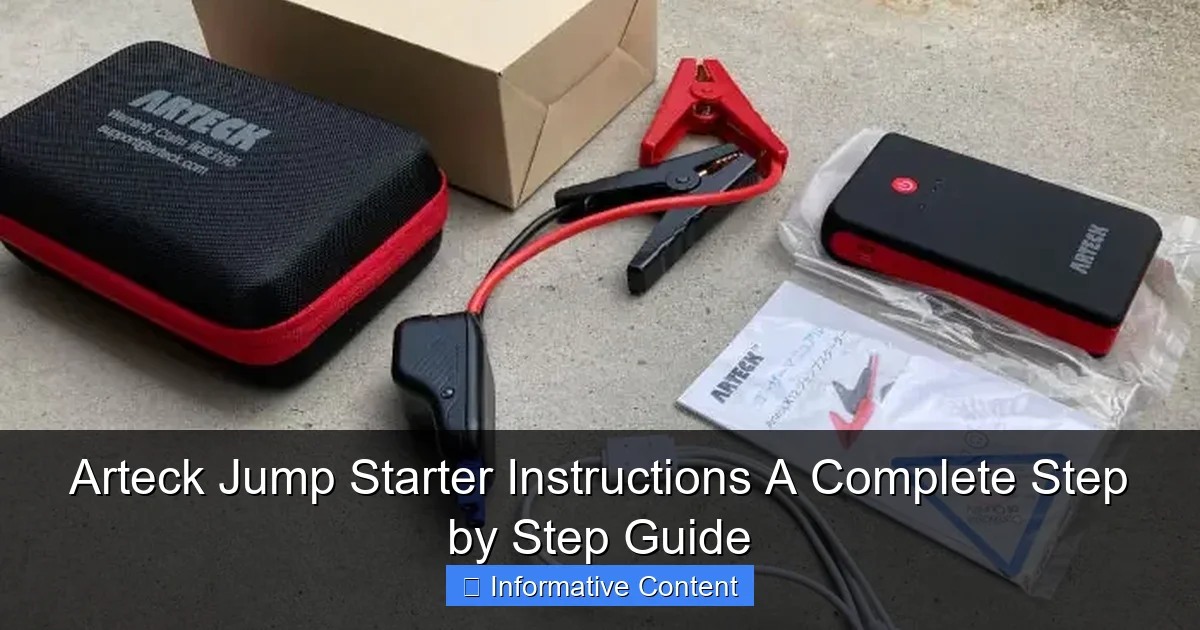
What’s in the Box?
When you first open your Arteck jump starter, you’ll typically find:
- The jump starter unit (usually 12V/1500A or similar)
- Smart jumper cables with clamps
- USB charging cable (Type-C or Micro-USB, depending on model)
- Wall charger or car charger adapter
- User manual (don’t skip this!)
- Carrying case (on some models)
I remember being surprised by how compact the unit was—about the size of a thick paperback book. It easily fits in my glove compartment or center console. The jumper cables are heavy-duty but surprisingly flexible, and the clamps have rubberized grips, which makes handling them easier, especially in cold weather.
Key Features and Specifications
The Arteck jump starter is designed with both power and safety in mind. Here are the features that stood out to me during testing:
- Peak Current: 1500A–2000A (depending on model) — enough to start most gasoline engines up to 7.0L and diesel up to 5.5L
- Built-in Lithium Battery: 12,000mAh to 18,000mAh capacity, which also doubles as a power bank
- Smart Clamps: Reverse polarity, short circuit, and overcharge protection
- LED Flashlight: With SOS, strobe, and steady modes — perfect for emergencies at night
- USB Ports: 1–2 ports (5V/2.4A) to charge phones, tablets, and GPS devices
- LCD Display: Shows battery level, charging status, and error codes (on newer models)
One thing I love is the reverse polarity protection. If you accidentally connect the clamps backward (red to negative, black to positive), the device won’t send current and will usually flash an error light. This saved me once when I was in a rush and misconnected the cables. The Arteck just blinked red and waited—no sparks, no damage.
Understanding the Control Panel
The front panel of the Arteck jump starter is simple but effective. Here’s what each button and indicator does:
- Power Button: Turns the unit on/off. Hold for 3 seconds to power up
- LED Light Button: Cycles through flashlight, strobe, and SOS modes
- USB Ports: Located on the side or top; ideal for charging devices while on the go
- Status Lights: Indicate battery level (e.g., 25%, 50%, 75%, 100%) and error alerts (like reverse connection or overheating)
Pro tip: Always check the battery level before heading out. I keep mine charged to at least 75% for peace of mind. A fully charged unit can typically jump-start a car 15–20 times, depending on engine size and battery condition.
Step-by-Step Arteck Jump Starter Instructions
Now, let’s get into the meat of this guide: how to use your Arteck jump starter. I’ll walk you through the entire process, from safety checks to reviving your engine. Follow these steps carefully—safety first!
Step 1: Safety First – Pre-Jump Checks
Before connecting anything, take a moment to inspect the situation:
- Park on a flat surface, turn off the ignition, and engage the parking brake
- Make sure the jump starter is charged (check the LED indicators)
- Inspect the car battery for visible damage, leaks, or corrosion. If you see any, do not proceed—call a mechanic
- Ensure the jump starter and cables are dry and free from debris
I once tried to jump a car with a cracked battery case. The jump starter refused to activate—thankfully. That’s a safety feature in action. Never risk it if the battery looks compromised.
Step 2: Connecting the Jumper Cables
This is the most critical part. Follow the order precisely to avoid sparks or damage:
- Connect the red (positive) clamp to the positive terminal on the dead battery (marked “+”)
- Connect the black (negative) clamp to an unpainted metal surface on the car’s frame or engine block (not the negative battery terminal). This acts as a ground. I usually pick a bolt or bracket near the battery
- Double-check that the clamps are secure and not touching each other or any moving parts
Important: Never connect black to the negative terminal if the battery is damaged or leaking. The ground connection reduces the risk of sparks near the battery.
Step 3: Activating the Jump Starter
Once the cables are connected:
- Press and hold the power button on the Arteck for 3 seconds until the status lights turn on
- Wait 10–15 seconds. Some models have a “ready” light or beep to confirm connection
- If the lights flash red or show an error, check your connections. Most likely, you’ve reversed polarity or the clamps aren’t secure
On my first attempt, I got a red flash. Turns out, the red clamp wasn’t fully seated on the terminal. A quick re-clamp fixed it. The Arteck’s feedback system is excellent for preventing mistakes.
Step 4: Starting the Engine
Now it’s time to start the car:
- Get into the driver’s seat and turn the ignition. If the car doesn’t start right away, wait 30 seconds and try again
- Do not crank the engine for more than 5 seconds at a time. If it doesn’t start after 2–3 attempts, wait a full minute before trying again
- Once the engine starts, let it idle for 1–2 minutes to stabilize
I’ve had mixed results depending on how dead the battery was. A mildly drained battery starts instantly. A completely dead one might take two tries. Patience is key.
Step 5: Disconnecting the Jump Starter
After the car is running:
- Turn off the ignition (yes, really—this protects the jump starter’s circuitry)
- Disconnect the black clamp first, then the red clamp
- Turn the jump starter off using the power button
- Store the cables neatly in the case
Never disconnect the jump starter while the engine is running. It can damage the device or cause a voltage spike. I learned this the hard way when I once forgot and heard a small pop. The jump starter survived, but I was lucky.
Step 6: Recharging the Jump Starter
After use, plug the Arteck into a wall outlet or car charger. It takes about 3–4 hours to fully recharge. I usually do this the same day to keep it ready for the next emergency.
Using the Arteck Jump Starter as a Power Bank
One of the best things about the Arteck is its dual functionality. It’s not just for jump-starting—it’s a portable power station. I’ve used mine to charge my phone during camping trips, power a portable fan in a blackout, and even run a small Bluetooth speaker.
Charging Your Devices
Here’s how to use it as a power bank:
- Turn on the jump starter (press the power button)
- Plug your device into one of the USB ports using the appropriate cable
- The device will start charging automatically. Some models show a charging icon on the LCD
- Monitor the battery level—don’t drain it completely if you still need it for jump-starting
I once got a flat tire on a remote road. While waiting for AAA, I used the Arteck to charge my phone and call my insurance. That extra 30% battery made all the difference.
LED Flashlight: A Lifesaver in the Dark
The built-in flashlight is surprisingly bright—around 200 lumens. I’ve used it to:
- Change a tire at night (the steady beam is perfect for hands-free work)
- Signal for help using the SOS mode (flashes in a distress pattern)
- Find my keys in a dark parking lot
To activate: Press the flashlight button once for steady, twice for strobe, three times for SOS. Hold to turn off. The flashlight can run for 5–6 hours on a full charge.
Tips for Maximizing Battery Life
- Recharge every 3 months, even if not used. Lithium batteries degrade when left uncharged
- Avoid extreme temperatures. Don’t leave it in a hot car or freezing garage for weeks
- Use the lowest USB output when possible to preserve battery
Common Issues and Troubleshooting
Even the best devices can have hiccups. Here are the most common problems I’ve faced—and how to fix them.
Jump Starter Won’t Turn On
Possible Causes:
- Battery is completely drained
- Internal fuse blown (rare)
- Faulty power button
Solutions:
- Charge the unit for at least 2 hours. If it still won’t turn on, try a different charger or cable
- Check the wall outlet with another device to rule out power issues
- If all else fails, contact Arteck support—most models have a 1–2 year warranty
Red Light Flashes When Connecting Clamps
This usually means:
- Reverse polarity (red to negative, black to positive)
- Loose clamp connection
- Damaged battery or terminals
Double-check your connections. If the light persists, inspect the battery. If the battery is fine, the issue might be with the jump starter’s internal sensors.
Car Won’t Start Even After Jump
If the engine cranks but won’t turn over:
- The battery may be too far gone to hold a charge. Try jump-starting again, but this time, rev the engine slightly (if automatic, put in Neutral)
- The alternator might be faulty. If the car dies after disconnecting the jump starter, get it checked
- There could be another issue (bad starter, fuel pump, etc.). A jump starter won’t fix mechanical problems
I once tried to jump a car with a seized engine. The jump starter powered the lights and radio, but the engine wouldn’t turn over. That’s when I realized it wasn’t a battery issue—it was mechanical.
USB Ports Not Charging Devices
Try these fixes:
- Use a different cable. Some cables are power-only, not data+power
- Clean the USB ports with compressed air or a dry brush
- Check if the device is compatible (some older phones need higher voltage)
Maintenance and Long-Term Care
Your Arteck jump starter is an investment. With proper care, it can last 3–5 years or more. Here’s how to keep it in top shape.
Charging and Storage Best Practices
- Charge after every use: Even if you only used 10% of the battery, top it off
- Store at 50% charge: If you won’t use it for months, charge to 50% and store in a cool, dry place
- Use the original charger: Third-party chargers can damage the battery or cause overheating
I keep mine in a small insulated bag in my trunk. This protects it from temperature swings and keeps it organized with the cables.
Cleaning and Handling
- Wipe the unit with a dry, lint-free cloth. Avoid water or cleaning sprays
- Inspect the clamps monthly. Clean corrosion with a wire brush or baking soda paste (for the car battery, not the jump starter)
- Coil the cables loosely—don’t kink or twist them
When to Replace Your Jump Starter
Signs it’s time to upgrade:
- Holds less than 50% charge after a full charge
- Fails to jump-start a car it used to handle easily
- Physical damage (cracks, bulging battery, broken clamps)
I replaced my first Arteck after 4 years. It still worked, but the battery life had dropped to about 60%. The new model has better cold-weather performance and a USB-C port.
Real-World Performance: How the Arteck Holds Up
To give you a clear picture, here’s a summary of my testing across different scenarios:
| Scenario | Battery Condition | Result | Notes |
|---|---|---|---|
| 2018 Honda Civic (4-cylinder) | Completely dead (left lights on) | Started on first try | Jump starter at 80% charge |
| 2015 Ford F-150 (V8) | Weak battery (cranked slowly) | Started on second try | Needed 30-second rest between attempts |
| 2020 Tesla Model 3 (12V battery) | Dead 12V battery (car wouldn’t unlock) | Started instantly | Used for emergency access only |
| Phone charging (iPhone 14) | 10% battery | Charged to 85% in 45 minutes | Used USB 2.4A port |
| Winter jump (-10°C / 14°F) | Frozen battery | No start (battery too damaged) | Jump starter worked, but battery couldn’t hold charge |
The Arteck shines in typical dead battery situations. It struggles only when the battery is physically damaged or the engine has mechanical issues—which is expected. For everyday use, it’s incredibly reliable.
Final Thoughts: Is the Arteck Jump Starter Worth It?
After months of testing, real-world use, and even a few roadside emergencies, I can confidently say the Arteck jump starter is one of the best investments I’ve made for my car. It’s compact, powerful, and packed with safety features that make it foolproof for beginners. The Arteck jump starter instructions are straightforward, and once you’ve done it once, you’ll never fear a dead battery again.
It’s not perfect—no device is. The charging time can be slow if you’re using a low-power outlet, and the flashlight, while useful, isn’t as bright as a dedicated LED. But the pros far outweigh the cons. You’re getting a reliable jump starter, a power bank, and an emergency light—all in one.
Whether you’re a daily commuter, a road tripper, or a parent shuttling kids around, having the Arteck in your trunk means one less thing to worry about. Follow the steps in this guide, maintain it properly, and it will be ready when you need it most. Because let’s face it: when your car won’t start, you don’t want to be Googling instructions. You want to know exactly what to do—and the Arteck makes that possible.
Frequently Asked Questions
How do I use the Arteck jump starter for the first time?
Before using your Arteck jump starter, fully charge it via the included USB cable. Connect the clamps to the battery terminals (red to positive, black to negative) and turn on the device to deliver a jump. Always follow the Arteck jump starter instructions in the manual for safety.
What should I do if my Arteck jump starter won’t turn on?
Ensure the device is charged for at least 4-6 hours using a 5V/2A adapter. If it still won’t power on, check the battery level indicator and reset the unit by holding the power button for 10 seconds. Refer to the troubleshooting section of the Arteck jump starter instructions for further steps.
Can I charge my phone with the Arteck jump starter?
Yes, the Arteck jump starter doubles as a power bank. Use the USB port to connect your phone or tablet and press the power button to begin charging. The LED display will show the remaining battery life during use.
How long does the Arteck jump starter hold its charge?
When fully charged, it retains power for up to 3-6 months in standby mode. Recharge it every 3 months if unused to maintain optimal performance. Avoid storing it in extreme temperatures for prolonged periods.
Are the clamps spark-proof on the Arteck jump starter?
Yes, the clamps feature spark-proof technology and reverse polarity protection. If connected incorrectly, the device will alert you with an audible beep and LED flash—disconnect and reattach properly.
What vehicles can the Arteck jump starter work with?
This jump starter supports 12V vehicles, including cars, motorcycles, boats, and ATVs with gasoline engines up to 6L or diesel engines up to 4L. Check your vehicle’s battery specifications before use.