

Featured image for armor all emergency jump starter instructions
Image source: media.takealot.com
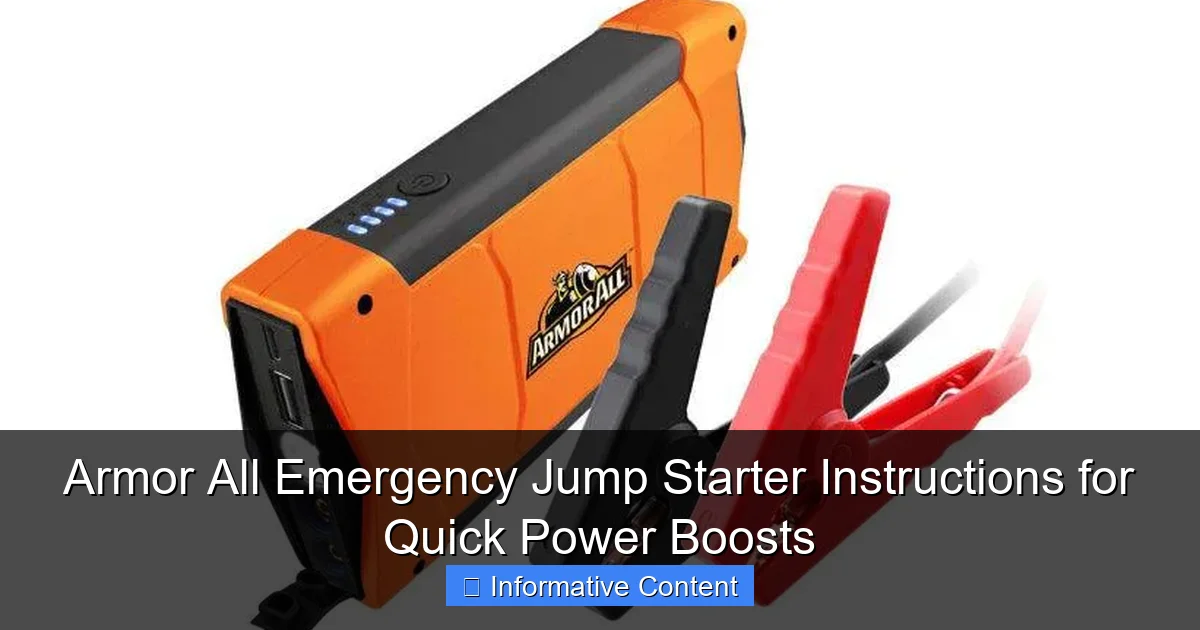
Revive your dead battery in minutes with the Armor All Emergency Jump Starter by following simple, foolproof instructions—just connect the clamps, power on, and start your engine. Designed for safety and speed, this portable jump starter eliminates the need for another vehicle, making roadside emergencies stress-free and efficient.
Key Takeaways
- Read the manual first: Always review instructions before using your Armor All jump starter.
- Check battery level: Ensure the jump starter is fully charged for maximum power output.
- Connect red to positive: Attach the red clamp to the battery’s positive terminal first.
- Secure black to ground: Connect the black clamp to an unpainted metal surface.
- Power on after connections: Only turn on the jump starter once clamps are properly attached.
- Start engine quickly: Attempt to start the vehicle within 30 seconds of powering on.
📑 Table of Contents
- Why Every Driver Needs a Reliable Jump Starter
- Understanding Your Armor All Emergency Jump Starter
- Step-by-Step Armor All Emergency Jump Starter Instructions
- Troubleshooting Common Issues and Mistakes
- Maintaining Your Jump Starter for Long-Term Reliability
- Real-World Scenarios and Pro Tips
- Data Table: Armor All Jump Starter Model Comparison
- Final Thoughts: Be Prepared, Not Panicked
Why Every Driver Needs a Reliable Jump Starter
Picture this: It’s a cold winter morning. You’re running late for work, and when you turn the key in your car’s ignition—nothing. The engine cranks weakly, or worse, stays completely silent. Your heart sinks. You’re stranded, and the nearest mechanic is miles away. This is where a reliable emergency jump starter becomes more than just a gadget—it’s a lifeline.
I’ve been there. One icy December morning, my car battery died in a grocery store parking lot. No jumper cables, no kind strangers offering help, just me and my dead car. That’s when I realized how crucial it is to have a portable jump starter like the Armor All emergency jump starter in your trunk. Unlike traditional jumper cables, which require another vehicle, these compact power banks deliver instant energy straight to your battery. No waiting. No relying on others. Just a quick, safe power boost that gets you back on the road—often in under two minutes.
But here’s the catch: having a jump starter isn’t enough if you don’t know how to use it properly. That’s why I’m writing this guide—not to sell you on Armor All, but to share Armor All emergency jump starter instructions that are clear, practical, and easy to follow. Whether you’re a new driver, a seasoned road warrior, or someone who just wants peace of mind, knowing how to use this tool could save your day (or your night).
Understanding Your Armor All Emergency Jump Starter
Before we dive into the step-by-step instructions, let’s get familiar with what you’re working with. The Armor All emergency jump starter isn’t just a battery pack—it’s a multi-functional device designed for real-world emergencies. But like any tool, it works best when you understand its parts and capabilities.
Visual guide about armor all emergency jump starter instructions
Image source: shop.cluballiance.aaa.com
Key Components and Features
- Jump Starter Unit: This is the main body of the device, housing a high-capacity lithium-ion battery. Most models range from 12,000mAh to 20,000mAh, which is enough to jump-start most gasoline engines (up to 6.0L) and smaller diesel engines (up to 4.0L).
- Smart Clamps (Jumper Cables): These are the red and black clamps connected to the unit via short, durable cables. They’re “smart” because they include reverse polarity protection, overload protection, and spark-proof technology—meaning they reduce the risk of sparks, shocks, or damage if connected incorrectly.
- Power Button and LED Indicators: A simple on/off switch and a series of LEDs show battery level (usually in 25% increments). Some models even have a digital display for precise readings.
- USB Ports: Most Armor All jump starters come with one or more USB-A or USB-C ports, allowing you to charge smartphones, tablets, GPS units, or even small electronics like dashcams or portable fans.
- Built-in LED Flashlight: A lifesaver in low-light conditions. Many models feature multiple modes: steady beam, SOS strobe, and emergency flashing.
- Carrying Case: A compact, padded case keeps everything organized and protected. Trust me—this is worth its weight in gold during a roadside emergency.
Common Models and Their Specs
Armor All offers several models, but the most popular ones include:
- Armor All AA-JS1200: 12,000mAh, 12V, supports up to 6.0L gas engines. Includes 2 USB ports and a flashlight.
- Armor All AA-JS1800: 18,000mAh, 12V, handles larger vehicles like SUVs and trucks (up to 7.0L gas). Comes with a digital battery display.
- Armor All AA-JS2000: 20,000mAh, 12V, dual USB-C ports, and a rugged, water-resistant design. Ideal for frequent travelers or off-roaders.
Tip: Always check your vehicle’s engine size before purchasing. If you drive a large pickup or a diesel-powered van, go for the higher-capacity models. For compact cars or sedans, the 12,000mAh version is usually sufficient.
What’s Not Included (But Should Be)
While Armor All jump starters are well-designed, there are a few things you’ll need to supply yourself:
- Wall charger or car charger: Most units come with a USB charging cable, but not the actual wall adapter. Use any standard 5V/2A USB charger (like the one from your phone).
- Extra storage: Keep your jump starter in the carrying case, but also consider a small trunk organizer to keep jumper cables, gloves, and a flashlight together.
- Knowledge: And that’s exactly what this guide is for!
Step-by-Step Armor All Emergency Jump Starter Instructions
Now, let’s get into the heart of the matter: how to use your Armor All emergency jump starter safely and effectively. I’ll walk you through each step, including what to do before, during, and after the jump.
Step 1: Safety First – Prepare Your Vehicle
Before touching any cables, take a moment to ensure your safety and your vehicle’s safety.
- Park on a flat, stable surface. Turn off the engine (obviously) and engage the parking brake. If you’re on a slope, place wheel chocks behind the tires.
- Turn off all electronics. Lights, radio, A/C, phone chargers—anything drawing power. This reduces the load on the jump starter and protects your car’s electrical system.
- Wear safety gloves and glasses. Even with smart clamps, it’s smart to protect your hands and eyes. I keep a pair of mechanic’s gloves in my trunk just for this.
- Check the battery terminals. Look for corrosion (white or greenish powder). If you see it, clean it gently with a wire brush or a mix of baking soda and water. Never jump-start a battery with visible cracks or leaks.
Step 2: Charge and Check Your Jump Starter
You wouldn’t try to start your car with a dead battery—don’t do it with your jump starter either.
- Charge it fully before use. If it’s been sitting in your trunk for months, plug it in for at least 4–6 hours. Most Armor All units take 4–8 hours to charge from 0% to 100%.
- Press the power button to check battery level. All four LEDs should be lit. If only one or two are on, recharge it before proceeding.
- Ensure the clamps are dry and clean. Moisture or dirt can interfere with conductivity.
Step 3: Connect the Clamps – Red First, Black Last
This is the most critical step. Follow the order exactly to avoid sparks or damage.
- Connect the RED (positive) clamp to the positive terminal on your car battery. It’s usually marked with a “+” and may have a red cover.
- Connect the BLACK (negative) clamp to an unpainted metal surface on the engine block or chassis. Never connect it directly to the negative terminal unless the manual specifically says it’s safe. Why? It reduces the risk of sparking near the battery, where flammable gases may be present.
- Double-check the connections. Make sure the clamps are tight and not touching each other or any moving parts (like belts or fans).
Real-life tip: I once connected the black clamp to the negative terminal by mistake. The jump starter beeped and flashed a warning light. I quickly unplugged it, reconnected to the engine block, and it worked perfectly. The smart protection saved me from a potential short circuit.
Step 4: Power On and Start Your Engine
- Turn on the jump starter. Press the power button. The LEDs should light up, and you may hear a soft hum.
- Wait 30 seconds. This gives the jump starter time to stabilize and deliver maximum current.
- Turn the key to “start.” Don’t crank for more than 3–5 seconds at a time. If the engine doesn’t start, wait 30 seconds before trying again. Most Armor All units can handle 3–5 attempts in a row.
- If successful: The engine will roar to life. Keep the jump starter connected for another 30 seconds to stabilize the battery.
Step 5: Disconnect in Reverse Order – Black First, Red Last
Just like connecting, the disconnect order matters.
- Disconnect the BLACK clamp first. Pull it straight off the metal surface.
- Disconnect the RED clamp next. Again, pull straight off—don’t wiggle it.
- Turn off the jump starter. Press the power button to shut it down.
- Stow everything neatly. Coil the cables, put the clamps in their holders, and store the unit in the case.
Pro tip: After a successful jump, drive your car for at least 20 minutes to recharge the battery. If it dies again, the issue might be the alternator or a failing battery—not just a low charge.
Troubleshooting Common Issues and Mistakes
Even with perfect instructions, things can go wrong. Here’s how to handle the most common problems you might face with your Armor All jump starter.
“The Jump Starter Won’t Turn On”
- Cause: Low battery, faulty power button, or internal issue.
- Solution: Charge it for at least 2 hours. If it still won’t power on, try a different USB cable or wall adapter. If nothing works, contact Armor All support. Most units have a 1-year warranty.
“I Connected the Clamps, But Nothing Happens”
- Cause: Poor connection, reversed polarity, or a completely dead battery.
- Solution:
- Re-check the clamps. Are they tight? Are the terminals clean?
- Make sure the red clamp is on positive, black on ground.
- Try wiggling the clamps slightly to improve contact.
- If the battery is completely dead (no lights, no sound), the jump starter may not detect it. In rare cases, you might need a professional battery service.
“The Engine Cranks But Won’t Start”
- Cause: The jump starter delivered power, but the battery can’t hold a charge, or there’s a fuel/ignition issue.
- Solution:
- Try 2–3 more attempts, waiting 30 seconds between each.
- If it still doesn’t start, the problem is likely not the battery. Check for fuel, spark, or a faulty starter motor.
- As a test, try jump-starting another vehicle with your jump starter. If it works, your car’s issue is internal.
“The Clamps Sparked When I Connected Them”
- Cause: You connected the black clamp to the negative terminal (bad), or there was a loose connection.
- Solution: Disconnect immediately. Reconnect the black clamp to the engine block or chassis. Sparking near the battery is dangerous—flammable hydrogen gas can ignite.
- Note: A tiny spark when connecting is normal. A loud pop or sustained sparking is not. If this happens, stop and inspect the battery for damage.
“My Phone Charges Slow From the Jump Starter”
- Cause: The USB port is low-amperage (e.g., 1A instead of 2.4A), or the jump starter’s battery is low.
- Solution: Use a high-quality USB cable. If charging is still slow, recharge the jump starter first. Also, avoid using it to charge devices while jump-starting—the current draw can overload the system.
Maintaining Your Jump Starter for Long-Term Reliability
A jump starter is only as good as its last charge. Proper maintenance ensures it’s ready when you need it most.
Charge It Every 3 Months
Lithium-ion batteries lose charge over time—even when not in use. To prevent deep discharge (which can damage the battery):
- Recharge every 90 days. Plug it in for 2–3 hours, even if it’s not empty.
- Store in a cool, dry place. Avoid extreme heat (like a hot car trunk in summer) or freezing temperatures.
- Use it occasionally. Power it on, check the battery level, and run the flashlight for a minute. This keeps the internal circuits active.
Clean and Inspect Regularly
- Wipe the unit with a dry cloth. No water or solvents.
- Check the cables and clamps. Look for fraying, rust, or loose connections.
- Test the flashlight and USB ports. Plug in your phone to ensure they still work.
Know When to Replace It
Even the best jump starters don’t last forever. Signs it’s time to replace your Armor All unit:
- Battery life drops below 50% after a full charge. This means the battery is degrading.
- It fails to hold a charge for more than a week. Normal self-discharge is about 5% per month.
- Physical damage: Cracks, leaks, or bent clamps.
- Age: Most lithium-ion jump starters last 3–5 years with proper care.
Personal note: I’ve had my AA-JS1800 for four years. It’s jump-started my car twice and charged my phone dozens of times. Last winter, it took three tries to start the car—unusual for it. I checked the battery level, and it was only holding 60% after a full charge. I replaced it with a new model, and it’s back to peak performance. Better safe than stranded.
Real-World Scenarios and Pro Tips
Let’s wrap up with some real-life situations and expert advice to help you get the most out of your Armor All emergency jump starter.
Scenario 1: Jump-Starting in the Rain
- Challenge: Wet conditions increase the risk of short circuits.
- Solution:
- Use a tarp or umbrella to shield the engine bay.
- Wipe the battery terminals with a dry cloth.
- Keep the jump starter under the hood or in a plastic bag with the cables exposed.
- Connect the clamps quickly and avoid letting water pool on the unit.
Scenario 2: Jump-Starting a Motorcycle
- Challenge: Motorcycle batteries are smaller and often harder to access.
- Solution:
- Use the same steps—red to positive, black to engine block.
- Most Armor All units can handle motorcycle engines (typically 12V, 50–100 CCA).
- Be extra careful with the clamps—motorcycle terminals are often close together.
Pro Tips from Experience
- Keep it in the cabin, not the trunk. I learned this the hard way. In freezing temps, the trunk gets colder than the cabin. A cold battery delivers less power. Now, I store mine under the passenger seat.
- Label the cables. I used a red and black label maker to mark “+” and “-” on the cables. No more second-guessing.
- Pair it with a tire inflator. Armor All also makes portable air compressors. Keep both in the same case—two emergencies, one kit.
- Teach a family member. My teenager learned how to use it last summer. Now, if I’m not home, he can handle it.
Data Table: Armor All Jump Starter Model Comparison
| Model | Battery Capacity | Engine Support | USB Ports | Flashlight | Special Features |
|---|---|---|---|---|---|
| AA-JS1200 | 12,000mAh | Up to 6.0L Gas | 2x USB-A | Yes (3 modes) | Compact design, 1-year warranty |
| AA-JS1800 | 18,000mAh | Up to 7.0L Gas / 4.0L Diesel | 1x USB-A, 1x USB-C | Yes (SOS mode) | Digital battery display, reverse polarity alert |
| AA-JS2000 | 20,000mAh | Up to 8.0L Gas / 5.0L Diesel | 2x USB-C | Yes (high-lumen beam) | Water-resistant, rugged casing, 2-year warranty |
Final Thoughts: Be Prepared, Not Panicked
Having an Armor All emergency jump starter in your car isn’t about expecting the worst—it’s about being ready for anything. Whether it’s a dead battery in a parking lot, a forgotten interior light left on overnight, or a cold-weather morning when your car just won’t cooperate, this little device can make all the difference.
But remember: a jump starter is only as useful as your knowledge of how to use it. By following these Armor All emergency jump starter instructions, you’re not just buying a product—you’re investing in confidence, safety, and peace of mind.
I can’t count how many times I’ve reached for mine and felt that wave of relief. No waiting for AAA. No awkward conversations with strangers. Just a quick, quiet boost that gets me back on the road.
So charge it up, store it wisely, and practice the steps. One day, when your car won’t start and the world feels a little less kind, you’ll be the one who knows exactly what to do. And that, my friend, is worth every penny.
Frequently Asked Questions
How do I use the Armor All emergency jump starter to jump-start my car?
To use the Armor All emergency jump starter, first ensure the device is charged. Connect the red clamp to the positive terminal of your car battery and the black clamp to a grounded metal surface, then start the vehicle while keeping the jump starter powered on.
Can the Armor All emergency jump starter be used in cold weather?
Yes, the Armor All emergency jump starter is designed to work in cold weather, though extreme temperatures may slightly reduce its efficiency. Always store it in a cool, dry place and recharge it after each use to maintain optimal performance.
How long does it take to fully charge the Armor All jump starter?
The Armor All emergency jump starter typically takes 4–6 hours to fully charge using the included AC adapter. Charging time may vary depending on the battery level and power source used.
Is the Armor All emergency jump starter safe for my car’s electronics?
Yes, it features built-in safety protections like over-current, short-circuit, and reverse polarity protection to safeguard your vehicle’s electrical system. Always follow the Armor All emergency jump starter instructions for proper usage.
What should I do if the jump starter doesn’t power on?
If the device doesn’t power on, ensure it’s fully charged and check the power button. If issues persist, consult the Armor All emergency jump starter instructions or contact customer support for troubleshooting.
Can I use this jump starter for other devices besides cars?
Yes, many Armor All models include USB ports to charge phones, tablets, and other small electronics. Refer to your specific model’s instructions to confirm compatible devices and power output.