
Featured image for anker jump starter instructions
Image source: forumus-uploads-production.s3-us-west-2.amazonaws.com
Master your Anker jump starter with simple, step-by-step instructions to safely jump-start your vehicle in minutes—no technical skills needed. From checking battery levels to connecting clamps correctly, this guide ensures reliable performance and long-term durability for every roadside emergency.
Key Takeaways
- Read the manual first: Always review Anker jump starter instructions before use to ensure safety and proper operation.
- Check battery levels: Fully charge the jump starter before storage to maintain performance and longevity.
- Connect in order: Attach red clamp to positive (+) terminal first, then black to negative (-) or ground.
- Use safety mode: Enable smart protection features to prevent reverse polarity and short circuits.
- Power off after use: Disconnect and turn off the unit to preserve battery life and prevent damage.
- Store properly: Keep in a cool, dry place away from extreme temperatures and moisture.
📑 Table of Contents
- Why Every Driver Should Have an Anker Jump Starter (And How to Use It Right)
- Understanding Your Anker Jump Starter: What’s in the Box?
- Step-by-Step: How to Use an Anker Jump Starter Safely
- Troubleshooting Common Issues (And When to Call for Help)
- Maintenance and Storage: Keeping Your Jump Starter Ready
- Beyond Jump Starting: Other Uses for Your Anker Power Pack
- Final Thoughts: Your Jump Starter Is Only as Good as Your Preparation
Why Every Driver Should Have an Anker Jump Starter (And How to Use It Right)
Imagine this: it’s a cold winter morning, and you’re already running late for work. You hop into your car, turn the key, and… nothing. The engine won’t start. Your heart sinks. You’re stranded, and the only thing standing between you and a delayed start to your day is a dead battery. This is where an Anker jump starter comes in—not just as a backup, but as a game-changer for modern drivers.
Anker, a brand synonymous with reliable charging solutions, has taken the jump starter market by storm. Their portable, high-capacity jump starters are designed to get your car back on the road in minutes—without needing another vehicle or a roadside assistance call. But here’s the catch: even the best tool is only as good as your ability to use it. Missteps in setup, storage, or operation can leave you right where you started—stranded. That’s why understanding Anker jump starter instructions isn’t just helpful; it’s essential.
Understanding Your Anker Jump Starter: What’s in the Box?
Before you even think about using your Anker jump starter, take a moment to unpack and get familiar with the components. This isn’t just about checking off a list—it’s about building confidence in the tool that might one day save your day.
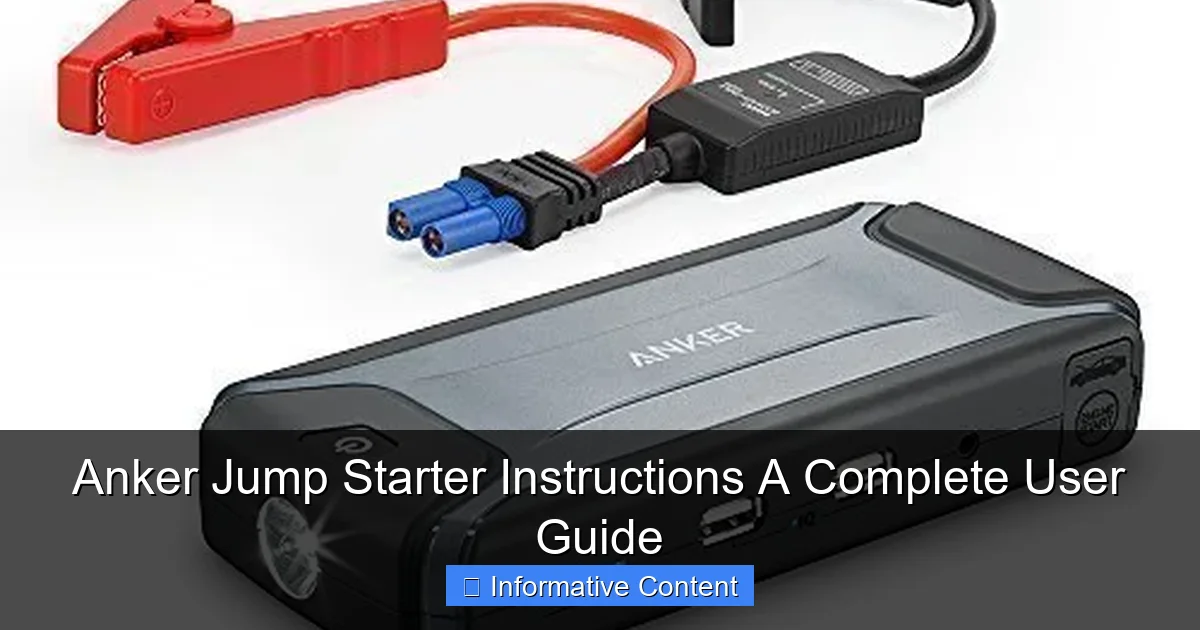
Visual guide about anker jump starter instructions
Image source: jumpstarter.io
Unboxing the Essentials
When you open the box, you’ll typically find:
- Anker jump starter unit (the main power pack)
- Smart jumper cables (with built-in safety features)
- USB charging cable (usually USB-C to USB-C or USB-A to USB-C)
- Wall charger (for recharging the jump starter)
- Carrying case or pouch
- User manual and safety guide
Pro tip: Keep the manual handy, especially during your first few uses. While Anker designs their products to be intuitive, the manual often includes model-specific details—like LED indicator meanings or maximum jump attempts per charge.
Key Features You Should Know
Anker jump starters aren’t just glorified batteries. They come with smart features that set them apart:
- Reverse polarity protection: Prevents damage if you connect the clamps backward.
- Overcurrent and overvoltage protection: Safeguards both your car and the jump starter.
- LED flashlight with strobe/SOS modes: Handy for emergencies at night.
- USB ports for charging phones/tablets: Doubles as a power bank.
- Low self-discharge technology: Holds a charge for months when stored properly.
For example, the Anker 622 Jump Starter (a popular mid-range model) offers 12,000mAh capacity, supports up to 6.0L gas or 3.0L diesel engines, and includes a 200-lumen flashlight. Knowing these specs helps you match the tool to your vehicle—and avoid overloading it.
Step-by-Step: How to Use an Anker Jump Starter Safely
Let’s get to the heart of the matter: Anker jump starter instructions for actual use. This isn’t rocket science, but skipping steps can lead to frustration—or worse, a failed jump.
Step 1: Charge Your Jump Starter (Yes, Even If It’s “New”)
Before your first use (and after every few months of storage), fully charge the jump starter using the included wall charger. Most models take 4–6 hours. A common mistake? Assuming a new unit is fully charged out of the box. It might be at 50%, which isn’t enough for a reliable jump.
Check the battery level using the LED indicators on the side. For instance, four solid LEDs mean 75–100% charge. If it’s below 50%, plug it in. Pro tip: Keep it charging overnight before a long trip—just to be safe.
Step 2: Prepare Your Vehicle
Turn off the engine, headlights, radio, and all electronics. Put the car in park (or neutral for manual) and engage the parking brake. Open the hood and locate the battery. If the terminals are corroded, gently clean them with a wire brush (safety first: wear gloves and eye protection).
Why this matters: A clean connection ensures maximum power transfer. I once tried jumping a car with a dirty terminal—the jump starter powered the lights, but the engine wouldn’t turn over. A quick clean fixed it.
Step 3: Connect the Jumper Cables
Here’s the critical part:
- Connect the red (positive) clamp to the battery’s positive terminal (+). It’s usually marked in red or has a “+” sign.
- Connect the black (negative) clamp to a unpainted metal surface (like a bolt or engine bracket), not the battery’s negative terminal. This reduces sparking near the battery, which is safer.
- Double-check the connections. The Anker cables have a “smart” LED indicator—if you connect them backward, it’ll flash red. Reconnect correctly.
Example: On my Honda Civic, I attach the black clamp to a bolt on the engine block. Avoid plastic or moving parts.
Step 4: Start the Engine
With the cables connected, turn on the jump starter (usually by pressing and holding the power button for 2–3 seconds). Wait 30 seconds—this lets the jump starter stabilize. Then, try starting your car. If it doesn’t start on the first try, wait 30–60 seconds before trying again. Most Anker models allow 3–5 jump attempts per charge.
Success? Great! Now, don’t disconnect the jump starter yet. Let the car run for 10–15 minutes to charge the battery. If you disconnect too soon, the car might stall.
Step 5: Disconnect Safely
Once the car is running, disconnect in this order:
- Turn off the jump starter.
- Remove the black clamp.
- Remove the red clamp.
- Close the hood and let the car idle for a few more minutes.
Store the jump starter in its case and recharge it as soon as possible. Even if it worked, it likely used 30–50% of its capacity.
Troubleshooting Common Issues (And When to Call for Help)
Even with perfect Anker jump starter instructions, things can go wrong. Here’s how to diagnose and fix common problems—without panicking.
“The Jump Starter Won’t Turn On”
- Cause: Battery is drained or faulty.
- Fix: Charge it for at least 30 minutes. If it still won’t turn on, the battery might be damaged (e.g., from extreme temperatures). Contact Anker support.
Real story: I once left my jump starter in the trunk during a heatwave. When I needed it, the LEDs were unresponsive. A 24-hour charge didn’t help—the heat had degraded the battery. Lesson: Store it in a temperature-controlled area.
“The Car Starts but Dies Immediately”
- Cause: The battery is too far gone, or the alternator isn’t charging it.
- Fix: Let the car run for 20–30 minutes. If it dies again, the battery likely needs replacement. The jump starter only bypasses the battery—it doesn’t fix it.
Tip: If your battery is over 3 years old, consider replacing it proactively.
“The Jumper Cables Are Sparking”
- Cause: Poor connection or incorrect order.
- Fix: Disconnect and reconnect the clamps. Ensure the black clamp is on metal, not the battery terminal. If sparking continues, the battery might be leaking gas—stop and call a mechanic.
“The Jump Starter Gets Hot”
- Cause: Normal during use, but excessive heat can indicate a problem.
- Fix: If it’s too hot to touch, turn it off immediately. Let it cool for 15 minutes. If it happens again, stop using it—it could be a short circuit.
Maintenance and Storage: Keeping Your Jump Starter Ready
Anker jump starters are designed to last, but they’re not immortal. Proper care ensures they’re ready when you need them.
Charging and Battery Care
- Charge every 3–6 months: Even if unused, lithium-ion batteries degrade when fully drained.
- Use the right charger: Avoid third-party chargers. Anker’s wall charger ensures the correct voltage/current.
- Don’t overcharge: While Anker includes overcharge protection, unplugging it after a full charge prolongs battery life.
Data point: Anker states their jump starters retain ~80% capacity after 500 charge cycles. That’s years of use if you recharge quarterly.
Storage Conditions
- Temperature: Store between 32°F–113°F (0°C–45°C). Avoid freezing or extreme heat.
- Location: Keep in a dry, dust-free area. I store mine in the car’s glove compartment (in a case) during winter but move it to the garage in summer.
- Humidity: High humidity can corrode internal components. Use a desiccant pack in the storage case if you live in a humid area.
Cleaning and Inspection
- Wipe the unit with a dry cloth. Never submerge it.
- Check the clamps for rust or damage. Replace the cables if the insulation is cracked.
- Inspect the USB ports for dust. Use compressed air to clean them.
Example: After a rainy camping trip, I noticed my jump starter’s USB port was slightly corroded. A quick cleaning with isopropyl alcohol saved it.
Beyond Jump Starting: Other Uses for Your Anker Power Pack
Your Anker jump starter isn’t just for cars. It’s a versatile tool for emergencies, road trips, and daily life.
Power Bank for Electronics
Most Anker models have USB-A and USB-C ports. Use them to charge:
- Smartphones (iPhone, Android)
- Tablets
- GPS devices
- Bluetooth speakers
Real use case: During a power outage, I charged my phone for 3 days using the jump starter. It’s a lifesaver when the grid fails.
Emergency Lighting
The built-in flashlight has three modes:
- Solid beam: For general use.
- Strobe: To signal for help.
- SOS: Flashes in a Morse code pattern (ideal for attracting attention).
Pro tip: In a breakdown, turn on the SOS mode and place the unit on your car’s roof. It’s visible from a distance.
Portable Power for Camping
Use it to:
- Power a mini fridge (check compatibility first)
- Charge a camera or drone
- Run a portable fan
Limitation: Most Anker jump starters can’t power high-wattage devices (like microwaves). Stick to low-draw electronics.
Data Table: Anker Jump Starter Models Compared
| Model | Capacity (mAh) | Engine Support | USB Ports | Special Features |
|---|---|---|---|---|
| Anker 622 | 12,000 | Up to 6.0L gas / 3.0L diesel | 1x USB-C, 1x USB-A | 200-lumen flashlight, 500A peak current |
| Anker 737 | 15,000 | Up to 8.0L gas / 5.0L diesel | 2x USB-C, 1x USB-A | 1000A peak current, LCD battery display |
| Anker 535 | 20,000 | Up to 10.0L gas / 6.0L diesel | 2x USB-C, 2x USB-A | 300-lumen flashlight, 2000A peak current |
Note: Always verify your vehicle’s battery requirements before choosing a model.
Final Thoughts: Your Jump Starter Is Only as Good as Your Preparation
Anker jump starters are reliable, user-friendly, and packed with features. But like any tool, they shine brightest when you know how to use them. Mastering the Anker jump starter instructions isn’t just about following steps—it’s about building a habit of preparedness.
Think of it this way: You wouldn’t keep a fire extinguisher without knowing how to use it. Your jump starter is no different. Charge it regularly, store it properly, and practice the steps before you’re in a crisis. And remember: while Anker’s safety features are excellent, they’re not foolproof. If you’re ever unsure, call a professional.
At the end of the day, your Anker jump starter isn’t just a gadget. It’s peace of mind. Whether you’re facing a dead battery at midnight or powering your phone during a storm, it’s there to help you take control. So keep it charged, keep it handy, and drive with confidence—knowing you’re ready for whatever the road throws at you.
Frequently Asked Questions
How do I use the Anker Jump Starter for the first time?
Before using your Anker Jump Starter, fully charge it using the provided USB-C cable. Connect the clamps to the battery terminals (red to positive, black to negative), then start the vehicle. Always follow the safety instructions in the manual.
What are the correct Anker Jump Starter instructions for jump-starting a dead battery?
Attach the smart clamps to the correct battery terminals, ensuring the power button is off. Turn on the jump starter, wait for the “Ready” light, then start the engine. Disconnect the clamps in reverse order once the engine runs.
Can I charge my phone with an Anker Jump Starter?
Yes! Most Anker jump starters include USB-A and USB-C ports for charging phones, tablets, or other devices. Use the appropriate cable and press the power button to activate the charging function.
How long does the Anker Jump Starter hold its charge?
Anker jump starters typically retain 80% charge for up to 6 months when stored properly. Recharge every 3-6 months to maintain optimal performance and battery health.
What does the error light on my Anker Jump Starter mean?
Error lights (e.g., flashing red or blue) indicate reversed clamps, low voltage, or overheating. Refer to the troubleshooting section in the Anker Jump Starter instructions to resolve the issue safely.
Is the Anker Jump Starter safe for gasoline and diesel engines?
Yes, Anker jump starters are designed for both gasoline and diesel engines up to a specific size (check model specs). Always verify compatibility with your vehicle’s engine type and size before use.