
Featured image for anker jump start instructions
Image source: frontend-cdn.solarreviews.com
Master your Anker jump starter with this simple, step-by-step guide designed for quick and safe vehicle jump-starts every time. Follow clear instructions—from powering on to connecting clamps correctly— to avoid mistakes and protect your battery. Get back on the road in minutes with confidence and ease.
Key Takeaways
- Always check battery charge: Ensure your Anker jump starter is fully charged before use.
- Connect red clamp first: Attach red to positive terminal, then black to ground.
- Turn on the device: Press power button and wait for LED indicator confirmation.
- Start vehicle within 30 seconds: Begin engine quickly after connecting to avoid power drain.
- Disconnect in reverse order: Remove black clamp first, then red after vehicle starts.
- Store properly after use: Recharge and keep in a cool, dry place for longevity.
📑 Table of Contents
- Why You Need Reliable Jump Start Instructions (And How Anker Makes It Simple)
- Understanding Your Anker Jump Starter: What’s in the Box and Key Features
- Step-by-Step Anker Jump Start Instructions: From Connection to Ignition
- Common Mistakes to Avoid (And How to Troubleshoot)
- Maximizing Battery Life: Charging, Storage, and Maintenance Tips
- Beyond Jump Starts: Other Ways to Use Your Anker Device
- Final Thoughts: Be Prepared, Not Panicked
Why You Need Reliable Jump Start Instructions (And How Anker Makes It Simple)
Let’s be honest—getting stranded with a dead car battery is one of those moments that feels like a scene from a bad movie. You’re late for work, the kids are screaming in the back, and your phone’s at 5%. You pop the hood, look at the battery, and suddenly realize: *you have no idea what to do next.* That’s where Anker jump starters come in. These compact, powerful devices have saved countless drivers from awkward calls to roadside assistance or waiting hours for a friend with jumper cables. But here’s the catch: even the best tool is useless if you don’t know how to use it properly.
Anker jump starters are popular for a reason—they’re lightweight, reliable, and packed with safety features. But if you’ve never used one before, the process can seem intimidating. What if you connect it backward? What if the battery doesn’t respond? Don’t worry. I’ve been there. I’ve fumbled with cables, panicked when the engine didn’t start on the first try, and even accidentally drained my jump starter because I left it on overnight. Over time, I’ve learned the *right* way to use an Anker jump starter—and in this guide, I’ll walk you through every step, from unboxing to safely storing your device. Whether you’re a first-time car owner or just want to be prepared, this step-by-step Anker jump start instructions guide will make the process feel as easy as charging your phone.
Understanding Your Anker Jump Starter: What’s in the Box and Key Features
What Comes in the Box
When you unbox your Anker jump starter (models like the PowerHouse, Jump Starter 2000A, or 1000A), here’s what you’ll typically find:
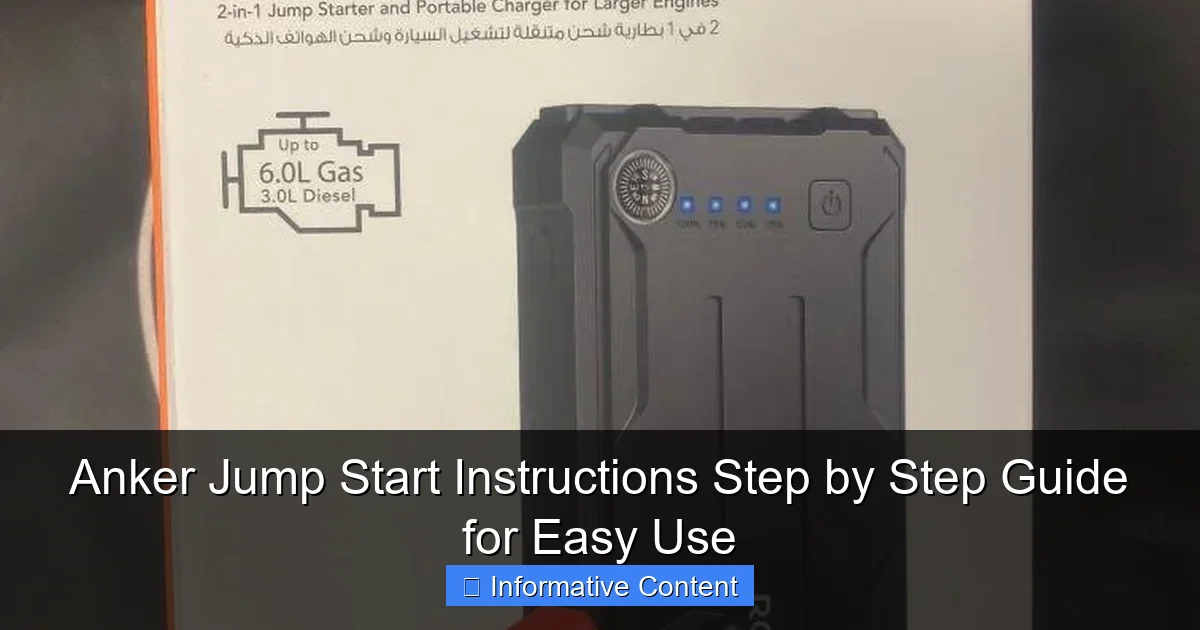
Visual guide about anker jump start instructions
Image source: media.karousell.com
- Jump starter unit (the main battery pack)
- Smart jumper cables (with clamps and safety indicators)
- USB charging cable (often USB-C)
- Wall charger (for recharging the jump starter)
- Carrying case (for storage and portability)
- User manual (keep this! It has critical safety info)
Pro tip: *Always store the jumper cables properly.* I once left mine loose in the trunk, and the clamps shorted against a metal tool—nearly drained the entire battery. Now I use the included case or a small ziplock bag.
Key Features That Make Anker Stand Out
Anker jump starters aren’t just batteries with cables. They’re designed with safety and convenience in mind:
- Reverse polarity protection: If you accidentally connect the clamps backward, the device won’t power on—preventing sparks or damage.
- Overcurrent and overcharge protection: Prevents overheating and extends battery life.
- LED flashlight: Handy for nighttime emergencies (some models have SOS strobe).
- USB ports: Charge phones, tablets, or even laptops in a pinch.
- LCD screen (on higher-end models): Shows battery percentage and charging status.
Real-world example: Last winter, my neighbor’s SUV wouldn’t start in -10°C weather. His traditional jumper cables failed because the battery was too drained. But his Anker 2000A worked instantly—no need for another running vehicle. The reverse polarity protection saved him when he briefly swapped the clamps.
Choosing the Right Anker Model for Your Vehicle
Anker offers jump starters with different power levels (measured in amps). Here’s how to pick the right one:
- 400–600A: Ideal for small cars (e.g., Honda Civic, Toyota Prius).
- 1000–1500A: Great for midsize vehicles (e.g., Ford Explorer, Honda CR-V).
- 2000A+: Best for large SUVs, trucks, or diesel engines (e.g., Ford F-150, RAM 1500).
Tip: Check your car’s manual for the recommended cranking amps (CA) or cold cranking amps (CCA). If your vehicle requires 500 CA, a 600A Anker model will suffice. But for a 800 CA engine, go for 1000A or higher.
Step-by-Step Anker Jump Start Instructions: From Connection to Ignition
Step 1: Prepare Your Vehicle and Jump Starter
Before you connect anything, follow these prep steps:
- Turn off the car and all accessories: Lights, radio, AC—everything. A live electrical system can damage the jump starter.
- Park on a flat surface: Engage the parking brake. For manual transmissions, shift to neutral.
- Check the jump starter’s charge: Press the power button. The LED indicator should show ≥50% (ideally 100%). If it’s low, charge it first.
- Open the hood: Locate the battery. If it’s covered by a plastic panel, remove it carefully.
Common mistake: I once tried to jump start a car with the radio on. The jump starter’s safety system immediately shut down—wasting 10 minutes. Learn from my error!
Step 2: Connect the Jumper Cables (The Right Way)
This is where most people panic. But Anker makes it foolproof:
- Plug the smart cables into the jump starter: Match the red (+) and black (-) ports. The connection is usually keyed to prevent mistakes.
- Attach the red clamp to the battery’s positive (+) terminal: Look for a “+” sign or red plastic cover. Scrape away corrosion with the clamp’s teeth if needed.
- Attach the black clamp to a grounded metal surface: Never connect it to the battery’s negative (-) terminal. Instead, choose an unpainted metal bracket or bolt near the engine (e.g., alternator mount). Why? It reduces spark risk near flammable battery gases.
Pro tip: If your car has a “jump start” terminal (common in modern vehicles), use that for the black clamp. It’s designed for this purpose.
Step 3: Power On the Jump Starter and Start the Engine
Now comes the moment of truth:
- Press and hold the power button: Most Anker models require a 3–5 second hold to activate jump mode. The LED will flash or display “Ready.”
- Enter the vehicle and start the engine: Turn the key (or press the start button). The engine should crank and start within 3–5 seconds.
- If it doesn’t start: Wait 30 seconds, then try again. If it fails twice, let the jump starter rest for 2 minutes to prevent overheating.
Real-life example: My friend’s 2015 Toyota Camry needed a jump after sitting idle for 2 weeks. The Anker 1000A powered on instantly, and the car started on the first try—no hesitation.
Step 4: Disconnect and Store Safely
Once the engine is running:
- Turn off the jump starter: Press the power button to deactivate.
- Disconnect the black clamp first: This minimizes spark risk.
- Disconnect the red clamp: Store both clamps in the carrying case.
- Close the hood and let the car run: Drive for at least 20 minutes to recharge the battery.
Critical reminder: Never leave the jump starter connected while driving. The engine’s electrical system can overcharge the device.
Common Mistakes to Avoid (And How to Troubleshoot)
“I Connected the Clamps Wrong—What Now?”
Don’t panic! Anker’s reverse polarity protection means the device won’t power on if the clamps are swapped. Here’s what to do:
- Check the jump starter’s LED: If it’s flashing red or showing an error code, the clamps are reversed.
- Unplug the cables: Reconnect them correctly (red to +, black to ground).
- Try again: The safety system resets automatically.
Personal anecdote: I once panicked when my Anker wouldn’t turn on. I realized I’d plugged the cables into the wrong ports. Once I fixed that, it worked perfectly.
“The Engine Cranks But Won’t Start”
This usually means the battery isn’t the issue—it’s something else. Try these fixes:
- Check fuel level: A near-empty tank can cause hard starts.
- Wait 5 minutes: Let the jump starter “rest” and try again.
- Use “Boost” mode (if available): Some Anker models have a high-power burst for stubborn batteries.
- Inspect the battery terminals: Corrosion or loose connections can block power.
Tip: If the jump starter’s LED dims during cranking, the battery is too drained. The jump starter can’t fully charge a dead battery—it only provides enough power to start the engine. You’ll need to recharge the car’s battery afterward.
“My Jump Starter Won’t Charge”
Frustrating, but fixable:
- Use the original wall charger: Third-party chargers may not deliver enough power.
- Check the USB-C port: Dust or debris can block connections. Clean it with compressed air.
- Charge in a cool environment: High temperatures can trigger overcharge protection.
- Reset the device: On some models, hold the power button for 10 seconds.
Maximizing Battery Life: Charging, Storage, and Maintenance Tips
How Often to Charge Your Jump Starter
Anker’s lithium-ion batteries last longer when stored at 50% charge. Here’s the schedule:
- After each use: Recharge to 100%.
- For long-term storage (e.g., winter): Charge to 50% every 3 months.
- Before a trip: Fully charge it 24 hours in advance.
Data point: Anker states that their batteries retain 80% capacity after 500 charge cycles—about 5–7 years with regular use.
Safe Storage Practices
- Store in a dry, temperature-controlled area: Avoid attics or garages that get hot/cold.
- Keep away from metal objects: Prevent accidental short circuits.
- Use the carrying case: It protects the device from dust and damage.
Example: I keep my Anker in a kitchen drawer (away from kids) with silica gel packets to absorb moisture.
When to Replace Your Jump Starter
Even the best devices wear out. Replace your Anker if:
- It won’t hold a charge for more than a month.
- The jump start power feels weaker (takes longer to start the car).
- The LED screen is dim or unresponsive.
Beyond Jump Starts: Other Ways to Use Your Anker Device
Portable Power Bank for Phones and Tablets
Anker jump starters have USB-A and USB-C ports. Here’s how to use them:
- For phones: Connect via USB-C or USB-A cable. Most Anker models can charge a phone 3–5 times.
- For tablets: Use the USB-C port for faster charging (e.g., iPad Pro).
- For laptops: Some models support 60W PD charging—check your laptop’s requirements.
Pro tip: Use the “low-current” mode (if available) to safely charge smartwatches or earbuds.
Emergency Lighting and SOS Signals
- LED flashlight: Great for roadside repairs or finding items in the dark.
- SOS strobe: Activate it to signal for help in emergencies (press the flashlight button 3 times).
Real-world use: During a camping trip, my Anker’s flashlight helped us set up our tent at night—no more fumbling with phone lights!
Powering Small Appliances
Higher-capacity models (e.g., PowerHouse) can run:
- CPAP machines
- Portable coolers
- Car vacuums
Note: Always check the wattage requirements. Most Anker jump starters support up to 150W.
| Anker Model | Peak Amps | Battery Capacity | USB Ports | Special Features |
|---|---|---|---|---|
| Jump Starter 400A | 400A | 10,000mAh | USB-A, USB-C | Reverse polarity protection |
| Jump Starter 1000A | 1000A | 12,000mAh | USB-A, USB-C, 12V port | LED flashlight, LCD screen |
| Jump Starter 2000A | 2000A | 18,000mAh | USB-A, USB-C, 12V port | SOS strobe, 60W PD charging |
| PowerHouse 521 | 1500A | 256Wh (69,000mAh) | USB-A, USB-C, AC outlet | Power small appliances, solar charging |
Final Thoughts: Be Prepared, Not Panicked
Having an Anker jump starter is like carrying a spare tire—you hope you’ll never need it, but you’ll be so glad it’s there when you do. The key to using it successfully isn’t just following Anker jump start instructions; it’s about preparation and confidence. I’ve learned that the hardest part isn’t the technical steps—it’s overcoming that initial fear of “messing something up.” But once you’ve done it once, it becomes second nature.
Here’s my final advice: practice the steps at home. Connect the clamps to your battery (with the car off) and power on the jump starter. Get familiar with the sounds, lights, and timing. Store your device in an easily accessible spot—not buried under gym bags in the trunk. And if you’re unsure about anything, refer back to this guide or Anker’s official manual. Remember, a dead battery is just a temporary setback. With the right tools and knowledge, you’ll be back on the road in minutes—no awkward phone calls or waiting for help. Stay safe, stay charged, and drive with peace of mind.
Frequently Asked Questions
How do I use Anker jump start instructions for the first time?
Begin by fully charging your Anker jump starter using the included USB-C cable. Connect the clamps to the battery terminals (red to positive, black to negative) and press the power button to initiate the jump start process.
Can I jump-start a car with a dead battery using an Anker portable jump starter?
Yes, Anker jump starters are designed for dead or low-car batteries. Follow the Anker jump start instructions carefully: ensure the device is charged, connect clamps correctly, and start the engine within 30 seconds of activation.
What safety features should I know before using the Anker jump starter?
Anker models include spark-proof clamps, reverse polarity protection, and overload protection. Always double-check clamp connections before powering on to avoid damage to the vehicle or device.
How long does it take to charge the Anker jump starter fully?
Most Anker jump starters charge fully in 4–6 hours via a 12V/2A adapter or USB-C. The LED indicator will show solid green when charging is complete.
Are Anker jump starters compatible with diesel engines?
Yes, select Anker models (like the 12V/2000A) support diesel engines up to 6.0L. Verify your model’s specifications and follow the Anker jump start instructions for high-compression engines.
What should I do if the jump starter doesn’t power on?
Check if the battery is depleted and charge it for at least 30 minutes. If the issue persists, contact Anker support—many models have a reset button or require a long-press of the power button.