
Featured image for anker car jump starter instructions
Image source: carpartcoupons.com
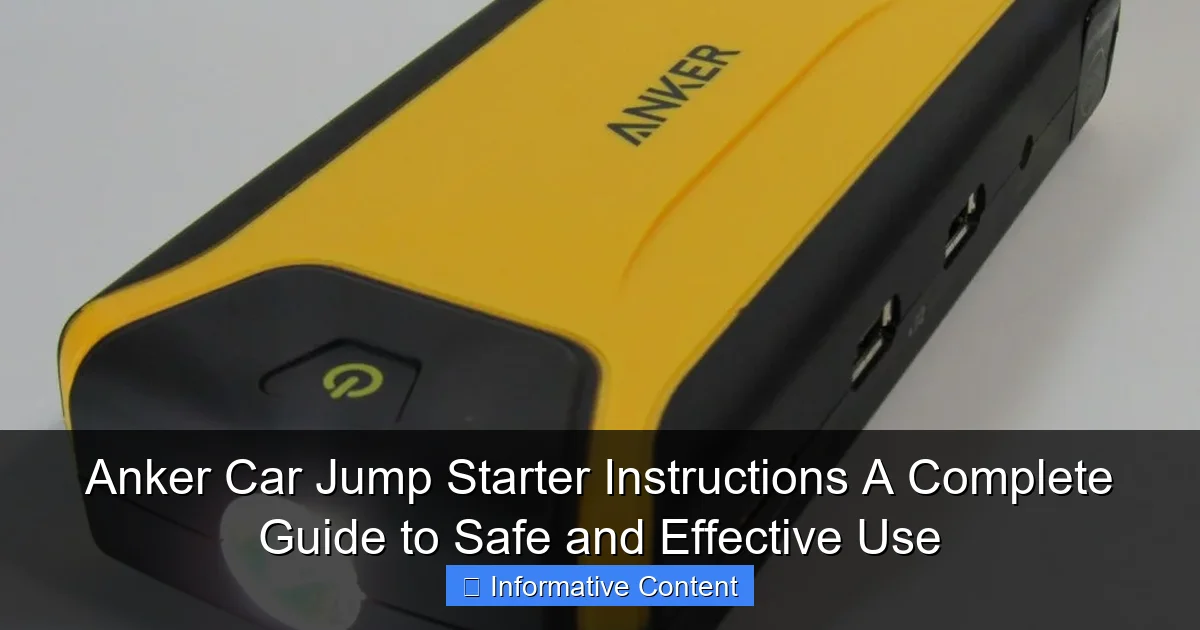
Always ensure the Anker car jump starter is fully charged before use to guarantee reliable performance in emergencies. Follow the step-by-step safety instructions—connect clamps correctly (red to positive, black to ground), power on the device, and start your vehicle within 30 seconds to avoid overheating. Safe, portable, and powerful, this guide ensures you jump-start your car confidently every time.
Key Takeaways
- Always read the manual: Familiarize yourself with Anker’s specific safety and usage guidelines first.
- Check battery levels: Ensure both the jump starter and vehicle battery are adequately charged before use.
- Connect clamps properly: Attach red to positive (+) and black to negative (-) terminals securely.
- Power on only after connection: Turn on the jump starter only once clamps are safely attached.
- Wait before starting: Allow 30 seconds after connection for voltage stabilization before cranking the engine.
- Disconnect in reverse order: Remove black first, then red, to avoid short circuits or sparks.
- Recharge after use: Replenish the jump starter’s battery immediately to maintain readiness.
📑 Table of Contents
- Why You Need a Reliable Car Jump Starter (And How Anker Stands Out)
- Understanding Your Anker Car Jump Starter: Features and Components
- Step-by-Step Anker Car Jump Starter Instructions
- Charging and Maintaining Your Anker Jump Starter
- Common Mistakes and How to Avoid Them
- Real-World Scenarios: How to Use Your Anker Jump Starter in Different Situations
- Data Table: Anker Jump Starter Models Compared
- Final Thoughts: Be Prepared, Not Panicked
Why You Need a Reliable Car Jump Starter (And How Anker Stands Out)
Let’s face it: a dead car battery is one of those moments that can ruin your day. You’re late for work, your kid has a soccer game, or you’re just trying to get home after a long shift. The last thing you need is to be stranded with no one around to help. That’s where a portable jump starter comes in—and not just any jump starter. Anker, a brand known for its reliable tech, has entered the game with powerful, compact, and user-friendly car jump starters.
I remember the first time I used a jump starter. I was parked in a grocery store lot, and my car wouldn’t start. No jump cables, no friendly stranger with jumper wires. Just me, my phone, and a growing sense of panic. That’s when I realized: a portable jump starter isn’t a luxury—it’s a necessity. After trying a few models, I landed on the Anker car jump starter. It’s lightweight, packs a punch, and—most importantly—is incredibly easy to use. But like any tool, it only works well if you know how to use it properly. That’s exactly what this guide is for: to walk you through Anker car jump starter instructions so you can jump-start your car safely, confidently, and without a single spark of worry.
Understanding Your Anker Car Jump Starter: Features and Components
What’s in the Box?
When you unbox your Anker car jump starter (like the popular Anker PowerHouse 521 or Anker Jump Starter 1200A), you’ll typically find:

Visual guide about anker car jump starter instructions
Image source: forumus-uploads-production.s3-us-west-2.amazonaws.com
- The jump starter unit
- Smart jumper cables (with built-in safety protection)
- USB charging cable (often USB-C)
- Car charger adapter
- User manual
- Carrying case (on select models)
<
Each component plays a role. The smart jumper cables are a standout feature—they have reverse polarity protection, over-current protection, and spark-proof clamps. This means you’re far less likely to fry your car’s electrical system or hurt yourself. I once saw a friend try to jump a car with cheap cables and accidentally short the battery—sparks flew, and the car’s ECU needed replacing. With Anker, that risk is drastically reduced.
Key Features That Make Anker Stand Out
Anker jump starters aren’t just about power. They’re designed with real-world use in mind. Here’s what sets them apart:
- High Peak Current: Models like the 1200A can jump-start cars, SUVs, trucks, and even small boats. That’s enough juice for a 6.0L gas or 3.0L diesel engine.
- Multi-Port Charging: Most models come with USB-A, USB-C, and DC ports. I use mine to charge my phone, tablet, and even a portable fan during road trips.
- LED Flashlight: A lifesaver at night. The flashlight has three modes: steady, SOS, and strobe. I used the SOS mode once when I broke down on a dark rural road—it caught the attention of a passing driver within minutes.
- Low Self-Discharge Battery: Anker uses lithium iron phosphate (LiFePO4) or high-grade lithium-ion batteries. These hold a charge for months. I left mine in my glovebox for 3 months, and it still had 85% power.
- LCD Screen: Shows battery percentage, voltage, and error codes. No guessing games.
Know Your Model: Differences to Watch For
Not all Anker jump starters are the same. The PowerCore 622 is smaller and better for compact cars, while the Jump Starter 1200A is built for larger vehicles. Always check your model’s manual for:
- Peak and cranking current (e.g., 1200A peak, 600A cranking)
- Engine size compatibility
- Charging time (most take 3–5 hours via USB-C or car charger)
- Weight and dimensions (important for portability)
Pro tip: If you drive a large SUV or pickup, go for at least 1000A. Smaller sedans can work with 600–800A models.
Step-by-Step Anker Car Jump Starter Instructions
Step 1: Safety First – Park and Prep
Before you even touch the jump starter, make sure you’re safe:
- Park on a flat, dry surface. Turn off the engine and remove the key.
- Engage the parking brake. Put the car in “Park” (automatic) or “Neutral” (manual).
- Turn off all accessories: lights, radio, AC, phone chargers. These can draw power and confuse the jump process.
- Wear gloves and eye protection if you have them. Not mandatory, but smart.
One time, I forgot to turn off the headlights. The car started, but the jump starter’s screen flashed a warning: “High load detected.” I turned off the lights, and it worked fine. Lesson learned.
Step 2: Connect the Jumper Cables (The Right Way)
Now, grab the smart jumper cables. They’re color-coded and labeled:
- Red clamp → Positive (+) terminal on the car battery
- Black clamp → Negative (−) terminal or a grounded metal part
Here’s the key: Connect the clamps in this order:
- Attach the red clamp to the positive (+) terminal of the dead battery.
- Attach the black clamp to the negative (−) terminal of the dead battery. Or—better yet—to a clean, unpainted metal surface on the engine block (like a bolt or bracket). This reduces sparking near the battery.
- Plug the cable into the jump starter. The unit will beep and show “Ready” or “Safe to Connect” on the screen.
Never connect the black clamp to the dead battery’s negative terminal if you can ground it elsewhere. Why? A dead battery can emit flammable hydrogen gas. A spark near the battery? Not a risk you want to take.
Step 3: Power On and Wait
Turn on the jump starter. The LCD screen will light up. You might see:
- “Connecting…”
- “Ready to Jump”
- Battery percentage
Wait 30 seconds. This gives the jump starter time to stabilize. During this time, the internal circuitry checks for reverse polarity, short circuits, and other hazards. If there’s a problem, the screen will show an error code (e.g., “Reverse Polarity” or “Short Circuit”).
Real talk: I once connected the clamps backward (yes, even after 5 years of using these). The Anker unit beeped loudly and showed “Reverse Polarity.” I fixed it in seconds. No damage. That’s the safety tech working.
Step 4: Start the Engine
Now, get in the car and try to start it:
- Turn the key or press the start button.
- Let the engine crank for 3–5 seconds. If it doesn’t start, wait 30 seconds before trying again. Over-cranking can overheat the jump starter.
- If it starts, great! Let it run for 1–2 minutes to stabilize.
Most cars start on the first try. If yours doesn’t, don’t panic. Wait, then try again. After 3 failed attempts, disconnect the jump starter and check:
- Are the clamps clean and tight?
- Is the jump starter charged? (Check the screen)
- Is the battery terminal corroded? (Clean it with a wire brush if needed)
Step 5: Disconnect and Store
Once the engine is running, disconnect in this order:
- Unplug the cable from the jump starter.
- Remove the black clamp first.
- Remove the red clamp.
Why this order? It minimizes the chance of a spark near the battery. Store the cables neatly in the case. I keep mine coiled and secured with a rubber band.
Charging and Maintaining Your Anker Jump Starter
How to Charge It (And How Long It Takes)
Anker jump starters charge via USB-C, USB-A, or a car charger. Here’s how:
- USB-C: Use a 15W+ charger (like the one for your phone). Takes 3–4 hours.
- USB-A: Slower. Use a 10W+ charger. Takes 5–6 hours.
- Car charger: Plug into your car’s 12V outlet. Takes 4–5 hours. Great for recharging while driving.
The LCD screen shows charging progress. A full charge usually takes 4 hours. Pro tip: Charge it to 100% before long trips. A 50% charge might not be enough for a cold-weather jump.
Storage Tips to Extend Battery Life
Lithium batteries hate extreme temperatures and full discharges. To keep your Anker jump starter in top shape:
- Store at 40–60% charge if you won’t use it for weeks. I charge mine to 50% before storing in the glovebox.
- Keep it cool and dry. Avoid the trunk in summer or the garage in winter. Temperatures above 113°F (45°C) or below −4°F (−20°C) can damage the battery.
- Check it every 3–6 months. Turn it on, see the charge level, and top it off if needed.
I once left my jump starter in a hot car for a week. The battery dropped to 20% and took longer to charge. Lesson: don’t bake your tech.
When to Replace the Battery
Most Anker jump starters last 3–5 years with regular use. Signs it’s time to replace (or retire) it:
- Charge drops below 50% in 1–2 months (even with proper storage)
- Fails to hold a charge after full recharging
- Overheats during charging or use
- Physical damage (cracks, swelling)
Anker offers a 18-month warranty on most models. If you’re within that window, contact customer support. They’re surprisingly helpful.
Common Mistakes and How to Avoid Them
Connecting Clamps Backward (And Why It’s Not the End of the World)
It happens. You’re stressed, it’s dark, and the battery is corroded. But here’s the good news: Anker’s smart cables have reverse polarity protection. If you connect the clamps backward, the jump starter will:
- Beep loudly
- Show “Reverse Polarity” on the screen
- Block power transfer
Just disconnect, fix the clamps, and try again. No harm done. I’ve done this twice. The Anker unit saved me both times.
Over-Cranking: The Silent Killer
Cranking the engine for more than 5 seconds can overheat the jump starter. The screen might show “High Temperature” or “Overload.” To avoid this:
- Crank for 3–5 seconds max
- Wait 30 seconds between attempts
- If the engine doesn’t start after 3 tries, stop. The battery might be too far gone, or there’s another issue (e.g., starter motor, fuel pump)
Using It on a Fully Dead Battery
A jump starter works best when the battery has some charge. If the battery is completely dead (0V), the jump starter might not recognize it. In this case:
- Try charging the jump starter fully first
- Connect the clamps and wait 1–2 minutes before starting
- If it still doesn’t work, the battery may need replacement
I once tried to jump a battery that had been dead for 2 weeks. The Anker unit showed “Low Battery Voltage.” We ended up replacing the battery, but the jump starter did its job—it warned us before causing damage.
Real-World Scenarios: How to Use Your Anker Jump Starter in Different Situations
Jump-Starting in Cold Weather
Cold weather kills batteries. But Anker jump starters perform well in cold conditions—down to −4°F (−20°C). Tips:
- Keep the jump starter warm until use. Store it under your seat, not in the trunk.
- Preheat the engine bay with a hair dryer (if possible) to help the battery accept charge.
- Crank the engine in short bursts (3 seconds on, 30 seconds off).
I used mine in −10°F weather last winter. The car started on the second try. The jump starter was cold, but the LiFePO4 battery held up.
Using It as a Power Bank on the Go
Your Anker jump starter is more than a jumper. It’s a portable power bank. I use mine to:
- Charge my phone during road trips
- Power a portable cooler for camping
- Run a dashcam overnight (with a DC adapter)
Just plug in your device and press the power button. The LCD shows how much power is left. A 10,000mAh model can charge a phone 2–3 times.
Emergency Situations: What to Do When You’re Stranded
If you’re stuck at night or in a remote area:
- Use the LED flashlight in SOS mode to signal for help
- Charge your phone to call roadside assistance
- Keep the jump starter charged and ready for the next jump
I was once stranded on a highway at night. I used the SOS light, charged my phone, and called a tow truck. The jump starter was my lifeline.
Data Table: Anker Jump Starter Models Compared
| Model | Peak Current | Engine Compatibility | Battery Type | Charging Time | Weight | Best For |
|---|---|---|---|---|---|---|
| PowerCore 622 | 600A | Up to 4.0L gas | Lithium-ion | 3.5 hrs (USB-C) | 1.1 lbs | Compact cars, daily drivers |
| Jump Starter 1200A | 1200A | Up to 6.0L gas / 3.0L diesel | LiFePO4 | 4 hrs (USB-C) | 1.8 lbs | SUVs, trucks, frequent travelers |
| PowerHouse 521 | 800A | Up to 5.0L gas | Lithium-ion | 5 hrs (USB-C + solar) | 2.5 lbs | Outdoor enthusiasts, campers |
Note: All models include USB-A/USB-C ports, LED flashlight, and smart jumper cables.
Final Thoughts: Be Prepared, Not Panicked
Using an Anker car jump starter isn’t rocket science. But like any tool, it’s only as good as the person using it. The key is to read the manual, practice the steps, and keep it charged. I keep mine in my car’s center console, next to my gloves. It’s the first thing I check before winter.
Remember: a jump starter is a safety net. It won’t fix a bad starter motor or a clogged fuel filter. But for a dead battery? It’s a game-changer. And with Anker’s smart safety features, you’re not just getting power—you’re getting peace of mind.
So next time you hear that dreaded “click-click-click” when you turn the key, don’t panic. Grab your Anker, follow the Anker car jump starter instructions, and get back on the road. Because being prepared isn’t about avoiding problems—it’s about solving them fast, safely, and with a little less stress.
Frequently Asked Questions
How do I use the Anker car jump starter for the first time?
Before using your Anker car jump starter, fully charge it using the provided USB-C or DC cable. Connect the clamps to the battery terminals (red to positive, black to negative) and press the power button to activate jump-start mode. Always follow the Anker car jump starter instructions in the manual for safety.
Can I leave my Anker jump starter plugged in overnight?
Yes, Anker jump starters have overcharge protection, so leaving them plugged in is safe. However, for optimal battery health, unplug it once fully charged, typically indicated by a solid LED light.
What should I do if my Anker car jump starter won’t turn on?
First, ensure the device is charged—connect it to a power source for at least 30 minutes. If it still won’t turn on, try a reset by holding the power button for 10 seconds. Refer to the Anker car jump starter instructions for model-specific troubleshooting.
How long does the Anker jump starter hold its charge?
Anker jump starters typically retain 80% of their charge for 3–6 months when stored properly in a cool, dry place. To maintain performance, recharge it every 3 months if unused.
Is it safe to use an Anker jump starter in the rain?
Anker jump starters are not waterproof, so avoid using them in heavy rain or wet conditions. Light moisture is usually harmless, but always dry the unit and clamps thoroughly before and after use.
Can I charge my phone with the Anker car jump starter?
Yes! Most Anker jump starters feature USB-A and USB-C ports to charge phones, tablets, or other devices. Use the appropriate cable and press the power button to activate the charging function.