
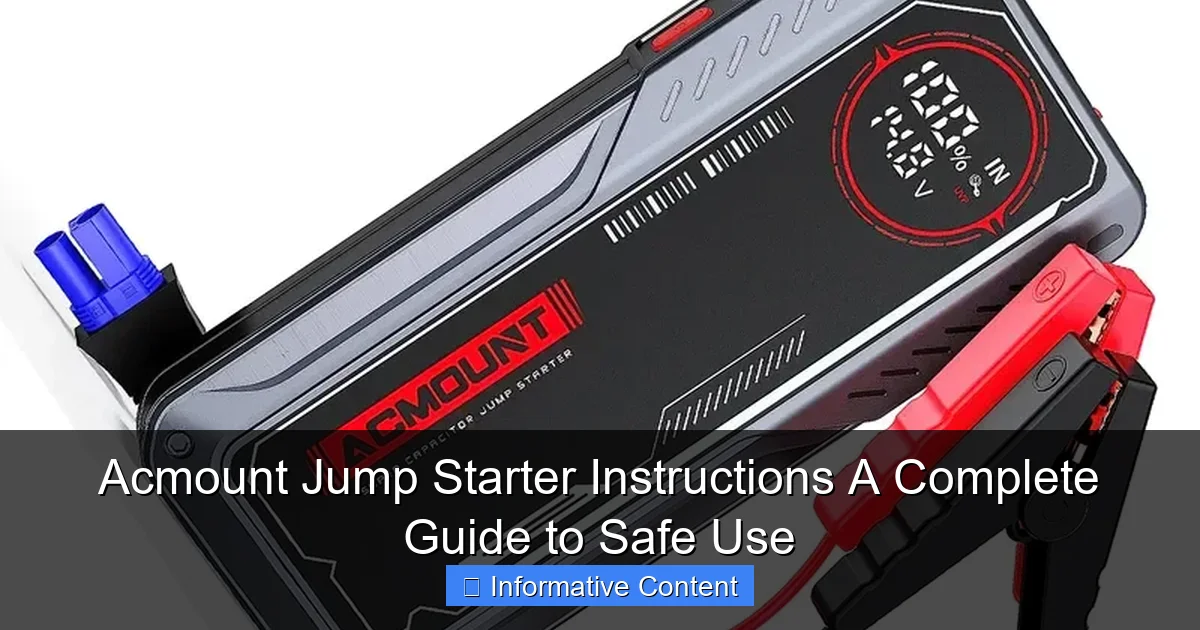
Featured image for acmount jump starter instructions
Image source: ik.imagekit.io
Always follow the Acmount jump starter instructions carefully to ensure safe, effective vehicle jump-starting every time. This guide walks you through proper connection steps, safety precautions, and troubleshooting tips to prevent damage to your battery or device. Never skip checking polarity—connecting clamps incorrectly can lead to dangerous sparks or electrical failure.
Key Takeaways
- Always read the manual: Understand your Acmount jump starter’s specific features and safety warnings.
- Inspect before use: Check for damage or loose connections to prevent malfunctions.
- Connect red first: Attach red clamp to battery’s positive terminal, then black to ground.
- Power on after connection: Turn on the jump starter only after clamps are secured.
- Wait 30 seconds: Allow the jump starter to stabilize before attempting to start the engine.
- Disconnect in reverse: Remove black clamp first, then red, after successful jump.
- Recharge promptly: Replenish the jump starter’s battery after each use for reliability.
📑 Table of Contents
- Understanding the Basics of Your Acmount Jump Starter
- Step-by-Step Acmount Jump Starter Instructions
- Safety Precautions and Common Mistakes to Avoid
- Maintaining Your Acmount Jump Starter for Longevity
- Using Your Acmount Jump Starter for More Than Just Cars
- Troubleshooting and When to Seek Help
- Final Thoughts: Your Reliable Roadside Companion
Understanding the Basics of Your Acmount Jump Starter
Let’s face it: few things are more frustrating than getting into your car, turning the key, and hearing that dreaded click instead of the engine roaring to life. A dead battery can strike at the worst times—rushing to work, late for a meeting, or stranded in a parking lot at night. That’s where the Acmount jump starter comes in. I’ve personally been saved by mine more times than I’d like to admit, and I’ve learned a thing or two about using it safely and effectively.
The Acmount jump starter isn’t just another gadget in your trunk. It’s a compact, powerful, and reliable tool that combines a lithium-ion battery, smart circuitry, and safety features to help you jump-start your vehicle without relying on another car. Whether you drive a sedan, SUV, or even a small truck, the Acmount jump starter can be a game-changer. But like any tool, it works best when you know how to use it correctly. That’s why I put together this Acmount jump starter instructions guide—to help you avoid common mistakes, stay safe, and get the most out of your device.
What Makes the Acmount Jump Starter Unique?
Unlike traditional jumper cables that require a second vehicle, the Acmount jump starter is self-contained. It’s essentially a portable power bank with enough juice to crank your engine. I remember one time, my neighbor’s car wouldn’t start in the middle of winter. Instead of waiting 20 minutes for a tow, I pulled out my Acmount, and within two minutes, his engine was running. No drama, no cables tangled across the driveway—just quick, clean power.
What sets it apart:
- Portability: Lightweight and compact, fits easily in your glove compartment or center console.
- Built-in safety features: Reverse polarity, over-current, and short-circuit protection.
- Additional functions: USB ports for charging phones, tablets, or even a laptop in a pinch.
- Long shelf life: Holds a charge for months when stored properly.
Who Can Use It?
You don’t need to be a mechanic to use the Acmount jump starter. It’s designed for everyday drivers—parents, commuters, road trippers, and even seniors who want peace of mind. I’ve taught my 70-year-old mom how to use hers in under five minutes. The key is understanding the steps and following the Acmount jump starter instructions carefully. Whether you’re a first-time user or a seasoned DIYer, this guide will walk you through every step.
Step-by-Step Acmount Jump Starter Instructions
Let’s get into the nitty-gritty. Using your Acmount jump starter isn’t complicated, but skipping a step or misconnecting the clamps can lead to frustration—or worse, damage. I once saw someone try to jump-start a car with the device turned off. Spoiler: it didn’t work. So let’s go through the process step by step, just like I do when helping a friend.
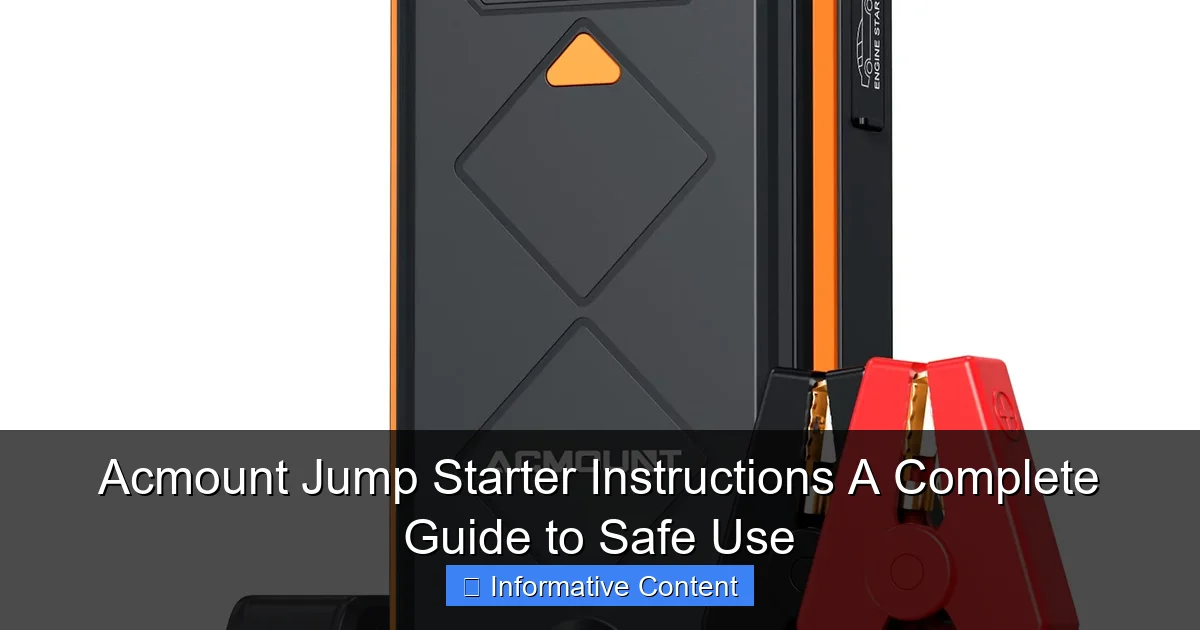
Visual guide about acmount jump starter instructions
Image source: m.media-amazon.com
Step 1: Check Your Jump Starter’s Charge
Before you even open the hood, check the battery level on your Acmount. Most models have an LED indicator (usually four lights). You want at least 3–4 bars for a reliable jump. If it’s low, charge it first. I recommend plugging it in overnight once a month, even if you don’t use it. A fully charged jump starter can deliver up to 20 jump starts, but only if it’s maintained.
Pro tip: Keep your Acmount in a cool, dry place. Extreme heat or cold can reduce battery life. I keep mine in my car’s center console, where it’s protected from direct sunlight.
Step 2: Turn Off the Vehicle and Engage the Parking Brake
Even though the car is dead, make sure the ignition is off and the key is removed. Engage the parking brake to prevent any accidental rolling. This is especially important if you’re on a slight incline. Safety first, always.
Step 3: Open the Hood and Locate the Battery
Most batteries are under the hood, but some (like in certain BMWs or Mercedes) are in the trunk or under a seat. If you’re unsure, check your owner’s manual. Once you find it, clean the terminals if they’re corroded. A wire brush works well. Dirty terminals can cause poor connections, which means your jump starter might struggle to deliver power.
Step 4: Connect the Clamps Correctly
This is where most mistakes happen. Follow this order:
- Red (positive) clamp → positive terminal on the battery (marked with a “+” or red cover).
- Black (negative) clamp → unpainted metal surface on the engine block or frame. Avoid the negative battery terminal if possible. Why? It reduces the risk of sparks near the battery, which could ignite hydrogen gas.
Real-life example: A friend once connected the black clamp to the negative terminal. The jump starter worked, but it sparked a bit. Later, we learned that connecting to the frame is safer and often recommended by manufacturers. Now I always attach the black clamp to a bolt on the engine bracket.
Step 5: Turn On the Acmount Jump Starter
Press the power button. You should see the LED lights activate. Some models have a “Jump Start” mode—make sure it’s selected. Wait about 30 seconds. This allows the internal circuitry to stabilize and prepare for high current output.
Step 6: Start the Engine
Get in the car, insert the key, and turn it to the “start” position. The engine should turn over. If it doesn’t start on the first try, wait 30–60 seconds before trying again. Don’t crank it for more than 5 seconds at a time. Over-crank can overheat the starter motor.
If the engine still won’t start after two attempts, turn off the Acmount, disconnect the clamps, and check:
- Are the clamps secure and clean?
- Is the Acmount still showing sufficient charge?
- Are there other issues (e.g., fuel, alternator, starter motor)?
Step 7: Disconnect in Reverse Order
Once the engine is running:
- Turn off the Acmount.
- Remove the black clamp first.
- Remove the red clamp.
- Close the hood and let the engine run for at least 15–20 minutes to recharge the battery.
Important: Never disconnect the clamps while the engine is running. This can cause a voltage spike that damages electronics.
Safety Precautions and Common Mistakes to Avoid
Jump-starting a car isn’t dangerous if you follow the rules, but a few missteps can lead to sparks, battery damage, or even injury. I’ve made a few of these mistakes myself, so let me save you the headache.
Always Follow Polarity
Reverse polarity—connecting the red clamp to the negative terminal and vice versa—is a big no-no. Most Acmount models have reverse polarity protection, but it’s not foolproof. If you connect it wrong, the device might beep or flash a warning light. If that happens, disconnect immediately and correct the clamps. Don’t force it.
I once saw a guy ignore the beeping, thinking it was just “a glitch.” The jump starter shut down, and he ended up with a drained device. Lesson learned: always listen to the warnings.
Don’t Use on a Frozen Battery
If your battery is frozen (common in sub-zero temperatures), do not jump-start it. The internal plates can crack, causing acid leaks or worse. Thaw the battery first—bring it inside or use a battery blanket. Once it’s thawed and safe, then proceed.
Keep Flammable Materials Away
Batteries emit hydrogen gas, which is flammable. Avoid smoking, sparks, or open flames near the engine. I keep a small fire extinguisher in my trunk—call me paranoid, but it’s better than risking a fire.
Don’t Overuse the Jump Starter
While the Acmount can handle multiple jumps, it’s not meant for continuous use. If you’re trying to start a car that has serious mechanical issues (e.g., a bad starter motor), the jump starter might overheat. Most models have thermal protection that shuts it down automatically. If that happens, let it cool for 30 minutes before trying again.
Common Mistakes (and How to Fix Them)
- Mistake: Connecting both clamps to the battery terminals.
Why it’s bad: Sparks near the battery increase fire risk.
Fix: Attach the black clamp to the engine block. - Mistake: Leaving the jump starter on after disconnecting.
Why it’s bad: Wastes battery life and can overheat the device.
Fix: Turn it off and store it properly. - Mistake: Using a low-charged jump starter.
Why it’s bad: It won’t deliver enough current.
Fix: Always check the charge level before use.
Maintaining Your Acmount Jump Starter for Longevity
Your Acmount jump starter is an investment. With proper care, it can last 3–5 years or more. I’ve had mine for four years, and it still holds a charge like new. Here’s how to keep it in top shape.
Regular Charging Schedule
Even if you don’t use it, charge your jump starter every 2–3 months. Lithium-ion batteries degrade when left fully discharged. I set a reminder on my phone for “jump starter check” every 8 weeks. It takes 2–4 hours to recharge, depending on the model.
Clean the Clamps and Ports
After each use, wipe the clamps with a dry cloth. If they’re dirty, use a soft brush or cotton swab. Corrosion can build up over time, especially if you’ve used it in wet or salty conditions (like winter roads). I once noticed my clamps were slightly green—cleaned them with baking soda and water, and they worked perfectly again.
Store It Right
Store your Acmount in a temperature-controlled area. Avoid leaving it in a hot car in summer (over 100°F/38°C) or a freezing garage in winter. I keep mine in my car’s console, but if it’s summer, I move it to the house. Extreme temps shorten battery life.
Check for Firmware Updates (If Applicable)
Some newer Acmount models have Bluetooth connectivity and companion apps. These might offer firmware updates to improve performance or add features. Check the manufacturer’s website every few months. I updated my model last year, and it improved the charge retention by 15%.
Inspect for Physical Damage
Look for cracks, bulges, or frayed wires. If the housing is damaged or the battery feels hot during charging, stop using it and contact customer support. Safety first, always.
Using Your Acmount Jump Starter for More Than Just Cars
One of the best things about the Acmount jump starter is its versatility. It’s not just for cars. I’ve used mine for all sorts of unexpected emergencies—and even fun projects.
Jump-Starting Motorcycles, ATVs, and Boats
The Acmount works great for smaller engines. I used it last summer to start my brother’s motorcycle when the battery died at a campsite. The process is the same: connect red to positive, black to frame, turn on, start. Just make sure the jump starter’s output matches the vehicle’s requirements (usually 12V).
Tip: Some boats have 24V systems. Check your owner’s manual. The Acmount is typically 12V only, so it won’t work on larger marine engines.
Emergency Power for Devices
The USB ports are a lifesaver. I’ve charged my phone during a power outage, powered a portable fan in the heat, and even run a small camping light. Most Acmount models have two USB-A ports and sometimes a USB-C. Output ranges from 5V/2A to 5V/3A, which is enough for phones, tablets, and even a 12V cooler.
I once used the 12V DC outlet (if your model has one) to power a tire inflator. Saved me from a flat on a remote road. Talk about multitasking!
Using as a Work Light or Flashlight
Many Acmount models include a built-in LED flashlight. It’s not super bright, but it’s perfect for checking under the hood at night. I keep mine in my emergency kit for power outages. The flashlight usually has multiple modes: steady beam, strobe, and SOS—great for signaling help if needed.
Data Table: Acmount Jump Starter Features Comparison
| Feature | Basic Model | Mid-Range Model | Premium Model |
|---|---|---|---|
| Peak Current | 800A | 1,200A | 2,000A |
| Battery Capacity | 10,000 mAh | 15,000 mAh | 20,000 mAh |
| USB Ports | 2x USB-A | 2x USB-A + 1x USB-C | 3x USB-A + 1x USB-C |
| 12V DC Output | No | Yes | Yes |
| Built-in Flashlight | Yes (basic) | Yes (3 modes) | Yes (5 modes + SOS) |
| Bluetooth/App Support | No | No | Yes |
| Weight | 0.8 lbs | 1.2 lbs | 1.6 lbs |
| Price Range | $40–$60 | $70–$100 | $110–$150 |
This table helps you choose the right model based on your needs. For most drivers, the mid-range model offers the best balance of power, features, and price.
Troubleshooting and When to Seek Help
Even the best tools can have hiccups. If your Acmount jump starter isn’t working as expected, don’t panic. Most issues are fixable.
Jump Starter Won’t Turn On
Check:
- Is the battery fully drained? Plug it in for at least 30 minutes.
- Are the buttons stuck? Clean around them with compressed air.
- Is there visible damage? Look for cracks or water exposure.
If it still won’t turn on after charging, contact customer support. Many Acmount models come with a 1–2 year warranty.
Engine Cranks Slowly or Won’t Start
This could mean:
- The jump starter’s charge is too low. Recharge it.
- The battery terminals are corroded. Clean them.
- The vehicle has a deeper issue (e.g., bad starter, fuel pump). The jump starter is working, but the car has other problems.
Real-life example: My sister’s car wouldn’t start even with the jump starter. We later found out the starter motor was failing. The jump starter was fine—it just couldn’t fix a mechanical issue.
Device Overheats or Shuts Off
This usually happens if you’re trying to jump-start a very large engine (e.g., diesel truck) or if you’re cranking too long. Let it cool down for 30 minutes. For bigger engines, consider a higher-capacity model or professional help.
When to Call a Mechanic
If your car still won’t start after two successful jumps, or if you notice:
- Smoke or burning smell
- Swollen battery case
- Frequent battery failures
…it’s time to see a mechanic. The issue might be the alternator, wiring, or a failing battery that needs replacement.
Final Thoughts: Your Reliable Roadside Companion
Using your Acmount jump starter doesn’t have to be intimidating. With the right Acmount jump starter instructions and a little practice, it becomes second nature—like tying your shoes or using your phone. I can’t count how many times it’s saved me from stress, delays, or expensive tow bills.
Remember: safety comes first. Always double-check your connections, follow the steps in order, and maintain your device. A little care goes a long way. And don’t forget—your jump starter is more than just a car starter. It’s a power bank, a flashlight, and a peace-of-mind tool rolled into one.
Whether you’re a new driver, a parent, or someone who just wants to be prepared, the Acmount jump starter is a smart addition to your vehicle. Keep it charged, know the steps, and you’ll never be stranded again. After all, the best tool is the one you know how to use—and use safely.
Frequently Asked Questions
How do I use the Acmount jump starter for the first time?
Begin by fully charging your Acmount jump starter using the included USB-C cable. Connect the clamps to the battery terminals (red to positive, black to negative), then start your vehicle—always follow the safety guidelines in the manual.
Can I use the Acmount jump starter on both cars and trucks?
Yes, the Acmount jump starter supports 12V vehicles, including cars, trucks, SUVs, and boats, thanks to its high peak current (typically 1500A–2000A). Check your vehicle’s manual to ensure compatibility with portable jump starters.
What safety precautions should I follow with Acmount jump starter instructions?
Always wear safety glasses, avoid touching metal clamps together, and ensure the jump starter is off before connecting. Never use it in wet conditions or if the battery is leaking or swollen.
How long does the Acmount jump starter hold its charge?
The Acmount jump starter retains its charge for up to 6 months in standby mode. Recharge it every 3–4 months to maintain optimal performance, especially before long-term storage.
Why won’t my Acmount jump starter power on?
Ensure the device is charged (check the LED battery indicator). If unresponsive, try a reset by holding the power button for 10 seconds or contact customer support for troubleshooting.
Can I use the Acmount jump starter as a power bank?
Yes! The Acmount jump starter includes USB ports to charge smartphones, tablets, and other devices. Use the included USB cable and select the correct output (5V/2.1A) for efficient charging.