
Featured image for aa jump starter instructions
Image source: images-eu.ssl-images-amazon.com
Master your AA jump starter in minutes with these clear, step-by-step instructions designed for safety and success. Learn how to properly connect the clamps, power on the unit, and jump-start your vehicle without risking damage or injury. Troubleshoot common issues like weak output or connection errors like a pro and get back on the road fast.
Key Takeaways
- Read the manual first: Always review manufacturer instructions before using your AA jump starter.
- Check battery level: Ensure the jump starter is fully charged prior to use.
- Connect properly: Attach red clamp to positive terminal, black to ground—never reverse.
- Power on after connection: Turn on the device only after clamps are securely attached.
- Wait before starting: Allow 30–60 seconds after powering on for stable connection.
- Disconnect safely: Power off and remove clamps in reverse order after use.
- Troubleshoot beeps/flashes: Refer to LED indicators for quick diagnosis of common issues.
📑 Table of Contents
- Why Every Driver Should Know How to Use an AA Jump Starter
- Understanding Your AA Jump Starter: What It Is and How It Works
- Step-by-Step AA Jump Starter Instructions: How to Use It Safely
- Troubleshooting Common AA Jump Starter Problems
- Maximizing Your AA Jump Starter’s Lifespan and Performance
- Data Table: Comparing Popular AA Jump Starter Models
- Final Thoughts: Be Prepared, Not Panicked
Why Every Driver Should Know How to Use an AA Jump Starter
Imagine this: It’s a cold winter morning, you’re running late for work, and as you turn the key in your car’s ignition, all you hear is a slow, sad *click… click… click*. The battery is dead. Your heart sinks. You’re stranded, and the nearest auto shop is miles away. Now, picture this instead: You calmly open your trunk, pull out a compact AA jump starter, connect the clamps, and within seconds, your engine roars back to life. No waiting for help, no awkward phone calls, no tow truck fees. That’s the power of being prepared.
An AA jump starter (also known as a portable jump box or battery booster) is a small, rechargeable device designed to jump-start a vehicle without needing another car. Unlike traditional jumper cables that rely on a second vehicle, these modern tools pack enough power to revive a dead battery in seconds. Whether you drive a compact sedan, a pickup truck, or even a motorcycle, having a jump starter in your emergency kit can save you time, stress, and money. But like any tool, knowing how to use it properly—and what to do when things go wrong—is key. In this guide, we’ll walk you through AA jump starter instructions, from setup to troubleshooting, so you can handle a dead battery like a pro.
Understanding Your AA Jump Starter: What It Is and How It Works
What Is an AA Jump Starter?
Despite the name “AA,” these devices don’t run on standard AA batteries. Instead, the “AA” in AA jump starter often refers to the brand (like AA Battery Booster or models sold by the American Automobile Association). These are portable lithium-ion or lead-acid battery packs with built-in jumper cables, safety features, and sometimes extra functions like USB charging ports, LED flashlights, or air compressors.
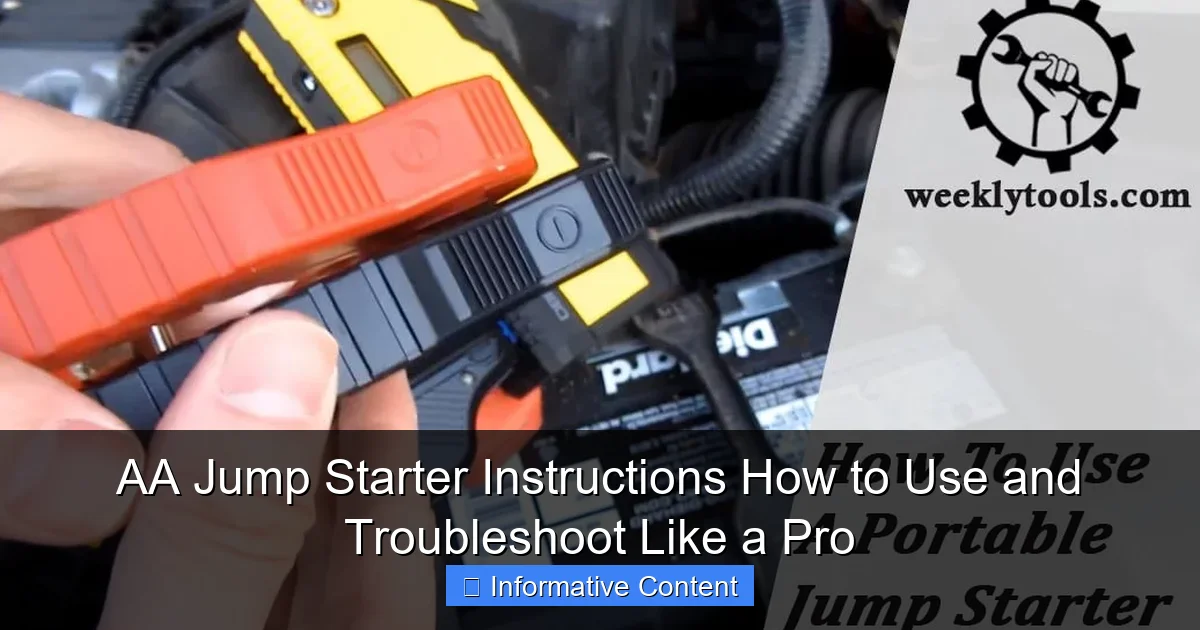
Visual guide about aa jump starter instructions
Image source: weeklytools.com
Think of it as a “battery in a box.” It stores electrical energy when charged and releases it when needed to start your vehicle. Most models can jump-start a 12V car battery up to 20 times on a single charge, depending on capacity (measured in peak amps and cold-cranking amps).
How Does It Work?
When your car battery dies, it lacks the voltage and current to turn the starter motor. The jump starter acts as a temporary power source. Here’s how it works in simple terms:
- The jump starter’s internal battery sends a high burst of current through the attached clamps.
- The positive clamp connects to the battery’s positive terminal (marked +).
- The negative clamp connects to a grounded metal part (not the negative battery terminal, to reduce sparking).
- Once connected, the jump starter delivers power to the starter motor, allowing the engine to crank and start.
Modern jump starters include smart circuitry to prevent reverse polarity, short circuits, and overcurrent. Some even have reverse-polarity alarms or LED indicators to guide you.
Key Features to Look For
Not all jump starters are created equal. Here’s what to consider when choosing or using one:
- Peak Amps: The maximum current the device can deliver (e.g., 1000A, 2000A). Higher is better for larger engines (trucks, SUVs).
- Capacity (mAh): Determines how many jump starts you can get. 10,000–20,000 mAh is typical.
- Smart Safety Features: Reverse polarity protection, spark-proof clamps, overload detection.
- Extra Functions: USB ports, LED flashlights, air compressors, or even jump-starting boats or ATVs.
- Portability: Weight and size matter if you’re storing it in your glove box or trunk.
Pro Tip: Always check your vehicle’s manual for recommended jump-starting amps. A 4-cylinder sedan might need 400–600 peak amps, while a V8 truck could require 1000+.
Step-by-Step AA Jump Starter Instructions: How to Use It Safely
Step 1: Prepare the Jump Starter
Before you even need to jump-start a car, make sure your AA jump starter is fully charged. Most models come with a wall charger, car charger, or USB-C cable. A full charge can take 3–6 hours, depending on capacity.
- Plug it in overnight before a long trip.
- Check the battery level indicator (if your model has one) before storing it.
- Store it in a cool, dry place—extreme heat or cold can damage the battery.
Real-life example: I once left my jump starter in the trunk during a heatwave. When I needed it, the battery had degraded and couldn’t hold a charge. Now I keep mine in the garage, away from direct sunlight.
Step 2: Park Safely and Turn Off the Vehicle
Pull over to a safe location—off the road, away from traffic, and on level ground. Turn off the ignition, put the car in park (or neutral for manuals), and engage the parking brake. Remove the key to avoid accidental cranking.
Step 3: Locate the Battery
Pop the hood and find your car’s battery. It’s usually in the engine bay, but some vehicles (like older BMWs or hybrids) have it under the rear seat or trunk. Clean any corrosion or debris from the terminals with a wire brush or rag.
Step 4: Connect the Clamps (The Right Way!)
This is where most mistakes happen. Follow these steps carefully:
- Positive First: Attach the red clamp to the battery’s positive terminal (marked +). It’s usually covered by a red plastic cap.
- Negative to Ground: Attach the black clamp to a clean, unpainted metal surface on the engine block or chassis. Never connect it directly to the battery’s negative terminal. This prevents sparks near the battery, which could ignite hydrogen gas.
- Double-Check Connections: Ensure clamps are snug and not touching other metal parts.
Pro Tip: Use a bolt or bracket on the engine block as a ground point. Avoid plastic covers or moving parts.
Step 5: Power On the Jump Starter
Turn on the jump starter using the power button or switch. Some models have a “boost” or “start” mode—activate it if needed. Wait 30–60 seconds to let the jump starter charge the car’s battery slightly.
Step 6: Start the Engine
Get in the car, insert the key, and turn it to the “start” position. If the engine cranks slowly, wait 10–15 seconds and try again. If it doesn’t start on the first try, wait 30 seconds before retrying (to avoid overheating the jump starter).
Step 7: Disconnect in Reverse Order
Once the engine is running:
- Turn off the jump starter.
- Remove the black clamp first.
- Remove the red clamp.
- Close the hood and let the engine run for 10–15 minutes to recharge the battery.
Important: Don’t drive immediately after jump-starting. Let the alternator recharge the battery fully.
Troubleshooting Common AA Jump Starter Problems
Problem 1: The Jump Starter Won’t Turn On
You press the power button—nothing happens. Here’s what to check:
- Low Battery: The most common issue. Recharge the jump starter fully. If it’s been unused for months, it may need a “trickle charge” (plug it in for 24 hours).
- Faulty Charger: Try a different cable or power source. Some models have USB-C ports—use a high-quality cable.
- Internal Damage: If the device is dropped or exposed to water, the battery or circuit board might be damaged. Contact the manufacturer.
Example: A friend’s jump starter wouldn’t power on. After troubleshooting, we realized the wall charger was broken. Switching to a car charger fixed it.
Problem 2: Engine Won’t Start (Even with a Charged Jump Starter)
If the jump starter is fully charged but the car won’t start, the issue might not be the battery. Consider:
- Faulty Battery Terminals: Corrosion or loose connections block current. Clean terminals and tighten clamps.
- Dead Battery: If the battery is over 3–5 years old, it may not hold a charge even after jump-starting. Replace it.
- Starter Motor or Alternator Failure: A jump starter can’t fix these. Listen for clicking (starter issue) or dim lights (alternator problem).
- Incorrect Clamp Connection: Double-check polarity and grounding. A reversed connection can damage the jump starter.
Pro Tip: Use a multimeter to test the battery voltage. A healthy battery should read 12.6V when off and 13.8–14.4V when running.
Problem 3: Sparks or Smoking During Connection
Sparks are normal when connecting the last clamp (due to current flow), but excessive sparks or smoke mean trouble:
- Reverse Polarity: You connected red to negative or black to positive. Disconnect immediately and check clamps. Most jump starters have protection, but repeated mistakes can damage them.
- Short Circuit: Clamps are touching each other or metal. Reconnect carefully.
- Faulty Jump Starter: Internal short or damaged battery. Stop using it and contact support.
Problem 4: Jump Starter Dies Mid-Use
The device powers off during cranking. Possible causes:
- Low Capacity: The jump starter can’t deliver enough current. Use a higher-amp model for larger engines.
- Overheating: The device shuts down to protect itself. Wait 10–15 minutes and try again.
- Weak Car Battery: A deeply discharged battery draws too much current. Let the jump starter charge the battery for 5 minutes before cranking.
Maximizing Your AA Jump Starter’s Lifespan and Performance
Regular Maintenance Tips
Like any battery-powered device, your AA jump starter needs care to last. Follow these habits:
- Recharge Monthly: Even if unused, lithium batteries degrade over time. Charge every 30–60 days to 50–80% (not 100%) for longevity.
- Store in Moderate Temperatures: Avoid leaving it in a hot car (above 100°F) or freezing garage (below 32°F). Ideal range: 50–80°F.
- Clean the Clamps: Wipe off corrosion or dirt with a dry cloth. Store clamps with plastic covers to prevent short circuits.
- Update Firmware (If Applicable): Some smart jump starters have app connectivity. Check for updates to improve performance.
When to Replace Your Jump Starter
No device lasts forever. Replace your jump starter if you notice:
- It takes longer to charge than usual.
- It can’t hold a charge for more than a few weeks.
- It fails to jump-start a car it previously handled easily.
- Physical damage (cracks, leaks, swollen battery).
Real-life insight: My first jump starter lasted 4 years. After a few failed jump attempts, I tested it and found the capacity had dropped by 40%. Time for an upgrade!
Using Your Jump Starter for More Than Cars
Many jump starters double as power banks or emergency tools:
- Charge Devices: Use the USB ports to charge phones, tablets, or GPS units.
- Emergency Light: The built-in flashlight is perfect for roadside repairs at night.
- Inflate Tires: Some models include a 12V air compressor for flat tires.
- Boats, ATVs, and Motorcycles: Check the manual—many jump starters work on 12V systems beyond cars.
Data Table: Comparing Popular AA Jump Starter Models
| Model | Peak Amps | Capacity (mAh) | Key Features | Best For |
|---|---|---|---|---|
| AA 12V Portable Jump Starter 1000A | 1000A | 12,000 mAh | USB ports, LED flashlight, reverse polarity alarm | Compact cars, sedans, hybrids |
| AA Heavy-Duty Jump Box 2000A | 2000A | 20,000 mAh | Air compressor, dual USB, 12V outlet | Trucks, SUVs, vans |
| AA Smart Jump Starter 800A | 800A | 10,000 mAh | App connectivity, battery health monitor | Tech-savvy drivers |
| AA Mini Jump Starter 600A | 600A | 8,000 mAh | Pocket-sized, keychain clip | Motorcycles, small engines |
This table compares top-selling AA jump starter models. Always match the peak amps to your vehicle’s needs. For example, a 2000A model is overkill for a Honda Civic but essential for a Ford F-150.
Final Thoughts: Be Prepared, Not Panicked
Learning AA jump starter instructions isn’t just about fixing a dead battery—it’s about confidence. Knowing you can handle a roadside emergency without relying on strangers or expensive services is empowering. Whether you’re a new driver, a seasoned road-tripper, or a parent shuttling kids to soccer practice, a jump starter is one of the smartest investments you can make.
Remember, preparation beats panic. Keep your jump starter charged, practice the steps at home (on a working battery), and store it where you can access it quickly. And if things go wrong? Don’t stress. Most issues—like reversed clamps or a weak battery—are fixable with patience and the right knowledge. You’ve got this.
Next time your car won’t start, you won’t be that person staring helplessly under the hood. You’ll be the one calmly pulling out your AA jump starter, connecting the clamps, and driving away—ready for whatever the road throws at you. Safe travels!
Frequently Asked Questions
How do I use an AA jump starter to jump-start my car?
To use an AA jump starter, first ensure the device is fully charged. Connect the red clamp to the positive (+) terminal of your car battery and the black clamp to a grounded metal surface, then turn on the jump starter and start your vehicle.
Can I use an AA jump starter on a completely dead battery?
Yes, most AA jump starters can revive a completely dead 12V battery, but it may take a few minutes of charging first. Check your model’s manual for specific voltage requirements and safety precautions.
What are the safety precautions for AA jump starter instructions?
Always wear protective gloves and goggles, and never touch clamps together during use. Follow the correct order: connect red first, then black, and disconnect in reverse to avoid sparks or short-circuiting.
Why won’t my AA jump starter hold a charge?
This could be due to over-discharging, prolonged storage without use, or a faulty battery. Recharge the unit fully and let it rest for 30 minutes; if the issue persists, contact AA customer support.
How long does an AA jump starter take to charge?
Most AA jump starters take 3–5 hours to fully charge via a wall outlet or USB. Refer to your model’s manual for exact charging times and avoid using fast chargers unless specified.
Can I use an AA jump starter while it’s charging?
No, most models prohibit simultaneous charging and use to prevent overheating or damage. Always wait until the unit is fully charged before attempting to jump-start a vehicle.