
Featured image for how to charge car jump starter
Image source: locardeals.com
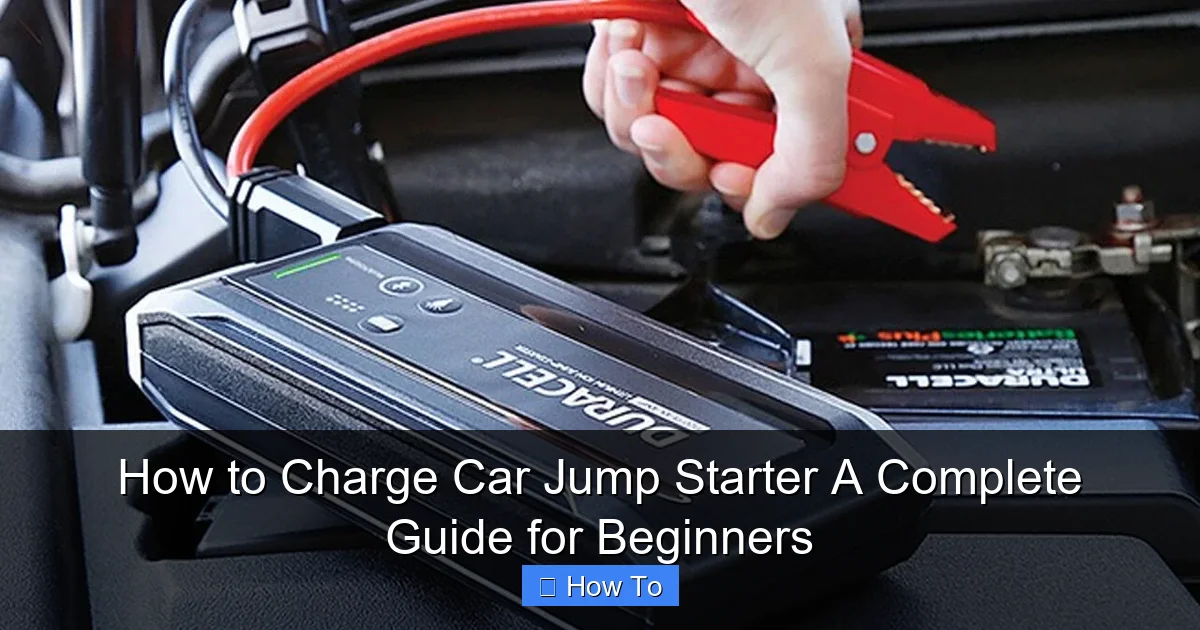
Always use the correct voltage charger to safely and effectively charge your car jump starter—this prevents damage and ensures peak performance. Simply plug the charger into the jump starter’s input port and connect it to a power source, monitoring the indicator lights until fully charged. Charging typically takes 3–6 hours, so plan ahead to avoid being stranded with a dead battery.
“`html
How to Charge Car Jump Starter: A Complete Guide for Beginners
Key Takeaways
- Always use the correct charger to avoid damaging your jump starter’s battery.
- Charge fully before first use to maximize performance and battery lifespan.
- Monitor charging time closely—overcharging can reduce battery efficiency over time.
- Store at 50% charge if not using for extended periods to preserve health.
- Check indicator lights to confirm charging status and troubleshoot issues early.
- Charge every 3–6 months to maintain readiness, even when not in use.
Why This Matters / Understanding the Problem
Picture this: It’s a cold winter morning, you’re running late for work, and your car won’t start. You reach for your trusty car jump starter—only to realize it’s completely dead. Sound familiar? That’s exactly what happened to me last January, and let me tell you, it’s a frustrating wake-up call.
Jump starters are lifesavers, but only if they’re charged. Many people buy them, toss them in the trunk, and forget about them—until they need one and it doesn’t work. The truth is, a jump starter is only as good as its battery life. Learning how to charge car jump starter properly isn’t just a nice-to-know—it’s essential for peace of mind on the road.
Whether you’re a new driver or a seasoned road warrior, this guide will walk you through everything you need to know. We’ll cover the basics, the tools you’ll need, step-by-step instructions, and even some pro tips I’ve picked up from years of roadside rescues (and mishaps). By the end, you’ll feel confident keeping your jump starter ready for action—no more cold mornings with a dead car and a dead device.
What You Need
Before we dive into the steps, let’s make sure you have everything on hand. Don’t worry—this isn’t complicated. Most of these items are probably already in your car or garage.
- Your car jump starter – Obviously! Make sure you know the model and brand.
- Original charging cable – Most jump starters come with a USB-C, micro-USB, or DC charging cable. Using the original ensures compatibility and safety.
- Power source – This could be a wall outlet, car cigarette lighter, or even a portable power bank.
- Clean, dry workspace – You don’t want to charge electronics near water or in extreme heat.
- User manual (optional but helpful) – If you’ve lost yours, check the manufacturer’s website—most have downloadable PDFs.
Pro tip: Some newer jump starters support fast charging via USB-C PD (Power Delivery). If yours does, using a compatible fast charger can cut charging time in half. But always check the manual first—overcharging or using the wrong adapter can damage the battery.
Step-by-Step Guide to How to Charge Car Jump Starter: A Complete Guide for Beginners
Step 1: Check the Current Battery Level
Before plugging anything in, take a moment to check how much charge your jump starter currently has. Most models have LED indicators—usually 3 to 4 lights—that show the battery level.
For example, if all four lights are off, your device is completely drained. If one or two are lit, you might only need a partial charge. This helps you avoid overcharging and gives you a sense of how long the process will take.
Some advanced jump starters even have digital displays that show the exact percentage. If yours has one, great! Use it to monitor progress. If not, don’t stress—the LED system works just fine for most users.
Step 2: Choose the Right Charging Method
Not all jump starters charge the same way. The method you use depends on your device and your situation. Here are the three most common options:
- Wall outlet (AC charging) – Fastest and most reliable. Plug the included adapter into a standard 120V outlet. Ideal for home use.
- Car cigarette lighter (DC charging) – Handy if you’re on the road. Use the 12V car charger cable that came with your jump starter. Great for topping up during long trips.
- USB charging (from a power bank or computer) – Slower, but useful in a pinch. Perfect if you’re camping or don’t have access to an outlet.
I personally keep my jump starter charged at home using the wall adapter. But I also carry the car charger in my glove box—just in case. Having multiple options gives you flexibility, especially during emergencies.
Step 3: Connect the Charging Cable
Now it’s time to plug in. Locate the charging port on your jump starter—it’s usually on the side or back. Match the cable to the port (USB-C, micro-USB, or DC jack) and connect it securely.
Make sure the connection is snug. A loose cable can cause intermittent charging or stop the process altogether. I learned this the hard way when my jump starter stopped charging halfway through because the cable had slipped out.
Once connected, plug the other end into your power source. If you’re using a wall outlet, ensure the adapter is fully inserted. For car charging, turn on the ignition (or at least accessory mode) so the 12V outlet is active.
Step 4: Monitor the Charging Process
After connecting, the LED lights should start blinking or change color to indicate charging has begun. This usually takes just a few seconds.
Keep an eye on the indicators. As the battery fills up, more lights will turn on. For example, a 4-light system might go from 1 light → 2 lights → 3 lights → all 4 solid (fully charged).
Charging times vary. A completely dead jump starter might take 3 to 6 hours to fully charge using a wall outlet. USB charging can take twice as long. If your device supports fast charging, you might see a full charge in under 2 hours.
Don’t walk away and forget it! While modern jump starters have built-in protection against overcharging, it’s still smart to check in occasionally. I set a phone timer for every hour just to be safe.
Step 5: Confirm Full Charge and Disconnect
Once all the LED lights are solid (not blinking), your jump starter is fully charged. At this point, unplug the cable from both the device and the power source.
Some models beep or flash a specific light pattern when charging is complete. If yours does, listen for that signal. It’s a helpful reminder, especially if you’re multitasking.
After disconnecting, store the cable neatly. I keep mine wrapped and tucked into the original case or a small pouch. This prevents tangles and makes it easier to grab in an emergency.
Step 6: Test the Jump Starter (Optional but Recommended)
You don’t have to test it every time, but doing a quick check once a month is a good habit. Turn on the jump starter and see if the lights respond. Some models have a “test” or “boost” button—press it briefly to confirm it’s holding a charge.
If the lights are dim or it won’t turn on, there might be an issue with the battery or charging system. In that case, consult the manual or contact customer support.
I test mine every time I charge it—just to be sure. It only takes 10 seconds and gives me total confidence that it’ll work when I need it most.
Pro Tips & Common Mistakes to Avoid
Over the years, I’ve made my share of mistakes with jump starters. Here’s what I’ve learned—so you don’t have to.
Pro Tip: Charge your jump starter every 3 months, even if you haven’t used it. Lithium-ion batteries lose charge over time, and a fully depleted battery can become unusable.
One of the biggest mistakes people make is assuming the jump starter will always be ready. Batteries self-discharge, especially in hot or cold environments. I once left mine in my car during a heatwave, and the battery degraded faster than expected. Now I store it in a cool, dry place—like my home office or garage shelf.
Another common error? Using the wrong charger. I tried charging my jump starter with a random USB cable once, and it took forever. Stick to the original cable or a high-quality replacement from a trusted brand.
Also, avoid charging in extreme temperatures. High heat can damage the battery, and cold can slow down the charging process. If your jump starter feels hot after use, let it cool down before plugging it in.
Finally, don’t ignore the manual. I used to skip reading instructions, but each jump starter is a little different. Some have safety locks, others have dual charging ports. The manual tells you everything you need to know—including how to charge car jump starter safely and efficiently.
FAQs About How to Charge Car Jump Starter: A Complete Guide for Beginners
Q: How often should I charge my car jump starter?
A: Even if you don’t use it, charge it every 3 months. Lithium-ion batteries slowly lose charge over time. Regular charging keeps the battery healthy and ready for emergencies.
Q: Can I overcharge my jump starter?
A: Most modern jump starters have built-in protection that stops charging when the battery is full. However, it’s still best to unplug it once charged to prolong battery life.
Q: What if my jump starter won’t charge at all?
A: First, check the cable and power source. Try a different outlet or USB port. If it still won’t charge, the battery may be dead or the device could be faulty. Contact the manufacturer for support.
Q: Can I charge my jump starter in the car while driving?
A: Yes, using the 12V car charger. Just make sure the ignition is on (or in accessory mode) so the outlet has power. Avoid doing this in extreme heat or cold.
Q: How long does a full charge last?
A: A fully charged jump starter can hold its charge for 3 to 6 months, depending on the model and storage conditions. That’s why regular top-ups are important.
Q: Is it safe to leave the jump starter plugged in overnight?
A: While most devices have overcharge protection, it’s not recommended. Unplug once fully charged to avoid unnecessary strain on the battery.
Q: Can I use a solar charger to charge my jump starter?
A: Only if your jump starter supports USB input and the solar charger provides stable 5V output. Most solar chargers are too slow or inconsistent for reliable charging.
Final Thoughts
Learning how to charge car jump starter might seem like a small task, but it can make a huge difference when you’re stuck with a dead battery. It’s one of those things you hope you never need—but when you do, you’ll be glad you prepared.
Remember: a jump starter is only useful if it’s charged. Make it a habit to check and charge yours every few months. Keep the cables organized, store it properly, and test it occasionally. These simple steps take just a few minutes but can save you hours of stress.
Whether you’re a beginner or just need a refresher, this guide gives you everything you need to keep your jump starter ready for action. So next time your car won’t start, you’ll be the one helping others—not calling for help.
Stay safe, stay charged, and happy driving!
“`