
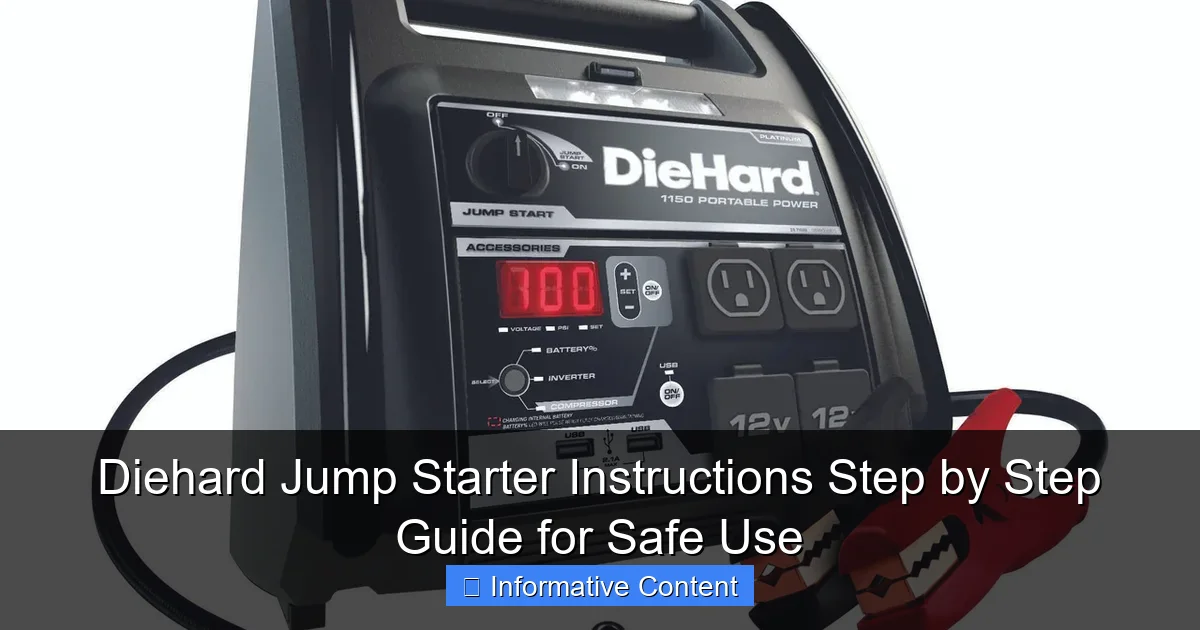
Featured image for diehard jump starter instructions
Image source: millerindustrial.com
Always connect the DieHard jump starter to the battery terminals in the correct order—red to positive (+), black to negative (−)—to prevent sparks or damage. Follow the step-by-step guide to safely power on, start the vehicle, and disconnect properly, ensuring long-term reliability. Never leave the unit connected after the engine starts—safety and performance depend on proper use.
Key Takeaways
- Always inspect cables for damage before connecting to avoid hazards.
- Follow polarity order: red to positive, black to negative terminals.
- Power on only after all connections are secure and correct.
- Wait 3–5 minutes after connecting before attempting to start.
- Disconnect in reverse order to prevent sparking or short circuits.
- Recharge after every use to maintain battery life and readiness.
📑 Table of Contents
- Why You Should Never Ignore a Dead Car Battery
- Understanding Your Diehard Jump Starter: What It Is and How It Works
- Step-by-Step Diehard Jump Starter Instructions for Safe Use
- Common Mistakes and How to Avoid Them
- Advanced Tips and Pro Tricks for Maximum Performance
- Comparison Table: Diehard Jump Starter Models at a Glance
- Final Thoughts: Be Prepared, Stay Safe
Why You Should Never Ignore a Dead Car Battery
We’ve all been there. You’re running late for work, your coffee’s already cold, and the moment you turn the key—nothing. Just a faint click and silence. A dead battery is one of those frustrating, unpredictable car troubles that can turn your day upside down. But here’s the good news: with a Diehard jump starter, you don’t need to wait for roadside assistance or flag down a kind stranger with jumper cables. You can get back on the road in minutes—safely and confidently—if you know how to use it correctly.
Diehard jump starters are portable power banks designed specifically for jump-starting vehicles. Unlike traditional jumper cables that rely on another car’s battery, these units are self-contained, compact, and incredibly user-friendly. But just like any tool, they only work well when used properly. That’s why understanding Diehard jump starter instructions is essential—not just for success, but for safety. Whether you’re a seasoned driver or a first-time car owner, this guide will walk you through every step, from setup to storage, so you’re never stranded again.
Understanding Your Diehard Jump Starter: What It Is and How It Works
Before we dive into the Diehard jump starter instructions, let’s take a moment to understand what you’re working with. A Diehard jump starter is more than just a glorified battery pack. It’s a smart, multi-functional device engineered for reliability, durability, and safety. Think of it as a superhero in a small, rugged case—ready to save the day when your car won’t start.

Visual guide about diehard jump starter instructions
Image source: images.globalindustrial.com
Key Components and Features
Most Diehard jump starters come with a few standard components. Here’s what you’ll typically find:
- Main unit (power bank): Houses the lithium-ion or lead-acid battery, circuitry, and ports.
- Smart jumper clamps: Red (positive) and black (negative) with built-in surge protection and reverse polarity alerts.
- USB charging ports: For phones, tablets, or other small electronics.
- LED flashlight: Often with SOS and strobe modes—great for nighttime emergencies.
- Power button and indicator lights: Show battery level and operational status.
- Charging cable: Usually a wall adapter or USB-C for recharging the unit.
For example, the Diehard 2200 Peak Amp model includes all of these, plus a built-in air compressor—making it a true all-in-one roadside companion. But even the basic models are packed with safety tech. One standout feature? Reverse polarity protection. If you accidentally connect the clamps backward, the unit won’t spark or damage your car—it’ll simply flash a warning light.
How the Jump Starting Process Works
Here’s the science in simple terms: Your car battery stores chemical energy and releases it as electrical energy to start the engine. When it’s dead, it can’t deliver enough power. The Diehard jump starter steps in by delivering a high-current surge directly to the battery terminals, mimicking a working battery long enough to crank the engine.
But here’s the catch: the jump starter doesn’t “charge” your car battery. It gives it a temporary boost. Once the engine is running, the alternator takes over and recharges the battery. So, if your battery is truly shot (not just drained), you’ll need a replacement. But for a one-time drain—like leaving the lights on overnight—your Diehard unit is the perfect fix.
Pro tip: Always check the jump starter’s charge level before heading out. A half-charged unit might not have enough juice to start a large V6 or V8 engine.
Step-by-Step Diehard Jump Starter Instructions for Safe Use
Now, let’s get into the heart of this guide: the Diehard jump starter instructions. Follow these steps carefully, and you’ll avoid common mistakes that could damage your vehicle or the device.
Step 1: Safety First—Park and Prepare
Before touching any cables, make sure you’re in a safe location. Pull over to a flat, dry surface—ideally away from traffic. Turn off the ignition, engage the parking brake, and pop the hood. If you’re on a busy road, turn on your hazard lights.
Next, grab your Diehard jump starter and inspect it. Look for cracks, frayed wires, or signs of water damage. Never use a damaged unit—it could overheat or spark. Also, ensure the clamps are clean and free of corrosion.
Real-life example: I once tried to jump-start a friend’s SUV with a jump starter that had a slightly bent clamp. The connection was loose, causing arcing—and a minor scare. A quick wipe with a cloth fixed it, but it taught me to always check the hardware first.
Step 2: Connect the Clamps—Order Matters!
This is where most people go wrong. The correct order is critical for safety. Here’s how to do it:
- Connect red (positive) clamp to the dead battery’s positive terminal. It’s usually marked with a “+” and may be red in color.
- Connect black (negative) clamp to a clean, unpainted metal surface on the car’s frame—not the negative terminal. This acts as a ground. Choose a spot near the engine, like a bolt or bracket.
Never connect the black clamp directly to the negative terminal of a dead battery. Why? A dead battery can release flammable gases. A spark near the terminal could ignite them—leading to an explosion. Using a grounding point reduces this risk.
Once connected, the Diehard unit may beep or flash lights. This is normal. Some models will display “Ready” or “Safe to Start” on a screen. Others use a green light. Refer to your user manual if unsure.
Step 3: Power On and Start the Engine
Press the power button on the jump starter. The indicator lights should show the charge level. Wait about 30 seconds to let the unit stabilize. This gives the internal circuitry time to detect proper connections and prepare for the surge.
Now, get in the car and turn the key. If the engine doesn’t start on the first try, don’t panic. Wait 20–30 seconds, then try again. Most Diehard units can handle 3–5 attempts in a row. But if it still won’t start after a few tries, the battery may be beyond help—or there could be another issue (like a faulty starter).
Tip: If the jump starter has a “boost” or “force mode,” use it only if the standard mode fails. This mode delivers extra current but should be used sparingly to avoid overheating.
Step 4: Disconnect in Reverse Order
Once the engine is running, disconnect the clamps in the opposite order:
- Remove the black (negative) clamp from the ground point.
- Remove the red (positive) clamp from the battery terminal.
Never let the clamps touch each other or any metal while connected. This can cause a short circuit. Store them in the included case or a plastic bag to prevent accidental contact.
Step 5: Let the Engine Run and Recharge the Jump Starter
Let the car idle for at least 10–15 minutes. This gives the alternator time to recharge the battery. If you turn it off too soon, the battery might die again. If possible, take a short drive—20 minutes or more is ideal.
Meanwhile, plug your Diehard jump starter into a wall outlet or USB port to recharge. Most models take 3–6 hours to fully charge, depending on capacity. Use the original charging cable for best results.
Note: Never leave the jump starter connected to the battery after the engine starts. This can damage both the unit and your car’s electrical system.
Common Mistakes and How to Avoid Them
Even with clear Diehard jump starter instructions, mistakes happen. Let’s look at the most common ones—and how to steer clear of them.
Mistake 1: Connecting Clamps in the Wrong Order
As mentioned earlier, reversing the clamp order is a major hazard. The red clamp must go to the positive terminal first. The black clamp should never touch the negative terminal directly. Stick to the ground point rule.
Why it’s dangerous: Connecting the black clamp to the negative terminal can create a spark near hydrogen gas buildup—especially in older batteries. A single spark can trigger an explosion.
Mistake 2: Using a Low-Charge Jump Starter
Imagine this: You connect everything, press the button, and… nothing. The engine barely turns over. This often happens when the jump starter is below 50% charge. Always check the battery level before use. A full charge is essential, especially for larger engines.
Solution: Keep your jump starter plugged in when not in use. Some models have a “maintenance mode” that keeps the battery at optimal levels without overcharging.
Mistake 3: Ignoring the Manual
Every Diehard model is slightly different. The 1200-amp version may have a different interface than the 2200-amp. Skipping the manual means you might miss key features—like a built-in tire inflator or USB-C fast charging.
Pro tip: Store the manual in your glove compartment or take a photo of the key pages. That way, you’re ready when you need it.
Mistake 4: Forgetting to Turn Off the Jump Starter After Use
Leaving the unit powered on drains the battery. Even if you disconnect the clamps, the internal circuits keep running. Always power down after disconnecting.
Bonus tip: Some models have an auto-shutoff feature after 10 minutes of inactivity. Check your manual to see if yours does.
Advanced Tips and Pro Tricks for Maximum Performance
Once you’ve mastered the basics, here are some advanced tips to get even more out of your Diehard jump starter.
Use the Flashlight in Emergency Situations
The built-in LED flashlight isn’t just for finding your keys. In a breakdown at night, it can signal for help. Many Diehard models have an SOS mode—flashing three short, three long, three short (the international distress signal). This can alert other drivers or emergency services.
Example: A friend was stranded on a rural highway after her battery died. She turned on the SOS light, and a passing truck driver noticed and called 911. The flashlight literally saved her from a long, dangerous wait.
Keep It Charged—Even in Storage
Batteries degrade when left discharged. If you store your jump starter for months, it could lose capacity or fail to hold a charge. To prevent this:
- Charge it to 50–80% before long-term storage.
- Recharge every 3–6 months.
- Store in a cool, dry place (not your trunk in summer).
Extreme heat (like in a car during summer) can shorten the battery’s lifespan. If you must keep it in your car, place it in a shaded, ventilated area.
Use It as a Power Bank for Other Devices
Most Diehard jump starters have 2–3 USB ports. You can charge your phone, GPS, or even a portable fan during a long road trip. Just remember: using USB ports drains the jump starter’s battery faster. If you plan to use it for jump-starting later, limit USB usage.
Smart move: Keep a small power bank for daily phone charging. Save the jump starter for emergencies.
Test It Periodically
Don’t wait for a dead battery to find out your jump starter isn’t working. Test it every few months by:
- Checking the charge level.
- Turning it on and off.
- Using the flashlight and USB ports.
This routine check ensures it’s ready when you need it most.
Comparison Table: Diehard Jump Starter Models at a Glance
Not sure which Diehard model to choose? Here’s a quick comparison of popular options. Use this to pick the right one for your vehicle and needs.
| Model | Peak Amps | Battery Type | USB Ports | Flashlight | Special Features | Best For |
|---|---|---|---|---|---|---|
| Diehard 800 | 800A | Lithium-ion | 2 (1x USB-A, 1x USB-C) | Yes (3 modes) | Compact, lightweight | Compact cars, daily drivers |
| Diehard 1200 | 1200A | Lithium-ion | 3 (2x USB-A, 1x USB-C) | Yes (SOS mode) | Reverse polarity alert | Mid-size sedans, SUVs |
| Diehard 2200 | 2200A | Lithium-ion | 3 (2x USB-A, 1x USB-C) | Yes (SOS + strobe) | Built-in air compressor, jump start + inflate | Trucks, vans, frequent travelers |
| Diehard 3000 | 3000A | Lithium-ion | 4 (3x USB-A, 1x USB-C) | Yes (SOS + work light) | Dual charging, 12V outlet | Heavy-duty vehicles, off-roaders |
Note: Peak amps indicate maximum output during a jump start. Higher amps = better for larger engines. But even the 800A model can start most 4- and 6-cylinder cars in mild conditions.
Final Thoughts: Be Prepared, Stay Safe
Having a Diehard jump starter in your car is like carrying a spare tire, a first-aid kit, and a flashlight all in one. But it’s only effective if you know how to use it. The Diehard jump starter instructions we’ve covered here—from proper clamp connection to post-start procedures—are designed to keep you safe, prevent damage, and get you back on the road fast.
Remember: Safety always comes first. Follow the steps in order, double-check your connections, and never rush. A few extra seconds of caution can prevent costly repairs or dangerous accidents. And while Diehard units are built to last, they’re not magic. Regular maintenance—like recharging and testing—is key to long-term reliability.
So, whether you’re a weekend warrior, a daily commuter, or a parent shuttling kids to school, take the time to familiarize yourself with your jump starter. Practice the steps at home. Keep it charged. And when that dreaded click happens, you’ll know exactly what to do—calmly, confidently, and safely. Because being stranded isn’t just inconvenient. It’s avoidable. And with the right tools and knowledge, you’re always ready.
Frequently Asked Questions
How do I use the Diehard jump starter for the first time?
To use your Diehard jump starter, first ensure it’s fully charged. Connect the red clamp to the positive (+) terminal of the dead battery and the black clamp to an unpainted metal surface on the car frame, then power on the unit and start the vehicle.
What safety precautions should I follow when using a Diehard jump starter?
Always wear safety glasses and gloves when jump-starting a vehicle. Ensure the jump starter and cables are free of damage, and never touch the clamps together during the process to avoid sparks or short circuits.
Can I use the Diehard jump starter on both 12V and 24V systems?
Most Diehard jump starters are designed for 12V systems, commonly used in cars, trucks, and motorcycles. Check your model’s manual—some heavy-duty versions support 24V systems, but incorrect use can damage the unit or vehicle.
How long does it take to recharge a Diehard jump starter after use?
Recharge time varies by model but typically takes 3–6 hours using the included AC charger or DC car adapter. Refer to your Diehard jump starter instructions for specific charging times and indicators.
Why won’t my Diehard jump starter turn on or hold a charge?
This may be due to prolonged storage without use or a deeply discharged battery. Try recharging it for at least 12 hours; if issues persist, contact Diehard support for troubleshooting or warranty service.
Can I use my Diehard jump starter to power other devices?
Yes! Many Diehard jump starters include USB ports and 12V outlets to charge phones, tablets, or inflate tires. Always follow the Diehard jump starter instructions for safe device compatibility and power limits.