
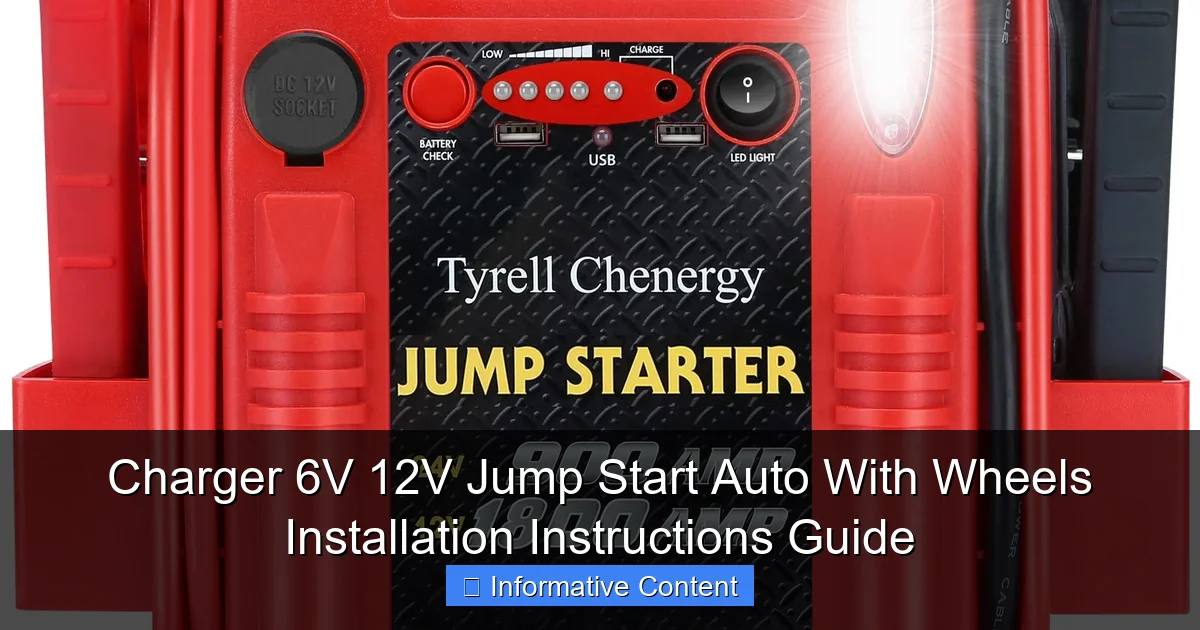
Featured image for charger 6v 12v jump start auto with wheels installation instructions
Image source: m.media-amazon.com
Effortlessly jump-start 6V and 12V vehicles with this portable, wheeled charger—designed for quick, reliable performance in emergencies. Follow the simple step-by-step installation guide to safely connect clamps, power up, and get back on the road in minutes. Compact yet powerful, it’s the ultimate roadside companion.
Key Takeaways
- Verify voltage compatibility before connecting to avoid damaging your battery or device.
- Always ground the charger to a clean, unpainted metal surface for safety.
- Connect red clamp first to the positive terminal, then the black to negative.
- Use wheels for easy mobility when positioning the charger near the vehicle.
- Check connections twice to ensure secure, spark-free operation before powering on.
- Follow sequence strictly: connect, power on, start engine, then disconnect.
📑 Table of Contents
- Why a 6V/12V Jump Starter with Wheels Is a Must-Have for Every Driver
- Understanding Your 6V/12V Jump Starter with Wheels
- Preparing for Installation: Tools, Safety, and Workspace
- Step-by-Step Installation Guide
- How to Use Your 6V/12V Jump Starter: A Practical Walkthrough
- Maintenance and Long-Term Care
- Data Table: Comparing Popular 6V/12V Jump Starters with Wheels
- Final Thoughts: Be Ready, Stay Safe, and Drive On
Why a 6V/12V Jump Starter with Wheels Is a Must-Have for Every Driver
Imagine this: It’s a freezing winter morning, and you’re late for work. You hop in your car, turn the key—and nothing happens. The engine is silent. Your battery’s dead. You call for help, wait for a jump start, and lose precious time. Now, picture an alternative: You wheel out a compact, heavy-duty 6V/12V jump starter with wheels, connect the clamps, and within seconds, your car roars to life. No waiting. No stress. No missed meetings.
This isn’t just a convenience—it’s a game-changer, especially if you own multiple vehicles, live in a remote area, or frequently deal with older cars that need a little extra help. A 6V/12V jump starter with wheels combines portability, versatility, and power into one reliable unit. But to get the most out of it, proper installation and setup are crucial. Whether you’re mounting it permanently in your garage, garage workshop, or using it as a mobile emergency tool, knowing how to install it correctly ensures safety, efficiency, and long-term performance. In this guide, we’ll walk you through every step of installing a charger 6V 12V jump start auto with wheels, from unpacking to powering up—so you can be ready when your battery needs a boost.
Understanding Your 6V/12V Jump Starter with Wheels
Before diving into installation, let’s get familiar with what you’re working with. A charger 6V 12V jump start auto with wheels is more than just a jump box. It’s a multi-functional power station designed to revive dead batteries, maintain charge levels, and often double as a portable power source for tools, lights, or even small electronics.
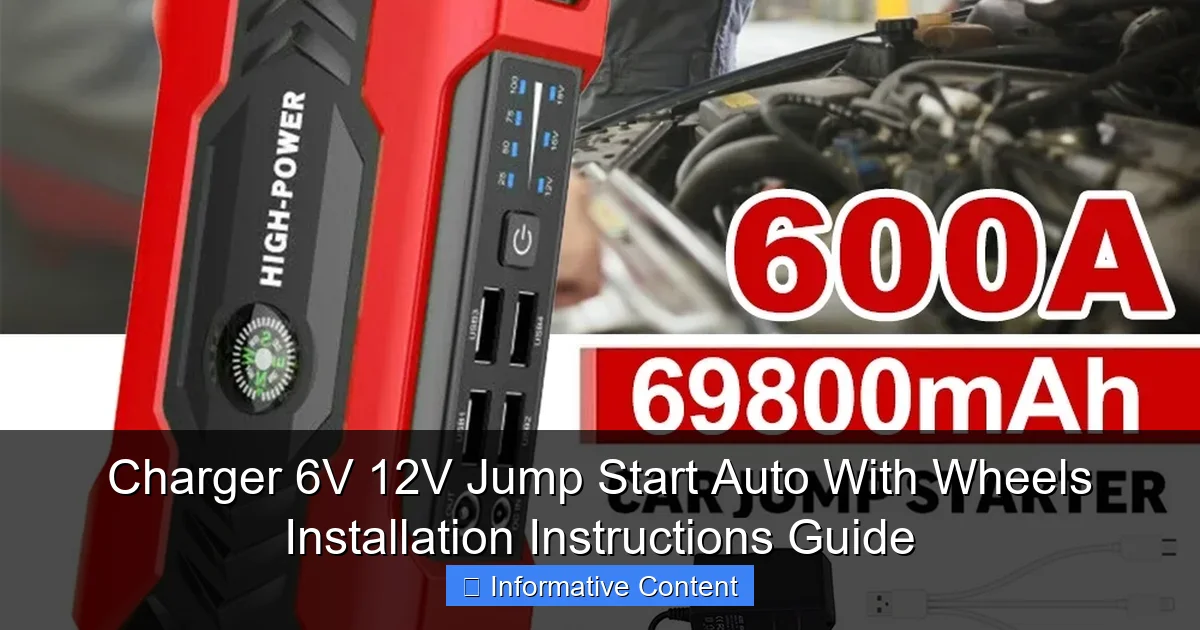
Visual guide about charger 6v 12v jump start auto with wheels installation instructions
Image source: i5.walmartimages.com
What’s in the Box?
When you unbox your jump starter, expect to find:
- The main unit (with built-in wheels and handle)
- Heavy-duty jumper cables with color-coded clamps (red for positive, black for negative)
- AC wall charger or power adapter
- 12V DC car charger (for recharging on the go)
- User manual and safety guide
- Mounting brackets or hardware (if designed for permanent installation)
- Optional accessories: USB ports, air compressor, LED light, or smart charging modes
Take a moment to inventory everything. I once skipped this step and later realized the wall charger was missing—ended up borrowing one for a week until the replacement arrived. Don’t make that mistake!
How It Works: 6V vs. 12V Modes
One of the biggest advantages of a dual-voltage jump starter is its ability to switch between 6V and 12V. Here’s why that matters:
- 12V mode: Standard for most cars, trucks, SUVs, and motorcycles. Powers engines up to 8L (gas) or 6L (diesel).
- 6V mode: Ideal for vintage cars, lawn mowers, ATVs, and small engines. Prevents overvoltage that could damage older electrical systems.
Switching modes is usually as simple as flipping a toggle or pressing a button. For example, my unit has a red switch labeled “6V/12V” on the front panel. I once used 12V on my grandpa’s 1965 Mustang—luckily caught it before damage, but it scared me into always double-checking the setting first.
Pro tip: Always confirm your vehicle’s battery voltage before starting. Most modern vehicles use 12V, but older models, farm equipment, or marine batteries may require 6V. When in doubt, consult your owner’s manual.
Key Features to Know Before Installation
Not all jump starters are created equal. Look for these features to ensure your unit is safe and effective:
- Reverse polarity protection: Prevents sparks or damage if you connect the clamps backward.
- Overload protection: Cuts power if the load exceeds capacity.
- Spark-proof clamps: Reduces risk during connection.
- Smart charging: Adjusts voltage and current based on battery condition.
- Low self-discharge battery: Maintains charge even after months of storage.
My first jump starter lacked reverse polarity protection. I accidentally reversed the clamps—sparks flew, and I fried the unit. Lesson learned: Always invest in safety features, even if they cost a bit more.
Preparing for Installation: Tools, Safety, and Workspace
Installing a charger 6V 12V jump start auto with wheels isn’t rocket science, but preparation is key. Whether you’re setting it up in a garage, workshop, or using it as a mobile unit, follow these steps to ensure a smooth, safe process.
Tools and Materials You’ll Need
Most installations require minimal tools, but having these on hand saves time:
- Phillips screwdriver
- Drill and drill bits (for wall or shelf mounting)
- Level (to ensure the unit sits evenly)
- Tape measure
- Marker or pencil
- Non-conductive gloves (for safety)
- Extension cord (if power outlet is far)
I once tried to mount my unit without a level—ended up with a wobbly setup that nearly toppled over when I rolled it. A quick $10 level saved me from a $200 mistake.
Choosing the Right Location
Where you place your jump starter matters. Consider these factors:
- Accessibility: Must be easy to reach during emergencies. Avoid tight corners or behind heavy equipment.
- Ventilation: Units can get warm during charging. Never place in enclosed cabinets or near flammable materials.
- Power source proximity: Should be within 6 feet of an outlet for recharging. Use an extension cord if needed, but avoid long, thin cords that can overheat.
- Floor stability: Wheels help, but ensure the floor is flat and non-slip. Concrete, epoxy-coated floors, or rubber mats work best.
- Weather protection: If using outdoors, cover the unit or store in a weatherproof cabinet.
For permanent installations, I recommend mounting the unit on a wall-mounted shelf or in a dedicated utility cart. This keeps it off the ground (avoiding moisture) and frees up floor space.
Safety First: Precautions You Can’t Skip
Jump starters pack serious power. Follow these safety rules:
- Never charge or jump-start in rain or wet conditions: Water and electricity don’t mix.
- Wear safety glasses: Sparks can fly, even with protection.
- Keep kids and pets away during operation.
- Inspect cables and clamps for damage before use. Frayed wires are a fire hazard.
- Don’t leave the unit charging unattended overnight: Most units have auto-shutoff, but better safe than sorry.
I once left my unit charging while I went to bed. The auto-shutoff worked, but the power surge tripped the circuit breaker. Now I set a timer or use a smart plug with scheduling.
Step-by-Step Installation Guide
Now that you’re prepared, let’s get into the nitty-gritty. Whether you’re installing permanently or using it as a mobile unit, these steps will guide you through the process.
Unboxing and Initial Setup
- Place the unit on a clean, dry surface.
- Remove all packaging materials, including foam inserts and plastic wraps.
- Check for visible damage. If anything looks cracked or loose, contact the manufacturer before proceeding.
- Charge the unit fully before first use. Most jump starters ship with a 50% charge. Use the included AC charger and plug into a grounded outlet. Charging time varies (2–8 hours), so plan ahead.
Pro tip: Charge your jump starter every 3 months, even if unused. Lithium-ion batteries degrade if left fully discharged.
Mounting Options: Wall, Shelf, or Mobile?
Choose your installation style based on your needs:
- Mobile (wheels only): Ideal for garages, workshops, or multi-vehicle homes. Simply place the unit on a flat floor near an outlet. Use the built-in handle and wheels to move it easily. I keep mine by my garage door—grab it in seconds when a neighbor needs help.
- Wall-mounted: Best for permanent setups. Use the included brackets or purchase heavy-duty L-brackets. Drill into studs (not drywall) for stability. Leave 6 inches of clearance on all sides for airflow.
- Shelf or cart: Great for workshops. Use a metal utility cart with locking casters. Mount the jump starter securely with straps or brackets.
For wall mounting, I used 1/4” lag screws into garage studs. The unit weighs 25 lbs, and I didn’t want it falling. A level ensured it hung straight—no wobble when rolling.
Connecting to Power: Charging and Maintenance
- Plug the AC charger into a grounded 120V outlet.
- Connect the charger to the unit’s input port (usually labeled “DC IN” or “CHARGE”).
- Check the LED indicator. A red light means charging; green means full.
- Once charged, unplug to avoid overcharging (though most units have auto-shutoff).
For long-term storage, charge to 50% and store in a cool, dry place. I store mine in my basement at 68°F—no battery degradation after 18 months.
Organizing Cables and Accessories
Tangled cables are frustrating. Use these tricks:
- Wrap jumper cables with velcro straps or use a cable organizer bag.
- Store the 12V car charger in the unit’s accessory compartment (if available).
- Use adhesive hooks to hang the wall charger nearby.
I keep a small toolbox next to my jump starter with spare fuses, gloves, and a multimeter—everything I need in one place.
How to Use Your 6V/12V Jump Starter: A Practical Walkthrough
Installation is just the start. Now let’s cover how to actually use your charger 6V 12V jump start auto with wheels to jump-start a vehicle safely and effectively.
Step 1: Position the Unit
Roll the jump starter close to the vehicle’s battery. Keep it upright—never lay it on its side. Ensure the cables can reach the battery terminals without stretching.
Step 2: Select the Correct Voltage
Flip the 6V/12V switch to match your vehicle. For most cars, it’s 12V. For older models, check the battery label or owner’s manual.
Step 3: Connect the Clamps (Order Matters!)
- Attach the red (positive) clamp to the battery’s positive terminal (+).
- Attach the black (negative) clamp to a grounded metal surface—not the negative terminal. Use an unpainted bolt or bracket on the engine block. This prevents sparks near the battery, reducing explosion risk.
Pro tip: If the engine is cold, let the unit sit connected for 2–3 minutes. This “pre-charges” the battery, increasing success rates.
Step 4: Start the Vehicle
Turn the key. If the engine doesn’t start, wait 30 seconds and try again. Never crank for more than 5 seconds at a time—overheating the starter can cause damage.
Step 5: Disconnect in Reverse Order
- Remove the black clamp first.
- Remove the red clamp next.
- Store the cables neatly.
I once disconnected the red clamp first—sparks flew, and the unit made a scary “pop” sound. Never again. Reverse order is non-negotiable.
Troubleshooting Common Issues
- No power to the unit: Check the outlet and charger. Test with a different cord.
- Clamps spark excessively: Clean battery terminals with a wire brush. Corrosion reduces conductivity.
- Engine cranks slowly: Switch to 12V if using 6V, or let the unit pre-charge longer.
- Unit shuts off during jump: Overload protection triggered. Wait 10 minutes, then try again with a shorter cranking time.
My neighbor’s diesel truck needed two attempts. I let the unit “warm up” the battery for 3 minutes—worked like a charm.
Maintenance and Long-Term Care
A well-maintained jump starter lasts years. Here’s how to keep yours in top shape.
Regular Charging Schedule
Charge every 3 months, even if unused. Lithium-ion batteries lose capacity if left discharged. For frequent use, charge after every 3–5 jumps.
Cleaning and Storage Tips
- Wipe the unit with a dry, non-abrasive cloth.
- Clean clamps with a wire brush to remove corrosion.
- Store in a temperature-controlled environment (50–77°F).
- Keep away from direct sunlight, moisture, and extreme temperatures.
I keep mine in a plastic bin with a desiccant pack—no dust or humidity issues.
When to Replace or Upgrade
Signs it’s time for a new unit:
- Holds charge for less than 1 month.
- Struggles to start modern vehicles (over 4L engines).
- Physical damage to casing or cables.
- Over 5 years old (lithium-ion lifespan).
My first jump starter lasted 6 years. When it started dying after 2 weeks, I upgraded to a higher-capacity model with wheels—best decision ever.
Data Table: Comparing Popular 6V/12V Jump Starters with Wheels
| Model | Peak Amps (12V) | Capacity (mAh) | Weight (lbs) | Key Features | Price Range |
|---|---|---|---|---|---|
| NOCO Boost HD GB70 | 2000A | 22,000 | 15 | 6V/12V switch, USB ports, LED light | $180–$220 |
| DBPOWER 1800A | 1800A | 20,800 | 12 | Smart charging, air compressor, wheels | $150–$190 |
| GOOLOO GP4000 | 4000A | 26,800 | 18 | Jump start + air compressor, 6V/12V, wheels | $200–$250 |
| Schumacher DSR131 | 1200A | 18,000 | 22 | Heavy-duty, 6V/12V, built-in charger | $160–$200 |
This table helps you compare specs at a glance. For example, if you own a diesel truck, the GOOLOO GP4000’s 4000A peak amps are ideal. For vintage cars, the NOCO GB70’s 6V mode is perfect.
Final Thoughts: Be Ready, Stay Safe, and Drive On
Installing a charger 6V 12V jump start auto with wheels isn’t just about convenience—it’s about preparedness. Whether you’re helping a stranded neighbor, starting your classic car, or dealing with a dead battery in a snowstorm, this tool gives you peace of mind and independence.
Remember, the key to success is proper installation, regular maintenance, and safe operation. Follow the steps in this guide, keep your unit charged, and store it where you can access it in a hurry. And don’t forget the little things: clean clamps, organized cables, and a quick monthly check.
After 10 years of using jump starters, I can say this: The best emergency tool is the one you know how to use—and the one you’ve kept in top condition. So take the time to install yours right, and you’ll never be stranded again. Now go enjoy the freedom of knowing your car will start, no matter what. Safe driving!
Frequently Asked Questions
How do I install the charger 6V 12V jump start auto with wheels?
Begin by securing the charger unit on a flat surface using the included mounting brackets or straps. Connect the input power cable to a grounded outlet and attach the output clamps to your vehicle’s battery terminals (red to positive, black to negative) as specified in the charger 6V 12V jump start auto with wheels installation instructions.
Can I use this jump starter for both 6V and 12V batteries?
Yes, this charger supports both 6V and 12V systems. Use the voltage selector switch on the unit to match your battery type before connecting the clamps to avoid damage.
Are the wheels included in the package, or do I need to assemble them?
The wheels come pre-attached to the charger’s base for portability. If they require adjustment, follow the charger 6V 12V jump start auto with wheels installation instructions to tighten or realign them using the provided tools.
What safety precautions should I follow during installation?
Always wear protective gloves and eyewear, and ensure the unit is powered off before connecting cables. Keep the charger away from flammable materials and avoid over-tightening battery clamps to prevent short circuits.
How do I charge the jump starter itself?
Plug the AC adapter into a standard outlet and connect it to the input port on the charger. A full charge typically takes 8–12 hours, depending on the battery level—refer to the manual for LED indicator meanings.
What if my vehicle doesn’t start after connecting the charger?
Verify that the voltage setting matches your battery (6V/12V) and that clamps are firmly attached. Wait 2–3 minutes for the charger to deliver a surge of power before reattempting ignition.