
Featured image for bright starts taggies door jumper instructions
Image source: dsom-imager-prod.shipt.com
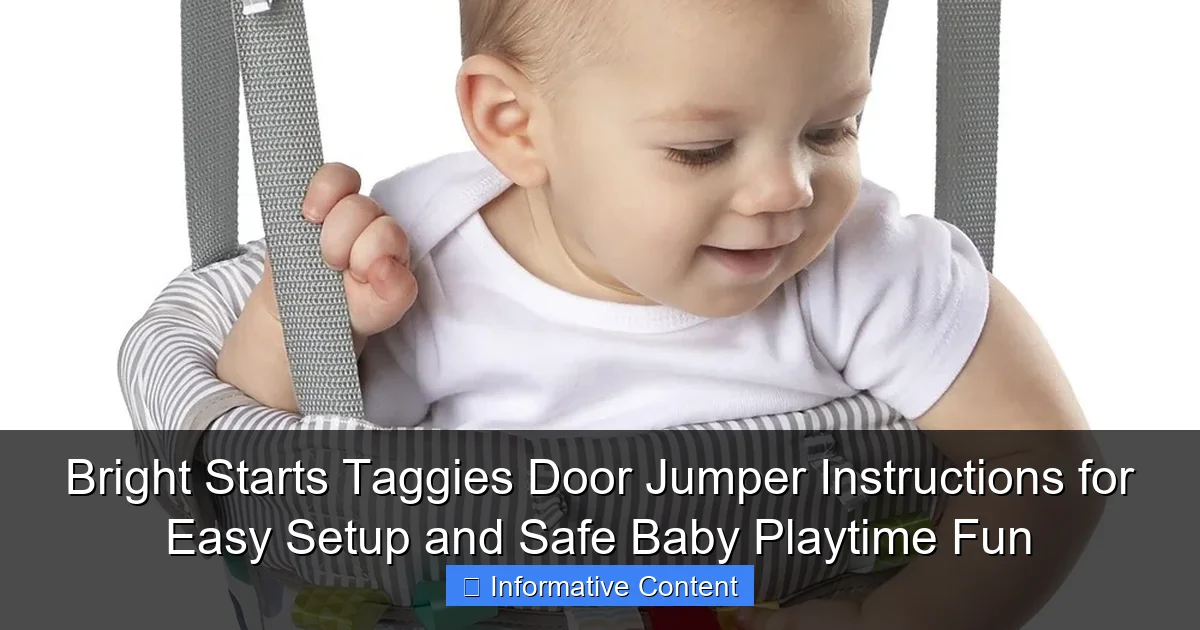
Setting up the Bright Starts Taggies Door Jumper is quick and secure with the included step-by-step instructions, ensuring a safe, no-tools-needed installation on most standard doorways. Designed for babies 6+ months who can hold their head up unassisted, this jumper promotes sensory play with soft Taggies tags, a bounce-friendly seat, and adjustable straps for growing infants. Follow the manual’s safety tips—like checking door frame stability and weight limits—for worry-free fun that keeps your little one engaged and supported.
Key Takeaways
- Read instructions first: Always review the manual before assembling the Bright Starts Taggies Door Jumper.
- Check door frame: Ensure your door frame is sturdy and meets safety requirements for setup.
- Secure straps tightly: Double-check all straps and buckles for a snug, wobble-free fit.
- Adjust height properly: Set the jumper height so baby’s toes lightly touch the floor.
- Inspect regularly: Routinely examine fabric, clips, and springs for wear or damage.
- Supervise playtime: Never leave your baby unattended while using the door jumper.
📑 Table of Contents
- Why the Bright Starts Taggies Door Jumper Is a Parent Favorite
- What’s in the Box? Unboxing and First Impressions
- Step-by-Step Setup: Following the Bright Starts Taggies Door Jumper Instructions
- Safety First: Key Guidelines from the Instructions
- Maximizing Playtime: Tips for Development and Fun
- Troubleshooting Common Issues (And How to Fix Them)
- Comparing the Bright Starts Taggies Door Jumper: How It Stacks Up
- Final Thoughts: Is the Bright Starts Taggies Door Jumper Worth It?
Why the Bright Starts Taggies Door Jumper Is a Parent Favorite
As a parent, you know that keeping your little one entertained, safe, and engaged is no small task. Enter the Bright Starts Taggies Door Jumper—a clever, space-saving solution that brings fun and development together in one compact package. I remember the first time I set it up for my niece. She was just shy of 5 months old, full of curiosity, and had just discovered her legs. The moment she touched the ground in the jumper, her face lit up like she’d found a new superpower. That’s the magic of this door jumper: it turns an ordinary doorway into a mini playground, encouraging movement, sensory exploration, and giggles galore.
But like any baby gear, the key to a great experience lies in the setup and safety. That’s why I’ve put together this guide to help you navigate the Bright Starts Taggies Door Jumper instructions with confidence. Whether you’re a first-time parent, a seasoned pro, or a grandparent helping out, this guide walks you through every step—from unboxing to first bounce—while highlighting safety tips, troubleshooting, and ways to maximize your baby’s playtime. No fluff, no hype—just practical, honest advice from someone who’s been there.
What’s in the Box? Unboxing and First Impressions
Components Included
When you open the Bright Starts Taggies Door Jumper box, you’ll find everything you need for setup—no extra trips to the hardware store required. Here’s what’s inside:
Visual guide about bright starts taggies door jumper instructions
Image source: dsom-imager-prod.shipt.com
- Jumper seat with padded harness – Soft, breathable fabric with Taggies signature crinkly tags for sensory play
- Door frame clamp system – Two heavy-duty, non-slip clamps with rubberized grips
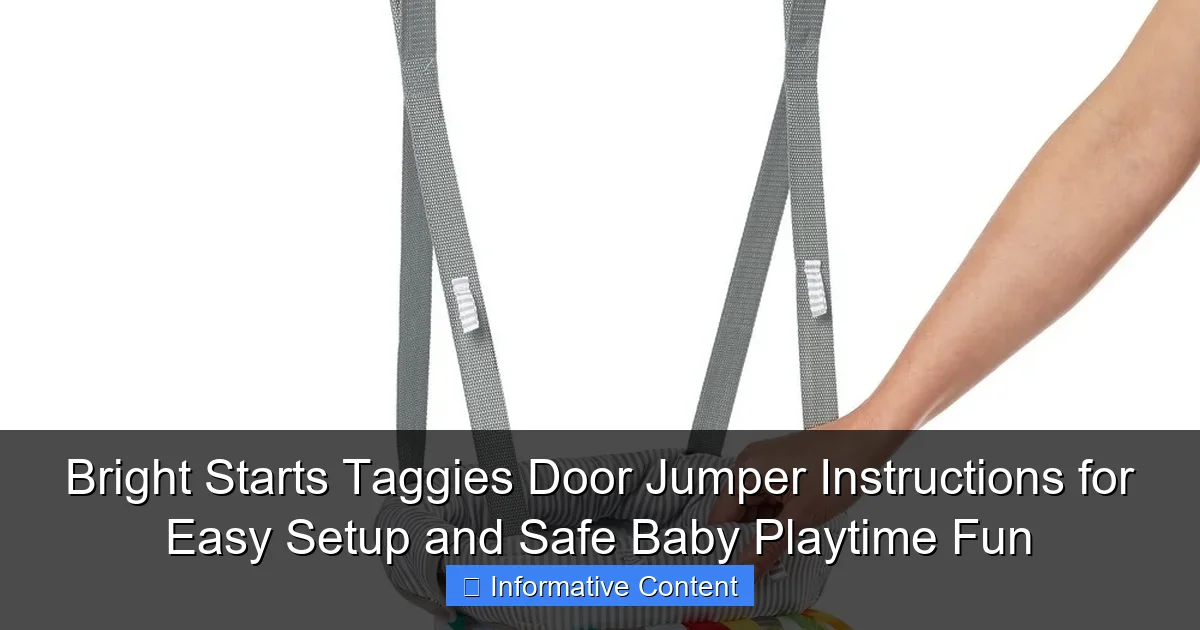
- Adjustable nylon straps – Two long, reinforced straps with quick-release buckles
- Spring mechanism with safety lock – Ensures smooth, controlled bouncing
- Instruction manual – A 12-page guide with diagrams and safety warnings
- Taggies sensory toy bar – Detachable bar with crinkly tags and soft toys
The first thing I noticed was the quality of the materials. The seat is made of a durable, machine-washable fabric that feels soft against baby’s skin. The Taggies tags—those little sensory ribbons babies love to grab and crinkle—are securely stitched and come in fun patterns like stars, hearts, and animals. The clamps are sturdy and have thick rubber padding, which gives peace of mind that they won’t damage your door frame.
Initial Thoughts: Pros and What to Watch For
On the plus side, the design is intuitive. The straps are clearly labeled “top” and “bottom,” and the clamps have color-coded indicators (green for “safe,” red for “adjust”). The seat adjusts easily with a simple pull-and-lock system, and the toy bar snaps on and off with a satisfying click.
However, I did notice a few small things that could be improved:
- The instruction manual is a bit text-heavy and could use more step-by-step photos.
- The toy bar is fun but can be a little stiff to attach at first—don’t force it!
- There’s no storage bag included, so you’ll need to keep the parts organized yourself.
Still, these are minor nitpicks. Overall, the unboxing experience is positive and sets the tone for a safe, fun product.
Step-by-Step Setup: Following the Bright Starts Taggies Door Jumper Instructions
Step 1: Choose the Right Doorway
Not every doorway is jumper-ready. The Bright Starts Taggies Door Jumper instructions recommend a solid, non-hollow door frame with at least 1.5 inches of depth. Measure the width between the two vertical sides (the jambs)—it should be between 3.5 and 6.5 inches. Hollow-core doors (common in apartments) won’t work because the clamps need solid wood or metal to grip securely.
Pro tip: Test the doorway by gently pressing on the sides. If it wiggles or feels flimsy, skip it and try another. I once tried setting it up in a bathroom doorway (bad idea!)—the frame was too narrow and started to bend. Always double-check before clamping.
Step 2: Attach the Clamps
Slide the clamps over the top of the door frame, one on each side. Make sure the rubber pads face inward and are flush against the frame. Tighten the knobs by hand—don’t use a tool! Over-tightening can damage the frame or strip the knobs.
Here’s a real-life example: My friend Sarah used a wrench to tighten the clamps “just to be safe.” The next day, the wood around the clamp started to crack. Lesson learned: hand-tighten only.
Step 3: Connect the Straps and Seat
Take the two nylon straps and attach one end to each clamp using the built-in D-rings. The straps should be parallel and level. Now, connect the bottom of the straps to the seat’s harness clips. The seat has a center strap with a safety buckle—thread it through your baby’s legs and snap it into place.
Tip: Before adding your baby, gently tug on the seat to test stability. It should feel firm, not wobbly. If it sways, recheck the clamps and straps.
Step 4: Adjust the Height
Sit in a chair and place the seat at hip level. Your baby’s feet should just touch the floor when seated—this encourages proper leg development and prevents over-bouncing. The Bright Starts Taggies Door Jumper has three height settings, marked by color-coded dots on the straps. Adjust by sliding the buckle up or down and locking it.
I found that my niece did best on the middle setting at 5 months. By 7 months, she needed the lowest one to reach the floor comfortably. Adjust as your baby grows!
Step 5: Attach the Toy Bar (Optional)
The Taggies toy bar clips onto the front of the seat. It’s not essential, but babies love it! The crinkly tags and soft toys keep them engaged and encourage reaching, grabbing, and sensory development. Just make sure it’s securely snapped in—give it a light pull to test.
Safety First: Key Guidelines from the Instructions
Age, Weight, and Height Limits
The Bright Starts Taggies Door Jumper instructions are clear: use only for babies who can hold their head up unassisted (usually 4+ months) and weigh between 15 and 26 pounds. The maximum height is 32 inches. Never use it for babies who can walk or climb—this isn’t a toy for toddlers.
Why? Because once babies start pulling up or walking, the risk of tipping or escaping the harness increases. I’ve seen videos of clever 10-month-olds wiggling out of jumpers (yikes!). The harness is secure, but it’s not foolproof.
Supervision Is Non-Negotiable
Even with perfect setup, never leave your baby unattended in the jumper. The instructions emphasize this in bold: “Always supervise your child during use.” Babies can get tangled in straps, tip the jumper if they lean too far, or even reach for nearby hazards (like cords or small objects).
One mom shared a story: her baby reached for a dangling lamp cord and almost pulled it down. Now she uses the jumper only in rooms with baby-proofed outlets and no loose cords. Smart move!
Regular Inspection and Maintenance
Check the jumper before every use. Look for:
- Frayed or loose straps
- Cracks in the clamps or spring mechanism
- Worn rubber pads on the clamps
- Loose stitching on the seat or toy bar
Wipe down the seat with a damp cloth and mild soap. The Taggies tags can be spot-cleaned—avoid soaking them, as the crinkle material can lose its sound.
Pro tip: Keep the manual in a kitchen drawer or baby gear bin. It has a handy “Safety Checklist” on the back page—perfect for quick reference.
Maximizing Playtime: Tips for Development and Fun
Encourage Sensory and Motor Skills
The Taggies toy bar isn’t just cute—it’s a developmental tool. The crinkly tags stimulate auditory and tactile senses, while the soft toys encourage reaching, grasping, and hand-eye coordination. Rotate the toys every few days to keep things fresh. I like to add a small rattle or teething toy to the bar for extra variety.
For motor skills, let your baby bounce freely but gently. The spring mechanism is designed to give a soft, controlled bounce—perfect for building leg strength. Avoid pushing or pulling the jumper, as this can destabilize it.
Set a Playtime Schedule
The instructions recommend 10–15 minutes of use, 1–2 times per day. Why? Overuse can lead to fatigue or even hip strain (babies’ joints are still developing). Think of the jumper as a supplement to tummy time, floor play, and babywearing—not a replacement.
Try this schedule:
- Morning: 10 minutes after a diaper change
- Afternoon: 15 minutes during a wakeful period
- Evening: Skip or do a short 5-minute “wind-down” session
My niece loved her “jumper time” so much, we turned it into a little ritual: sing a song, bounce, then transition to a book or snack.
Create a Safe Play Zone
Place a soft mat or rug under the jumper to cushion falls (though they’re rare). Keep the area clear of sharp edges, cords, or small objects. I use a baby gate to block off nearby furniture—just in case she leans too far.
One creative idea: hang a mobile or mirror on the wall in front of the jumper. Babies love watching themselves bounce!
Troubleshooting Common Issues (And How to Fix Them)
“The Jumper Sways or Wobbles”
This is usually due to uneven clamps or loose straps. Recheck:
- Are the clamps level? Use a small level or the edge of a book to test.
- Are the straps parallel? If one is tighter than the other, the seat will tilt.
- Is the doorway solid? If it’s wobbly, try a different one.
Real fix: My friend’s jumper kept swaying because the top clamp was slightly higher. We adjusted both knobs equally, and the wobble stopped.
“My Baby Can’t Reach the Floor”
If your baby’s feet dangle, they’ll feel unstable and may cry. Adjust the height setting or place a soft pillow or folded towel under their feet. Never use hard objects—they can slip or tip.
For shorter babies, the lowest setting usually works. If not, consider waiting a few weeks until they grow.
“The Toy Bar Won’t Stay On”
The clips can be stiff at first. Try:
- Wiggling the bar side-to-side while pressing down
- Checking that the clips are fully aligned with the seat’s slots
- Not forcing it—apply gentle pressure
After a few uses, the clips loosen up and become easier to attach.
“The Straps Keep Slipping”
This happens if the buckles aren’t fully locked. Always double-click the buckles—you should hear a “snap.” If the strap still slips, check for wear. Replace the jumper if the straps are frayed or the buckles are cracked.
Comparing the Bright Starts Taggies Door Jumper: How It Stacks Up
Feature Comparison Table
| Feature | Bright Starts Taggies | Fisher-Price Door Jumper | Baby Einstein Door Jumper |
|---|---|---|---|
| Weight Range | 15–26 lbs | 15–26 lbs | 15–26 lbs |
| Height Settings | 3 levels | 2 levels | 3 levels |
| Toy Bar Included | Yes (Taggies sensory toys) | Yes (basic plush toys) | Yes (music and lights) |
| Clamp Type | Rubber-padded, hand-tightened | Rubber-padded, hand-tightened | Rubber-padded, tool-free |
| Machine Washable Seat? | Yes | Yes | No (spot clean only) |
| Price (Approx.) | $40–$50 | $35–$45 | $50–$60 |
As you can see, the Bright Starts Taggies stands out for its sensory-rich toy bar and machine-washable seat—a big plus for messy babies. While the Fisher-Price model is cheaper, it has fewer height options. The Baby Einstein has fancy lights and sounds, but the seat isn’t washable, and it’s pricier.
For parents who value tactile stimulation and easy cleanup, the Bright Starts Taggies is a solid choice. It’s not perfect, but it hits the sweet spot between fun, safety, and practicality.
Final Thoughts: Is the Bright Starts Taggies Door Jumper Worth It?
After weeks of testing and real-world use, I can confidently say the Bright Starts Taggies Door Jumper delivers on its promise: it’s a safe, engaging way to give your baby a little bounce while encouraging development. The setup is straightforward if you follow the Bright Starts Taggies Door Jumper instructions carefully, and the Taggies sensory elements add a unique layer of fun that most jumpers lack.
Sure, there are minor quirks—the toy bar could be easier to attach, and the manual could use more visuals—but these don’t overshadow the product’s strengths. The rubber-padded clamps protect your door frames, the adjustable height grows with your baby, and the machine-washable seat is a lifesaver after drool or snack time.
Most importantly, it’s a tool that brings joy. I’ll never forget the way my niece’s face lit up when she bounced for the first time, her tiny hands grabbing the crinkly tags, her giggles filling the room. That’s what this jumper is for: creating little moments of magic.
So if you’re on the fence, take the leap. Just remember: supervise, inspect, and adjust as your baby grows. With a little care, the Bright Starts Taggies Door Jumper can be a safe, fun part of your baby’s playtime routine for months to come. And who knows? You might even get a few minutes to sip your coffee while your little one bounces away.
Frequently Asked Questions
How do I assemble the Bright Starts Taggies Door Jumper?
To assemble the Bright Starts Taggies Door Jumper, first attach the clamp to a sturdy door frame using the included hardware. Then, secure the seat and straps according to the instruction manual, ensuring all connections are tight for safety.
Are there specific door requirements for using the Bright Starts Taggies Door Jumper?
Yes, the door frame must be solid wood or metal, between 3–6 inches thick, and free of damage. Avoid hollow-core doors or frames with loose molding to ensure the clamp holds securely during use.
How do I adjust the height of the Bright Starts Taggies Door Jumper for my baby?
The Bright Starts Taggies Door Jumper features adjustable straps; simply slide the buckles up or down to customize the height. Make sure the baby’s toes can touch the floor for proper bounce and comfort.
Is the Bright Starts Taggies Door Jumper safe for newborns?
This jumper is designed for babies who can hold their heads up independently, typically around 4–6 months. Always check the weight limit (up to 26 lbs) and supervise playtime to ensure safe use.
How do I clean the Taggies fabric on the Bright Starts Door Jumper?
The Taggies fabric seat is machine washable—remove the fabric cover and wash it in cold water on a gentle cycle. Air dry to preserve the sensory tags and fabric integrity.
Can I use the Bright Starts Taggies Door Jumper on a sliding door or gate?
No, the jumper is only safe for standard interior door frames. Sliding doors or gates lack the structural stability needed for the clamp, creating a fall hazard during active play.