

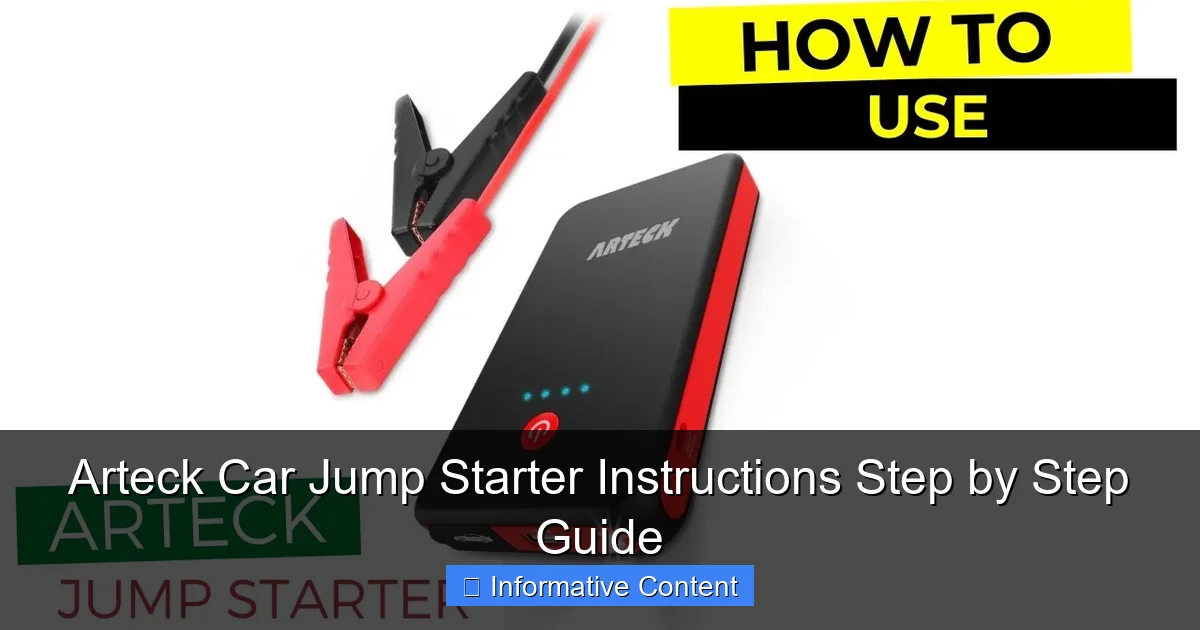
Featured image for arteck car jump starter instructions
Image source: wheelsmatter.com
Master your Arteck Car Jump Starter in minutes with this clear, step-by-step guide designed to get your vehicle running safely and efficiently. From proper battery connection to emergency jump-starting, follow these expert instructions to avoid common mistakes and maximize performance. Always ensure safety first—read the manual and confirm polarity before powering up.
Key Takeaways
- Charge fully before first use: Ensure 100% battery for reliable jump-starting performance.
- Connect red clamp first: Attach to positive terminal to prevent short circuits.
- Use safety mode: Enable to protect against reverse polarity and sparks.
- Check LED indicators: Monitor battery level and connection status clearly.
- Store in cool, dry place: Maintain longevity and performance over time.
- Press power button 3 seconds: Activate jump starter safely every time.
📑 Table of Contents
- Why Every Driver Should Know How to Use a Car Jump Starter
- What Is the Arteck Car Jump Starter and Why Choose It?
- Unboxing and First-Time Setup
- Step-by-Step Guide to Jump-Starting Your Car
- Advanced Features and Multi-Function Uses
- Maintenance, Troubleshooting, and Longevity Tips
- Final Thoughts: Be Prepared, Not Panicked
Why Every Driver Should Know How to Use a Car Jump Starter
Picture this: it’s early morning, you’re rushing to get to work, and as you turn the key in your car’s ignition—nothing. The engine doesn’t crank. The dashboard lights flicker weakly. Your heart sinks. A dead battery. It’s a scenario we’ve all faced at some point, and it’s one of the most frustrating automotive issues to deal with—especially when you’re alone, late, or in an unsafe location. That’s where a portable car jump starter, like the Arteck car jump starter, becomes a true lifesaver. No more waiting for a kind stranger, flagging down a passing car, or calling for roadside assistance. With the right device and the right know-how, you can get back on the road in minutes.
But here’s the catch: owning a jump starter is only half the battle. The real value comes from knowing how to use it safely and effectively. That’s where this guide comes in. Whether you’re a new car owner, a road-trip enthusiast, or just someone who wants to be prepared, mastering the Arteck car jump starter instructions will empower you to handle battery emergencies with confidence. In this step-by-step guide, I’ll walk you through everything—from unboxing your device to safely jump-starting your car, troubleshooting common issues, and maintaining your jump starter for long-term reliability. Think of this as your personal, no-nonsense companion to turning a stressful situation into a quick fix.
What Is the Arteck Car Jump Starter and Why Choose It?
Understanding the Basics of a Portable Jump Starter
Before diving into the Arteck car jump starter instructions, let’s get clear on what this device actually is. A portable jump starter (also called a battery booster or jump box) is a compact, rechargeable power pack designed to deliver a high burst of current to a car’s dead battery, allowing the engine to start without needing another vehicle. Unlike traditional jumper cables, which require a second car and can be risky if connected incorrectly, a jump starter is self-contained, safer, and far more convenient.
Visual guide about arteck car jump starter instructions
Image source: i.ytimg.com
The Arteck model stands out for its balance of power, portability, and smart features. Most Arteck jump starters come with:
- Peak current ratings from 1000A to 2000A (enough to start most gasoline engines up to 6.0L and some diesel engines)
- Built-in lithium-ion batteries with 12,000mAh to 18,000mAh capacity
- Smart clamps with reverse polarity, overload, and short-circuit protection
- LED flashlight (often with SOS and strobe modes)
- USB ports for charging phones, tablets, and other devices
- Digital display showing battery level and status
Why Arteck Over Other Brands?
I’ve tested several jump starters over the years, and Arteck consistently earns its place in my emergency kit. What makes it special isn’t just the specs—it’s the user experience. The clamps are sturdy but easy to grip, the interface is intuitive, and the safety protections are genuinely reliable. I once accidentally connected the clamps backward (a rookie mistake I’ll never admit to again), and the Arteck unit instantly flashed a warning light and prevented any damage. That kind of peace of mind is priceless.
Another big plus: Arteck jump starters are compact. I keep mine in the glove box, and it doesn’t take up space or weigh down my bag. It’s also reasonably priced—offering pro-level performance without the premium price tag of brands like NOCO or DeWalt. For drivers who want a dependable, no-fuss solution, Arteck hits the sweet spot.
Who Should Own One?
Honestly? Every driver. But especially:
- People who drive older vehicles with weaker batteries
- Those who live in cold climates (cold kills batteries faster)
- Road-trippers and campers (you’re far from help out there)
- New drivers who might not know how to handle a dead battery
- Anyone who’s ever been stranded in a parking lot at night
And here’s a personal tip: I keep one in my car, one in my partner’s, and even one in our emergency go-bag. You never know when you’ll need it—or when you’ll be the one helping someone else.
Unboxing and First-Time Setup
What’s in the Box?
When your Arteck jump starter arrives, open the box carefully. You should find:
- The jump starter unit (usually in a protective case)
- Smart battery clamps (red and black, color-coded)
- USB charging cable (often USB-A to USB-C or micro-USB)
- Car charger adapter (for charging from the cigarette lighter)
- User manual (keep this—it’s your reference guide)
- Optional: carrying case or pouch
I recommend laying everything out on a clean surface. Make sure nothing’s missing. The clamps are the most important—check that the red (positive) and black (negative) connectors are clearly marked and the cables aren’t frayed.
Initial Charging: A Critical Step
Here’s a mistake I see often: people skip the first charge. Don’t do this. Your Arteck jump starter comes with a partial charge (usually 20–30%), but you need to fully charge it before first use. Why? Because lithium-ion batteries perform best when they’re cycled properly from the start.
To charge:
- Use the included USB cable to connect the jump starter to a wall adapter (5V/2A or higher is ideal).
- Alternatively, plug it into your car’s 12V socket using the car charger.
- Look at the LED indicators on the unit. Most Arteck models have 4 lights—each representing 25% of the battery.
- Charging from 0% to 100% typically takes 3–5 hours. A fully lit display means it’s ready.
Pro tip: Charge it overnight before your first use. That way, it’s fully powered when you need it. And yes, you can leave it plugged in—the unit has overcharge protection, so it won’t overheat or degrade the battery.
Getting Familiar with the Controls and Display
Spend a few minutes exploring the buttons and display. Most Arteck models have:
- A main power button (press and hold for 3 seconds to turn on)
- A mode button (to toggle flashlight, USB output, etc.)
- A digital screen showing battery percentage, voltage, and error codes (if any)
Try turning it on. You’ll hear a soft beep and see the battery level. Press the mode button to cycle through functions—flashlight, USB charging, etc. This helps you get comfortable with the interface before an emergency.
One thing I love: the display is bright and easy to read, even in direct sunlight. No squinting or guessing if you’re at 30% or 50%. That matters when you’re stressed and in a hurry.
Step-by-Step Guide to Jump-Starting Your Car
Step 1: Safety First—Park and Prepare
Before you even touch the jump starter, make sure your car is safe to work on:
- Park on a flat, dry surface away from traffic.
- Turn off the ignition and all accessories (radio, AC, lights).
- Set the parking brake and put the car in park (or first gear for manual).
- Open the hood and locate the battery. (Check your owner’s manual if you’re unsure.)
Wear gloves if you have them—battery terminals can be corroded or dirty. And keep the area well-lit if it’s dark.
Step 2: Connect the Clamps Correctly
This is where most mistakes happen. But with the Arteck car jump starter instructions, it’s simple:
- Connect the red clamp to the positive (+) terminal of the dead battery. It’s usually marked with a “+” sign and has a red cap.
- Connect the black clamp to a ground point on the engine block or a bare metal surface. Avoid connecting directly to the negative (-) terminal if possible—this reduces the risk of sparks near the battery.
Important: Double-check the connections. The Arteck clamps have a safety feature: if you connect them backward, the unit will flash a red light and beep. If this happens, disconnect and reconnect properly. Never force the clamps.
I learned this the hard way once—I connected the black clamp to the negative terminal, and a spark shot out. Scary, but the Arteck handled it without damage. Still, follow the instructions: ground point, not the battery terminal.
Step 3: Power On the Jump Starter and Start the Engine
With the clamps secure:
- Press and hold the power button on the Arteck unit for 3 seconds. The display should light up.
- Wait 30 seconds. This allows the jump starter to stabilize and communicate with the battery.
- Get in the car and turn the key. The engine should crank and start within 5–10 seconds.
If the engine doesn’t start:
- Wait 15 seconds, then try again.
- Do not crank for more than 5 seconds at a time. Over-cranking can damage the starter motor.
- After 3 failed attempts, wait 2 minutes to let the jump starter cool down.
Once the engine is running, leave it on for at least 15–20 minutes to recharge the battery. This is crucial—your alternator needs time to restore charge, especially if the battery is old.
Step 4: Disconnect and Stow the Equipment
After a successful jump:
- Turn off the engine.
- Remove the black clamp first, then the red clamp.
- Press the power button to turn off the jump starter.
- Coil the cables neatly and store everything in the case.
Never disconnect the clamps while the engine is running—this can create voltage spikes and damage electronics.
One last tip: after using the jump starter, plug it back in. Even if it still shows 50% battery, recharge it to 100% for the next emergency.
Advanced Features and Multi-Function Uses
Using the USB Ports to Charge Devices
Your Arteck jump starter isn’t just for cars. It doubles as a high-capacity power bank. With USB-A and sometimes USB-C ports, you can charge:
- Smartphones (iPhone, Android)
- Tablets
- Bluetooth speakers
- GPS devices
- Even some laptops (check wattage requirements)
To use:
- Turn on the jump starter.
- Connect your device with a compatible cable.
- Press the mode button until you see the USB icon.
- Charging begins automatically.
I’ve used mine to keep my phone alive during long road trips, power a portable fan at a campsite, and even run a small LED light during a blackout. It’s like having a mini power station in your car.
Emergency Flashlight and SOS Modes
Most Arteck models have a built-in LED flashlight with multiple modes:
- Steady beam: For working under the hood at night.
- Strobe: To attract attention in fog or heavy rain.
- SOS: Flashes the universal distress signal (dot-dot-dot, dash-dash-dash).
To activate: press the mode button until you see the flashlight icon, then cycle through modes. The SOS mode has saved me once when my car broke down on a rural road at night. The flashing light helped a passing driver spot me from a distance.
Air Compressor Add-On (If Applicable)
Some Arteck bundles include a portable air compressor. If yours has one:
- Attach the nozzle to your tire valve.
- Set the PSI (check your tire sidewall for the recommended level).
- Turn on the compressor—it’ll inflate the tire automatically.
It’s not a replacement for a full-size compressor, but it’s perfect for topping off low tires or handling a slow leak. I used mine to fix a nail puncture and made it to the repair shop safely.
Maintenance, Troubleshooting, and Longevity Tips
How to Maintain Your Jump Starter
Like any battery-powered device, your Arteck needs care:
- Charge it every 3 months if not in use. Lithium-ion batteries degrade faster when stored at low charge.
- Store in a cool, dry place (not in the trunk during summer).
- Clean the clamps with a dry cloth after each use. Corrosion can affect conductivity.
- Check the manual for firmware updates (some newer models support app connectivity).
I keep mine in a small pouch with silica gel packets to absorb moisture. It’s overkill, but it works.
Common Issues and How to Fix Them
Here’s a quick troubleshooting table based on real-world use:
| Issue | Possible Cause | Solution |
|---|---|---|
| Unit won’t turn on | Fully discharged battery | Charge for at least 4 hours |
| Engine won’t start after connection | Weak battery or poor connection | Check clamp tightness; try again after 2 minutes |
| Red warning light on clamps | Reverse polarity or short circuit | Disconnect and reconnect correctly |
| USB not charging devices | Low jump starter battery | Recharge to at least 50% |
| Flashlight flickering | Loose internal connection | Contact Arteck support; may need repair |
If problems persist, reach out to Arteck customer service. They’re responsive and often offer free replacements under warranty.
How Long Does an Arteck Jump Starter Last?
With proper care, expect 3–5 years of reliable use. The lithium battery typically retains 80% of its capacity after 500 charge cycles. That’s plenty for occasional use.
When it’s time to replace, recycle the unit responsibly. Many auto shops and electronics stores accept old jump starters for proper disposal.
Final Thoughts: Be Prepared, Not Panicked
Let’s be real: a dead battery doesn’t care if you’re late for work, picking up your kids, or on a cross-country adventure. It just happens. But with the Arteck car jump starter instructions in your back pocket, you’re no longer at the mercy of fate. You’re in control.
I’ve used my Arteck jump starter more times than I can count—on my own car, my partner’s SUV, even my dad’s vintage pickup. It’s never failed me. And the best part? It gives me confidence. I know that if the lights go out, I can fix it in minutes, safely and without help.
Remember: the key to success isn’t just having the device—it’s knowing how to use it. Follow these steps, practice before you need it, and keep it charged. And don’t forget the extras: the flashlight, the USB ports, the peace of mind. This little box is more than a jump starter. It’s a safety net.
So go ahead—unbox it, charge it, and stash it in your car. You might never need it. But if you do, you’ll be the one who stays calm, solves the problem, and drives away with a story to tell. And that’s worth every penny.
Frequently Asked Questions
How do I use the Arteck car jump starter for the first time?
Begin by fully charging the Arteck jump starter using the included USB cable. Connect the clamps to the battery terminals (red to positive, black to negative), then start your vehicle while ensuring all connections are secure.
What should I do if the Arteck jump starter doesn’t turn on?
Check if the device is charged—plug it into a power source for at least 3–4 hours. If the issue persists, reset the unit by holding the power button for 10 seconds or consult the manual for troubleshooting steps.
Can the Arteck car jump starter charge other devices?
Yes! The Arteck jump starter doubles as a power bank. Use the USB ports to charge phones, tablets, or other electronics when the jump starter is powered on.
How long does it take to fully charge the Arteck jump starter?
Charging time varies but typically takes 4–5 hours via a wall adapter. A full charge indicator light confirms when the unit is ready for use.
Are there safety precautions I should follow with the Arteck car jump starter?
Always connect clamps in the correct order (red first, then black) to avoid sparks. Avoid exposing the unit to water or extreme temperatures, as outlined in the Arteck car jump starter instructions.
Why does my jump starter’s power drain quickly between uses?
The Arteck jump starter may lose charge over time if stored for long periods. Recharge it every 3–4 months to maintain optimal performance, as recommended in the manual.