
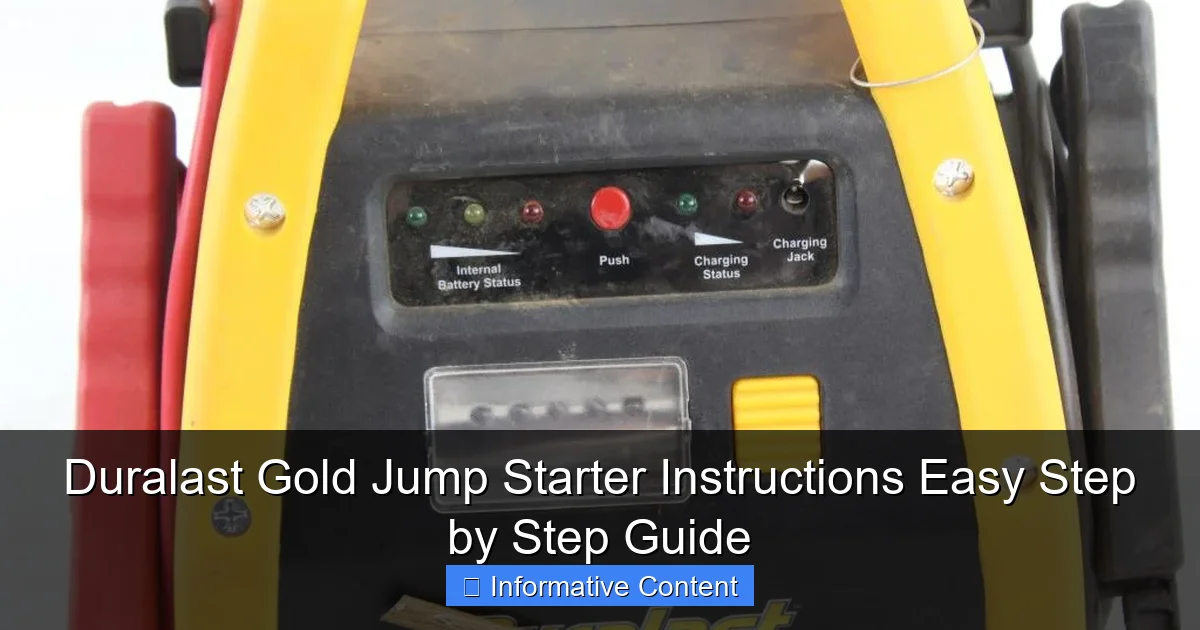
Featured image for duralast gold jump starter instructions
Image source: content.propertyroom.com
Master your Duralast Gold Jump Starter in minutes with this clear, step-by-step guide designed for safe and reliable jump-starting every time. Follow simple instructions—from proper cable connection to power activation—to confidently revive dead batteries without risk of damage or reverse polarity.
Key Takeaways
- Read the manual first: Always review safety warnings and setup steps before use.
- Charge fully before use: Ensure 100% battery to avoid jump-start failures.
- Connect clamps properly: Red to positive (+), black to negative (−) for safety.
- Power on after connection: Turn on the unit only once cables are secure.
- Wait before starting: Allow 30–60 seconds after connection for optimal power transfer.
- Disconnect in reverse order: Remove black first, then red after successful start.
📑 Table of Contents
Why a Reliable Jump Starter is a Game-Changer
Picture this: It’s a cold winter morning. You’re running late for work, and as you turn the key in the ignition, your car just groans. The engine won’t start. You’ve been here before—the dreaded dead battery. Maybe you’ve relied on a friendly neighbor or a passing stranger with jumper cables. But what if you didn’t need anyone else? That’s where the Duralast Gold Jump Starter comes in. It’s like having a superhero in your trunk, ready to save the day with just a few simple steps.
I’ve been there—stranded in a parking lot, phone in hand, calling for help. It’s stressful, inconvenient, and sometimes even dangerous. That’s why I decided to invest in a portable jump starter. After researching options, I landed on the Duralast Gold Jump Starter. It’s not just a tool; it’s peace of mind. Whether you’re a seasoned driver or someone who just wants to be prepared, knowing how to use this device can make all the difference. And the best part? It’s easier than you think. In this guide, I’ll walk you through everything you need to know, step by step, so you can feel confident using your Duralast Gold Jump Starter when the time comes.
Getting to Know Your Duralast Gold Jump Starter
Unboxing and First Impressions
When I first unboxed my Duralast Gold Jump Starter, I was impressed by its compact yet sturdy design. It feels solid, not flimsy, and the weight is just right—heavy enough to feel durable but light enough to carry easily. Inside the box, you’ll find:

Visual guide about duralast gold jump starter instructions
Image source: content.propertyroom.com
- The jump starter unit
- Smart jumper cables with clamps
- A USB charging cable (usually USB-A to micro-USB)
- A wall charger and sometimes a car charger adapter
- A user manual
- Sometimes a carrying case or storage bag
The first thing I noticed was the LED display. It’s bright and easy to read, showing the battery level and status. There’s also a built-in flashlight, which I’ve used more times than I’d like to admit—like when I dropped my keys under the car at night.
Key Features and Specifications
The Duralast Gold Jump Starter isn’t just about looks. It’s packed with features that make it stand out:
- Peak Amperage: Ranges from 1,000 to 2,000 amps, depending on the model—enough to jump most cars, trucks, and SUVs.
- Battery Capacity: Typically around 18,000 to 22,000 mAh, which also allows it to charge phones and tablets.
- Smart Safety Technology: Includes reverse polarity, overcharge, and short-circuit protection.
- Multi-Port Charging: USB-A and USB-C ports for charging devices.
- Built-in LED Flashlight: With SOS and strobe modes for emergencies.
One thing I love is the “intelligent clamps.” They have sensors that prevent sparks and incorrect connections. I once accidentally connected the clamps backward (yes, it happens), and the unit beeped and displayed a warning. No damage, no drama—just a gentle reminder to check the polarity.
Common Models and Variants
Duralast offers a few Gold models, like the Duralast Gold 1200A, 1600A, and 2000A. The main differences are in peak amperage and battery capacity. For most drivers, the 1600A is a sweet spot—powerful enough for larger engines but still compact. If you drive a big SUV or truck, go for the 2000A. The 1200A is great for smaller cars and everyday use.
Pro tip: Check the model number on your unit. It’s usually on a sticker on the back or side. Knowing your exact model helps when looking up specific instructions or troubleshooting.
Preparing Your Jump Starter for Use
Charging Your Jump Starter
Before you ever need to jump a car, make sure your Duralast Gold Jump Starter is fully charged. I learned this the hard way once. I left it in my trunk for months without checking. When I needed it, the battery was dead. Lesson learned.
Here’s how to charge it properly:
- Use the provided charger: Plug the wall adapter into an outlet and connect the USB cable to the jump starter’s micro-USB port.
- Check the LED display: It should show the charging status. A full charge usually takes 4-6 hours.
- Don’t overcharge: Once fully charged, unplug it. The unit has overcharge protection, but it’s good practice to disconnect.
I charge mine every 3-4 months, even if I haven’t used it. Lithium batteries degrade over time, so keeping them topped off helps maintain capacity.
Inspecting the Jumper Cables and Clamps
Before using the jumper cables, give them a quick once-over:
- Check for frayed wires or damaged insulation.
- Make sure the clamps open and close smoothly.
- Look for any signs of corrosion on the metal contacts.
The Duralast Gold cables are well-insulated, but it’s still good to inspect them. I keep a small microfiber cloth in my glove box to wipe down the clamps after each use. It keeps them clean and extends their life.
Storing Your Jump Starter
Storage matters more than you think. I used to toss mine in the trunk without a case. Then I noticed the unit getting scuffed. Now I keep it in the provided storage bag or a padded case.
- Keep it in a dry, cool place: Avoid extreme heat or cold. Trunks can get hot in summer and freezing in winter.
- Store upright: This prevents any liquid (if there’s condensation) from pooling inside.
- Check the charge level every few months: A simple glance at the LED display tells you if it needs a top-up.
One winter, I left it in my garage (which gets cold). When I tested it, the battery was sluggish. Now I keep it in the car during cold months and in the garage during summer.
Step-by-Step Jump Starting Instructions
Step 1: Safety First—Parking and Positioning
Before you even touch the jump starter, safety is key. Here’s what to do:
- Park on a flat surface: Turn off the engine and engage the parking brake. Put the car in “Park” (automatic) or first gear (manual).
- Turn off all electronics: Lights, radio, AC, phone chargers—everything. This prevents a power surge when the engine starts.
- Open the hood: Make sure it’s securely propped up. I use a flashlight if it’s dark.
- Keep the jump starter close: Place it on the ground or a stable surface near the battery. Don’t rest it on the battery or engine parts.
I once tried to jump start a car on a slope. Not a good idea. The jump starter slid and almost fell into the engine bay. Now I always check the ground first.
Step 2: Connecting the Jumper Cables
This is the most critical step. Follow these steps exactly:
- Identify the battery terminals: Look for “+” (positive) and “-” (negative) markings. They’re usually on the battery or nearby.
- Connect the red (positive) clamp first: Attach it to the positive terminal on the dead battery. It should click or snap in place. Wiggle it gently to ensure it’s secure.
- Connect the black (negative) clamp: Attach it to a clean, unpainted metal surface on the engine block or frame. I usually use a bolt or bracket. Avoid the negative battery terminal—it can cause sparks.
The Duralast Gold clamps have color-coding and symbols, which helps. But I still double-check. One time, I connected the black clamp to the positive terminal. The unit beeped loudly and flashed a warning. I unplugged it, corrected the connection, and tried again. No harm done—thanks to the safety tech.
Step 3: Powering On and Starting the Engine
Now it’s time to bring your car back to life:
- Turn on the jump starter: Press and hold the power button until the LED lights up. The display should show the battery level.
- Wait 30 seconds: This allows the jump starter to send power to the battery. Some models have a “boost” mode—activate it if needed.
- Try to start the engine: Turn the key or push the start button. If it doesn’t start the first time, wait 10-15 seconds and try again. Don’t crank for more than 5-6 seconds at a time.
When my car finally started, I felt a wave of relief. The engine roared to life after just two attempts. The jump starter handled it like a champ. If the engine still doesn’t start after a few tries, don’t panic. Wait a minute or two, then try again. Sometimes the battery needs a moment to “wake up.”
Step 4: Disconnecting the Cables
Once the engine is running, disconnect the cables in reverse order:
- Turn off the jump starter: Press the power button to shut it down.
- Remove the black (negative) clamp first: Pull it off the engine block.
- Remove the red (positive) clamp: Take it off the battery terminal.
- Stow the cables: Coil them neatly and put them back in the storage bag.
I always wipe down the clamps with a dry cloth after use. It keeps them clean and prevents corrosion. Also, let the engine run for at least 10-15 minutes to recharge the battery. Take a short drive if possible.
Troubleshooting Common Issues
Jump Starter Won’t Power On
If the unit doesn’t turn on, don’t panic. Try these fixes:
- Check the battery level: The LED display might show “0%.” Charge it fully and try again.
- Inspect the power button: Sometimes it gets stuck. Press it firmly or use the edge of a key to unstick it.
- Reset the unit: Unplug all cables, wait 30 seconds, then try again.
I once thought mine was broken. It turned out the battery was just too low. After charging overnight, it worked perfectly.
Engine Doesn’t Start After Connection
This is frustrating, but there are a few reasons it might happen:
- Low charge on the jump starter: Even if the display shows 50%, it might not have enough power for a jump. Recharge it fully.
- Loose clamps: Double-check that both clamps are secure. Wiggle them gently.
- Dead battery or alternator issue: If the jump starter is fully charged and the clamps are secure, the problem might be deeper. The battery could be too far gone, or the alternator might be failing.
I had a case where the jump starter worked fine, but the car still wouldn’t start. Turned out the battery was completely dead and needed replacement. The jump starter did its job—it just couldn’t revive a battery that was beyond saving.
Clamps Sparking or Overheating
Some sparking is normal when connecting the clamps, but excessive sparking or heat is a red flag:
- Check for reverse polarity: If you connected the clamps backward, correct it immediately.
- Clean the battery terminals: Corrosion or dirt can cause resistance. Use a wire brush to clean them.
- Don’t leave the jump starter connected for too long: Once the engine starts, disconnect it right away.
The Duralast Gold has thermal protection, so it should shut down if it gets too hot. But it’s still good to avoid overheating. I once left it connected for 10 minutes after starting the car. The unit got warm, but the safety system kicked in and prevented damage.
Maximizing Performance and Longevity
Regular Maintenance Tips
To keep your Duralast Gold Jump Starter in top shape, follow these maintenance tips:
- Charge every 3-4 months: Even if you don’t use it, lithium batteries self-discharge.
- Clean the clamps and ports: Wipe them with a dry cloth after each use. Use a cotton swab to remove dust from the USB ports.
- Store in a temperature-controlled environment: Avoid extreme heat or cold when possible.
- Test it occasionally: Try turning it on and checking the battery level every few months.
I keep a small checklist in my glove box. Every time I check my oil or tire pressure, I also glance at the jump starter. It’s a small habit that saves me from surprises.
Using the Jump Starter for Other Devices
The Duralast Gold isn’t just for cars. It’s a multi-tool:
- Charge your phone or tablet: Use the USB ports. I’ve charged my phone twice on a single jump starter charge.
- Use the flashlight in emergencies: The LED light is bright and has different modes. I used it during a power outage at home.
- Power small electronics: Some models have a 12V outlet for things like air compressors or camping gear.
On a road trip, my phone died, and I had no access to a charger. I plugged it into the jump starter and got enough juice to last until the next town. It was a lifesaver.
When to Replace Your Jump Starter
Even the best jump starters don’t last forever. Here are signs it’s time to replace yours:
- It won’t hold a charge: After a full charge, the battery drains quickly.
- The clamps are damaged: Frayed wires or loose connections are unsafe.
- The unit gets excessively hot: Even with short use.
- It’s over 3-5 years old: Lithium batteries degrade over time, even with proper care.
My first jump starter lasted about 4 years. When it started struggling to charge my phone, I knew it was time to upgrade. I kept it as a backup and bought a newer Duralast Gold model.
| Maintenance Task | Frequency | Notes |
|---|---|---|
| Charge the battery | Every 3-4 months | Even if not used |
| Inspect cables and clamps | Before each use | Look for damage or corrosion |
| Clean the unit | After each use | Wipe with dry cloth |
| Test functionality | Every 6 months | Turn on, check battery level |
| Replace if needed | Every 3-5 years | Based on performance and age |
Final Thoughts: Your Peace of Mind, Delivered
Looking back, I can’t imagine not having my Duralast Gold Jump Starter. It’s saved me from being stranded more times than I can count. But more than that, it’s given me confidence. I know that if my car won’t start, I have a reliable solution right in my trunk.
Using the Duralast Gold Jump Starter is simple once you know the steps. Charge it regularly, inspect it before use, and follow the connection process carefully. The safety features are there to protect you, so don’t skip them. And remember, it’s not just a jump starter—it’s a multi-purpose tool that can charge your devices and light your way in emergencies.
I’ve shared my experiences, tips, and even my mistakes to help you get the most out of your jump starter. Whether you’re a new driver or a seasoned one, being prepared makes all the difference. So keep this guide handy, charge your jump starter, and drive with peace of mind. Because when the unexpected happens, you’ll be ready—no waiting for help, no stress, just a quick fix and back on the road.
Your Duralast Gold Jump Starter is more than a tool. It’s your personal roadside assistant. Use it wisely, take care of it, and it will take care of you.
Frequently Asked Questions
How do I use the Duralast Gold Jump Starter for the first time?
Begin by fully charging the jump starter using the included AC adapter. Connect the clamps to your car battery (red to positive, black to negative), then press the power button to initiate the jump-start process—no tools needed. Always follow the safety guidelines in the manual.
Can I jump-start a car with a completely dead battery using the Duralast Gold Jump Starter?
Yes, the Duralast Gold Jump Starter is designed to revive deeply discharged batteries. Its high peak current (up to 2000A) and smart protection features ensure safe operation even with a 0-volt battery. Allow the unit to charge the battery for 30 seconds before attempting to start.
How do I charge and maintain the Duralast Gold Jump Starter?
Recharge the unit every 3–6 months using the included charger, even when not in use. The LED indicator shows charging status—keep it plugged in until all bars are lit to maintain battery health. Store in a cool, dry place to prolong lifespan.
What safety features does the Duralast Gold Jump Starter have?
The Duralast Gold Jump Starter includes reverse polarity, overcurrent, and short-circuit protection to prevent damage. The clamps automatically shut off if incorrectly connected, ensuring user safety during operation.
Can I use the Duralast Gold Jump Starter in cold weather?
Yes, it performs reliably in temperatures as low as -4°F (-20°C). Lithium-ion batteries retain charge better in cold conditions than traditional lead-acid jump starters. Pre-warm the unit in your car if exposed to extreme cold for extended periods.
What’s the difference between the Duralast Gold and other jump starter models?
The Duralast Gold Jump Starter offers higher peak amps (2000A), USB-C fast charging, and a built-in LED work light compared to base models. Its durable casing and advanced safety tech make it ideal for frequent or heavy-duty use.