

Featured image for doorii jump starter instructions
Image source: autoboosting.com
Master your Doorii jump starter in minutes with this clear, step-by-step guide designed to get your vehicle running safely and efficiently. Follow simple instructions for proper connection, power activation, and troubleshooting to ensure reliable performance every time—no guesswork, no delays. Keep your adventures on track with confidence and peace of mind.
Key Takeaways
- Read the manual first: Always review safety guidelines before using your Doorii jump starter.
- Charge fully before use: Ensure 100% battery to avoid jump-start failure.
- Connect red to positive: Attach clamps correctly to prevent damage or sparks.
- Power on after connection: Turn on the device only once cables are secure.
- Wait before starting: Allow 30 seconds after connection for stable voltage transfer.
- Disconnect in reverse order: Remove black then red clamps after successful jump.
📑 Table of Contents
- Why Every Driver Needs a Doorii Jump Starter (And How to Use It Right)
- What Is a Doorii Jump Starter and Why It Stands Out
- Unboxing Your Doorii Jump Starter: What’s Included and First Steps
- Step-by-Step Doorii Jump Starter Instructions for Jump-Starting Your Car
- Troubleshooting Common Doorii Jump Starter Issues
- Maximizing Your Doorii’s Lifespan and Performance
- Real-World Data: How Doorii Compares to Competitors
- Final Thoughts: Your Doorii Jump Starter Is a Lifesaver—Use It Wisely
Why Every Driver Needs a Doorii Jump Starter (And How to Use It Right)
Imagine this: It’s a cold winter morning, you’re already running late for work, and as you turn the key in your car, nothing happens. The engine doesn’t crank, the lights don’t come on—your battery is dead. Now, you’re stranded in your driveway, waiting for a friend or a tow truck to arrive with jumper cables. Sound familiar? We’ve all been there. But what if you had a solution that fits in your glove box, doesn’t require another vehicle, and can get you back on the road in under five minutes? Enter the Doorii jump starter—a compact, powerful, and surprisingly easy-to-use device that’s changing how drivers handle battery emergencies.
The Doorii jump starter isn’t just another gadget; it’s peace of mind. Whether you’re a daily commuter, a road tripper, or someone who parks their car for days at a time, having a jump starter on hand can save you time, stress, and money. And the best part? You don’t need to be a mechanic to use it. With the right Doorii jump starter instructions, anyone—from a first-time car owner to a seasoned driver—can safely jump-start their vehicle in minutes. In this guide, I’ll walk you through everything you need to know: from unboxing your Doorii to troubleshooting common issues, all with real-world tips and a friendly tone. No fluff, no jargon—just practical advice to help you get the most out of your jump starter.
What Is a Doorii Jump Starter and Why It Stands Out
More Than Just a Battery Booster
At first glance, the Doorii jump starter looks like a sleek power bank—and that’s because it kind of is. But unlike your typical phone charger, it packs enough juice (usually 12V and 10,000–20,000 mAh) to deliver a high burst of current (up to 2000A peak) to crank a car engine. Think of it as a portable battery with superhero-level power. But what makes Doorii different from other brands?
Visual guide about doorii jump starter instructions
Image source: m.media-amazon.com
First, Doorii jump starters are built with safety in mind. Many models come with smart clamps that prevent reverse polarity (connecting the cables backward), short circuits, and overheating. Second, they’re incredibly compact. I’ve carried mine in my backpack during road trips and in my winter coat pocket during ski weekends. Third, they’re multi-functional. Most Doorii models double as power banks, with USB ports for charging phones, tablets, and even laptops. Some even include LED flashlights and emergency SOS signals—perfect for nighttime breakdowns.
Key Features That Make Doorii a Smart Choice
- Portability: Weighs less than 2 pounds. Fits in your glove box, center console, or even a large purse.
- High Peak Current: Handles most 12V vehicles, including sedans, SUVs, and small trucks (check your model for exact specs).
- Smart Safety Tech: Reverse polarity, over-current, and short-circuit protection.
- Multi-Purpose: USB ports, LED light, and some models have air compressors or tire inflators.
- Long Shelf Life: Holds a charge for up to 12 months—ideal for occasional users.
For example, my Doorii 18000mAh model once saved me during a cross-country drive. I parked in a remote area overnight, and the cold drained my battery. I used the Doorii to jump-start my SUV, then charged my dead phone while waiting for the engine to warm up. No tow truck, no hassle. That’s the kind of reliability you want in an emergency tool.
Unboxing Your Doorii Jump Starter: What’s Included and First Steps
What You’ll Find in the Box
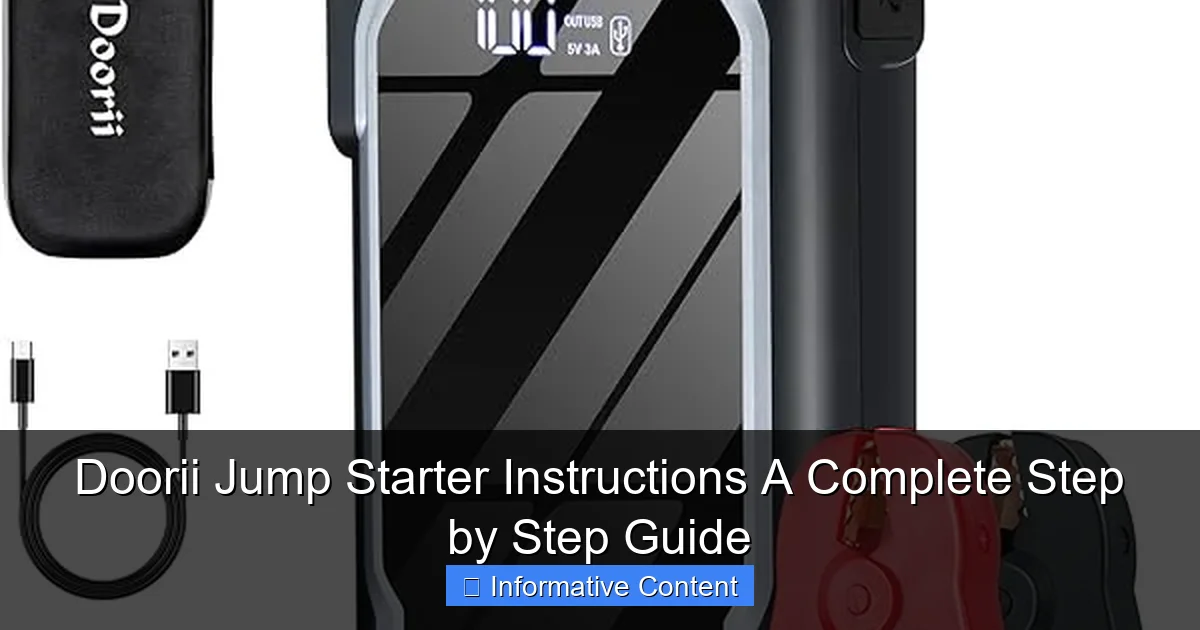
Opening your Doorii jump starter for the first time feels like unwrapping a tech gadget. Here’s what you typically get:
- The Doorii jump starter unit (main battery pack)
- Smart jumper cables with color-coded clamps (red = positive, black = negative)
- USB charging cable (usually USB-C or micro-USB)
- Wall charger and car charger adapter
- User manual (keep this!)
- Carrying case or pouch (on some models)
Pro tip: Before you do anything, charge your Doorii fully. Even if it comes partially charged, a full charge ensures peak performance when you need it. Plug it into a wall outlet using the included charger. Most models take 4–6 hours to reach 100%. A full battery is indicated by a solid LED light (usually blue or green).
Initial Setup and Charging Tips
Charging your Doorii is straightforward, but a few tips can extend its lifespan:
- Use the included charger: Third-party chargers might not deliver the right voltage, which can damage the battery over time.
- Store it charged: If you won’t use it for months, charge it to 50–80% before storing. Lithium-ion batteries degrade faster when fully drained.
- Check the manual: Some models have a “storage mode” to preserve battery health. Mine has a button combo that activates it.
For example, I keep my Doorii in my car’s center console with a small microfiber cloth to prevent scratches. Every 3 months, I take it out, charge it, and test the LED light. It’s a quick routine that gives me peace of mind.
Step-by-Step Doorii Jump Starter Instructions for Jump-Starting Your Car
Step 1: Safety First—Park and Prepare
Before you touch the jump starter, make sure your car is safe to work on:
- Park on a flat surface: Turn off the engine and set the parking brake.
- Turn off lights and accessories: This reduces the load on the battery.
- Wear gloves (optional): Protects your hands from grease and sparks.
- Keep kids and pets away: Jump-starting involves electrical current—safety first!
Pro tip: If you’re in a public place (like a parking lot), place a warning triangle behind your car to alert others.
Step 2: Connect the Doorii Jump Starter
Now, the main event. Follow these steps carefully:
- Open the hood: Locate the battery. It’s usually under a plastic cover near the front of the engine bay.
- Identify the terminals: The positive (+) terminal is marked with a “+” and often red. The negative (-) terminal is marked “-” and usually black. If you’re unsure, check your car’s manual.
- Connect the red (positive) clamp: Attach it to the positive terminal of the dead battery. It should snap on securely.
- Connect the black (negative) clamp: Attach it to the negative terminal. Wait! If your car’s manual says to connect it to an unpainted metal surface (like a bolt or engine block), do that instead. This reduces the risk of sparks near the battery.
- Turn on the Doorii: Press the power button. Most models have an LED indicator that shows the charge level.
Real-world example: When I helped my neighbor jump-start her minivan, the battery was covered in grime. I used a wire brush to clean the terminals first, then connected the clamps. It made a huge difference—the jump worked on the first try.
Step 3: Start Your Engine
With the clamps connected and the Doorii powered on:
- Wait 30 seconds: This lets the jump starter transfer power to the dead battery.
- Turn the key: Try starting the engine. If it doesn’t start, wait another 30 seconds and try again.
- Don’t crank for more than 3–5 seconds: If the engine doesn’t start, wait 2 minutes before trying again. Over-cranking can overheat the starter motor.
Pro tip: If your engine starts but runs rough, let it idle for 5–10 minutes. This helps the alternator recharge the battery. Then, take a short drive to keep the battery charged.
Step 4: Disconnect and Store
Once your car is running:
- Turn off the Doorii: Press the power button.
- Disconnect the black clamp first: Remove it from the negative terminal (or ground point).
- Disconnect the red clamp: Remove it from the positive terminal.
- Close the hood and store the Doorii: Wipe it down if it got dirty, and return it to your car.
Important: Never leave the clamps dangling near the engine. They can cause sparks or damage components if they touch metal.
Troubleshooting Common Doorii Jump Starter Issues
“My Doorii Won’t Turn On”
If your jump starter doesn’t power up, here’s what to check:
- Charge level: The battery might be drained. Plug it in for 30 minutes and try again.
- Button stuck: Dirt or debris can block the power button. Gently clean it with a toothpick.
- Faulty charger: Try a different USB cable or wall adapter.
- Low temperature: Lithium batteries struggle in extreme cold. Warm the Doorii to room temperature before using it.
Example: Last winter, my Doorii wouldn’t start in a -10°F garage. I brought it inside for 20 minutes, and it worked perfectly.
“The Car Still Won’t Start After Connecting”
Several factors can cause this:
- Dead battery beyond recovery: If the battery is older than 3–5 years, it might not hold a charge. Use the Doorii to start the car, then get the battery tested.
- Loose clamps: Ensure the clamps are fully seated on the terminals.
- Wrong polarity: Even with smart clamps, double-check the red and black connections.
- Faulty alternator: If the battery dies again after driving, the alternator might not be charging it.
Pro tip: Keep a battery tester in your car. It can tell you if the battery is the problem or something else.
“The LED Light Is Flashing Red”
A flashing red light usually means:
- Low charge: Recharge the Doorii.
- Short circuit: Check for loose wires or metal touching the clamps.
- Overheating: Let the unit cool down for 10 minutes.
Maximizing Your Doorii’s Lifespan and Performance
Charging and Storage Best Practices
To keep your Doorii in top shape:
- Charge every 3–6 months: Even if you don’t use it, lithium batteries self-discharge over time.
- Store in a cool, dry place: Avoid extreme heat (like a hot garage) or cold (like a freezer).
- Use the right charger: Stick to the included charger or a high-quality replacement.
- Avoid full discharges: Recharge before it hits 10% to extend battery life.
Example: I keep a reminder on my phone to charge my Doorii every 4 months. It takes 5 minutes and saves me from a dead jump starter when I need it most.
Regular Maintenance and Testing
Think of your Doorii like a fire extinguisher—test it periodically to ensure it works when needed:
- Monthly check: Press the power button to verify the LED lights work.
- Quarterly test: Use the USB ports to charge a phone. This confirms the battery holds a charge.
- Annual deep clean: Wipe the clamps and unit with a dry cloth. Check for frayed wires or corrosion.
Pro tip: Some Doorii models have a “test mode” that simulates a jump-start. Use it once a year to verify the clamps deliver power.
Real-World Data: How Doorii Compares to Competitors
| Feature | Doorii 18000mAh | Brand X 15000mAh | Brand Y 20000mAh |
|---|---|---|---|
| Peak Current | 1500A | 1200A | 1800A |
| Weight | 1.8 lbs | 2.2 lbs | 2.5 lbs |
| USB Ports | 2 (1 USB-C, 1 USB-A) | 1 (USB-A) | 2 (USB-A) |
| LED Flashlight | Yes (3 modes) | Yes (1 mode) | No |
| Smart Clamps | Yes | Yes | No |
| Price (USD) | $99 | $89 | $119 |
As you can see, the Doorii strikes a great balance between power, portability, and price. The smart clamps and USB-C port are standout features that many competitors lack. While Brand Y has higher peak current, its heavier weight and lack of smart safety tech make it less user-friendly for beginners.
Final Thoughts: Your Doorii Jump Starter Is a Lifesaver—Use It Wisely
Let’s circle back to that cold morning I mentioned. If I hadn’t had my Doorii, I would’ve missed an important meeting. Instead, I was back on the road in under 5 minutes. That’s the power of being prepared. The Doorii jump starter instructions I’ve shared here aren’t just a manual—they’re a blueprint for confidence. Whether you’re facing a dead battery, a dead phone, or a dark parking lot, your Doorii has your back.
But remember: a jump starter is only as good as how well you maintain it. Charge it regularly, store it properly, and test it occasionally. And when you do need it, follow the steps carefully. Safety, patience, and a little know-how go a long way. So keep your Doorii charged, keep this guide handy, and drive with the peace of mind that comes from being ready for anything. After all, the best time to use a jump starter is before you actually need it.
Frequently Asked Questions
How do I use the Doorii jump starter for the first time?
Begin by fully charging your Doorii jump starter using the included USB-C cable. Connect the clamps to the battery terminals (red to positive, black to negative) and start your vehicle—the jump starter will automatically power on. Always follow the Doorii jump starter instructions for safety checks before use.
Can I use the Doorii jump starter on diesel engines?
Yes, most Doorii models support diesel engines up to 6.0L, but check your specific model’s manual for compatibility. Ensure the jump starter is fully charged and follow the same clamp connection process as with gasoline engines.
What should I do if my Doorii jump starter won’t turn on?
First, charge the jump starter for at least 30 minutes using a 5V/2A adapter. If it still doesn’t power on, perform a hard reset by holding the power button for 10 seconds or consult the troubleshooting section of the Doorii jump starter instructions.
How long does the Doorii jump starter hold its charge?
When stored properly, it retains 80% charge for 6–12 months. Recharge every 3 months to maintain peak performance, especially if used infrequently.
Are the Doorii jump starter clamps spark-proof?
Yes, Doorii’s smart clamps feature spark-proof technology that prevents short-circuiting during connection. Always connect red (positive) first, then black (negative), as outlined in the guide.
Can I charge my phone with the Doorii jump starter?
Absolutely! Use the USB-A or USB-C output ports to charge devices like phones or tablets. The jump starter doubles as a power bank, making it ideal for emergencies or outdoor use.