
Featured image for aickar jump starter instructions
Image source: content.propertyroom.com
Master your Aickar jump starter in minutes with this clear, step-by-step guide designed for safe and reliable vehicle jumps every time. From proper cable connection to power-up procedures, follow these easy instructions to avoid common mistakes and keep your battery running strong—no mechanic needed.
Key Takeaways
- Read the manual first: Always review safety guidelines before using the Aickar jump starter.
- Check battery charge: Ensure the device is fully charged before attempting a jump start.
- Connect red to positive: Attach the red clamp to the dead battery’s positive terminal.
- Black to ground: Secure the black clamp to an unpainted metal surface for safety.
- Power on after connections: Turn on the jump starter only after clamps are properly attached.
- Start the engine: Attempt ignition within 30 seconds of activation to avoid overheating.
📑 Table of Contents
- Getting Started with Your Aickar Jump Starter
- Understanding Your Aickar Jump Starter: What’s in the Box?
- Step-by-Step Aickar Jump Starter Instructions
- Safety First: Essential Precautions and Best Practices
- Maintaining and Charging Your Aickar Jump Starter
- Beyond Jump-Starting: Extra Features You Should Use
- Real-World Tips and Troubleshooting
Getting Started with Your Aickar Jump Starter
Imagine this: you’re all set to head out on a road trip, or maybe you just need to get to work on time, and your car won’t start. The engine clicks but doesn’t turn over—classic dead battery. Now, instead of waiting for a stranger to help or calling a tow truck, you reach for your Aickar jump starter, and within minutes, you’re back on the road. Sounds like a dream, right? Well, it’s absolutely possible with the right device and a little know-how.
Jump starters have become essential tools for drivers everywhere, and the Aickar jump starter stands out for its reliability, compact design, and user-friendly features. Whether you’re a seasoned DIY car enthusiast or someone who’s never even popped the hood before, this guide will walk you through everything you need to know. We’ll cover setup, safe usage, troubleshooting, and even how to get the most out of your device’s extra features. Think of this as your personal, friendly chat with someone who’s used the Aickar jump starter through thick and thin—rain, snow, and even a midnight roadside rescue.
Understanding Your Aickar Jump Starter: What’s in the Box?
Unboxing and First Impressions
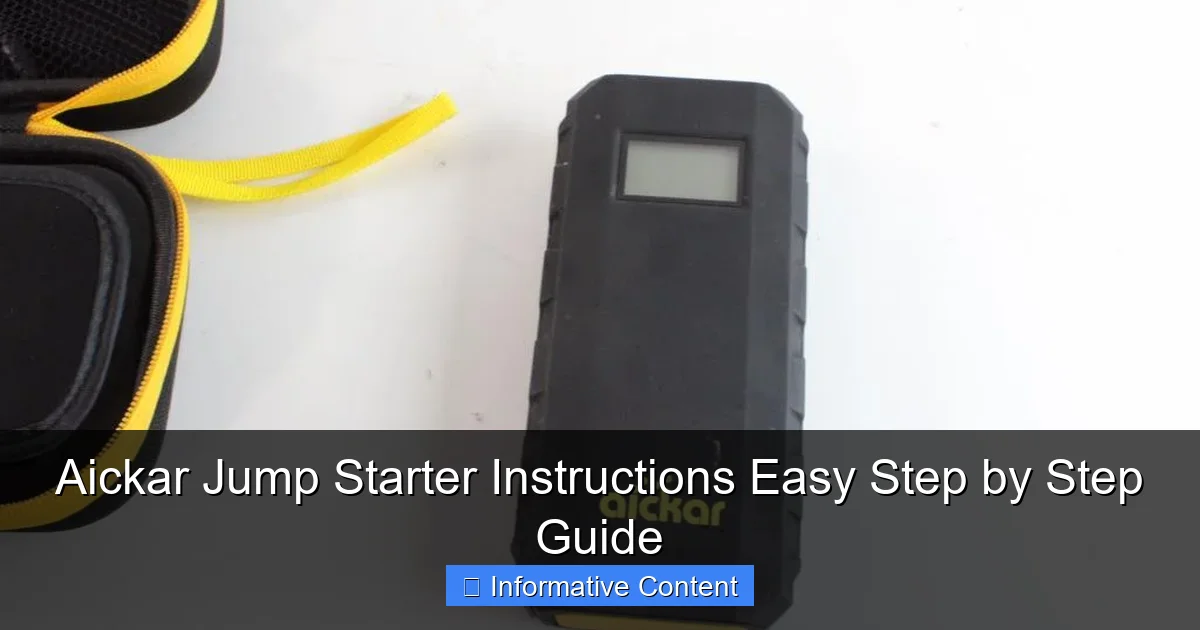
When you open the Aickar jump starter package, you’ll find more than just a battery pack. It’s like getting a mini emergency kit for your car. Inside, you typically get:
Visual guide about aickar jump starter instructions
Image source: m.media-amazon.com
- The Aickar jump starter unit (available in 12V, 18,000mAh or 24V, 25,000mAh models)
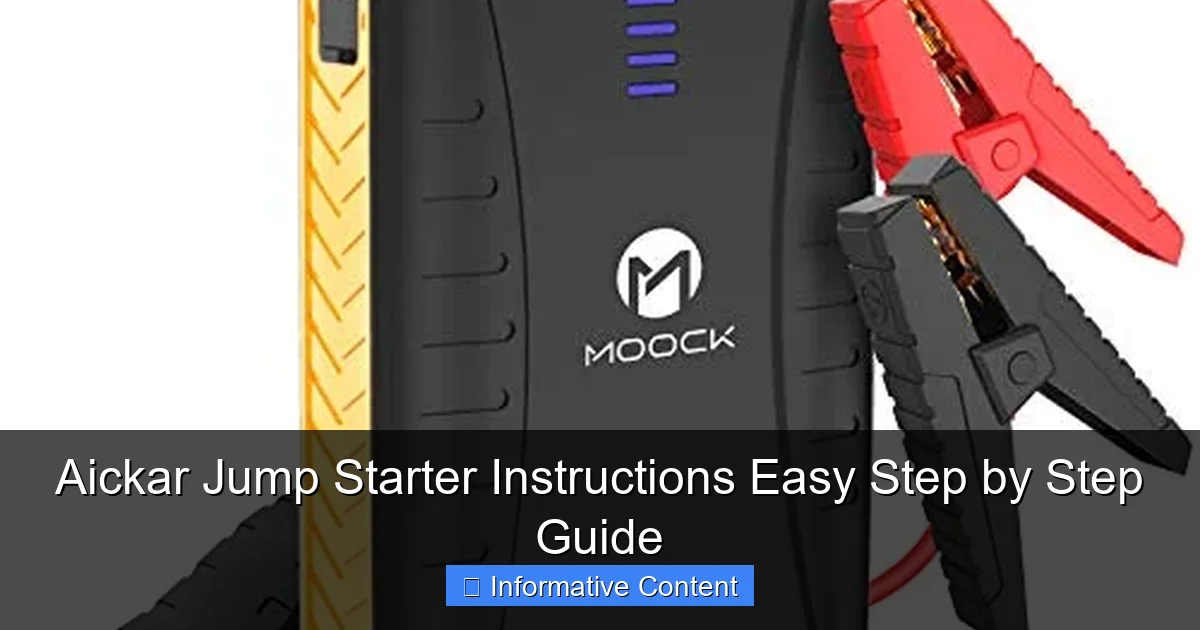
- Smart jumper cables with built-in clamps
- USB charging cable (Type-C and sometimes USB-A)
- AC wall adapter for charging
- Car charger adapter (for on-the-go charging)
- User manual (keep this—it’s handy!)
- Carry case or storage bag
The first thing you’ll notice is how compact it feels. Unlike older, clunky jump starters, the Aickar model is designed to fit in your glove compartment or under a seat. Despite its small size, it packs a serious punch—capable of jump-starting vehicles up to 7.0L gasoline and 5.5L diesel engines (depending on model).
Key Features and Specifications
Let’s break down what makes the Aickar jump starter special:
- Dual Voltage Support: Most models offer 12V and 24V compatibility, making them suitable for cars, trucks, SUVs, motorcycles, and even small boats.
- Smart Clamp Technology: The jumper cables have built-in protection against reverse polarity, short circuits, and over-voltage. This means you can’t mess up easily—even if you connect the clamps backward, the device won’t let power flow.
- Multi-Function Power Bank: It doubles as a USB power source for charging phones, tablets, GPS units, and even portable lights.
- LED Flashlight with SOS Mode: Super useful during nighttime breakdowns. The flashlight has high, low, and SOS strobe settings.
- LCD Display: Shows battery level, charging status, and error codes if something’s wrong.
- Fast Charging: Recharges fully in about 4-6 hours via AC or car outlet.
I remember my first time using it. I was camping in the mountains, and my phone died while navigating a remote trail. I pulled out the Aickar, plugged in my phone, and had 80% battery in under an hour. That’s when I realized this thing isn’t just for jump-starting—it’s a full-on emergency tool.
Which Model Do You Have?
Before diving into instructions, check your model. Look for labels like “Aickar 1200A” or “Aickar 2000A.” The number refers to peak amps, which affects starting power. A 1200A model is great for sedans and compact SUVs, while 2000A+ is better for larger trucks and diesel engines. Knowing your model helps you set realistic expectations—don’t expect a 1200A to start a full-size diesel pickup in freezing temps.
Step-by-Step Aickar Jump Starter Instructions
Step 1: Check Your Jump Starter’s Charge
Before you even think about jumping a car, make sure your Aickar is charged. Press the power button—the LCD screen will show the battery percentage. You want at least 50% charge for a reliable jump, but 80-100% is ideal, especially in cold weather.
Pro tip: I keep mine charged to 100% and store it in my car’s center console. I set a reminder on my phone every 3 months to top it off. Lithium batteries degrade faster when left fully drained.
Step 2: Park and Prepare the Vehicles
Position the working vehicle (or use the Aickar solo) so the batteries are close—but the vehicles must not touch. Turn off both engines, set the parking brakes, and put the transmissions in Park (automatic) or Neutral (manual).
Open the hoods. Locate the battery. In most cars, it’s under the hood, but in some (like older BMWs or certain Fords), it’s in the trunk. If you’re unsure, check your car’s manual.
Step 3: Connect the Jumper Cables
This is where the magic happens. Follow these steps precisely:
- Turn on the Aickar jump starter by pressing and holding the power button for 3 seconds.
- Attach the red (positive) clamp to the positive (+) terminal of the dead battery.
- Attach the black (negative) clamp to a bare metal ground point—not the negative battery terminal. Good spots: unpainted engine bracket, bolt, or frame rail. This prevents sparks near the battery, which could ignite fumes.
- Double-check the connections. The Aickar’s smart system will flash a warning light if the clamps are reversed or if there’s a bad connection.
I learned this the hard way once. I connected the black clamp to the negative terminal, and the jump starter beeped and shut down. I re-read the manual (yes, I finally did) and realized I’d missed the ground rule. Once I fixed it, it worked like a charm.
Step 4: Start the Engine
Now, get in the car and turn the ignition. The Aickar will deliver a surge of power. You might hear a click or two—that’s normal. If the engine doesn’t start on the first try, wait 20-30 seconds and try again. Most Aickar models can deliver 3-5 jump attempts on a full charge.
If it starts, great! Let the engine run for at least 2-3 minutes to allow the alternator to recharge the battery. Don’t rev the engine—just let it idle.
Step 5: Disconnect in Reverse Order
Once the car is running, disconnect the jump starter in this order:
- Remove the black (negative) clamp from the ground point.
- Remove the red (positive) clamp from the battery terminal.
- Turn off the Aickar jump starter.
Never disconnect the red clamp first—this can cause a spark or short circuit. Also, avoid letting the clamps touch each other or any metal parts while connected.
Real-life example: A friend borrowed my Aickar to jump her SUV. She disconnected the red first, and the clamp touched the fender. There was a loud pop, and the jump starter shut off. We thought it was ruined, but it restarted after a minute—thanks to its built-in protection. Still, better safe than sorry!
Safety First: Essential Precautions and Best Practices
Understanding Safety Features
The Aickar jump starter isn’t just powerful—it’s smart. It comes with multiple safety layers:
- Reverse Polarity Protection: If you connect the clamps backward, the device won’t send power. A warning light will flash, and you’ll hear a beep.
- Short Circuit Protection: If the clamps touch or connect to a shorted circuit, the Aickar cuts power instantly.
- Over-Voltage and Over-Current Protection: Prevents damage to the jump starter and your vehicle’s electrical system.
- Over-Temperature Protection: Shuts down if the unit gets too hot during use.
These features give peace of mind, especially for beginners. But they’re not a license to be careless. Always follow proper procedure.
What NOT to Do
Even with safety tech, avoid these common mistakes:
- Don’t use on a damaged or leaking battery. If the battery is cracked, swollen, or smells like rotten eggs, do not attempt a jump. Replace the battery first.
- Don’t leave the jump starter connected after the engine starts. Once the car is running, disconnect it immediately. Prolonged connection can overcharge the Aickar’s internal battery.
- Don’t use near flammable materials. Keep it away from gas spills, oily rags, or open flames.
- Don’t jump-start a vehicle with a frozen battery. A frozen battery can explode. Thaw it first or replace it.
Weather Considerations
Extreme temperatures affect performance:
- Cold Weather: Lithium batteries lose efficiency below 32°F (0°C). If it’s freezing, keep the Aickar in your car’s cabin (not the trunk) and charge it fully before use. Cold batteries need more cranking amps.
- Hot Weather: Don’t leave the jump starter in direct sunlight or a hot car. Temperatures above 110°F (43°C) can damage the battery and reduce lifespan.
I once tried to jump a car in -10°F weather. The Aickar powered up, but the engine wouldn’t turn over. I realized the battery was too cold. I brought the jump starter inside for 20 minutes, then tried again—success! The warmth helped the internal battery deliver more power.
Maintaining and Charging Your Aickar Jump Starter
How to Charge It Properly
Charging is simple, but there are a few best practices:
- Use the included AC adapter or car charger. Avoid third-party chargers unless they’re certified.
- Plug into a wall outlet or 12V car socket. The LCD will show “Charging” and the progress bar.
- Full charge takes 4-6 hours. A red light means charging; green means fully charged.
- Don’t leave it charging overnight unless your model has auto-shutoff. Most Aickar models do, but it’s good to verify.
Tip: Charge it after every use, even if it only used 20% battery. This keeps the cells balanced and extends lifespan.
Storage Tips
How you store it matters:
- Store in a cool, dry place (40-80°F / 5-27°C).
- Keep it in the carry case to avoid dust and scratches.
- Check the charge level every 2-3 months. Recharge if it drops below 50%.
- Never store it fully drained. This can cause permanent damage.
I keep mine in my car’s center console. I also have a second one at home, stored in a closet with a sticky note: “Check charge every 90 days.” It’s saved me more than once during power outages or when a neighbor needed help.
When to Replace the Battery
Like all batteries, the Aickar’s internal battery degrades over time. Signs it’s losing capacity:
- Takes longer to charge
- Shows less than 100% even after full charge
- Can’t hold a charge for more than a week
- Fails to jump-start after multiple attempts
Average lifespan: 3-5 years with proper care. If it’s failing, contact Aickar support. Some models have replaceable batteries, others don’t. Check your warranty—many come with 2-3 year coverage.
Beyond Jump-Starting: Extra Features You Should Use
Using It as a Power Bank
The Aickar jump starter is more than a one-trick pony. It’s a portable power station:
- Charge phones, tablets, and Bluetooth speakers via USB-A or USB-C ports.
- Use it to power a portable fan, camping light, or even a mini cooler.
- Some models have a 12V DC output—great for inflating tires with a portable air compressor.
On a recent road trip, my GPS died in the middle of nowhere. I plugged it into the Aickar’s USB port, and it was back in 15 minutes. Saved me from getting lost in a rural area with no cell service.
LED Flashlight: A Lifesaver at Night
The built-in LED flashlight has three modes:
- High Beam: Bright light for visibility
- Low Beam: Energy-saving mode
- SOS Strobe: Blinking pattern to signal for help
To turn it on: press and hold the flashlight button. Cycle through modes with a single press.
I used the SOS mode once when my car broke down on a dark highway. I placed the Aickar on the roof with the light flashing. It caught the attention of a passing truck driver, who stopped to help. That little light might have prevented a dangerous situation.
Air Compressor and Other Accessories
Some Aickar models (like the Aickar 2000A Pro) come with a built-in air compressor. If yours has it:
- Use the included nozzle adapters for car tires, bike tires, or sports equipment.
- Set the desired PSI using the digital display.
- It automatically stops when the target pressure is reached.
Even without the compressor, the jump starter can power external air pumps via the 12V outlet.
Real-World Tips and Troubleshooting
When the Jump Starter Doesn’t Work
Don’t panic if it fails to start the car. Try these fixes:
| Issue | Possible Cause | Solution |
|---|---|---|
| No power when pressing the button | Drained battery | Charge fully, wait 10 minutes, try again |
| Clamps spark when connected | Bad connection or short circuit | Check clamps, ensure no metal contact, reconnect |
| Engine cranks but won’t start | Fuel, spark, or starter issue (not battery) | Check fuel level, listen for fuel pump, call for help |
| LCD shows error code (e.g., E01) | Overload, overheat, or connection fault | Disconnect, let it cool, reconnect properly |
Most issues are connection-related. Always double-check clamps and ground points.
Pro Tips from Frequent Users
- Label your clamps: I used colored tape—red for positive, black for negative—so I never mix them up.
- Keep a microfiber cloth in the case: Wipe clamps after use to prevent corrosion.
- Test it monthly: Turn it on, check the battery level, and press the flashlight button. It only takes 30 seconds.
- Use it for small engines: I’ve jump-started my motorcycle, ATV, and even a generator with my Aickar 1200A.
Final Thoughts: Why the Aickar Is Worth It
The Aickar jump starter isn’t just a tool—it’s peace of mind. It’s saved me from stranded situations, helped friends and neighbors, and even powered my devices during camping trips. It’s reliable, safe, and surprisingly versatile.
Sure, it’s not perfect. The carry case could be sturdier, and the charging speed is decent but not lightning-fast. But for the price and performance, it’s one of the best portable jump starters on the market.
Whether you’re a daily commuter, a weekend warrior, or a road trip adventurer, having an Aickar jump starter in your car is like carrying a safety net. You hope you never need it—but when you do, you’ll be glad it’s there. And now, with these easy Aickar jump starter instructions, you’re ready to handle any dead battery, anytime, anywhere.
Frequently Asked Questions
How do I use the Aickar jump starter for the first time?
To use the Aickar jump starter, first fully charge it via the included USB cable. Connect the clamps to the battery (red to positive, black to negative), then start your vehicle while ensuring the device is powered on.
What are the safety precautions when following Aickar jump starter instructions?
Avoid touching the clamps together and ensure the jump starter is off before connecting. Always follow the correct polarity to prevent short-circuiting, as outlined in the Aickar jump starter instructions.
Can I charge my phone with the Aickar jump starter?
Yes, the Aickar jump starter doubles as a power bank. Use the USB output port to charge smartphones, tablets, or other 5V devices, even while jump-starting a vehicle.
How long does it take to charge the Aickar jump starter?
The Aickar jump starter typically takes 3-4 hours to fully charge via a wall adapter. A red LED light indicates charging, while a green light shows it’s fully charged and ready for use.
Why is my Aickar jump starter not holding a charge?
This may occur due to prolonged storage without use or extreme temperatures. Recharge it fully, and if issues persist, contact customer support—avoid storing below 32°F or above 104°F.
Is the Aickar jump starter compatible with diesel engines?
Yes, the Aickar jump starter works with both gasoline and diesel engines up to 6L. Ensure the vehicle’s voltage matches the device (12V) and follow the step-by-step instructions for best results.