
Featured image for type s battery jump starter instructions
Image source: dygtyjqp7pi0m.cloudfront.net
Master your Type S battery jump starter in minutes with this clear, step-by-step guide designed for safe and reliable engine starts. Follow simple instructions—connect clamps, power on, start the vehicle—and avoid common mistakes like reversed polarity or weak battery checks. Get back on the road fast, every time.
Key Takeaways
- Always read the manual before using the Type S jump starter for safety and proper setup.
- Charge fully before first use to ensure maximum power and battery lifespan.
- Connect red clamp first to the positive terminal, then black to a grounded metal surface.
- Never reverse clamps to avoid sparks, damage, or injury during jump starting.
- Wait 30 seconds after connecting before attempting to start the engine.
- Turn off all electronics in the vehicle before jump starting to prevent surges.
- Recharge after each use to maintain readiness for future emergencies.
📑 Table of Contents
Understanding Your Type S Battery Jump Starter
Imagine this: you’re late for an important meeting, and your car won’t start. You turn the key, and all you hear is that dreaded clicking sound. It’s a dead battery. Now, instead of waiting for a stranger with jumper cables or calling a tow truck, you reach for your Type S battery jump starter—a compact, powerful, and reliable device that can save the day. I’ve been in that exact situation more times than I’d like to admit, and having a Type S jump starter in my trunk has turned what could have been a stressful ordeal into a quick fix.
But here’s the thing—having a jump starter is only half the battle. Knowing how to use it correctly is what really matters. Whether you’re a first-time user or someone who’s had their Type S for years, this guide will walk you through everything you need to know. From unboxing to troubleshooting, I’ll share my real-world experience, tips, and step-by-step instructions to help you get the most out of your device. And yes, I’ll even include the mistakes I made early on (like accidentally reversing the clamps—oops!).
Unboxing and Initial Setup
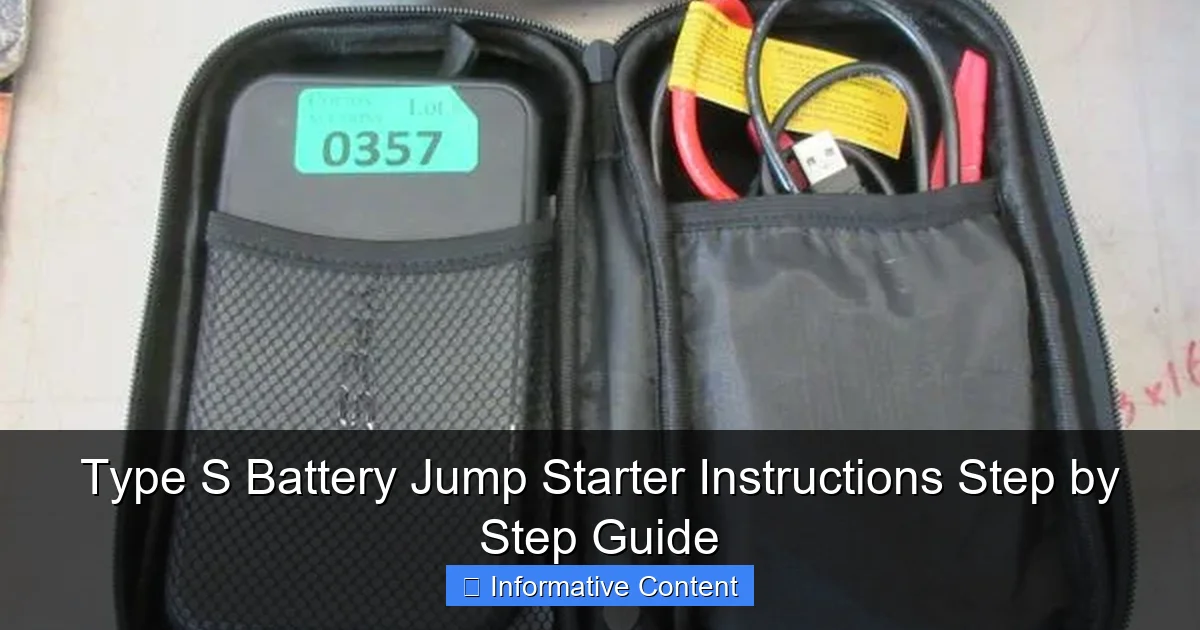
When you first unbox your Type S battery jump starter, it’s easy to feel a mix of excitement and slight overwhelm. The box usually includes the jump starter unit, a set of heavy-duty jumper cables (often with color-coded clamps), a wall charger, a car charger, and a user manual. Some models may also come with USB cables, a carrying case, or even a built-in flashlight or air compressor.
Visual guide about type s battery jump starter instructions
Image source: i1.wp.com
What’s in the Box?
Let’s break down what you should find and what each component does:
- Jump Starter Unit: The main lithium-ion battery pack. It’s compact but packs a punch—usually 12V with 1000–2000 peak amps, depending on the model.
- Jumper Cables with Clamps: These are designed to handle high current. Red (positive) and black (negative) clamps are clearly marked.
- Wall and Car Chargers: For recharging your jump starter. The wall charger is ideal for home use; the car charger lets you top it off on the go.
- User Manual: Don’t skip this! It contains model-specific safety warnings and charging times.
- Bonus Features (on select models): Built-in LED flashlight, USB ports for charging phones, and even a 12V air compressor for tires.
One thing I love about Type S models is that they’re designed with user-friendliness in mind. For example, my Type S 1200A model has a digital display that shows battery level, voltage, and even error codes—super helpful for diagnosing issues.
First-Time Charging
Before using your jump starter for the first time, fully charge it. This is critical—even if the unit shows some charge out of the box. Why? Lithium-ion batteries perform best when cycled properly from the start.
- Plug the wall charger into a standard 120V outlet.
- Connect the charger to the jump starter’s DC input port (usually labeled “Charge”).
- Charging time varies by model: typically 3–6 hours. My Type S 1200A takes about 4.5 hours.
- Look for a solid green LED or a full battery icon on the display when done.
Pro Tip: I keep my jump starter charging overnight after a jump—just to be ready for next time. It’s like giving it a “battery nap.”
Storage and Maintenance
Where you store your jump starter matters. I keep mine in a cool, dry place in my trunk—away from direct sunlight or extreme cold. Why? Lithium batteries degrade faster in heat, and freezing temps can reduce their output.
- Charge it every 3–6 months if not in use. I set a phone reminder every 4 months.
- Keep the clamps clean and free of corrosion. A quick wipe with a damp cloth after each use helps.
- Avoid dropping it or exposing it to water. While some models are water-resistant, they’re not fully waterproof.
Step-by-Step Jump Starting Instructions
Now for the main event: how to actually use your Type S battery jump starter to start a dead car battery. I’ve used mine on everything from my 2010 Honda Civic to my buddy’s pickup truck, and the process is almost identical across vehicles. Let’s walk through it step by step.
Step 1: Safety First
Before touching anything, make sure both vehicles (if jump-starting from another car) are off and in park (or neutral for manual transmissions). Remove the keys. Wear safety glasses if you have them—batteries can spark or vent gas.
Park your jump starter on a flat, stable surface near the battery. I usually place it on the ground or on the bumper. Never hold it while connecting—this reduces the risk of shorting the clamps.
Step 2: Locate the Battery
Open the hood and find the battery. It’s usually near the front of the engine bay, but in some cars (like older Hondas or BMWs), it’s in the trunk. Check your owner’s manual if you’re unsure.
Look for the positive (+) and negative (-) terminals. They’re marked clearly, but double-check. The positive terminal often has a red cover or “+” sign. The negative is usually black or bare metal.
Real Talk: I once tried to jump a friend’s car and connected the negative clamp to the battery terminal instead of the engine block. Not dangerous, but it’s a common mistake. More on that in a sec.
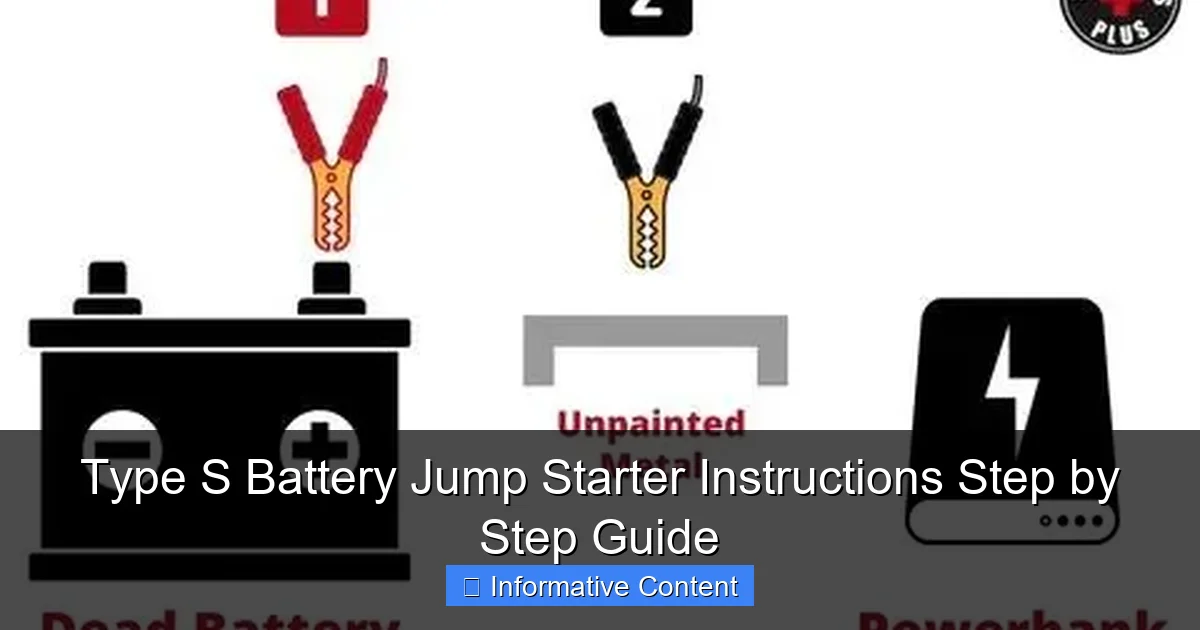
Step 3: Connect the Clamps (Correctly!)
This is where most people mess up. Here’s the golden rule: connect positive first, negative last.
- Attach the red (positive) clamp to the positive (+) terminal on the dead battery. Make sure it’s tight and secure.
- Attach the black (negative) clamp to an unpainted metal surface on the engine block or frame—not the negative terminal. Why? It reduces the chance of sparks near the battery, which could ignite hydrogen gas. I use a bolt on the engine mount—it’s always clean and grounded.
Pro Tip: If you’re jump-starting a motorcycle or ATV with a tiny battery, connect the negative clamp directly to the frame (away from the battery) for the same reason.
Step 4: Power On and Start the Engine
Now turn on your Type S battery jump starter. Most models have a simple power button. Once on, you’ll see the battery level and voltage displayed.
- Wait 1–2 minutes for the jump starter to stabilize. This is called “pre-charge mode”—it sends a small current to wake up the dead battery.
- Turn the key to “Start.” If the engine cranks but doesn’t start, wait 30 seconds and try again. Don’t crank for more than 5 seconds at a time.
- If it starts, great! Let the engine run for 3–5 minutes to charge the battery.
My Experience: On a cold winter morning, my Civic took two tries. The first crank was slow, but the second time it fired right up. The jump starter handled it like a champ.
Step 5: Disconnect in Reverse Order
Once the engine is running, disconnect the clamps in reverse order:
- Remove the black (negative) clamp from the engine block.
- Remove the red (positive) clamp from the battery.
- Turn off the jump starter and pack it up.
Important: Never let the clamps touch each other or any metal while connected. I keep them separated with a piece of cardboard when storing.
Using Advanced Features (Flashlight, USB, Air Compressor)
Many Type S battery jump starter models go beyond just jump-starting. Mine has a flashlight, USB ports, and even a tire inflator. These features have saved me in unexpected ways—like when I got a flat on a dark rural road at 10 p.m.
Built-in LED Flashlight
The flashlight is usually activated by a dedicated button. On my model, it has three modes: high, low, and strobe (for emergencies).
- Use it to inspect the engine bay at night.
- Signal for help if you’re stranded.
- Find dropped tools or keys in the dark.
Real-World Use: I once dropped a wrench into the engine bay of my truck. The flashlight’s beam helped me fish it out without removing any parts—saved me an hour of work.
USB Charging Ports
Most Type S models have 1–2 USB ports (usually 5V/2.1A). Perfect for charging phones, GPS devices, or even a tablet.
- Connect your phone with a USB cable.
- Press the “USB” or “Power” button to activate.
- My phone gains about 20% charge per 30 minutes.
Tip: I keep a spare USB cable in the jump starter case. You never know when you’ll need to charge a friend’s phone during a roadside emergency.
Air Compressor (Select Models)
If your model has a built-in air compressor (like the Type S 1500A+), it’s a game-changer for tire maintenance.
- Attach the air hose to the tire valve.
- Set the desired PSI using the digital display.
- Press start. The compressor inflates the tire automatically and shuts off at the target pressure.
My Story: I had a slow leak in my rear tire. Instead of driving to a gas station, I used the jump starter’s compressor to fill it to 35 PSI. It took 4 minutes and cost me nothing.
Note: The compressor isn’t meant for heavy-duty use (like filling a flat tire from 0 PSI). But for topping off or fixing slow leaks? It’s perfect.
Troubleshooting Common Issues
Even the best Type S battery jump starter can run into issues. Here are the problems I’ve faced—and how I fixed them.
Jump Starter Won’t Turn On
Symptoms: No lights, no display, no response.
- Check the battery level: If it’s been sitting for months, it may need a full charge.
- Try a different charger: The wall charger might be faulty. Use the car charger as a test.
- Reset the unit: Some models have a reset button. Hold it for 10 seconds.
My Fix: Once, my jump starter wouldn’t turn on after a year of storage. A 6-hour charge revived it completely.
Engine Cranks but Won’t Start
Possible Causes:
- The jump starter doesn’t have enough charge.
- The clamps aren’t making good contact.
- The dead battery is too far gone (e.g., sulfated or damaged).
Solutions:
- Recharge the jump starter fully and try again.
- Clean the battery terminals with a wire brush.
- Check the jump starter’s peak amps. Older cars with big engines (e.g., V8 trucks) may need 1500A+.
Reverse Polarity Alarm
If you accidentally connect the clamps backward, the jump starter will beep and flash red. This is a safety feature—don’t panic!
- Disconnect both clamps immediately.
- Correct the polarity (red to +, black to engine block).
- Wait 10 seconds, then reconnect.
Lesson Learned: I once connected the black clamp to the positive terminal (don’t ask how). The alarm went off, but no damage was done. The jump starter protected itself—thankfully!
Data Table: Type S Jump Starter Models Compared
| Model | Peak Amps | Battery Capacity | Special Features | Best For |
|---|---|---|---|---|
| Type S 1000A | 1000A | 18,000 mAh | Flashlight, USB ports | Compact cars, sedans |
| Type S 1200A | 1200A | 22,000 mAh | Digital display, USB-C | SUVs, crossovers |
| Type S 1500A+ | 1500A | 26,000 mAh | Air compressor, 3-mode flashlight | Trucks, vans, RVs |
| Type S 2000A | 2000A | 30,000 mAh | Jump start + power bank, dual USB | Heavy-duty vehicles, boats |
Note: All models include reverse polarity protection, overcharge protection, and short-circuit protection.
Final Thoughts and Pro Tips
After using my Type S battery jump starter for over three years, I can confidently say it’s one of the best investments I’ve made for my car. It’s reliable, easy to use, and packed with features that go beyond just jump-starting. But like any tool, it works best when you know how to use it properly.
Here are my top tips to get the most out of your device:
- Charge it after every use: Even if you only used 10% of the battery, top it off. It extends battery life.
- Keep it accessible: Don’t bury it under gym clothes or groceries. I keep mine in a dedicated compartment in my trunk.
- Practice before you need it: Try a “dry run” at home. Connect it to your battery when it’s working—just to get comfortable with the process.
- Don’t rely on it forever: If your car battery dies repeatedly, it’s likely time for a replacement. A jump starter is a temporary fix, not a permanent solution.
And finally, share the knowledge. Show your family or roommates how to use it. You never know when they’ll need it—and you might not be around to help.
Whether you’re a daily commuter, a weekend adventurer, or just someone who hates being stranded, the Type S battery jump starter is a smart, practical tool. With this guide, you’re now ready to handle dead batteries with confidence—and maybe even help a friend out of a jam. Stay safe, stay charged, and happy driving!
Frequently Asked Questions
How do I use the Type S battery jump starter for the first time?
Begin by fully charging the jump starter using the included USB-C cable. Follow the Type S battery jump starter instructions to connect the clamps properly—red to positive (+) and black to negative (−) terminals—before turning it on.
What should I do if the jump starter doesn’t power on?
Ensure the device is charged for at least 3–4 hours. Check the battery level indicator; if it’s still unresponsive, press and hold the power button for 3 seconds as per the manual.
Can I use the Type S jump starter on a 12V and 24V battery?
Most Type S models support 12V systems (cars, motorcycles). Confirm your unit’s specifications—only select versions are compatible with 24V batteries (trucks, RVs).
How do I safely disconnect the jump starter after use?
First, turn off the jump starter, then remove the black clamp followed by the red. Avoid letting the clamps touch each other during this process to prevent sparks.
Is it safe to leave the Type S jump starter plugged in overnight?
Yes, the built-in overcharge protection prevents damage. However, unplug once fully charged (indicated by a solid LED light) to prolong battery lifespan.
What do the flashing lights on my Type S jump starter mean?
Flashing red indicates a connection error (reverse polarity), while a blinking green light means the device is charging. Refer to the Type S battery jump starter instructions for error code details.