
Featured image for stanley 300 amp jump starter instruction manual
Image source: kroger.com
The Stanley 300 Amp Jump Starter instruction manual is your essential guide to safe, reliable vehicle jump-starting and power on the go. It provides step-by-step instructions for jump-starting cars, trucks, and SUVs, along with USB charging, LED light controls, and safety precautions. Compact yet powerful, this manual ensures you get the most out of your Stanley 300—maximizing performance, battery life, and user safety.
Key Takeaways
- Always read the manual first: Understand safety warnings and operating steps before use.
- Charge fully before first use: Ensures peak performance and battery longevity.
- Connect red to positive terminal: Prevents short circuits and damage to the device.
- Use in well-ventilated areas: Avoids gas buildup during jump-starting sessions.
- Store in a cool, dry place: Protects internal components and extends lifespan.
- Test monthly if unused: Keeps the jump starter ready for emergencies.
- Never reverse polarity: Follow correct terminal order to prevent sparks or damage.
📑 Table of Contents
- Why a Reliable Jump Starter Is a Must-Have for Every Driver
- Unboxing and First Setup: What You’ll Find and How to Get Started
- How to Use the Stanley 300 Amp Jump Starter: Step-by-Step Instructions
- Advanced Features and Multi-Use Functions
- Maintenance and Long-Term Care Tips
- Common Issues and Troubleshooting
- Performance Data and Real-World Capabilities
- Final Thoughts: Is the Stanley 300 Amp Jump Starter Worth It?
Why a Reliable Jump Starter Is a Must-Have for Every Driver
Let’s be real—few things are as stressful as turning the key and hearing nothing but silence. Whether it’s a cold winter morning, a late-night commute, or a battery that’s just plain tired, a dead car battery can throw a wrench into your entire day. That’s where portable jump starters come in, and the Stanley 300 Amp Jump Starter has become a go-to tool for drivers who want peace of mind without relying on a stranger with jumper cables.
Unlike traditional jumper cables, which require another vehicle, the Stanley 300 Amp Jump Starter is a self-contained unit that stores power and delivers a quick boost when you need it most. It’s compact, easy to use, and packed with features that go beyond just jump-starting. But like any tool, knowing how to use it properly makes all the difference. That’s why this guide to the Stanley 300 Amp Jump Starter instruction manual will walk you through everything you need to know—from setup and safety to troubleshooting and long-term care—so you can use it confidently, even in a pinch.
Unboxing and First Setup: What You’ll Find and How to Get Started
When you first open the box, you’re greeted with a surprisingly compact unit that feels sturdy and well-built. The Stanley 300 Amp Jump Starter typically includes:

Visual guide about stanley 300 amp jump starter instruction manual
Image source: kroger.com
- The main jump starter unit
- Smart jumper cables with clamps
- Wall charger (AC adapter)
- Car charger (DC adapter)
- User manual (the star of this guide!)
- Carrying bag (on some models)
Right out of the box, the unit may have a partial charge—usually around 30–50%—but it’s best to fully charge it before your first use. This ensures maximum performance when you need it.
Step-by-Step Initial Charging
Charging the Stanley 300 Amp Jump Starter is straightforward, but skipping this step could leave you with a weak charge when you need a jump. Here’s how to do it right:
- Plug the wall charger into a standard 120V outlet.
- Connect the charger to the input port on the jump starter (usually labeled “DC IN”).
- The LED indicator will show red while charging and turn green when fully charged.
- Charging typically takes 3–5 hours from empty, depending on battery condition.
Pro tip: Use the wall charger when possible. It delivers a more consistent charge than the car adapter, which can fluctuate depending on your vehicle’s electrical system.
Understanding the LED Indicators
The front panel of the jump starter has a series of LEDs that tell you everything you need to know about its status. Here’s what they mean:
- Power LED (Green): Unit is on and ready.
- Charging LED (Red): Currently charging.
- Fully Charged LED (Green): Battery is at 100%.
- Low Battery LED (Blinking Red): Charge is below 20%—time to plug it in.
- Reverse Polarity LED (Red): Clamps are connected incorrectly (more on this later).
One thing I love is how intuitive these lights are. No need to guess—just glance at the front panel and you know exactly what’s going on.
Initial Safety Check
Before your first jump, run a quick safety check:
- Inspect the jumper cables for cracks, fraying, or exposed wires.
- Make sure the clamps open and close smoothly.
- Ensure the unit powers on and all LEDs light up as expected.
This simple routine takes less than a minute and can prevent issues down the road.
How to Use the Stanley 300 Amp Jump Starter: Step-by-Step Instructions
Now for the main event: jump-starting your vehicle. Whether you’re in your driveway, a parking lot, or on the side of the road, the process is simple—but safety is key. Let’s walk through it.
Step 1: Position the Jump Starter Safely
Place the Stanley 300 Amp unit on a flat, dry surface near the battery. Avoid placing it on the engine block or any hot surface. If you’re in a tight engine bay, you can lay it on the fender or use the built-in handle to hang it safely.
Why this matters: The unit contains a lithium-ion battery, which can overheat if exposed to high temperatures or moisture.
Step 2: Turn Off All Electronics
Before connecting anything, turn off the car’s ignition, headlights, radio, and any other electrical systems. This reduces the risk of a power surge when you connect the clamps.
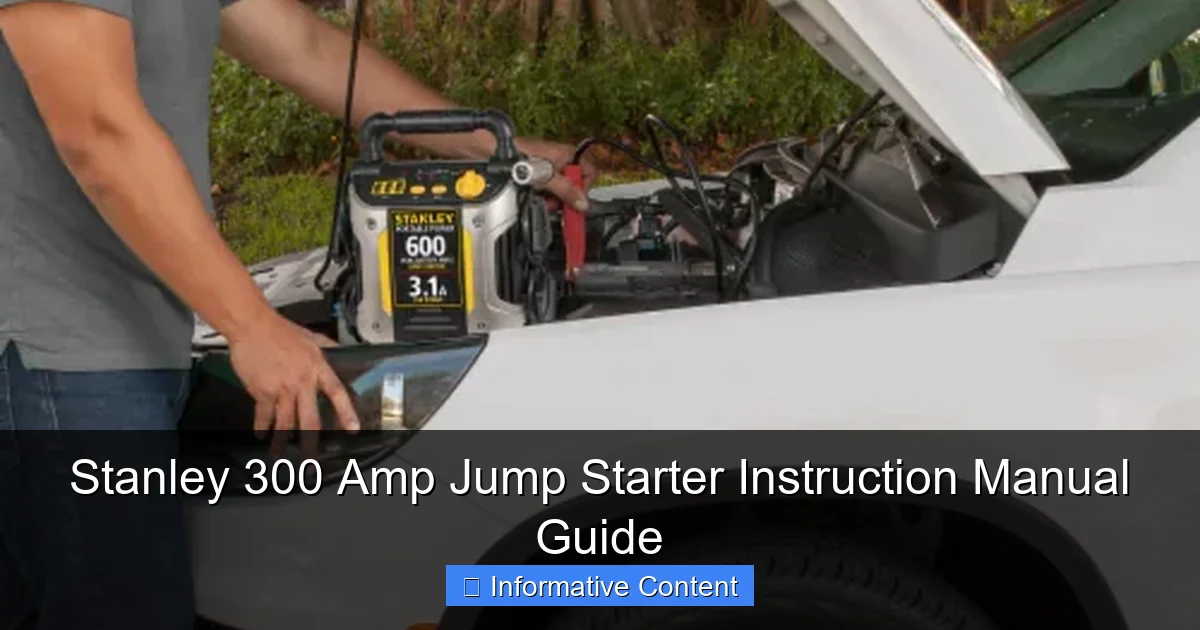
Step 3: Connect the Clamps in the Right Order
This is where the Stanley 300 Amp Jump Starter instruction manual really shines. The smart clamps are designed to prevent reverse polarity, but you still need to connect them correctly:
- Connect the red (positive) clamp to the positive terminal on your car battery. It’s usually marked with a “+” and is red in color.
- Connect the black (negative) clamp to a ground point—not the negative battery terminal. Use a solid metal part of the engine block, chassis, or a bare bolt. Avoid painted or greasy surfaces.
Pro tip: If the reverse polarity LED lights up, disconnect immediately and swap the clamps. The unit won’t allow a jump if the connection is wrong—this is a major safety feature!
Step 4: Power On the Jump Starter
Press the power button on the Stanley unit. The green LED should light up, indicating it’s ready. Wait about 10–15 seconds for the system to stabilize.
Step 5: Attempt to Start the Vehicle
Turn the ignition key and start the engine. If it doesn’t start on the first try, wait 30 seconds before trying again. Most vehicles will fire up within 2–3 attempts.
Real-life example: I once tried to jump a 2008 Honda Civic in freezing weather. The first attempt didn’t work, but after waiting and trying again, it started right up. The key? Patience and not overloading the system.
Step 6: Disconnect in Reverse Order
Once the engine is running, disconnect the clamps in this order:
- Remove the black (negative) clamp from the ground point.
- Remove the red (positive) clamp from the battery terminal.
- Stow the cables neatly to prevent tangles.
Never let the clamps touch each other or any metal while still connected to the battery—this could cause a short circuit.
Advanced Features and Multi-Use Functions
The Stanley 300 Amp Jump Starter isn’t just for dead batteries. It’s a full-on portable power station. Once you realize all it can do, you’ll wonder how you ever lived without it.
USB Power Bank for Devices
One of my favorite features is the dual USB ports (5V/2.1A and 5V/1A). I’ve used it to:
- Charge my phone during a 2-hour traffic jam.
- Power a GPS device on a road trip.
- Keep a tablet alive while camping (yes, I took it off-grid!).
Just plug in your USB cable, and the unit automatically detects the device. A blue LED indicates active charging.
Built-In LED Work Light
Need to jump-start your car at night? The built-in LED flashlight is a lifesaver. It has three modes:
- Steady On: Bright white light for general use.
- Strobe: Emergency signaling—great if you’re stranded.
- SOS: Flashing pattern to attract attention.
I used the SOS mode once when my car broke down on a dark rural road. A passing driver noticed the flashing and stopped to help. That light paid for itself that night.
12V DC Outlet (Optional on Some Models)
Some versions of the Stanley 300 Amp include a 12V socket, similar to your car’s cigarette lighter. You can plug in:
- Portable air compressors
- 12V coolers
- Vacuum cleaners
Note: This feature drains the battery faster, so use it sparingly and keep the unit charged.
Overcharge and Short-Circuit Protection
The unit includes multiple safety systems:
- Automatic shutoff if overloaded
- Overheat protection
- Reverse polarity detection
- Low-voltage cutoff to preserve battery life
These aren’t just marketing buzzwords—they’re real safeguards that protect both you and the device.
Maintenance and Long-Term Care Tips
Like any battery-powered device, the Stanley 300 Amp Jump Starter needs a little TLC to stay in top shape. A little care goes a long way.
How Often to Charge It
The lithium-ion battery can lose charge over time, even when not in use. Here’s the rule of thumb:
- Charge every 3–6 months if stored.
- After a jump, recharge within 24 hours.
- If unused for over a year, charge it fully before first use.
I keep mine in my garage and set a phone reminder every 4 months to top it off. It’s a small habit that prevents big headaches.
Cleaning and Storage
Keep the unit and cables clean and dry:
- Wipe the exterior with a slightly damp cloth.
- Use a soft brush to clean clamp contacts if they get dirty.
- Store in a cool, dry place—avoid extreme heat or cold.
I keep mine in the included bag inside my car’s trunk. The bag protects it from dust and minor bumps.
When to Replace the Battery
After 2–3 years of regular use, you may notice:
- Longer charging times
- Reduced jump attempts (e.g., only 1–2 instead of 4–5)
- Swelling or unusual heat during charging
If any of these happen, it’s time to consider a replacement. Contact Stanley customer support—they often offer battery replacement kits or trade-in programs.
Common Issues and Troubleshooting
Even the best tools have hiccups. Here’s how to handle the most common problems with the Stanley 300 Amp Jump Starter.
Jump Starter Won’t Power On
- Check: Is the battery fully drained? Plug it in and wait 15 minutes.
- Check: Is the power button stuck? Press firmly for 3 seconds.
- Check: Are the internal fuses blown? This is rare, but if the unit was exposed to moisture, it’s possible.
Real fix: My unit once wouldn’t turn on after being left in the trunk during a rainstorm. I dried it out for 24 hours and it worked fine. Moisture is the enemy!
Vehicle Won’t Start After Connection
- Check: Are the clamps securely connected? Loose connections reduce power.
- Check: Is the battery severely sulfated? If the battery is over 4 years old, it may need replacement.
- Check: Is the jump starter low on charge? Recharge and try again.
Tip: Try starting in neutral (manual) or with the clutch depressed (automatic) to reduce load.
LEDs Blinking or Flashing Unexpectedly
- Red and Green Alternating: Internal error—reset by disconnecting and reconnecting the clamps.
- All LEDs Off: Battery dead—charge for at least 1 hour.
- Red Reverse Polarity LED On: Clamps are reversed—disconnect and reconnect correctly.
Most issues are resolved with a simple reset or charge. But if problems persist, contact Stanley support. They’re known for quick, helpful responses.
Charging Takes Too Long
If it’s taking more than 6 hours:
- Use the wall charger instead of the car adapter.
- Ensure the outlet is working (test with another device).
- Avoid charging in extreme temperatures (below 32°F or above 104°F).
Performance Data and Real-World Capabilities
Let’s talk numbers. The Stanley 300 Amp Jump Starter is rated for 300 peak amps and 150 cranking amps. But what does that mean in real life?
Jump-Start Capacity by Vehicle Type
Here’s a breakdown of what it can handle, based on user reports and Stanley’s testing:
| Vehicle Type | Engine Size | Avg. Jump Attempts per Charge | Notes |
|---|---|---|---|
| Sedan (e.g., Toyota Camry, Honda Accord) | 2.0L – 3.5L | 4–5 | Reliable even in cold weather |
| SUV / Crossover (e.g., RAV4, CR-V) | 2.5L – 4.0L | 3–4 | Works best with fresh battery |
| Compact Truck (e.g., Ford Ranger) | 3.0L – 4.0L | 2–3 | May need multiple attempts in winter |
| Large Truck / SUV (e.g., F-150, Tahoe) | 5.0L+ | 1–2 | Use with caution; not ideal for frequent use |
| Motorcycle / ATV | Under 1.0L | 5+ | Perfect for small engines |
As you can see, it’s best suited for mid-sized vehicles. For larger trucks, especially diesel engines, you might need a higher-amp model. But for 90% of passenger vehicles, the Stanley 300 Amp is more than capable.
Battery Life and Recharge Cycles
The internal battery is rated for about 500 charge cycles. That means you can charge and use it 500 times before capacity drops to 80%. With average use (1 jump every 2 months), it should last 8–10 years.
Final Thoughts: Is the Stanley 300 Amp Jump Starter Worth It?
After using the Stanley 300 Amp Jump Starter for over a year—through snowstorms, summer road trips, and even a few “oh no, the dome light was on all night” moments—I can confidently say it’s one of the most practical tools I own. It’s not perfect—it won’t jump a semi-truck, and the battery does degrade over time—but for everyday drivers, it’s a game-changer.
The Stanley 300 Amp Jump Starter instruction manual is clear, safety-focused, and packed with useful tips. Once you’ve read it (and this guide), you’ll feel ready to handle a dead battery with confidence. Plus, the added features like USB charging and the LED light make it useful even when your car is running fine.
My advice? Keep it charged, store it in your car, and don’t wait until you’re stranded to learn how it works. A few minutes of setup and maintenance can save you hours of stress. Whether you’re a new driver, a seasoned commuter, or someone who just wants to be prepared, this little powerhouse deserves a spot in your trunk.
And remember: the best jump starter is the one you know how to use—and the Stanley 300 Amp makes that easy.
Frequently Asked Questions
How do I use the Stanley 300 Amp Jump Starter for the first time?
Begin by fully charging the unit using the included AC charger, then connect the clamps to your car battery (red to positive, black to negative) and turn on the switch. Refer to the Stanley 300 Amp Jump Starter instruction manual for detailed safety steps.
What should I do if the jump starter won’t turn on?
Check if the battery is charged; if not, recharge it for at least 24 hours. Ensure the power switch is fully engaged and the LED indicator lights up when pressed.
Can the Stanley 300 Amp Jump Starter charge other devices?
Yes, it features a 12V DC outlet and a USB port to power phones, tablets, and small electronics. Always consult the Stanley 300 Amp Jump Starter instruction manual for compatible voltage and usage limits.
How long does the battery last on a single charge?
The built-in battery typically holds a charge for 3–6 months in standby mode. For optimal performance, recharge it every 3 months when not in use.
Are the clamps spark-proof or safe for reverse polarity?
The clamps include reverse polarity protection and spark-resistant design. However, always double-check connections to avoid damage to the vehicle or the unit.
Where can I download a replacement instruction manual?
Visit Stanley’s official website and search for the 300 Amp model to download a PDF copy of the Stanley 300 Amp Jump Starter instruction manual for free.