

Featured image for portable jump starter instructions
Image source: i.ytimg.com
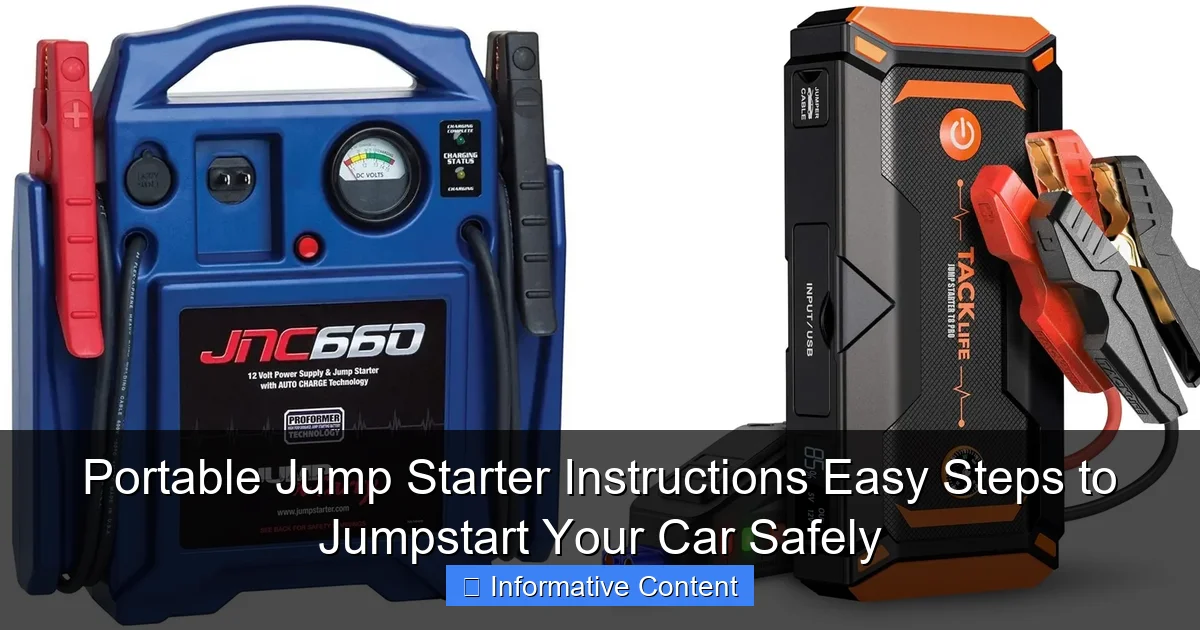
Always connect the portable jump starter to the battery terminals correctly—red to positive (+), black to negative (−)—to avoid sparks or damage. Ensure the device is powered on and the car ignition is off before starting; once connected, start the vehicle and let it run for a few minutes to recharge. Following these simple, safe steps ensures a reliable jump every time, even in emergencies.
Key Takeaways
- Always read the manual before using your portable jump starter for safety and compatibility.
- Check battery levels on the jump starter to ensure it’s fully charged before use.
- Connect red to positive (+) and black to negative (-) terminals to avoid damage.
- Start the working vehicle first to stabilize voltage before attempting a jump.
- Wait 3–5 minutes after connecting before trying to start the dead engine.
- Disconnect in reverse order once the car starts to prevent electrical surges.
- Store properly in a cool, dry place to extend battery life and reliability.
📑 Table of Contents
- Why You Need a Portable Jump Starter (And How to Use It Right)
- Understanding Your Portable Jump Starter: What It Is and How It Works
- Preparing for a Jump Start: Safety First and Foremost
- Step-by-Step Portable Jump Starter Instructions: The Right Way to Use It
- Common Mistakes and How to Avoid Them
- Maintenance and Long-Term Care for Your Jump Starter
- Real-World Scenarios and Pro Tips
- Final Thoughts: Be Prepared, Stay Safe
Why You Need a Portable Jump Starter (And How to Use It Right)
Imagine this: it’s a cold winter morning, you’re running late for work, and your car won’t start. The engine groans, the lights dim, and you realize—your battery’s dead. You call a friend, a neighbor, or roadside assistance, only to wait in the freezing cold for 30 minutes or more. Now picture this instead: you pull a compact, lightweight device from your trunk, connect it to your battery in seconds, and your engine roars to life. No waiting. No stress. That’s the magic of a portable jump starter.
Portable jump starters have revolutionized roadside emergencies. No longer do you need another car or a set of jumper cables to get back on the road. These battery-powered devices are compact, safe, and incredibly easy to use—once you know how. But despite their simplicity, many people hesitate to use them because they’re unfamiliar or afraid of making a mistake. That’s why I’m here: to walk you through portable jump starter instructions in a way that’s clear, practical, and stress-free. Whether you’re a first-time user or just need a refresher, this guide will help you jumpstart your car safely and confidently—every single time.
Understanding Your Portable Jump Starter: What It Is and How It Works
Before we dive into the step-by-step portable jump starter instructions, let’s take a moment to understand what you’re working with. Think of your jump starter as a powerful backup battery for your car. It’s not a permanent fix—it’s an emergency tool designed to deliver a high burst of current to your engine when your car battery is too weak to start the vehicle.
Visual guide about portable jump starter instructions
Image source: docerp.s3.amazonaws.com
How It Differs from Traditional Jumper Cables
Traditional jumper cables rely on another vehicle to provide power. You need a second car, someone willing to help, and a bit of luck that the cables reach. Portable jump starters eliminate all that. They’re self-contained units with built-in lithium-ion or lead-acid batteries that store energy. When activated, they deliver a surge of electricity—typically between 800 and 2,000 peak amps—directly to your car’s battery terminals.
For example, a 12-volt, 1,200-amp jump starter can handle most sedans, SUVs, and light trucks. I once used a 1,000-amp model to jumpstart my friend’s 3.5L V6 pickup truck after a weekend camping trip—no problem. But if you drive a diesel truck or a large SUV, you’ll want something with 1,500+ amps for safety.
Key Features to Know Before Use
Not all jump starters are the same. Here are the features you should understand before following any portable jump starter instructions:
- Peak Amps vs. Cranking Amps: Peak amps are the maximum power the device can deliver in a burst. Cranking amps (CA) or cold cranking amps (CCA) are more important for real-world performance, especially in cold weather.
- Safety Protections: Look for built-in protections like reverse polarity, short circuit, overcharge, and overheat protection. These features prevent damage to your car and the jump starter.
- USB Ports & Power Bank Function: Many modern jump starters double as power banks. I use mine to charge my phone during road trips—super handy!
- LED Flashlight: Some models include a bright flashlight with SOS or strobe modes. Great for nighttime emergencies.
One thing I learned the hard way: always check the charge level before you need it. I once left mine in the garage for six months without recharging. When I needed it, it was completely dead. Now, I keep mine at 80% charge and top it off every three months.
Preparing for a Jump Start: Safety First and Foremost
Using a portable jump starter is simple, but safety should always come first. A few simple precautions can prevent damage to your vehicle, the jump starter, and—most importantly—yourself.
Step 1: Find a Safe Spot
Never attempt a jump start on a busy road, incline, or in the rain without proper shelter. Pull over to a safe, flat area away from traffic. Turn on your hazard lights, set the parking brake, and put the car in “Park” (or “Neutral” for manual transmissions).
For example, I once had to jumpstart my car at a rest stop during a snowstorm. I parked in a well-lit area, turned on my hazards, and wore reflective gloves so passing cars could see me. It made the whole process much less nerve-wracking.
Step 2: Inspect the Battery and Jump Starter
Before connecting anything, take a close look at your car battery. If the terminals are corroded (covered in white or green powder), clean them gently with a wire brush or baking soda and water. Never touch both terminals with your bare hands at the same time—this can cause a short.
Also, check your jump starter. Is it charged? (Most have LED indicators.) Are the clamps clean and undamaged? I once used a jump starter with a cracked clamp, and it sparked when I connected it. Not dangerous, but unsettling. Always inspect your gear.
Step 3: Read the Manual (Yes, Really)
I know—nobody likes reading manuals. But every jump starter has unique quirks. Some require you to press a “Boost” button before connecting. Others have a safety lock that prevents accidental activation. Take 60 seconds to skim the quick-start guide. It could save you from a costly mistake.
For instance, my jump starter has a “Smart Clamp” system that beeps if I connect the clamps in reverse. That’s a lifesaver for someone like me who occasionally mixes up red and black!
Step-by-Step Portable Jump Starter Instructions: The Right Way to Use It
Now that you’re prepared, let’s walk through the portable jump starter instructions—the actual process of jumpstarting your car. Follow these steps carefully, and you’ll be back on the road in minutes.
Step 1: Turn Off the Car and Accessories
Make sure your car is completely off. Remove the key from the ignition. Turn off the radio, lights, AC, and any USB devices. This prevents a power surge that could damage electronics when the engine starts.
Pro tip: I always unplug my phone from the USB port before starting. One time, the sudden voltage spike fried my charging cable. Lesson learned.
Step 2: Connect the Jumper Cables (Clamps)
Here’s the critical part: connect the clamps in the correct order.
- Connect the red (positive) clamp to the positive (+) terminal of your car battery. It’s usually marked with a “+” sign and is slightly larger than the negative terminal.
- Connect the black (negative) clamp to an unpainted metal surface on the car’s frame—like a bolt or bracket—away from the battery. This is called a “ground.” Avoid the negative battery terminal if possible, as it reduces the risk of sparks near flammable gases.
For example, I connect the black clamp to a strut tower bolt near the engine bay. It’s clean, unpainted, and easy to reach. Never attach it to a moving part like the alternator or fan!
Step 3: Activate the Jump Starter
Now, turn on your portable jump starter. Some models require you to press a “Boost” or “Start” button. Others activate automatically when they detect a connection. Wait for the indicator lights to show it’s ready.
If your jump starter has a “Smart” mode, it will check for reverse polarity or short circuits. If everything’s correct, you’ll see a green light or hear a beep. If there’s an error (like reversed clamps), it will warn you—don’t ignore it!
Step 4: Start the Car
Turn the ignition key or push the start button. The engine should crank and start within a few seconds. If it doesn’t start on the first try, wait 10–15 seconds before trying again. Most jump starters can handle 2–3 attempts before needing a recharge.
I once had a stubborn battery that took two tries. I waited 15 seconds, tried again, and—vroom!—it fired up. Patience is key.
Step 5: Disconnect in Reverse Order
Once the engine is running, disconnect the clamps in reverse order:
- Remove the black clamp from the ground point.
- Remove the red clamp from the positive terminal.
Never let the clamps touch each other or any metal while they’re still connected to the car. This can cause a short circuit and damage the jump starter.
Step 6: Let the Engine Run
Keep the engine running for at least 15–30 minutes to recharge the battery. If you have a long drive, even better. Avoid turning the car off immediately—this can drain the battery again.
After jumpstarting, I usually drive for 20 minutes and then check the battery with a multimeter. If the voltage is below 12.6V, the battery may need replacement.
Common Mistakes and How to Avoid Them
Even with clear portable jump starter instructions, mistakes happen. Let’s cover the most common ones—and how to avoid them.
1. Connecting Clamps in the Wrong Order
Reversing the clamps (black to positive, red to ground) can damage your car’s electronics or the jump starter. Always double-check before connecting. If your jump starter has reverse polarity protection, it may shut down automatically. But don’t rely on it—be careful.
2. Using a Low-Charge Jump Starter
A jump starter with a weak battery won’t deliver enough power. Always keep it charged. I recommend checking the charge level every 3 months. Some models have a “low charge” indicator, but don’t wait until it’s critical.
3. Jumping a Damaged or Swollen Battery
If your battery is cracked, leaking, or swollen, do not jumpstart the car. It could explode. Replace the battery immediately. I once ignored a bulging battery and ended up with acid on my hands. Not fun.
4. Leaving the Jump Starter Connected While Driving
Never leave the jump starter connected while driving. It’s not a permanent power source. Disconnect it as soon as the car starts. I’ve seen people forget this and damage their alternator.
5. Using It in Extreme Temperatures
Most lithium-ion jump starters perform poorly in freezing or scorching heat. Store it in your car’s interior (not the trunk) during winter. In summer, keep it out of direct sunlight. I keep mine under the passenger seat—safe and accessible.
Maintenance and Long-Term Care for Your Jump Starter
A portable jump starter is an investment. With proper care, it can last 3–5 years or more. Here’s how to keep it in top shape.
Charge It Regularly
Even if you don’t use it, charge it every 3 months. Lithium-ion batteries degrade over time, especially when left fully discharged. I set a reminder on my phone every 90 days.
Store It Properly
Keep it in a cool, dry place. Avoid extreme temperatures. Most manufacturers recommend storing it at 50–77°F (10–25°C). I keep mine in a small bag in my trunk with a desiccant pack to absorb moisture.
Clean the Clamps and Terminals
After each use, wipe the clamps with a dry cloth. If they’re dirty, clean them with isopropyl alcohol. Corrosion on the clamps can reduce conductivity and make jumpstarting harder.
Check for Updates or Firmware (If Applicable)
Some high-end jump starters connect to apps or have firmware updates. Check the manufacturer’s website occasionally. One of my models had a software update that improved safety features—definitely worth installing.
Replace When Necessary
If your jump starter won’t hold a charge, delivers weak cranking power, or shows signs of damage (swelling, cracks), replace it. Safety first. I retired my old one after 4 years when the charge indicator became unreliable.
Real-World Scenarios and Pro Tips
Let’s look at a few real situations and how to handle them using portable jump starter instructions.
Scenario 1: Dead Battery in a Remote Area
You’re hiking and left your car lights on. No cell service. No other cars. Your jump starter is your lifeline. Here’s what to do:
- Find a safe spot to park.
- Follow the steps above—connect, start, disconnect.
- Once running, drive to the nearest town or service station to check the battery.
I did this once in a national park. The jump starter saved my trip—and my sanity.
Scenario 2: Jumpstarting a Diesel Truck
Diesel engines require more cranking power. Use a jump starter with at least 1,500 peak amps. Let it “warm up” for 30 seconds before starting. I used a 1,800-amp model for my brother’s diesel pickup—worked like a charm.
Pro Tip: Use It as a Power Bank
Many jump starters have USB ports. I used mine to charge my phone during a power outage. It’s not just for cars—it’s a multi-tool for emergencies.
| Jump Starter Feature | Why It Matters | Example Use Case |
|---|---|---|
| Reverse Polarity Protection | Prevents damage if clamps are connected wrong | New driver connects red to black—no harm done |
| LED Flashlight | Provides light during nighttime emergencies | Jumpstarting at midnight on a dark road |
| USB Charging | Can charge phones, tablets, or GPS devices | Powering a phone during a road trip |
| Smart Clamp Technology | Audible/visual alerts for incorrect connections | Prevents accidental short circuits |
| High Cranking Amps (1,500+) | Essential for large engines (SUVs, trucks, diesels) | Jumpstarting a V8 engine in cold weather |
Final Thoughts: Be Prepared, Stay Safe
Using a portable jump starter isn’t rocket science—but it does require attention to detail. By following these portable jump starter instructions, you can turn a stressful dead battery situation into a quick, painless fix. Remember: safety first, check your gear, and practice the steps so you’re ready when the moment comes.
I keep my jump starter in my car year-round. It’s one of those tools I hope I never need—but I’m incredibly grateful it’s there when I do. Whether you’re a daily commuter, a weekend adventurer, or a parent running errands, a portable jump starter gives you peace of mind. You’re not just buying a device—you’re buying independence, confidence, and control over your journey.
So take 10 minutes today: check your jump starter’s charge, read the manual, and visualize the steps. When that moment comes—and it will—you’ll know exactly what to do. And trust me, you’ll feel like a roadside hero.
Frequently Asked Questions
How do I use a portable jump starter for the first time?
Begin by fully charging your portable jump starter using the provided cable. Connect the red clamp to your car battery’s positive terminal and the black clamp to a grounded metal surface, then power on the device to start your engine.
Can I leave my portable jump starter connected while driving?
No, always disconnect the jump starter immediately after starting your car. Leaving it connected can damage the device or battery due to prolonged voltage fluctuations.
What safety precautions should I follow with portable jump starter instructions?
Always wear safety glasses and avoid touching clamps together. Follow the portable jump starter instructions to ensure correct polarity—red to positive (+), black to ground (-)—to prevent sparks or short circuits.
How long does it take to charge a portable jump starter?
Most models take 3–5 hours for a full charge. Refer to your device’s manual for specific charging times, and avoid using it while charging to prolong battery life.
Can a portable jump starter work on diesel engines?
Yes, but ensure the device is rated for diesel engines, which often require higher cranking power. Check the peak amperage in your portable jump starter instructions to confirm compatibility.
Why won’t my portable jump starter turn on?
First, verify it’s charged and the power button is pressed for 3+ seconds. If issues persist, consult the troubleshooting section of your manual or contact the manufacturer.