
Featured image for bright starts door jumper instructions
Image source: arcticcotton.com
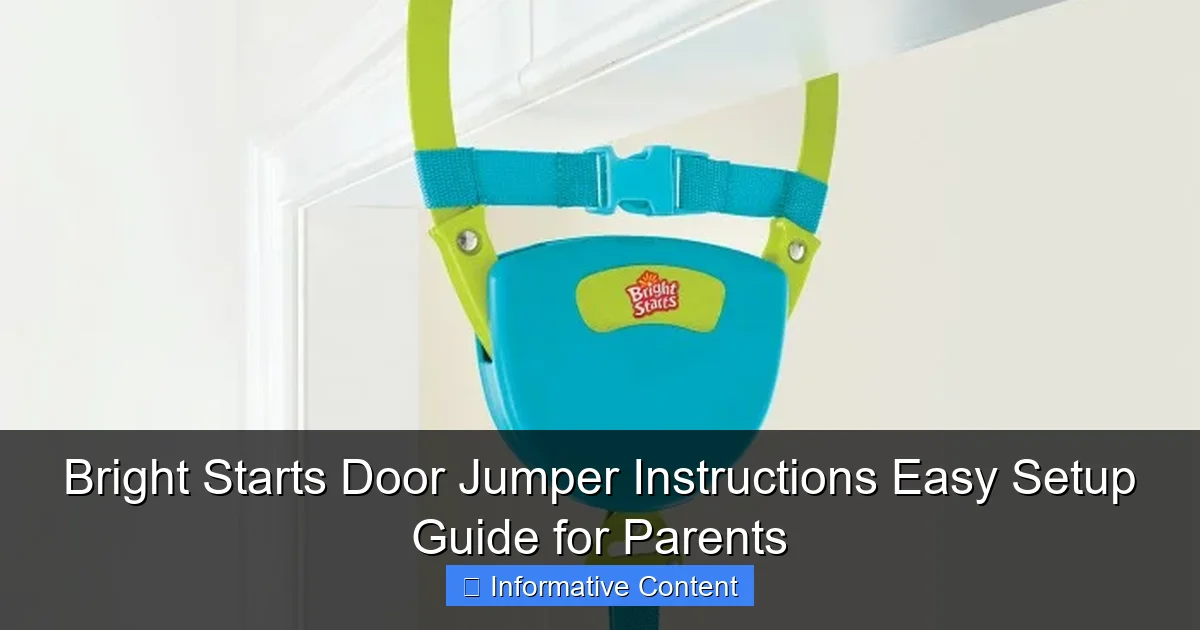
Setting up your Bright Starts Door Jumper is quick and hassle-free with the easy-to-follow instructions designed specifically for busy parents. No tools or complicated steps—just secure the clamp, adjust the straps, and let your baby bounce safely in minutes. This simple setup ensures fun and mobility without stress.
Key Takeaways
- Always check door frame compatibility before installing the Bright Starts jumper.
- Use the adjustable straps to ensure a snug, secure fit every time.
- Anchor the clamp tightly to prevent wobbling during use.
- Follow the manual’s weight limits for baby’s safety and product longevity.
- Inspect straps and clamp before each use for wear or damage.
- Set up in a clear area with no obstructions for safe bouncing.
📑 Table of Contents
- Bright Starts Door Jumper Instructions: A Parent’s Best Friend for Busy Days
- Why the Bright Starts Door Jumper Is Worth It
- Step-by-Step Bright Starts Door Jumper Instructions
- Safety Tips Every Parent Should Know
- Maximizing Fun and Development
- Troubleshooting and Maintenance
- Final Thoughts: Is the Bright Starts Door Jumper Right for You?
Bright Starts Door Jumper Instructions: A Parent’s Best Friend for Busy Days
Let’s be real: parenting is a full-time job with no breaks. Between feeding, diaper changes, and trying to squeeze in a shower, it’s easy to feel overwhelmed. That’s why I love baby gear that gives me a few extra hands—like the Bright Starts Door Jumper. This little device has been a game-changer for me, giving my baby a safe, fun place to bounce while I prep meals, answer emails, or just take a deep breath. But like any piece of baby equipment, setting it up for the first time can feel a little intimidating. That’s why I’ve put together this easy-to-follow guide to Bright Starts Door Jumper instructions, based on my own experience (and a few trial-and-error moments!).
Whether you’re a first-time parent or a seasoned pro, this guide will walk you through everything you need to know: from choosing the right door frame to adjusting the height for your baby’s comfort. I’ll share practical tips, safety checks, and even some fun ways to keep your little one entertained while they bounce. No fancy jargon, just real, honest advice from one parent to another. Let’s get started!
Why the Bright Starts Door Jumper Is Worth It
What Makes It Stand Out?
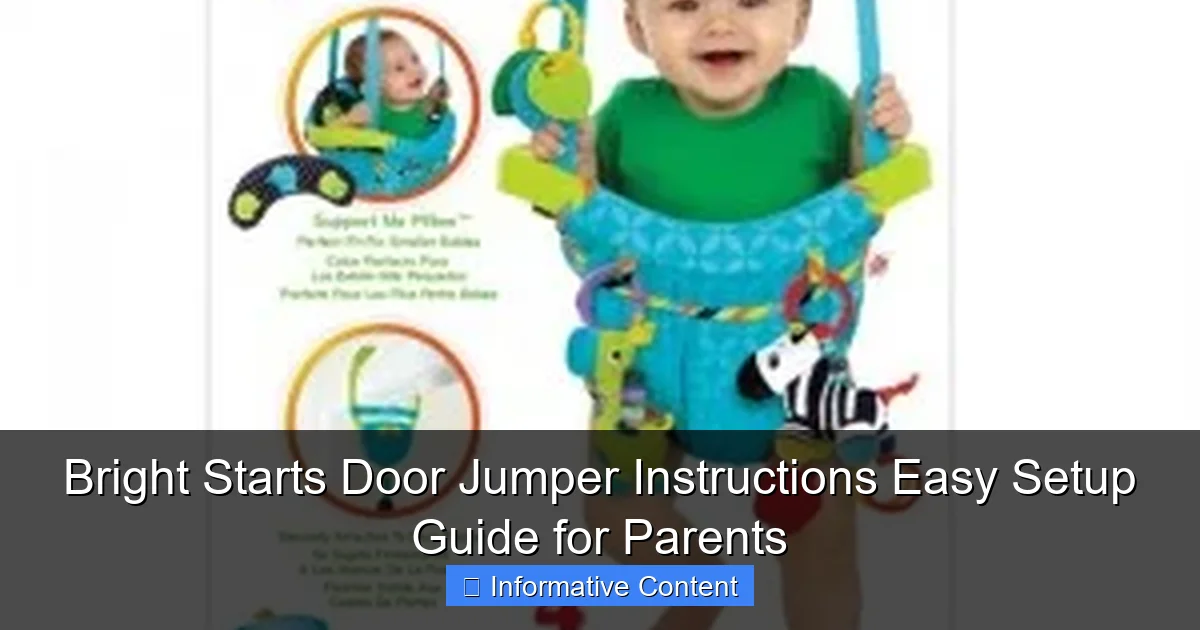
The Bright Starts Door Jumper isn’t just another baby bouncer—it’s a smart solution for parents who need a hands-free moment. Unlike traditional jumpers that take up floor space, this one hangs from your door frame, making it perfect for small apartments or cluttered living rooms. The padded seat, spring system, and adjustable straps create a cozy, bouncy experience that keeps babies engaged (and often giggling!).
Visual guide about bright starts door jumper instructions
Image source: arcticcotton.com
Here’s what I love most:
- Space-saving design: No bulky base or legs to trip over.
- Quick setup: Once you’ve mastered the steps, you can install it in under 5 minutes.
- Entertaining features: Many models come with detachable toys, music, or crinkly fabrics to keep your baby stimulated.
- Portability: Easy to move between rooms or pack for travel (hello, grandparents’ house!).
The Trade-Offs: What to Keep in Mind
Of course, no product is perfect. While the Bright Starts Door Jumper is a lifesaver, there are a few things to consider:
- Door frame compatibility: Not all doors work—we’ll cover how to check this in the next section.
- Weight limits: Most models support babies up to 26 lbs (12 kg), so it’s a short-term investment. But for the 6-12 month window when babies are super active, it’s worth every penny.
- Noise level: The spring can creak if not lubricated occasionally (more on that later).
For me, the pros far outweigh the cons. My 8-month-old squeals with joy every time she hops in, and I get 15 minutes of uninterrupted time—win-win!
Step-by-Step Bright Starts Door Jumper Instructions
Step 1: Check Your Door Frame
Before you even unbox the jumper, measure your door frame. The Bright Starts Door Jumper requires a solid, rectangular door frame with a flat top edge (not rounded or arched). The frame must be at least 4 inches (10 cm) wide and made of sturdy wood or metal—hollow-core or flimsy frames won’t support the weight.
Pro tip: Use a tape measure to confirm the width and thickness. If your door is too narrow, consider a freestanding jumper instead. I learned this the hard way when my first attempt failed because our apartment doors were too thin!
Step 2: Assemble the Jumper
Open the box and lay out all the parts:
- Seat with attached straps
- Spring mechanism
- Door clamp (the part that hooks onto the frame)
- Toys or activity tray (varies by model)
Attach the spring to the door clamp first. Most Bright Starts models have a simple hook-and-loop system—just slide the spring into the clamp’s slot and snap it into place. Then, connect the other end of the spring to the seat’s straps. Double-check that all connections are secure before hanging.
Step 3: Install the Door Clamp
This is the most critical step. Follow these instructions carefully:
- Open the door clamp fully by twisting the adjustment knob counterclockwise.
- Slide the clamp over the top edge of the door frame, ensuring it sits flush against the flat surface.
- Tighten the knob clockwise until the clamp is snug. You should hear a clicking sound—this means it’s locked in place.
- Give the clamp a firm tug to test stability. If it moves, tighten it further.
Safety reminder: Never install the jumper on a door that’s used frequently (like a bathroom door). The constant motion could loosen the clamp over time.
Step 4: Adjust the Height
Your baby’s feet should lightly touch the floor when seated—this helps them push off and build leg strength. To adjust the height:
- Loosen the straps on the seat.
- Lift or lower the seat to the desired position.
- Retighten the straps and check that the buckles are secure.
I found that starting with the seat slightly higher (so baby’s toes graze the floor) works best for younger infants. As they grow, you can lower it for more bounce.
Step 5: Add Toys and Test
Attach any included toys to the seat’s loops or activity tray. Then, place your baby in the seat and fasten the safety harness. Give the jumper a gentle bounce to ensure everything is working smoothly. If the spring creaks, add a drop of lubricant (like WD-40) to the moving parts.
Safety Tips Every Parent Should Know
Never Skip These Checks
Safety first! Here’s how to keep your baby secure:
- Inspect daily: Check the clamp, straps, and spring for wear or damage. Replace any frayed parts immediately.
- Limit use to 15-20 minutes: Overuse can strain your baby’s developing joints. I set a timer to avoid losing track.
- Always supervise: No leaving baby unattended, even for a second. Accidents happen fast.
- Use on flat surfaces: Never install the jumper on a slanted or uneven floor—it could tip.
Common Mistakes to Avoid
From my own blunders, here are pitfalls to watch for:
- Overtightening the clamp: This can damage your door frame. Tighten just enough to prevent wobbling.
- Ignoring weight limits: If your baby is close to 26 lbs, consider transitioning to a freestanding activity center.
- Using on weak doors: If your door squeaks or feels loose, choose another location.
One time, I accidentally left a toy dangling too low, and my baby grabbed it and yanked the entire jumper off the frame (thankfully, she was fine, but my heart stopped!). Now, I double-check toy placement every time.
Maximizing Fun and Development
Engaging Activities for Your Bouncer
The Bright Starts Door Jumper isn’t just for bouncing—it’s a mini playground! Try these ideas to keep your baby entertained:
- Rotate toys weekly: Switch out rattles, mirrors, or soft books to spark curiosity.
- Add music: Play upbeat songs and encourage baby to “dance” by bouncing.
- Mirror play: Place a baby-safe mirror on the floor so they can see their movements.
- Interactive games: Sing “If You’re Happy and You Know It” and prompt baby to clap or stomp their feet.
Supporting Motor Skills
Bouncing isn’t just fun—it’s a developmental boost! The Bright Starts Door Jumper helps with:
- Leg strength: Pushing off the floor builds muscle for crawling and walking.
- Balance and coordination: Reaching for toys improves hand-eye coordination.
- Spatial awareness: Feeling the up-and-down motion teaches depth perception.
I noticed my daughter started pulling herself up to stand after a few weeks of regular use. The jumper gave her the confidence to experiment with movement—something I hadn’t expected!
Troubleshooting and Maintenance
Fixing Common Issues
Even the best products need TLC. Here’s how to solve common problems:
- Squeaky spring: Lubricate with silicone spray or a drop of oil. Avoid WD-40—it can damage plastic parts.
- Loose clamp: Tighten the knob and check for cracks in the frame. If the clamp itself is damaged, contact Bright Starts for a replacement.
- Wobbly seat: Ensure all straps are evenly tightened and the spring is securely attached.
Cleaning and Storage
Keep your jumper hygienic with these tips:
- Spot clean the seat with a mild soap and water. Avoid submerging the straps—they can lose elasticity.
- Wipe down toys with disinfectant wipes (let them air-dry).
- Store indoors: Moisture can rust the spring. If traveling, pack the jumper in a breathable bag.
Here’s a quick maintenance schedule I follow:
| Task | Frequency | Notes |
|---|---|---|
| Inspect straps and clamps | Weekly | Look for fraying or cracks |
| Lubricate spring | Monthly | Use a tiny amount of oil |
| Deep clean seat | Every 2 weeks | Air-dry completely before use |
| Check toy attachments | Before each use | Ensure nothing is loose or broken |
Final Thoughts: Is the Bright Starts Door Jumper Right for You?
After months of using the Bright Starts Door Jumper, I can confidently say it’s one of my top baby gear picks. It’s affordable, easy to use, and gives my little one endless joy (plus a few sanity-saving moments for me!). The Bright Starts Door Jumper instructions are straightforward once you get the hang of them, and the safety features give me peace of mind.
That said, it’s not a magic bullet. You’ll still need to supervise, maintain it regularly, and transition to other activities as your baby grows. But for the 6-12 month window when babies are curious, active, and need a safe space to explore, this jumper is a lifesaver. Whether you’re a busy parent, a grandparent, or a caregiver, I hope this guide makes your setup smoother and your baby’s bouncing sessions more fun. Trust me—you’ll wonder how you ever managed without it!
Frequently Asked Questions
How do I assemble the Bright Starts Door Jumper?
To assemble the Bright Starts Door Jumper, attach the seat to the frame by aligning the clips and pressing firmly. Ensure all parts are securely locked before use. Refer to the instruction manual for visual guidance.
What are the weight and age limits for the Bright Starts Door Jumper?
The Bright Starts Door Jumper supports babies up to 25 lbs (11.3 kg) who can hold their heads upright unassisted. It’s ideal for infants aged 4–12 months, depending on development.
How do I safely attach the jumper to my door frame?
Use the adjustable straps with sturdy metal clips to secure the jumper to a standard door frame. Always check that the frame is solid and free of damage before attaching the Bright Starts Door Jumper.
Can I adjust the height of the Bright Starts Door Jumper?
Yes, the Bright Starts Door Jumper features adjustable straps to customize the seat height. Adjust it so your baby’s toes lightly touch the floor for safe bouncing.
How do I clean the Bright Starts Door Jumper?
Wipe the frame with a damp cloth and mild soap. The seat pad is machine-washable—remove it and follow the care instructions in the manual.
Is the Bright Starts Door Jumper safe for all door frames?
The jumper works best with standard wooden or metal door frames. Avoid hollow-core or damaged frames, and always follow the included safety guidelines for proper setup.